

Cooler Master has been a leader in the computer cooling industry for decades. Their latest H500M is an excellent addition to their lineup, offering performance and aesthetics at a great price point.
The cooler master mastercase h500m is a case that combines the performance of a high-end PC and the aesthetics of a high-end gaming PC.
Hello everyone, welcome to another case review, this time on the Cooler Master H500M. The Cooler Master H500M was first shown off at Computex this year as a still-in-development model, and it was eventually launched on May 22, 2018, nearly four months later. However, on July 2nd, I was able to buy it.
The review will be split into three parts: the first will be an unpacking of the new case, the second will be a build, and the third will be a comprehensive summary that will include information on thermals, airflow, noise, and other essential details.
So, without further ado, let’s begin unpacking our case. Nowadays, cases are packaged in a bag, which makes it much easier to unbox them. The case itself, as well as a user manual, an accessories box containing Cable Ties, Screws, 1x Molex fan connector, 1x RGB extender cable, and finally a piece of cloth to clean the case; however, I will prefer to use my additional microfiber cloth for that purpose and leave this one alone, and finally the front tempered glass panel which can be slid in and out.

Putting everything else aside, let’s concentrate on the casing, and after taking a look at it, there’s only one thing that comes to mind: it’s very gorgeous, with a wonderful Iron-grey color combination that covers the whole case save for the tinted tempered glass panels on both sides. The casing has four tempered glass panels on both sides, the top, and the front. Unlike the original H500P, the front and top panels now feel solid. These panels are more robust, and the top panel is secured by a thumb screw located in the case’s rear. Additionally, the panels have greater ventilation, allowing the fans behind them to breathe properly.
Panel on the front
Four USB 3.0 ports are included, as well as a USB 3.1 type C connector, audio ports, a power and reset button, and an HDD activity LED. However, since the IO panel is glossy and susceptible to different impressions, I opted not to remove the plastic for the time being. The twin 200mm ARGB fans can be accessed by removing the front panel, however there is no 5′′ drive bay. You may also use the supplied tempered glass panel to replace the mesh.

Panel on the Side
The casing includes tinted tempered glass on both sides and comes with a two-step installation process to prevent mishaps when removing them, but you’ll need a screwdriver, a tool, or a coin to remove or install the panel, which might have been much easier in my opinion.

Top Panel
By removing the top panel, you’ll get access to the Fan bracket, which can accommodate rads up to 360mm in diameter, but keep in mind the clearance for thickness, which is 43cm. It can also house 3x 120mm fans or 2x 140mm/200mm fans, which is an excellent choice with lots of space to breathe. Push-pull can also be done, but there will still be clearance problems, and the ideal way to set up push-pull is in front. The bracket is not significantly raised, as we saw in previous models such as the H500P, but it is symmetrical in form, and removing the bracket requires removing six screws first. Because there are no slots/notches to keep the bracket in place until the screws are tightened, you must be extra cautious while placing it.

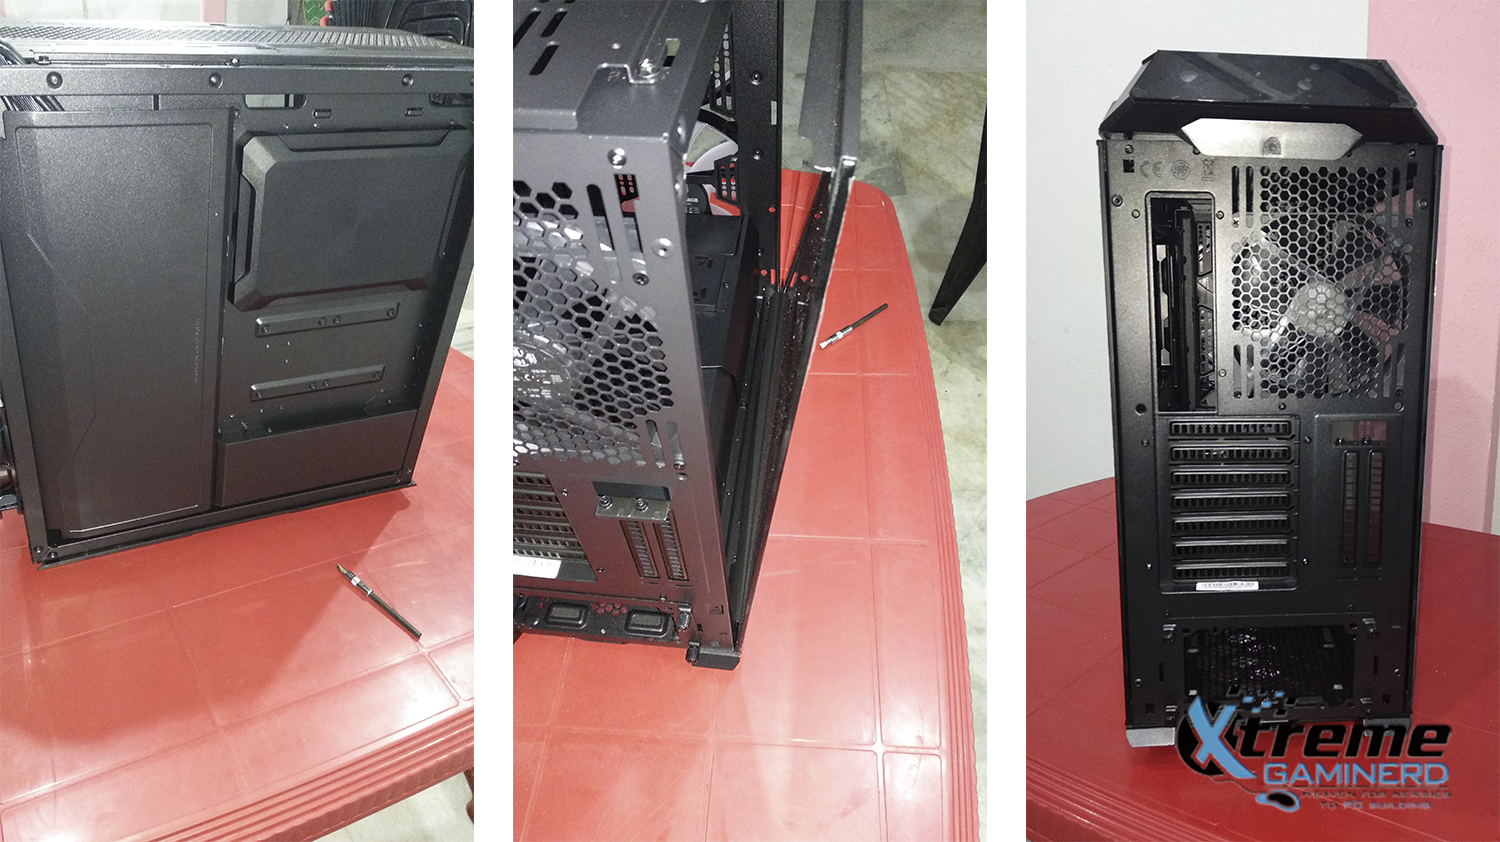
Panel on the back
On the rear of the case, there is a conventional cutout for motherboard IO connections, as well as 7 expansion slots and 2 additional expansion slots for vertically mounting your GPU. The PSU can be accessible from the rear side externally, which is a nice alternative and can be done without using any tools, and the dust filter can be found underneath it.
Interior
After removing the side tempered glass panel, the interior of the case is exposed, which consists mostly of the main chamber, which can accommodate up to an E-ATX Motherboard, as well as the PSU shroud, which is made up of two pieces that can be removed separately. Removing the first PSU shroud cover reveals your storage unit, which has two HDD drive bays, each of which can hold a 3.5′′ HDD or a 2.5′′ HDD, and a total of six 2.5′′ HDD slots.
However, when I fitted an MSI 970 motherboard, I discovered that the slots for 2.5′′ drives on the PSU shroud could not be utilized since the drive connections interfered with the motherboard connectors. Furthermore, when I put my radiator in push-pull at the front of the slot behind it, the slot beside it became useless, leaving me with no choice but to install my two 2.5′′ drives at the rear. However, I believe that the addition of two additional 3.5′′/2.5′′ disk bay slots would have been beneficial, since there is a restriction that exists in my configuration.

On the other side, there are CPU covers and one plate that now swivels around to open, as well as another cover attached at the bottom beside the PSU shroud that contains the LED controller, which you can connect to your mobo for a full RGB setup or sacrifice your Reset button to convert it into a switch for changing the illumination. Furthermore, the cutout can be used to hide your cables that will be coming from the PSU, but keep in mind that the clearance it offers after closing is very narrow. Nonetheless, it managed to hold all of my cables inside it and gave me a clean cable management at the back, which is required because the other side also has tinted tempered glass.

If you remove the first PSU shroud cutout, which requires a little effort to release, you can fit rads up to 360mm at the front. The ideal place to install a push-pull radiator is in the front, since there will be clearance issues if you install it in the top. As a result, the radiator was originally placed at the top, but owing to a clearance problem with the push-pull system, it was subsequently relocated to the front. As I previously stated, the case can accommodate up to an E-ATX motherboard, but I believe this is a bad idea because you will need to remove a panel near the front to allow your cables to pass through it because the motherboard will obscure the presence of rubber grommets, leaving you with no option to route those cables. There is a 140mm fan in the rear that will serve as your primary exhaust. For individuals with a lengthy GPU, the availability of a GPU support handle is an additional benefit.
Build
I’m using an FX8350 CPU and a GTX MSI1060 Gaming Edition GPU from my prior case, which is a bit of a relic from my previous case. All of my equipment will be transferred from my previous HAF 922 case. After completing my installation, one thing I would say is that if you are thinking of purchasing this beautiful case, make sure you have all of the latest equipment, especially the PSU, as I had a lot of trouble positioning my drives so that the SATA cables could easily reach them without any issues with my old Cooler Master Thunder 750. However, after some work and the purchase of a connector converter, I was eventually able to install everything properly, with the exception of the Type C connection, which my motherboard lacked. And one thing that went off without a hitch was the cable management, which isn’t necessary in this instance since all of your wires will be tucked away under those covers, but you should double-check that they’re correctly routed before closing those panels.

The worst case scenario I encountered was that after connecting the 19pin USB 3 connection to my motherboard header, the two SSD mounts located above the PSU shroud were unreachable, and the SATA cable and power connector interfered with the mobo’s header. If you go with a Push-Pull setup at the front, the SSD mounts above that position become worthless as well. As a result, I’m left with just one option: utilize my 2.5′′ drives in the rear, which is a good thing to remember.


Tests and Findings
 Thermal: The room temperature was 29 degrees Celsius when the thermal test was performed, and the following are the results of the test:
 Apart from the installed 200mm ARGB fans, I used 3x120mm Master Pro Air Pressure Fans at the top for exhaust, 1x140mm pre-installed fan at the back, also set to exhaust mode, and finally a push-pull radiator set-up at the front, and the noise is literally very low when all of these are running at their full potential.
When the radiator and GPU are set to balanced mode, they are completely silent. The heat and acoustic graphs clearly show the case’s performance characteristics.
Last Thoughts
The Cooler Master H500M is a lovely case to work with, but you’ll need modern hardware to get the most out of it. In contrast to what we saw in the H500P, the case’s performance has significantly improved. The case costs $200, which I believe is a little much for what we receive for such a high-end case. However, if you want a gorgeous case that will fit well with your setup, this is the one to buy. Below are the Pros and Cons, as well as a video of unpacking and installation.
Note that all of the above-mentioned hardware was bought by us.
[rwp box id=”0′′] rwp box id=”0′′] rwp box

– Understand the significance of these honors
The h500m review is a hands-on review of the Cooler Master H500M. This case has an interesting combination of performance and aesthetics.

