
133 Results

node

Search

McDonald’s and Minecraft might seem like an odd pairing at first glance, but the iconic fast-food brand has become a surprisingly popular theme in the blocky universe. Whether you’re looking to dress up as Ronald McDonald, roleplay as a fry cook, or just add some absurd humor to your survival world, McDonald’s skins have carved out their own niche in the community. Unlike official crossover skins from franchises like Star Wars or Marvel, most McDonald’s skins are community-driven creations, which means there’s a massive variety to choose from, ranging from pixel-perfect recreations of the Golden Arches uniforms to nightmare-fuel interpretations of Grimace.

This guide covers everything you need to know about finding, installing, and using McDonald’s skins in Minecraft across all platforms. We’ll walk through the history of McDonald’s in the Minecraft community, show you where to download the best skins, and even cover how to create your own custom designs. If you’ve ever wanted to serve up pixelated Big Macs in your multiplayer server, you’re in the right place.

Key Takeaways

  • McDonald’s skins in Minecraft are community-created cosmetic designs that let players dress as employees, mascots, or menu items, with no official branded collaboration from McDonald’s or Mojang.
  • You can download free McDonald’s skins from popular databases like NameMC, The Skindex, and Planet Minecraft, or create your own using skin editors like NovaSkin with a standard 64×64 PNG template.
  • Installation processes differ by platform—Java Edition allows direct upload through the launcher, while Bedrock Edition requires additional steps through Settings or the Minecraft website depending on whether you’re on Windows, mobile, or console.
  • Ronald McDonald and Grimace skins dominate the community, with variations ranging from classic and modern designs to horror-themed ‘cursed’ versions that tie into meme culture.
  • Pairing your Minecraft McDonald’s skin with a custom build featuring red-and-yellow color schemes, drive-thrus, and interior details creates immersive roleplay servers or impressive content creator showcases.
  • Common skin issues like corrupted textures or incorrect model alignment can be fixed by verifying the 64×64 resolution, selecting the correct player model (Steve vs. Alex), and ensuring your internet connection is stable for multiplayer sync.

What Are Minecraft McDonald’s Skins?

McDonald’s skins are custom player appearances that transform your Minecraft character into something related to the fast-food chain. These can range from employees in recognizable uniforms to mascots like Ronald McDonald, Grimace, or the Hamburglar. Some skins are straightforward, a crew member in a visor and polo, while others get creative with interpretations of menu items, packaging, or even abstract concepts like “living Happy Meal.”

Skins in Minecraft are purely cosmetic. They don’t affect gameplay, stats, or hitboxes, but they’re a huge part of player identity, especially on multiplayer servers or in content creation. A McDonald’s skin can be a gag for a one-off video, part of a themed roleplay server, or just a way to mess with your friends during a co-op session.

The format is simple: skins are 64×64 pixel PNG files that wrap around the player model. Both Java Edition and Bedrock Edition support custom skins, though the installation process differs slightly. On Java, you’ve got full freedom to upload any skin file. On Bedrock (which covers Windows 10/11, consoles, and mobile), you can still use custom skins, but some platforms require a few extra steps or Xbox Live sign-in.

The History of McDonald’s and Minecraft Collaborations

Official McDonald’s Skin Promotions

Unlike some major brands that have partnered directly with Mojang for official skin packs, McDonald’s has never had a formal, wide-scale collaboration with Minecraft. There have been regional promotions, particularly in Asian markets, where McDonald’s Happy Meals included codes for Minecraft-themed toys or accessories, but nothing that resulted in an official McDonald’s skin pack on the Minecraft Marketplace.

In 2018, McDonald’s Singapore ran a promotion that tied Minecraft toys to Happy Meals, but it focused on generic Minecraft characters rather than McDonald’s branding. A few years later, rumors circulated about potential skins tied to McDonald’s promotions in Japan and South Korea, but nothing materialized on a global scale. As of March 2026, there’s no official McDonald’s DLC or branded content in Minecraft.

Community-Created McDonald’s Skins

What the community lacks in official support, it more than makes up for in creativity. McDonald’s skins started appearing on skin databases as early as 2011, shortly after Minecraft’s full release. The designs range from pixel-art recreations of the classic red-and-yellow uniforms to horror-themed reinterpretations of mascots.

The popularity spiked around 2016-2017 when roleplay servers and YouTube content creators began featuring fast-food-themed builds and skins. Channels focused on Minecraft roleplay would create entire McDonald’s restaurants, complete with drive-thrus, kitchens, and customer areas, and players needed matching skins to sell the illusion.

By 2020, the trend evolved with meme culture. Skins based on the “Grimace Shake” meme or cursed Ronald McDonald images became common on servers. The community has kept the theme alive, and in 2026, you can still find hundreds of McDonald’s skins across various platforms, updated regularly to match current design trends and memes.

How to Get McDonald’s Skins in Minecraft

Downloading Free McDonald’s Skins

The easiest and most common way to get a McDonald’s skin is to download one from a skin database. Websites like NameMC, The Skindex, MinecraftSkins.com, and Planet Minecraft host thousands of user-uploaded skins, searchable by keyword. Simply type “McDonald’s” or “Ronald McDonald” into the search bar, and you’ll get pages of results.

Most of these skins are free and available for instant download. Once you’ve found one you like, download the PNG file to your device. Make sure it’s a 64×64 resolution skin, older “classic” 64×32 skins are still around but lack support for features like second layers on arms and legs.

On sites like Nexus Mods, you can also find modded skin packs or texture replacements that change NPCs or mobs into McDonald’s-themed characters, though these require additional mod loaders like Fabric or Forge.

Finding Premium McDonald’s Skins in the Marketplace

Bedrock Edition’s Minecraft Marketplace doesn’t currently feature any official McDonald’s skin packs, but there are third-party creators who sell themed skin bundles that include fast-food worker designs. These packs typically cost between 310 and 660 Minecoins (roughly $1.99 to $3.99 USD) and often bundle multiple occupations, including restaurant employees.

While you won’t find a pack labeled “McDonald’s,” you can search terms like “restaurant,” “fast food,” or “worker” to find close alternatives. Keep in mind that Marketplace content must pass Microsoft’s approval process, so direct brand references are rare.

Creating Your Own Custom McDonald’s Skin

If you can’t find the exact skin you want, or you’re after something hyper-specific like a 1990s McDonald’s uniform or a menu item mashup, you can make your own. Skin editors like NovaSkin, Skinseed (mobile), or even basic image editors like GIMP or Photoshop work fine.

Start with a blank skin template (easily found via a Google search for “Minecraft skin template”). Use reference images of McDonald’s uniforms, logos, or mascots to guide your pixel art. The hardest part is usually getting the proportions right on the model, so preview your work frequently using the editor’s 3D view.

Once you’re satisfied, export the skin as a PNG and follow the installation steps for your platform. Custom skins are especially useful for content creators who want a unique look that no one else has.

Step-by-Step: Installing McDonald’s Skins on Different Platforms

Installing Skins on Java Edition

Java Edition has the most straightforward skin installation process. Here’s how to do it:

  1. Download your McDonald’s skin PNG file from a skin site or create your own.
  2. Open the Minecraft Launcher and click on the Skins tab.
  3. Select New Skin and click Browse to locate your downloaded PNG file.
  4. Choose your player model: Steve (classic, wider arms) or Alex (slim arms). Most McDonald’s employee skins look better on Steve, while some mascot designs work on either.
  5. Name your skin (optional) and click Save & Use.
  6. Launch the game. Your new skin will be active immediately.

Alternatively, you can upload skins directly through the official Minecraft website by logging into your account and navigating to the Profile section. This method syncs your skin across devices automatically.

Installing Skins on Bedrock Edition (Windows, Mobile, Console)

Bedrock Edition’s process varies slightly depending on your platform, but the core steps are similar:

For Windows 10/11:

  1. Download the McDonald’s skin PNG.
  2. Open Minecraft and go to Settings > Profile > Edit Character.
  3. Click the hanger icon (second from the left) to open the skin menu.
  4. Select Owned and then Import (the + icon).
  5. Choose New Skin and select your PNG file.
  6. Pick your model (Classic or Slim), confirm, and you’re done.

For Mobile (iOS/Android):

  1. Download the skin to your device (usually via a browser or file manager).
  2. Open Minecraft and tap Settings > Profile > Edit Character.
  3. Tap the hanger icon, then Owned, then the + button.
  4. Tap Choose New Skin and navigate to your downloaded file.
  5. Select the model type and confirm.

For Consoles (PlayStation, Xbox, Switch):

Consoles require skins to be uploaded through the Minecraft website or transferred via a linked Microsoft account. The easiest method:

  1. On a PC or mobile browser, log into Minecraft.net with your Microsoft account.
  2. Navigate to your profile and upload the skin PNG there.
  3. Launch Minecraft on your console. If signed in with the same account, the skin will sync automatically.

Note: Some console editions have restrictions on custom skins for players without Xbox Live Gold or PlayStation Plus, depending on server settings.

The Most Popular McDonald’s Character Skins

Ronald McDonald Skins

Ronald McDonald is by far the most downloaded McDonald’s skin in the Minecraft community. The iconic clown mascot translates surprisingly well into pixel art, with his red-and-yellow jumpsuit, oversized shoes, and exaggerated makeup.

There are dozens of variations:

  • Classic Ronald: The traditional look from the 1980s-2000s, with the striped shirt and baggy yellow pants.
  • Modern Ronald: A slightly updated, less clown-heavy design that McDonald’s used in the 2010s before phasing out the mascot in many markets.
  • Cursed Ronald: Horror-themed interpretations that lean into creepypasta aesthetics, often featuring distorted faces or blood effects. These became especially popular during the “evil McDonald’s” meme waves.

Most Ronald skins use the Steve model for the classic proportions. Players searching for Steve from Minecraft skin guides will find that the base character’s blocky build works well for mascot costumes.

Grimace and Other Mascot Skins

Grimace, the big purple taste-bud creature, had a resurgence in 2023 thanks to the “Grimace Shake” TikTok trend. Minecraft skin creators responded with a flood of Grimace designs, ranging from cute and cartoonish to disturbingly realistic.

Other mascots that get the skin treatment:

  • Hamburglar: The striped convict outfit is easy to recreate in pixel art and remains a fan favorite.
  • Birdie the Early Bird: Less common but still available on most skin sites.
  • Mayor McCheese: A deep cut for McDonald’s lore fans. These skins usually feature a giant cheeseburger head.

Mascot skins tend to use the Steve model for better proportions, though some creators make Alex versions for players who prefer the slimmer arms.

McDonald’s Employee and Worker Skins

For roleplay servers or build showcases, employee skins are essential. These typically feature:

  • Black polo or button-up shirt with the McDonald’s logo on the chest.
  • Black pants or dark jeans.
  • Visor or baseball cap with the Golden Arches.
  • Name tag (optional detail depending on the skin’s resolution).

Some creators include variations for different roles: cashiers, cooks (with aprons), managers (with ties or different shirt colors), and drive-thru attendants. These skins are usually more understated than mascot designs, making them perfect for immersive builds.

Employee skins are popular on servers with economy plugins or job systems, where players can “work” at player-owned businesses. Pairing these skins with detailed building showcases elevates the realism of roleplay scenarios.

Best Websites and Resources for McDonald’s Skins

Here are the top sites for finding high-quality McDonald’s skins in 2026:

NameMC

One of the most popular skin databases, with a clean interface and robust search. Searching “McDonald’s” returns 200+ results, and you can filter by date uploaded, popularity, or user rating. Each skin has a 3D preview, and downloading is a single click.

The Skindex

A veteran skin site that’s been around since Minecraft’s early days. The Skindex has a massive library, and its “trending” section often features meme-driven skins like cursed Ronald McDonald designs. You can also upload your own creations here.

Planet Minecraft

Known for its community-driven content, Planet Minecraft hosts skins, mods, and builds. The site’s “Featured Skins” section highlights high-quality uploads, and the comments often include installation tips or requests for edits.

MinecraftSkins.com

A straightforward database with minimal clutter. Great for quick downloads if you know exactly what you’re looking for. The search function is fast, and the 3D preview tool works well on mobile.

NovaSkin

Not just a download site, NovaSkin is a full skin editor with a gallery of user creations. You can browse McDonald’s skins, download them, or open them in the editor to tweak colors, add details, or remix designs.

Reddit: r/MinecraftSkins

The subreddit is a solid place to request custom skins or share your own. If you’re looking for something obscure (like a specific McDonald’s uniform from a certain year), posting a request here often gets results within a day or two.

External gaming sites like Twinfinite occasionally feature curated skin lists for trending themes, including fast-food and meme-related designs. Similarly, GamesRadar+ publishes seasonal guides that highlight the best community creations across various categories.

Creating Custom McDonald’s-Themed Builds to Match Your Skin

Building a McDonald’s Restaurant

A McDonald’s skin isn’t complete without a matching build. Constructing a recognizable restaurant adds context and makes for great screenshots or roleplay scenarios.

Start with the exterior. The classic McDonald’s look uses:

  • Red and yellow concrete or terracotta for the signature color scheme.
  • Quartz or white concrete for the modern, clean-lined aesthetic of newer locations.
  • Glass panes for floor-to-ceiling windows (most McDonald’s have lots of natural light).
  • Gold blocks (sparingly) to represent the Golden Arches logo. Place two vertical arches at the entrance or on the roof.

For the interior, focus on:

  • Counter area: Use slabs or trapdoors to create a service counter, with item frames displaying food items (baked potatoes for fries, cooked beef for burgers, etc.).
  • Kitchen: Hide this behind the counter with furnaces (grills), cauldrons (fryers), and chests (storage). Redstone lamps can simulate heat lamps.
  • Seating: Use stairs and slabs to create booths or tables. Red and yellow carpet ties the color scheme together.
  • Menu boards: Use black concrete or blackstone with item frames and maps to display a custom menu. Some builders create pixel art menus using map art tools.

For added realism, include a bathroom (with doors and signs), a storage room, and a manager’s office. Lighting is key, use lots of lanterns, sea lanterns, or glowstone to mimic the bright, fluorescent feel of a real McDonald’s.

Designing a Drive-Thru and Play Area

A drive-thru adds functionality and authenticity. Build a winding path using concrete or asphalt-textured blocks (gray concrete works well). Add:

  • Speaker box: A single fence post with a note block and button.
  • Order screen: Use a painting, banner, or item frame.
  • Pickup window: An open space with a hopper or dropper mechanism if you want a functioning item delivery system.

For the play area (a staple of McDonald’s in the ’90s and 2000s), use:

  • Colorful blocks: Bright wool, terracotta, or concrete in primary colors.
  • Climbing structures: Fences, ladders, and trapdoors to simulate tubes and slides.
  • Ball pit: A sunken area filled with colored wool or concrete powder.
  • Tables and seating: Smaller versions of the main dining area.

Some builders go further and include a PlayPlace exterior structure with a slide exiting into the parking lot. This is purely decorative but adds a nostalgic touch, especially for players who grew up with those setups.

Troubleshooting Common McDonald’s Skin Issues

Skin not showing up in multiplayer:

This is usually a server-side setting. Some servers disable custom skins or require players to use a specific resource pack. Check the server’s rules or ask an admin. On Bedrock realms, custom skins should work automatically if your Xbox profile is linked.

Skin looks corrupted or pixelated:

You likely downloaded a skin in the wrong resolution. Minecraft supports 64×64 skins, but older 64×32 skins still exist. If your skin looks stretched or missing textures, re-download from a different source or check the file properties before uploading.

Skin resets to default Steve or Alex:

On Java Edition, this can happen if your Minecraft session isn’t connected to the internet when you launch. The game will default to Steve until it can fetch your skin from Mojang’s servers. On Bedrock, make sure your Microsoft account is signed in and that you’ve selected the custom skin in the profile editor.

Can’t import skin on Bedrock (mobile/console):

Some platforms restrict file imports due to OS-level permissions. On iOS, make sure the PNG is saved to your Files app, not just the Photos app. On Android, check that Minecraft has storage permissions enabled in your device settings. On consoles, upload the skin via Minecraft.net instead of trying to import directly.

Skin doesn’t match model (arms look wrong):

You may have selected the wrong model type during import. If your skin was designed for the Steve (classic) model but you chose Alex (slim), or vice versa, the arms will look misaligned. Re-import the skin and double-check the model setting. Most McDonald’s employee and mascot skins use the Steve model by default.

Skin isn’t visible to other players:

On some third-party servers or modded clients, skins require additional permissions or client-side mods to display. Vanilla Minecraft should show skins automatically as long as both players are connected to the internet and have skins enabled in their settings.

Conclusion

McDonald’s skins might not be official Minecraft DLC, but the community has kept the theme alive with an impressive variety of designs, from nostalgic mascots to modern meme interpretations. Whether you’re setting up a roleplay server, building a massive franchise replica, or just want to confuse your friends by showing up as Grimace in a hardcore survival world, there’s a McDonald’s skin out there for you.

The installation process is quick on both Java and Bedrock, and with the wealth of free resources available, you can swap skins as often as you like. Pair your new look with a themed build, and you’ve got the foundation for some memorable multiplayer moments or content creation. Just remember: no matter how detailed your skin is, you still can’t actually eat the pixelated fries.
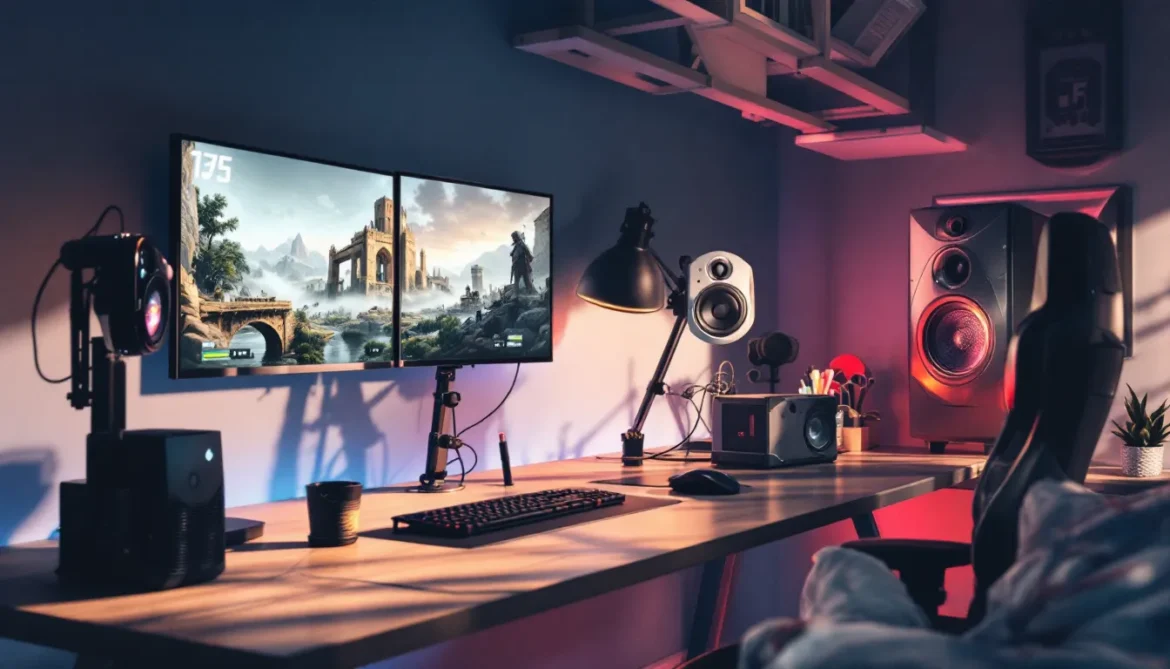

Minecraft’s blocky world is iconic, but after years of playing, vanilla graphics can feel stale. That’s where shaders come in, transforming sunlight into actual god rays, turning water into reflective surfaces, and adding shadows that give depth to every build. Whether you’re running a beast of a gaming rig or squeezing frames from a laptop, there’s a shader pack that’ll breathe new life into your worlds without tanking performance.

In 2026, shader development has exploded. Ray tracing shaders push photorealism to new heights, while lightweight options prove you don’t need a $2,000 GPU to enjoy better visuals. This guide breaks down the best shader packs across every performance tier, from jaw-dropping SEUS PTGI to frame-friendly Vanilla Plus. We’ll cover installation, optimization, and which packs suit your build style, so you can spend less time tweaking settings and more time actually playing.

Key Takeaways

  • Minecraft shaders transform vanilla graphics by enhancing lighting, shadows, water reflections, and atmospheric effects without adding new blocks or mobs.
  • High-end systems with RTX 3070+ GPUs can handle ray-traced shaders like SEUS PTGI for photorealistic visuals, while mid-range and budget hardware benefit from optimized packs like Sildur’s Vibrant or Vanilla Plus.
  • Installation requires a shader loader (OptiFine or Iris Shaders) and shader pack files placed in your shaderpacks folder, with most packs offering multiple presets to balance visual quality and frame rates.
  • Shader performance depends heavily on settings adjustments—reducing render distance from 16 to 10-12 chunks, lowering shadow resolution, and disabling volumetric effects can recover 30-40 FPS.
  • Different shader packs suit specific build styles: BSL and Complementary enhance medieval and fantasy worlds, SEUS PTGI excels for modern architecture, while Sildur’s or Chocapic13’s optimize survival gameplay.

What Are Minecraft Shaders and Why Do They Matter?

Shaders are rendering modifications that overhaul Minecraft’s graphics engine. They don’t add new blocks or mobs, instead, they change how light, shadows, water, and atmosphere are processed and displayed. Think of them as Instagram filters for your game, except actually functional and not just aesthetic fluff.

How Shaders Enhance Your Minecraft Experience

The visual jump is immediate and dramatic. Dynamic lighting means torches cast realistic, flickering glows that fade with distance. Volumetric fog rolls through forests at dawn, and water gains realistic reflections and wave physics. Shadows shift throughout the day, adding depth to terrain and making builds pop with dimension.

Beyond eye candy, shaders change how you experience the game. Building becomes more deliberate when you can see exactly how light falls across your structure. Exploring feels genuinely atmospheric, caves are darker and more menacing, sunsets over oceans become screenshot-worthy moments. Even veterans who’ve played for years report rediscovering the game through shader-enhanced visuals.

Most modern shader packs also include physically-based rendering (PBR) support, which makes materials like metal, glass, and stone respond to light more realistically. Resource packs designed for PBR take this even further, creating textures with depth maps and specular highlights.

Performance vs. Visual Quality: Finding the Right Balance

Here’s the catch: shaders are GPU-intensive. A pack that looks incredible at 15 FPS isn’t worth using. The key is matching shader complexity to your hardware without compromise.

High-end systems (RTX 3070+, Radeon RX 6800+) can handle ray-traced shaders at 1440p or 4K with solid frame rates. Mid-range builds (GTX 1660, RTX 2060, RX 5600 XT) perform best with optimized packs that offer visual upgrades without extreme computational overhead. Low-end and integrated graphics need lightweight packs that enhance vanilla aesthetics while maintaining 60+ FPS.

Most shader packs include multiple presets, Ultra, High, Medium, Low, letting you fine-tune within a single download. Performance scales with render distance too: dropping from 16 to 12 chunks can recover 20-30 FPS with shaders enabled. Testing is essential. What runs well for streamers with overclocked systems might chug on your hardware.

How to Install Minecraft Shaders in 2026

Installing shaders is straightforward once you know the process. You’ll need a shader loader mod and the shader pack files themselves. Two main loaders dominate in 2026: OptiFine and Iris Shaders.

Installing OptiFine or Iris Shaders Mod

OptiFine has been the standard for years. It’s a performance mod that also enables shader support, along with features like connected textures, better grass rendering, and zoom. Download the latest version compatible with your Minecraft release (1.21.x as of early 2026) from the official OptiFine site. Run the .jar installer, select your Minecraft directory, and it’ll create an OptiFine profile in your launcher.

Iris Shaders is the newer alternative, built for Fabric mod loader. It’s lighter, often faster, and compatible with Sodium, a performance mod that dramatically boosts FPS. If you’re running modded Minecraft or want maximum performance, Iris is the better choice. Install Fabric Loader first, then drop Iris (and optionally Sodium) into your mods folder.

Both loaders work similarly once installed. OptiFine is easier for vanilla players: Iris is superior for modded setups or performance chasers. You can’t run both simultaneously.

Downloading and Applying Shader Packs

Shader packs come as .zip files, don’t extract them. Find your pack (we’ll cover the best options shortly) from sources like CurseForge, Modrinth, or the creator’s official page. Community hubs on Nexus Mods also host curated collections with detailed compatibility notes.

Once downloaded:

  1. Launch Minecraft with OptiFine or Iris installed
  2. Go to Options > Video Settings > Shaders
  3. Click Shaders Folder (opens the shaderpacks directory)
  4. Drop your .zip file into this folder
  5. Return to the Shaders menu and select your pack from the list
  6. Click Done to apply

The game will reload with shaders active. If you experience crashes, the pack may be incompatible with your Minecraft version or another mod. Check version compatibility and remove conflicting mods (some lighting or performance mods clash with shaders).

Top Shaders for High-End Gaming PCs

If you’ve got the hardware, these packs deliver visuals that rival AAA game engines. Expect GPU usage near 100% and frame rates around 60-90 FPS at 1440p on high-end rigs.

SEUS PTGI: Ray Tracing Realism at Its Finest

SEUS PTGI (Sonic Ether’s Unbelievable Shaders Path Traced Global Illumination) is the gold standard for photorealism. It implements full path tracing, real-time ray tracing for light bounces, reflections, and global illumination. Sunlight filters through leaves, bounces off water, and illuminates caves naturally. Nighttime gameplay is transformed: moonlight actually matters, and torches cast soft, realistic glows.

The performance cost is steep. You’ll need an RTX 3070 or better (preferably RTX 4070+) to maintain 60 FPS at 1080p with moderate render distance. SEUS PTGI is currently Patreon-exclusive during development, with public releases following major updates.

Best for: Screenshot enthusiasts, cinematic builders, and anyone who wants Minecraft to look like a ray-traced tech demo.

Complementary Shaders: The Perfect Balance of Beauty and Performance

Complementary Shaders has become the community favorite for good reason. It offers stunning visuals, volumetric clouds, realistic water, subtle bloom, and excellent shadow quality, while running surprisingly well. It’s highly customizable through in-game menus, letting you toggle dozens of effects without editing config files.

Performance is solid: RTX 3060 or RX 6700 XT can hit 100+ FPS at 1080p on High settings. The shader scales beautifully, with Ultra presets rivaling SEUS PTGI in select scenarios. Weather effects are particularly impressive, rain looks wet, storms feel ominous, and fog creates genuine atmosphere.

Complementary also supports both OptiFine and Iris, making it versatile. Many players exploring detailed survival bunker designs find that shader-enhanced lighting makes underground bases feel genuinely immersive.

Best for: Players who want top-tier visuals without sacrificing frame rates, or those who enjoy tweaking every setting to personal preference.

BSL Shaders: Customizable Cinematic Graphics

BSL Shaders leans into warm, cinematic color grading. Sunsets are golden, water sparkles, and the overall tone feels inviting rather than stark. It’s less aggressive than SEUS PTGI but more stylized than Complementary, hitting a sweet spot for players who want their worlds to feel like fantasy concept art.

Customization is BSL’s strength. The settings menu includes over 100 adjustable parameters: shadow resolution, ambient occlusion strength, bloom intensity, weather particle density, and more. You can create wildly different looks, from vibrant and saturated to muted and realistic, all within the same pack.

Performance is comparable to Complementary. An RTX 3060 Ti or RX 6700 handles 1080p High at 80-100 FPS, with 1440p Medium still smooth. BSL works on both OptiFine and Iris, and the developer updates regularly for new Minecraft versions.

Best for: Builders who want their creations to look cinematic, or players who enjoy deep customization options.

Best Shaders for Mid-Range Systems

Mid-range GPUs (GTX 1660 Super, RTX 2060, RX 5600 XT, or similar) benefit most from optimized packs that deliver visual upgrades without the ray-tracing overhead. These shaders prove you don’t need a flagship card to escape vanilla graphics.

Sildur’s Vibrant Shaders: Versatile and Optimized

Sildur’s Vibrant Shaders has been a community staple for years, and it’s aged gracefully. The pack comes in multiple tiers, Lite, Medium, High, Extreme, letting you scale visual complexity to your hardware. Even the Lite version adds dynamic shadows, improved water, and better sky rendering.

Vibrant lives up to its name. Colors pop without oversaturation, and the lighting feels warm and inviting. It’s less realistic than BSL or Complementary but more cheerful, perfect for creative mode or relaxed survival. The High preset runs at 60+ FPS on a GTX 1660 at 1080p, and Medium maintains 80-100 FPS easily.

Compatibility is excellent. Sildur’s works with OptiFine and Iris, supports older Minecraft versions back to 1.12, and rarely conflicts with other mods. It’s a safe, reliable choice if you want immediate improvement without research paralysis.

Best for: Mid-range systems, players who prefer vibrant aesthetics over stark realism, or anyone upgrading from vanilla for the first time.

MakeUp Ultra Fast: High Quality Without the Lag

MakeUp Ultra Fast is optimized specifically for performance-conscious players. Even though the name, it looks fantastic, offering realistic water reflections, smooth shadows, and atmospheric fog while maintaining high frame rates on modest hardware. A GTX 1650 or RX 5500 XT can hit 80+ FPS at 1080p.

The secret is intelligent optimization. MakeUp skips expensive effects that provide minimal visual return, focusing instead on impactful changes like lighting overhauls and refined water physics. The result feels premium without the usual performance tax.

It’s particularly good for multiplayer servers where consistent frame rates matter more than screenshot-perfect visuals. Many players building creative structures appreciate that MakeUp lets them see their work enhanced without frame drops during complex edits.

Best for: Mid-range laptops, budget gaming PCs, or multiplayer-focused players who need stable performance.

Chocapic13’s Shaders: Smooth Performance With Stunning Effects

Chocapic13’s Shaders occupies the middle ground between performance and beauty. It offers multiple versions (Lite, Medium, High, Extreme, Ultra) with noticeable visual jumps between tiers. The Medium version is the sweet spot for mid-range hardware, adding godrays, realistic clouds, detailed water, and smooth shadows while staying above 70 FPS on an RTX 2060.

Chocapic’s color palette is natural and balanced. It doesn’t oversaturate like some vibrant packs or go full grimdark like certain realistic shaders. Sunrise and sunset times feel magical, and weather effects, especially rain, add genuine atmosphere. Resources such as Game8’s shader guides often recommend Chocapic13’s for its reliability across different build styles.

The pack is also well-maintained. Regular updates ensure compatibility with new Minecraft versions, and the developer actively addresses bugs reported by the community.

Best for: Mid-range systems, players who want noticeable visual improvement without sacrificing smooth gameplay, or those who appreciate natural color grading.

Lightweight Shaders for Low-End PCs and Laptops

Running Minecraft on integrated graphics or older hardware doesn’t mean you’re stuck with vanilla visuals. These lightweight packs deliver meaningful improvements while preserving playable frame rates.

Vanilla Plus Shaders: Subtle Enhancement, Maximum FPS

Vanilla Plus Shaders does exactly what the name suggests: enhances Minecraft’s default look without fundamental changes. It adds subtle shadows, slightly improved water, softer lighting transitions, and refined sky gradients. The impact is gentle but noticeable, like cleaning smudges off a window rather than replacing it.

Performance is its superpower. Integrated graphics like Intel UHD 620 or Vega 8 can run Vanilla Plus at 60+ FPS with 8-10 chunk render distance. The shader adds minimal GPU overhead, making it ideal for laptops that thermal-throttle under load. Players gathering resources in areas with blocks like Minecraft sand will appreciate that even desert biomes render smoothly with enhanced visuals.

Vanilla Plus is perfect if you want Minecraft to look better without looking different. It respects the game’s aesthetic while polishing rough edges.

Best for: Low-end laptops, integrated graphics, players who prefer vanilla aesthetics but want subtle improvements.

Lagless Shaders: Smooth Gameplay on Budget Hardware

Lagless Shaders is optimized for the absolute lowest-end systems. It focuses on frame rate above all else while still adding basic improvements: soft shadows, slightly better water, and cleaner lighting. Expect minimal visual change compared to vanilla, but enough to feel like an upgrade.

On a system with 4GB RAM and integrated graphics, Lagless can maintain 50-70 FPS where other shaders would drop below 30. It’s particularly useful for older PCs or budget laptops where even lightweight packs like Vanilla Plus cause stuttering. According to troubleshooting guides on Twinfinite, Lagless Shaders is the go-to recommendation for players experiencing chronic performance issues with other packs.

The visual trade-off is real, Lagless won’t wow anyone in screenshots, but it proves that even minimum-spec machines can escape vanilla graphics entirely.

Best for: Budget laptops, older PCs, players who prioritize smooth gameplay over visual fidelity, or anyone frustrated by other shaders’ performance impact.

Best Shaders for Specific Minecraft Styles

Your shader choice should complement your build style. Certain packs enhance specific aesthetics better than others.

Shaders for Medieval and Fantasy Builds

Medieval and fantasy worlds benefit from warm, atmospheric shaders with strong godrays and enhanced fog. BSL Shaders excels here, its cinematic color grading makes castles feel ancient and mystical, especially at dawn or dusk. Complementary Shaders is another excellent choice, with volumetric fog that rolls through courtyards and forests, adding drama to towers and keeps.

Lighting matters for fantasy builds. Torches and lanterns should cast warm, inviting glows, and stained glass windows need to filter colored light realistically. Both BSL and Complementary handle this beautifully. When working on structures that incorporate varied blocks like white concrete or quartz, these shaders ensure clean materials reflect light naturally without overblown bloom.

Avoid overly realistic packs like SEUS PTGI for fantasy builds, the stark realism can clash with Minecraft’s inherent aesthetic.

Shaders for Modern and Futuristic Worlds

Modern architecture demands clean, crisp lighting with accurate reflections. SEUS PTGI is ideal if your hardware can handle it, glass facades, polished concrete, and metal beams look genuinely contemporary with path-traced reflections. Complementary Shaders on Ultra settings is a strong alternative, offering excellent PBR support for modern materials.

Futuristic builds benefit from shaders with customizable ambient light and strong contrast. BSL Shaders with tweaked settings (cooler color temperature, reduced bloom) creates a sleek, high-tech atmosphere. Glass blocks, beacons, and glowstone gain visual pop that reinforces sci-fi themes.

Modern builds also rely on clean lines and geometry. Shaders that add heavy fog or oversaturated colors can muddy the aesthetic, stick with balanced or customizable packs.

Shaders for Survival and Adventure

Survival gameplay needs performance-friendly packs that enhance atmosphere without frame drops during combat or exploration. Sildur’s Vibrant (Medium) is perfect, adding enough visual flair to make caves feel dangerous and sunsets rewarding, while maintaining stable FPS during mob encounters.

Chocapic13’s (Medium or High) is another solid choice. Improved shadows help spot hostile mobs, and better water rendering makes ocean exploration more engaging. Survival players often venture into caves where finding resources like iron ore at optimal depths becomes crucial, and well-optimized shaders ensure you’re not fighting low FPS along with creepers.

For hardcore survival or adventure maps, avoid extremely dark shaders that make navigation frustrating. Look for packs with adjustable brightness or night vision that doesn’t require cranking gamma to unsafe levels.

Troubleshooting Common Shader Issues

Shaders can be finicky. Here’s how to fix the most common problems without reinstalling everything.

Fixing Low FPS and Performance Problems

First, check your shader preset. Many packs default to Ultra settings that even high-end systems struggle with. Drop to High or Medium and test, the visual difference is often minimal while FPS gains are substantial.

Reduce render distance. Shaders apply effects to every visible chunk. Dropping from 16 to 10-12 chunks can recover 30-40 FPS with minimal visual impact. Adjust Video Settings > Shadow Quality to Medium or Low if your pack supports it, shadow resolution is a major performance hog.

Disable unnecessary effects in the shader’s settings menu. Volumetric fog, godrays, and screen-space reflections are GPU-intensive. Turning off just one or two can stabilize frame rates without gutting visual quality. If you’re running other mods, conflicts with lighting or performance mods (like Better Foliage or Dynamic Lights) can tank FPS. Test with shaders alone, then add mods back gradually.

Allocate more RAM to Minecraft. Shaders benefit from 6-8GB allocated (if your system has 16GB total). Edit your launcher profile and adjust the JVM arguments to include -Xmx6G (or higher). Don’t exceed 50% of your total system RAM.

Resolving Compatibility and Crashes

Crashes on shader load usually mean version mismatch. Verify your shader pack, OptiFine/Iris, and Minecraft version are compatible. Many shaders lag behind major Minecraft updates by weeks or months. Check the shader creator’s page for compatibility notes.

If shaders load but cause crashes during gameplay, disable other mods one by one. Forge and Fabric mods that alter rendering (Optifine alternatives, lighting mods, some minimap mods) commonly conflict. Keep a log of which mods you’re testing.

Black screen or corrupted textures? Update your GPU drivers. Outdated drivers are a leading cause of shader rendering bugs. AMD and NVIDIA release regular updates, install the latest stable version, not beta drivers.

Some shader packs have known bugs with specific features. Check the pack’s issue tracker (usually on CurseForge or GitHub). Common culprits include underwater rendering, end dimension effects, and modded dimension compatibility. Disabling the problematic effect via shader settings often resolves the issue without waiting for a patch.

Optimizing Your Shader Settings for Best Results

Most players install a shader pack and leave everything on default. That’s a mistake. Proper optimization squeezes better performance and visuals from the same hardware.

Start with preset tuning. Load your shader’s High preset, test performance in different biomes (plains, forest, ocean), then adjust. If you’re above 80 FPS everywhere, try Ultra. If you dip below 50 in forests, drop to Medium. Match the preset to your worst-case scenario, not your best.

Shadow resolution is the biggest performance lever. Ultra shadow resolution (2048×2048 or higher) looks crisp but murders FPS. Medium (1024×1024) still looks solid while recovering significant performance. Test the difference, you might not even notice.

Disable or reduce godrays/volumetric lighting intensity. They’re beautiful but expensive. Dropping intensity from 100% to 60% maintains the effect while easing GPU load. Same with bloom, subtle bloom (20-40%) looks cleaner than maxed-out glow that washes out builds.

Water quality deserves special attention. Realistic water with reflections and refraction is gorgeous but demands processing power. If you’re not doing ocean builds or exploring underwater, consider simplified water settings. The performance gain is worth it.

Test ambient occlusion settings. SSAO (screen-space ambient occlusion) adds depth to corners and crevices but costs FPS. Some shaders let you disable it entirely or reduce quality. If you’re getting frame drops in dense forests or cave systems, AO is a likely culprit.

Finally, match your render distance to your hardware realistically. High-end shaders at 20 chunks will choke anything short of an RTX 4080. Most players are fine with 10-14 chunks for exploration and can bump up to 16-18 for screenshots. You can change render distance on the fly, use lower settings for gameplay, higher for building or capturing content.

Save multiple profiles if your shader allows it. Create a “Performance” preset for survival sessions and a “Beauty” preset for creative building. Switching between them takes seconds and optimizes your experience for the task at hand.

Conclusion

Shaders prove that Minecraft’s visual ceiling is higher than most players realize. Whether you’re chasing ray-traced photorealism with SEUS PTGI, balancing performance and beauty with Complementary or Sildur’s, or squeezing enhanced visuals from budget hardware with Vanilla Plus, there’s a pack that fits your system and style.

The right shader transforms more than graphics, it changes how you experience building, exploring, and surviving. Sunsets become moments worth pausing for. Caves feel genuinely atmospheric instead of repetitive tunnels. Your builds gain depth and dimension that vanilla lighting can’t deliver.

Installation is simple, optimization is manageable, and the performance cost is lower than ever thanks to years of shader development refinement. Start with a mid-range pack like Sildur’s or Chocapic13’s if you’re new to shaders. Test settings, adjust to your hardware, and don’t be afraid to experiment. The visual upgrade is immediate, and there’s no going back to vanilla once you’ve seen your world with proper lighting.

If you’ve stumbled across “The Hating Game” while browsing storefronts or heard your kid mention it, you’re probably wondering whether it’s appropriate for younger players. The title alone raises questions, and parents deserve clear answers before handing over the controller. This guide breaks down everything you need to know, age ratings, content warnings, online risks, and practical tips for monitoring gameplay. Whether you’re vetting a potential purchase or trying to understand what your teen’s already playing, this is your no-nonsense breakdown of The Hating Game’s content and suitability for different age groups.

Key Takeaways

  • The Hating Game carries an M/17+ (ESRB) and 16+ (PEGI) rating due to sexual themes, strong language, and alcohol use—making it primarily suitable for older teens (16+) and adults, not younger audiences.
  • Sexual content is suggestive and implied rather than explicit, featuring fade-to-black transitions and no nudity, similar to R-rated films or adult television dramas.
  • The game includes frequent profanity (15-20 instances across an 8-10 hour campaign) integrated into character dialogue, but avoids slurs or gratuitous shock value.
  • The Hating Game features no microtransactions, loot boxes, or predatory monetization—it’s a single $29.99 purchase with optional story expansions, eliminating hidden spending risks.
  • Co-op gameplay and parental controls offer opportunities for supervised play with older teens, turning mature themes into teachable moments about relationships, workplace dynamics, and conflict resolution.
  • Platform-specific parental controls can restrict access by age rating and spending across PlayStation, Xbox, Nintendo, and Steam to prevent unauthorized purchases and gameplay.

What Is The Hating Game?

Game Overview and Genre

The Hating Game is a narrative-driven adventure title with romance and social simulation elements, developed by indie studio Brimstone Interactive. Released in late 2024 for multiple platforms, it adapts the popular novel of the same name into an interactive experience where player choices shape relationship dynamics and story outcomes.

The gameplay revolves around workplace rivalry, dialogue trees, mini-games tied to office tasks, and decision-making that affects character relationships. Think of it as a blend between visual novel mechanics and life sim progression, closer to Telltale’s narrative adventures than action-heavy titles. Players navigate corporate environments, engage in verbal sparring matches, and unlock story branches based on how they handle conflict and romance.

The tone skews mature, targeting older teens and adults rather than younger audiences. Expect witty banter, workplace tension, and romantic tension that builds throughout the campaign. It’s not a shooter or competitive multiplayer experience, this is story-first gaming.

Platform Availability and System Requirements

The Hating Game launched on **PC (Steam, Epic Games Store), PlayStation 5, Xbox Series X

|

S, and Nintendo Switch**. Cross-save functionality exists between PC and console versions via cloud sync, but no cross-platform multiplayer exists since the game is primarily single-player with optional co-op dialogue choices.

PC minimum specs:

  • OS: Windows 10 64-bit
  • Processor: Intel Core i5-6600K or AMD Ryzen 5 1600
  • Memory: 8 GB RAM
  • Graphics: NVIDIA GTX 1060 or AMD RX 580
  • Storage: 15 GB available space

Console versions run at 1080p/60fps on Switch (docked), with PS5 and Xbox Series X pushing 4K/60fps. Load times are significantly faster on current-gen consoles compared to Switch. No physical edition exists yet, digital download only across all platforms as of March 2026.

Age Rating and Official Content Descriptors

ESRB, PEGI, and Other Regional Ratings

The Hating Game carries a Mature 17+ (M) rating from the ESRB in North America, citing Sexual Themes, Strong Language, and Use of Alcohol. In Europe, PEGI rated it 16, focusing on similar descriptors: Sex, Bad Language, and Alcohol/Tobacco references.

Australia’s classification board gave it an MA 15+, while Japan’s CERO assigned a D rating (17+). Regional differences are minimal, core content remains consistent across versions, though some dialogue localization adjusts phrasing without altering meaning.

Parents should note that ratings don’t account for online interactions if playing co-op modes. The base game’s content drives these ratings, not community behavior.

Understanding the Rating Categories

Sexual Themes doesn’t mean explicit content appears on-screen. The rating reflects suggestive dialogue, implied intimate scenarios (fade-to-black), and romantic tension between adult characters. No nudity exists in-game.

Strong Language includes frequent use of profanity integrated into character dialogue, words like “damn,” “hell,” and occasional F-bombs appear in heated exchanges. It mirrors what you’d hear in a rated-R comedy, not gratuitous swearing for shock value.

Alcohol Use shows characters drinking in social settings (office parties, bars). No drug use appears, and alcohol isn’t glorified, it’s environmental detail matching the adult workplace setting. Characters don’t get visibly intoxicated or face consequences from substance abuse within the narrative.

Violence and Combat Content

Types of Violence Depicted

The Hating Game isn’t a violent game in traditional gaming terms. No combat mechanics exist, no weapons appear, and no physical confrontations occur during gameplay. The “violence” rating descriptor stems from occasional moments of emotional intensity and verbal aggression between characters.

One story sequence involves a character punching a wall in frustration, and another shows a brief shoving match during an argument, both are cutscene moments without player control. These scenes serve narrative purposes rather than action beats. When gaming guides cover this title, they rarely mention violence because it’s functionally absent from gameplay.

Blood, Gore, and Visual Intensity

Zero blood or gore appears in The Hating Game. The art style uses semi-realistic character models with stylized environments, nothing approaches horror or graphic imagery. The most “intense” visual moments involve angry facial expressions and tense body language during confrontations.

Parents concerned about nightmares or desensitization to violence can rest easy here. This isn’t that kind of game. The tension is interpersonal and emotional, not physical or visceral.

Language and Profanity

Frequency and Severity of Strong Language

Profanity appears regularly throughout The Hating Game’s dialogue. Characters use “damn,” “hell,” “ass,” “bitch,” and occasional F-bombs during heated exchanges or comedic beats. The frequency varies by story branch, more aggressive dialogue choices from the player character trigger stronger language from NPCs.

A typical playthrough might hit 15-20 instances of strong profanity across the 8-10 hour campaign. It’s not constant, but it’s present enough that sensitive families should take note. The writing mirrors adult contemporary fiction, characters talk like real people in their late twenties navigating workplace stress.

No slurs or hate speech appear in the script. The profanity serves character development and emotional authenticity rather than shock value.

In-Game Chat and Online Communication Risks

The game includes an optional co-op dialogue mode where a second player can vote on conversation choices during local or online play. This introduces potential exposure to unmoderated voice or text chat if playing with strangers through platform-level communication (Discord, Xbox Party Chat, PlayStation Party).

The game itself doesn’t feature built-in text or voice chat. All communication risks come from external platforms. Parents should use platform-specific privacy settings to restrict who can contact their children during online sessions.

Solo play eliminates these concerns entirely, the game is perfectly enjoyable as a single-player experience without online features enabled.

Sexual Content and Romantic Themes

This is the primary content concern for most parents evaluating The Hating Game. The entire narrative builds toward romantic and sexual tension between the protagonist and her workplace rival.

What’s actually shown: Kissing scenes, suggestive dialogue, implied sexual encounters (fade-to-black transitions), and characters discussing attraction, past relationships, and desire. One sequence involves characters undressing each other before the camera cuts away. Another shows a morning-after scene with characters in bed (covered by sheets, no nudity).

What’s NOT shown: No nudity, no explicit sexual acts, no graphic descriptions. The game handles intimacy similarly to network TV dramas aimed at adults, suggestive but not explicit.

Dialogue includes sexual innuendo, flirting, and frank discussions about attraction and relationships. Characters make references to physical intimacy without graphic detail. Think of it as equivalent to a PG-13 rom-com’s verbal content, paired with an R-rated film’s implied scenarios.

Parents should know this is fundamentally a romance game. The central relationship involves workplace enemies who develop feelings for each other, that’s the core experience. It’s emotionally mature content designed for players who understand adult relationship dynamics.

Many gaming news outlets compared its approach to romance to titles like Dream Daddy or Hades, present and meaningful without being gratuitous.

Substance Use and Mature Themes

Alcohol appears frequently in social contexts, characters drink wine at office parties, order cocktails at bars, and keep bottles in their apartments. One character mentions being “buzzed” after drinks, but no one gets sloppy drunk or faces alcohol-related consequences. It’s normalized adult behavior rather than cautionary content or glorification.

No drug use appears anywhere in the game. No smoking or vaping is depicted either.

Mature themes beyond romance include workplace harassment (verbal, not physical), power dynamics between characters in different corporate positions, anxiety and stress related to job security, and financial pressure. One character deals with past emotional trauma from a toxic relationship, handled with surprising nuance for a game in this genre.

These themes require emotional maturity to process. Younger teens might not fully grasp the workplace politics or relationship complexities driving character motivations. The game assumes players understand office culture, professional boundaries, and adult relationship complications.

Online Features and Safety Concerns

Multiplayer Interactions and Toxicity

The Hating Game’s online component is minimal but worth understanding. Co-op dialogue mode lets a second player join remotely to vote on conversation choices during story sequences. This creates potential exposure to strangers if using matchmaking rather than inviting known friends.

No open lobbies or public matchmaking exist, players must exchange friend codes or use platform-specific invite systems. This drastically reduces exposure to random players compared to competitive multiplayer games.

Toxicity potential is low because there’s no competitive element, no leaderboards, and no voice chat within the game. Most toxic gaming behavior stems from competitive pressure and anonymity, neither factor applies here. The worst-case scenario involves a co-op partner deliberately choosing dialogue options that derail the player’s preferred story path.

According to reports on platforms covering multiplayer experiences, the co-op community for narrative games tends toward cooperative and respectful behavior compared to PvP communities.

Privacy and Data Protection for Young Players

The game collects basic telemetry data, playtime, choices made, which story branches players pursue, to inform developer analytics. No personal information is required beyond platform account credentials for online features.

No in-game profile system exists where players create public identities. No friends lists, no messaging, no user-generated content. This eliminates common vectors for predatory behavior in online games.

Parents should still review platform-level privacy settings (PlayStation Network, Xbox Live, Nintendo Online, Steam) to control who can send friend requests, view activity, or initiate communication. The game itself is relatively safe, but the platforms hosting it require standard precautions for minor accounts.

In-Game Purchases and Monetization

Microtransactions and Loot Boxes

Good news here: The Hating Game has no microtransactions, no loot boxes, and no season passes. It’s a premium single-purchase title without ongoing monetization. You buy it once for $29.99 USD (standard price as of March 2026), and you own the complete experience.

DLC exists in the form of two story expansions released post-launch: “Office Politics” ($9.99) adds a workplace subplot with new characters, and “Vacation Mode” ($9.99) offers an alternate setting for relationship development. Both are optional and don’t lock away endings or core content from the base game.

No in-game currency, no cosmetic stores, no battle passes. The monetization model is straightforward and consumer-friendly. This also means there’s no risk of children racking up charges without parental permission, a purchase happens once at the storefront level, not continuously within the game.

Setting Parental Controls for Spending

Even with minimal monetization, parents should enable purchase restrictions at the platform level to prevent unauthorized DLC purchases:

PlayStation: Settings > Family and Parental Controls > Child account > Monthly Spending Limit (set to $0 for no purchases without approval)

Xbox: Settings > Account > Family settings > Privacy & online safety > Set spending limit and require approval for purchases

Nintendo Switch: System Settings > Parental Controls > Restriction Level > Restrict Nintendo eShop purchases

Steam: Enable Steam Family View, which requires a PIN for any purchases or downloads

These settings prevent surprise charges if kids have access to stored payment methods on family accounts.

Positive and Educational Aspects

Problem-Solving and Strategic Thinking

Even though the mature themes, The Hating Game does offer legitimate cognitive benefits. The branching dialogue system requires players to consider consequences before choosing responses, certain dialogue paths close off story options or damage relationships with NPCs.

Players must read social cues, interpret character motivations, and predict how their choices will affect long-term outcomes. It’s essentially a crash course in navigating complex social dynamics and understanding that actions have consequences beyond immediate reactions.

The office mini-games (email management, meeting scheduling, project prioritization) introduce light time-management and resource allocation challenges. Nothing groundbreaking, but they do encourage organizational thinking.

Teamwork and Social Skills Development

The co-op mode, when played with friends or family members, creates opportunities for communication and compromise. Players must discuss which dialogue options to select and negotiate when they disagree on character decisions.

This can actually serve as a conversation starter between parents and older teens about relationship dynamics, workplace behavior, and conflict resolution. Playing together lets parents contextualize mature content rather than leaving kids to interpret it alone.

The game also models emotional intelligence through its characters, recognizing when someone’s anger masks hurt feelings, understanding that people’s behavior stems from past experiences, learning that vulnerability can strengthen relationships. These aren’t explicitly taught, but they’re embedded in the narrative structure.

Obviously, these benefits don’t override age-appropriateness concerns. A game can be educational and still not suitable for younger audiences.

Parental Control Settings and Recommendations

Platform-Specific Parental Controls

Beyond spending limits, each platform offers tools to restrict access based on age ratings:

PlayStation 5:

  • Settings > Family and Parental Controls > Child account
  • Set Age Level for Games to block M-rated titles
  • Restrict Communication Features to prevent messages from strangers

**Xbox Series X

|

S:**

  • Settings > Account > Family settings > Privacy & online safety
  • Set content restrictions to block Mature games
  • Manage who can communicate via text and voice

Nintendo Switch:

  • Download the Nintendo Switch Parental Controls app (mobile)
  • Set Restriction Level to Teen or lower to block Mature titles
  • Monitor playtime and set time limits remotely

Steam (PC):

  • Enable Steam Family View with PIN protection
  • Restrict access to games not in a curated library
  • No built-in age rating filters, requires manual curation

These controls prevent kids from launching The Hating Game without parental approval, even if it’s already installed on a shared device.

Monitoring Playtime and Screen Time Limits

All modern platforms include playtime tracking and limit-setting features:

PlayStation: Parental Controls > Play Time Settings > set daily limits and play schedule

Xbox: Screen time settings in Microsoft Family Safety app > set daily limits and require approval to extend

Nintendo: Parental Controls app > set daily play limits with automatic suspend at time limit

Steam: No native time limits, third-party tools like Cold Turkey or Windows Family Safety required

For a narrative game like The Hating Game, reasonable session limits might be 1-2 hours per sitting to prevent eye strain and encourage breaks. The story naturally breaks into chapters that take 45-90 minutes each, making it easy to establish stopping points.

Consider co-viewing for younger teens (15-16) rather than outright bans, watching them play or playing together lets you address mature content as it arises rather than leaving them to process it alone.

Is The Hating Game Appropriate for Your Child?

Age-Specific Recommendations

Under 13: No. The romantic and sexual themes, combined with mature workplace scenarios, aren’t developmentally appropriate. The game offers nothing that would benefit this age group.

Ages 13-15: Probably not for most families. The sexual content and strong language exceed what most parents consider acceptable for middle schoolers. Exceptionally mature 15-year-olds in households with progressive media boundaries might handle it, but it’s a judgment call.

Ages 16-17: This is the intended audience sweet spot. The ESRB’s M rating and PEGI’s 16+ align here. Teens in this range typically understand romantic relationships, workplace dynamics, and can contextualize the mature themes. Parental discretion still applies, you know your kid’s maturity level better than a rating board.

Ages 18+: No concerns. The game targets adult players and handles its content with the expectation of an adult audience.

Key consideration: Is your teen interested in romance narratives? If they read YA romance novels, watch rom-coms, or engage with relationship-focused media, The Hating Game fits that interest profile. If they prefer action games and have no interest in relationship drama, they’ll probably find it boring regardless of age.

Co-Playing and Supervised Gaming Tips

For parents on the fence about a 16-17 year old playing, co-viewing is the compromise solution:

  • Play through the first few chapters together to gauge content and your teen’s reactions
  • Use co-op mode to participate rather than just watching over their shoulder
  • Pause during key scenes to discuss character decisions and real-world parallels
  • Frame it as a conversation starter about relationships, consent, workplace boundaries

Questions to ask during play:

  • “Why do you think that character reacted that way?”
  • “Would you handle that situation differently?”
  • “What do you think about how the game portrays this relationship dynamic?”

This transforms potentially concerning content into teachable moments. The game’s themes, power dynamics, communication in relationships, navigating conflict, are things teens will encounter in real life. Discussing them in a fictional context creates a safe space for those conversations.

If your teen pushes back on supervised play, that’s actually useful information. If they’re uncomfortable playing it with you watching, they might recognize the content is beyond their comfort zone, or they’re not ready to discuss those themes maturely yet.

Conclusion

The Hating Game sits firmly in the mature teen to adult category. Its M/16+ rating reflects genuine content concerns, sexual themes, profanity, and emotionally complex scenarios, that make it inappropriate for younger players. Parents of 16-17 year olds should evaluate their individual teen’s maturity and media literacy before approving.

The good news: no predatory monetization, minimal online risks, and legitimate cognitive benefits for age-appropriate players. The better news: you now have specific information about what the game contains, not vague rating descriptors. Use platform parental controls, consider co-playing with older teens, and trust your judgment about what fits your family’s values. When in doubt, watch some gameplay footage or play the first hour yourself before deciding.

Most Roblox players today know the platform as a sprawling universe of millions of user-created experiences, everything from anime battle arenas to tycoon simulators and parkour challenges. But rewind twenty years, and Roblox looked very different. The library was nearly empty, the tools were primitive, and the community was a fraction of what it is now. So what was the first game on Roblox, and how did that humble beginning evolve into the creative powerhouse we know today?

The answer isn’t as straightforward as you might think. While Roblox officially launched in 2006, pinpointing the very first game requires understanding the platform’s development timeline and the distinction between internal tests and public releases. This article digs into the true origins of Roblox’s first game, the creators who built it, and how those early experiments laid the groundwork for a platform that would eventually host over 40 million games and attract hundreds of millions of players worldwide.

Key Takeaways

  • Rocket Arena, created in January 2006, was the first game on Roblox and showcased the platform’s physics engine through simple rocket-launcher combat in a confined arena.
  • Early Roblox games like Classic Roblox and Crossroads were staff-created to populate the platform and demonstrate its social and competitive multiplayer capabilities before community creators emerged.
  • The first game on Roblox was built with primitive tools featuring basic Lua scripting, flat-colored blocks, and no advanced graphics, yet established core design principles still used today.
  • Roblox Studio has evolved from a browser-based editor into a professional development environment, with major upgrades including terrain tools (2011), advanced lighting (2018), and collaborative editing (2021).
  • Modern creators can learn from early Roblox games by focusing on tight, focused mechanics, prioritizing community feedback, embracing technical constraints for creativity, and emphasizing multiplayer social interaction.

Understanding Roblox’s Early Development and Timeline

The Birth of Roblox: From DynaBlocks to a Gaming Empire

Before Roblox became Roblox, it went by another name: DynaBlocks. Co-founders David Baszucki and Erik Cassel began working on the platform in 2004, envisioning a physics-based sandbox where users could build and share their own creations. The name “DynaBlocks” reflected the dynamic, block-based nature of the building system, think digital LEGOs with physics simulation.

By late 2005, the team rebranded to Roblox (a portmanteau of “robots” and “blocks”), and the platform entered beta testing with a small group of users. During this closed beta phase, Roblox wasn’t yet open to the public. Developers and testers experimented with the creation tools, building simple games and testing the platform’s stability.

On September 1, 2006, Roblox officially launched to the public. This is the date most consider the platform’s true birthday, even though development and internal testing had been ongoing for over two years. At launch, the game library was sparse, just a handful of experiences created by Roblox staff and early beta testers.

How Roblox’s Game Creation System Evolved

Early Roblox relied on a rudimentary version of what would eventually become Roblox Studio. The initial tools were clunky by modern standards but revolutionary for 2006. Users could drag and drop parts, adjust properties like size and color, and write simple scripts using Lua, a lightweight scripting language that remains the backbone of Roblox development today.

The earliest games were often tech demos more than fully realized experiences. Creators tested basic mechanics: spawning objects, implementing basic physics, creating simple combat systems. There were no sophisticated monetization systems, no advanced lighting engines, and no cross-platform support. You played on PC via a browser plugin, and that was it.

Even though these limitations, the core philosophy was already in place: empower users to create, not just consume. Roblox wasn’t shipping a finished game: it was shipping a creative toolkit. That distinction would prove crucial as the platform grew.

Rocket Arena: The Official First Game on Roblox

What Made Rocket Arena Special

So what is the oldest game on Roblox? The answer, according to Roblox’s own records and community historians, is Rocket Arena. Created in January 2006, months before the public launch, Rocket Arena holds the distinction of being the first game uploaded to the platform.

Rocket Arena was exactly what it sounds like: a simple combat arena where players spawned with rocket launchers and battled each other in a confined space. The gameplay loop was straightforward, spawn, grab a weapon, shoot opponents, respawn, repeat. There were no complex objectives, no progression systems, and no cosmetic unlocks. Just pure, physics-driven chaos.

The game showcased Roblox’s physics engine in action. Rocket explosions sent players and objects flying, demonstrating the platform’s ability to handle real-time physics calculations across multiple players. For 2006, this was impressive stuff. While games like Halo 2 and Half-Life 2 had already pushed physics in AAA titles, seeing it work in a user-generated content platform was novel.

Rocket Arena served a dual purpose: it was both a playable experience and a proof of concept. It demonstrated to early users what was possible with Roblox’s tools and set expectations for the kinds of games the platform could support.

The Creator Behind the First Game

Rocket Arena was created by Roblox staff members as an internal project during the beta period. Specifically, it’s attributed to the core development team working under David Baszucki and Erik Cassel. Unlike later Roblox games built by independent creators, the first Roblox game was essentially a first-party title designed to populate the platform and give early users something to play.

The fact that Roblox staff created the first game makes sense when you consider the timeline. In early 2006, there were no established community creators yet, the platform hadn’t even launched publicly. The dev team needed to seed the ecosystem with content to attract users and demonstrate the platform’s capabilities.

This practice of staff-created content continued throughout 2006. Games like Classic Roblox, Crossroads, and Chaos Canyon were all developed or co-developed by Roblox employees to fill out the library and give players a variety of experiences to try.

Other Early Roblox Games That Shaped the Platform

Classic Roblox and Crossroads

Classic Roblox and Crossroads emerged shortly after Rocket Arena and became staples of the early platform. Both were staff-created games that introduced more variety to the fledgling game library.

Classic Roblox was essentially a social hangout space, a simple map where players could meet, chat, and experiment with movement and basic interactions. It wasn’t a “game” in the traditional sense: there were no win conditions or objectives. Instead, it functioned as a testing ground for the social features Roblox was building. Players could see each other’s avatars, communicate via text chat, and explore a shared 3D environment.

Crossroads, on the other hand, leaned more toward gameplay. It featured a multi-team deathmatch setup where players spawned into one of four teams and battled for control of a central area. Weapons spawned around the map, and basic team mechanics were in place. Crossroads became one of the most popular early Roblox games, regularly hosting dozens of concurrent players, a significant number for 2006.

Both games demonstrated different aspects of what Roblox could do. Classic Roblox proved the social infrastructure worked, while Crossroads showed that competitive multiplayer was viable on the platform. These early experiments informed how community creators would approach game design in the years to come, with many user-generated experiences drawing inspiration from these foundational titles.

Chaos Canyon and Other Pioneering Experiences

Chaos Canyon arrived slightly later in 2006 and pushed the platform’s capabilities further. It featured more complex terrain, scripted events, and a larger map compared to Rocket Arena or Crossroads. Players navigated a canyon environment filled with vehicles, weapons, and environmental hazards.

What made Chaos Canyon noteworthy was its ambition. The map included drivable vehicles, a significant technical achievement for early Roblox. The physics engine had to handle not just player characters and projectiles, but also moving vehicles with multiple passengers. The game wasn’t always stable (crashes were common), but it demonstrated the platform’s potential for more complex experiences.

Other early games from 2006 and 2007 included simple racing tracks, obstacle courses (precursors to the modern “obby” genre), and basic tycoon games. These weren’t as polished as what we see today, but they established genre conventions that Roblox creators still follow. The oldest game on Roblox might be Rocket Arena, but these follow-up experiences were equally important in shaping the platform’s identity.

How Early Roblox Games Differed from Modern Experiences

Graphics and Gameplay Mechanics in 2006

If you could somehow load up the first ever Roblox game today, the visual difference would be jarring. Early Roblox graphics were extremely basic: flat-colored blocks, minimal texturing, and no dynamic lighting. Everything had a plastic, toy-like appearance because, well, that’s exactly what the assets were, simple geometric shapes with solid colors.

There were no particle effects, no advanced shaders, and definitely no ray tracing. When a rocket exploded in Rocket Arena, you got a simple blast radius and some physics knockback, no fancy fire effects or screen shake. Character models were stick-figure simple: a torso, head, and four limbs, all made from basic rectangular parts.

Gameplay mechanics were equally stripped down. Most early games featured basic movement (WASD controls), jumping, and simple combat. There were no complex ability systems, no crafting mechanics, and no progression systems beyond basic scoreboards. Games like those featured on gaming news outlets were far more advanced in terms of graphics and mechanics, but Roblox wasn’t trying to compete with AAA titles, it was building something fundamentally different.

The technical limitations of 2006 internet infrastructure also played a role. Most players were on dial-up or early broadband connections. Keeping bandwidth usage low meant simplifying graphics and limiting the number of concurrent players. A “crowded” server in 2006 might have 20 players: today, some Roblox games support hundreds or even thousands simultaneously.

Community Size and Player Interaction

The early Roblox community was tiny compared to today’s hundreds of millions of active users. In 2006, a successful game might have a few hundred total visits. There were no viral hits, no influencer marketing, and no YouTube or Twitch to drive discovery. Players found games through the Roblox homepage, word of mouth, or by browsing the limited game library.

This small community size had advantages. Players often recognized each other across different games. The forums (Roblox had active forums back then) were close-knit, and developers frequently interacted directly with their players. If you had a bug report or feature suggestion, you could message the creator and expect a response.

Player interaction was also more limited. Text chat was the only communication method, no voice chat, no emotes beyond basic animations, and no sophisticated social features. Friend lists existed but were basic. The concept of “following” creators or joining groups was either absent or extremely primitive compared to modern Roblox’s social infrastructure.

Even though these limitations, the community was passionate. Early adopters recognized they were part of something new and spent hours experimenting with the creation tools. That DIY ethos, the sense that anyone could learn to build and contribute, remains a core part of Roblox culture today.

The Evolution of Game Creation Tools on Roblox

From Simple Scripts to Advanced Development

When Rocket Arena was created in 2006, Roblox scripting was in its infancy. The platform used Lua 5.1 (it still does, though with heavy modifications), but the API was extremely limited. Developers had access to basic functions for manipulating objects, handling player input, and managing simple game states. That was about it.

There were no robust networking solutions, no data persistence APIs (saving player progress was impossible initially), and no marketplace for assets. If you wanted a specific model or texture, you built it yourself or did without. The concept of the Roblox marketplace, where creators buy and sell assets, wouldn’t emerge for a couple years.

Early scripts were often just a few dozen lines long. A typical weapon script might check if the player clicked, cast a ray to determine what they hit, and apply damage if it was another player. Modern weapon systems in games can involve thousands of lines of code, handling recoil patterns, hit registration, damage falloff, penetration mechanics, and more.

As Roblox grew, the scripting API expanded dramatically. Major additions over the years included:

  • DataStore services (2013): Finally allowed persistent data storage, enabling RPG progression and economy systems
  • FilteringEnabled (2015): Improved security by separating client and server code, reducing exploits
  • Custom GUI systems (2014-2016): Allowed developers to create complex interfaces instead of relying on basic CoreGui elements
  • Terrain systems (2011-2015): Enabled natural-looking landscapes instead of just blocky structures
  • Advanced physics constraints (ongoing): Added rope physics, springs, and more complex mechanical systems

By 2026, Roblox Studio is a legitimate game development environment. Professional developers use it to create experiences that rival indie titles on Steam or the App Store. The gap between “what was the first Roblox game” and what’s possible now is astronomical.

How Roblox Studio Transformed Over Two Decades

Roblox Studio, the platform’s creation tool, has been rebuilt multiple times since 2006. The original editor was browser-based and extremely limited. You placed objects in a 3D viewport, tweaked properties in a sidebar, and tested your game by launching it in a separate window.

Early Studio had no terrain tools, no advanced modeling capabilities, and no animation editors. If you wanted an animated character, you had to script the movement frame by frame or use extremely basic preset animations. Building anything complex required patience and creative problem-solving.

Major Studio updates over the years include:

2008-2010: Standalone Application

Roblox Studio became a downloadable desktop application, improving performance and stability. This allowed for larger, more complex projects that would have choked a browser-based editor.

2011-2013: Terrain Tools

The introduction of voxel-based terrain generation let creators build natural-looking landscapes with hills, water, and caves. Before this, everything was built from individual parts, making organic shapes nearly impossible.

2014-2017: Advanced Building Tools

Features like solid modeling (CSG operations that let you subtract one shape from another) and improved mesh importing opened up new possibilities for detailed builds. Creators could now import models from tools like Blender.

2018-2020: Lighting and Visual Upgrades

The introduction of Future lighting technology dramatically improved visual fidelity. Dynamic shadows, realistic reflections, and atmospheric effects became standard. Games started looking less like toy dioramas and more like actual games, as gaming coverage sites began to notice.

2021-2026: Professional Development Features

Recent years have added collaborative editing (multiple developers working in Studio simultaneously), version control integration, advanced debugging tools, and performance profilers. Roblox Studio now feels like Unity or Unreal Engine’s simpler cousin rather than a toy editor.

The transformation is remarkable. The tools used to create the first game on Roblox couldn’t build even a basic modern Roblox experience. Today’s Studio is a professional-grade development environment supporting teams of developers, artists, and designers.

Why the First Roblox Games Matter Today

Preserving Roblox History and Nostalgia

There’s a growing movement within the Roblox community to preserve early games and platform history. Many of the oldest games, including variants of Rocket Arena and Crossroads, have been lost to time, deleted by creators, broken by API changes, or simply forgotten as the platform evolved.

Some community members run preservation projects, attempting to recreate or restore early Roblox experiences. These aren’t perfect recreations (original assets and scripts are often gone), but they capture the spirit and gameplay of those pioneering games. For players who joined Roblox in its first few years, these projects offer a nostalgic trip back to simpler times.

The nostalgia factor is real. Roblox has been around long enough that adults who played as kids now look back fondly on early experiences. The blocky graphics and simple mechanics that once seemed cutting-edge now evoke the same warm feelings that millennials have for early Minecraft or Flash games.

Several prominent Roblox YouTubers and historians have documented the platform’s history, interviewing early creators and showcasing gameplay from vintage titles. These efforts help newer players understand where Roblox came from and appreciate how far it’s evolved. When you play a modern hit like Escape Tsunami for Brainrots, it’s worth remembering that it stands on foundations laid by games like Rocket Arena two decades earlier.

Lessons Modern Creators Can Learn from Early Games

Even though their simplicity, the first Roblox games offer valuable lessons for modern creators:

Start Simple, Iterate Later

Rocket Arena wasn’t trying to be a complex, feature-rich experience. It focused on one core mechanic, physics-based combat with rocket launchers, and executed it well. Modern developers often try to cram too many features into initial releases. Early Roblox games remind us that a tight, focused experience beats a bloated, unfocused one.

Community Feedback is Gold

Early Roblox developers worked closely with their small player base, incorporating feedback and iterating rapidly. This direct creator-player relationship built loyalty and improved games. Modern creators can still benefit from this approach, even as Roblox’s community has grown massive. Engaged communities drive long-term success.

Technical Limitations Breed Creativity

The first game on Roblox succeeded even though severe technical constraints. Creators had to be clever with limited tools, finding creative solutions to problems. Modern Roblox Studio is powerful, but sometimes constraints force better design decisions. Not every game needs advanced lighting and thousands of assets.

Multiplayer and Social Features Matter

Even in 2006, the most successful early games emphasized multiplayer interaction. Classic Roblox and Crossroads succeeded because they brought players together. Twenty years later, the most popular Roblox games still prioritize social interaction and shared experiences over solo gameplay.

Studying the oldest game on Roblox and its contemporaries reveals timeless game design principles. Tech changes, graphics improve, but core engagement loops, fun mechanics, social interaction, and iterative improvement, remain constant.

How to Experience Classic Roblox Games in 2026

Want to experience what the first ever Roblox game felt like? Your options are limited but not impossible.

Search for Revival Projects

Several Roblox developers have created remakes or restored versions of classic games. Search the Roblox game library for terms like “Classic Roblox,” “2006 Revival,” or “Old Roblox.” These won’t be perfect recreations, but many capture the visual style and gameplay feel of early Roblox.

Popular revival games include recreations of Crossroads, Chaos Canyon, and various 2006-2007 maps. Some developers have even built “Roblox museums” that showcase different eras of the platform’s history, letting you explore vintage builds and try simplified versions of classic games.

Check Community Archives

Websites and Discord servers dedicated to Roblox history sometimes host archived game files or detailed documentation about early experiences. The Roblox Wiki maintains records of significant early games, including screenshots and descriptions of how they worked.

YouTube is another valuable resource. Several content creators specialize in Roblox history and have uploaded gameplay footage from 2006-2008, giving you a visual sense of what the platform looked like. Channels focused on gaming history and reviews occasionally cover Roblox’s evolution as well.

Understand the Limitations

Even if you find a faithful recreation, the experience won’t be exactly the same. Modern Roblox’s physics engine, networking infrastructure, and client behavior have all changed. Scripts that worked in 2006 often don’t function on today’s platform without significant modifications.

Also, the social context has shifted. Part of what made early Roblox special was the small, tight-knit community. You can’t recreate that atmosphere with today’s massive player base. Still, exploring these historical games offers valuable perspective on how much the platform has evolved.

Create Your Own Vintage-Style Game

If you’re a developer, consider building a game inspired by early Roblox aesthetics and mechanics. Limit yourself to basic parts, simple scripts, and minimalist design. You might be surprised how much fun you can create with self-imposed constraints. It’s also a great way to learn fundamental game design before diving into more complex projects.

Conclusion

The first game on Roblox, Rocket Arena, created in January 2006, was a simple physics-based combat arena that barely resembles the sprawling, sophisticated experiences dominating the platform today. But its simplicity was its strength. Rocket Arena and other early games like Classic Roblox, Crossroads, and Chaos Canyon established the foundational principles that still guide Roblox development: accessible creation tools, multiplayer interaction, and community-driven content.

Understanding what was the first Roblox game offers more than historical trivia. It provides perspective on how far user-generated content platforms have come and reminds us that every massive creative ecosystem starts with simple beginnings. The blocky, basic games of 2006 paved the way for a platform that now hosts millions of games, supports professional development teams, and attracts hundreds of millions of players.

For modern creators, studying the oldest Roblox games reveals timeless design lessons: focus on core mechanics, build community, iterate based on feedback, and don’t let technical limitations kill creativity. Whether you’re a nostalgic veteran or a curious newcomer, exploring Roblox’s origins enriches your understanding of one of gaming’s most unique platforms.

Not many historical dramas connect directly to the DNA of modern gaming, but The Imitation Game is the rare exception. Released in 2014, this biographical thriller tells the story of Alan Turing, the mathematician who cracked Nazi Germany’s Enigma code and laid the groundwork for the computers that power every game we play today. More than a decade later, the film still holds up as essential viewing for anyone who’s ever solved a puzzle, optimized a build, or wondered how the hell we got from mechanical calculators to ray-traced open worlds.

This isn’t just a period piece about World War II espionage. It’s a story about problem-solving under pressure, the persecution of brilliance, and the hidden figures who shaped our digital age. For gamers especially, people who live and breathe systems, patterns, and logic, Turing’s story hits different. This review breaks down why The Imitation Game remains compelling in 2026, what it gets right (and wrong) about history, and why Benedict Cumberbatch’s portrayal of Turing deserves a spot on any gamer’s watch list.

Key Takeaways

  • The Imitation Game tells Alan Turing’s story as a brilliant mathematician whose work breaking the Enigma code established the theoretical foundations for all modern computers and gaming.
  • Benedict Cumberbatch delivers a career-defining performance that authentically portrays Turing’s genius and social complexity without relying on ‘quirky genius’ clichés.
  • The film dramatizes history for emotional impact, particularly regarding workplace conflict and collaboration, which historians note wasn’t as antagonistic as depicted.
  • Turing’s approach to codebreaking—identifying patterns, exploiting weaknesses, and automating grunt work—mirrors how gamers tackle complex systems and optimize builds.
  • The film’s portrayal of Turing’s persecution and chemical castration earned significant cultural impact, leading to policy changes like the UK’s ‘Turing’s Law’ and broader LGBTQ+ representation in historical dramas.
  • While historically imperfect, The Imitation Game remains essential viewing that connects gaming culture to the outsider genius who made it all possible.

Plot Overview: Cracking Codes and Breaking Barriers

The Imitation Game weaves together three timelines from Alan Turing’s life: his World War II work at Bletchley Park breaking the Enigma cipher, his school days discovering his sexuality and passion for cryptography, and the 1951 investigation that would eventually destroy him. The film centers on the race to decrypt Nazi communications before thousands more die, but it’s equally interested in Turing’s internal struggles, his social awkwardness, his forbidden love for fellow student Christopher, and his genius-level intellect that both saves lives and alienates colleagues.

The narrative structure jumps between these periods, creating a puzzle box of its own. We see young Turing (played by Alex Lawther) forming his first romantic connection while learning cryptography fundamentals. The bulk of the runtime focuses on the Bletchley Park years, where Turing assembles a team, builds his electromechanical “bombe” machine to automate code-breaking, and battles military brass who don’t understand his methods. The final timeline reveals the tragic cost of 1950s homophobia: Turing’s arrest for “gross indecency” and his chemical castration, the punishment that preceded his death by cyanide poisoning in 1954.

Director Morten Tyldum frames the Enigma-cracking sequences with genuine tension. Each day at midnight, the Germans reset their cipher settings, meaning Turing’s team has less than 24 hours to decrypt messages before starting from scratch. It’s the ultimate daily challenge, think roguelike mechanics applied to wartime intelligence. When they finally crack a message revealing a U-boat attack, the moral complexity deepens: they can’t act on every decoded message or the Nazis will know Enigma is compromised. Turing must calculate which lives to save and which to sacrifice, a trolley problem with thousands of variables.

The film doesn’t sugarcoat Turing’s personality. He’s abrasive, dismissive of social norms, and convinced of his intellectual superiority, traits that would probably get him kicked from a Discord server but were essential to solving an “unsolvable” problem. His relationship with Joan Clarke (Keira Knightley), the only woman on the team, provides the emotional anchor. Their engagement is both genuine friendship and mutual protection in a world hostile to both brilliant women and gay men.

The Historical Accuracy Debate: Fact vs. Fiction

What the Film Got Right About Alan Turing

The core facts check out. Turing absolutely led the cryptanalytic effort at Bletchley Park, designed the bombe machine that automated Enigma decryption, and his work shortened the war by an estimated two years, saving roughly 14 million lives according to historians. The film accurately portrays the Enigma’s complexity: a 158 million million million possible settings that changed daily, making brute-force attempts mathematically impossible without automation.

His persecution is historically accurate and devastating. In 1952, Turing was convicted under Section 11 of the Criminal Law Amendment Act 1885 for homosexual acts. Given the choice between prison and chemical castration via hormone treatment, he chose the latter. He died in 1954 from cyanide poisoning, officially ruled suicide though some historians question this conclusion. The film’s anger at this injustice is earned, Britain destroyed the man who helped save it.

The fundamental achievement is real: Turing’s theoretical work on computation, formalized in his 1936 paper on computable numbers, established the conceptual framework for all modern computers. Without Turing, there’s no processor architecture as we know it, no algorithms, no software, and definitely no gaming industry.

Creative Liberties and Dramatization

Here’s where historians started sharpening their pitchforks. The film condenses, simplifies, and occasionally invents for dramatic effect. The biggest fabrication: Turing’s colleagues didn’t initially resist him, and Commander Denniston (Charles Dance) wasn’t an antagonist. Bletchley Park was actually a remarkably collaborative environment, and Turing was eccentric but not socially crippled to the degree shown.

The “Christopher” bombe naming is Hollywood invention. While Turing did have a close relationship with Christopher Morcom at school, there’s no evidence he named his machine after him. The film also compresses the team’s dynamics, Joan Clarke worked in a different section and wasn’t part of daily Enigma-breaking sessions with Turing’s core group.

Most problematic for purists: the film implies Turing single-handedly broke Enigma when in reality it was a massive collaborative effort building on Polish mathematicians’ earlier work. Marian Rejewski, Jerzy Różycki, and Henryk Zygalski cracked early Enigma versions in the 1930s and shared their methods with Britain in 1939. Turing’s genius was iterating on this foundation, not conjuring solutions from nothing.

The spy subplot involving Soviet agent John Cairncross feels tacked on and historically questionable. While Cairncross did work at Bletchley and was later exposed as a spy, his proximity to Turing and the film’s depiction of their interactions are largely speculative. It adds thriller elements but muddies the historical record.

Benedict Cumberbatch’s Career-Defining Performance

Cumberbatch’s Turing is a masterclass in portraying intelligence without relying on “genius” clichés. He plays Turing as someone whose brain processes information differently, faster in some ways, catastrophically slower in others. Watch his facial micro-expressions during problem-solving sequences: you can see him running calculations, testing hypotheses, discarding failures in real-time. It’s the same hyperfocus any gamer recognizes from optimizing a build or routing a speedrun.

The physicality matters too. Cumberbatch hunches over the bombe machine like someone hovering over a keyboard during a clutch 1v5. His Turing fidgets, avoids eye contact, and speaks in clipped sentences that prioritize information density over social grace. It’s a portrayal that feels authentically neurodiverse without being caricature, the kind of “difficult genius” archetype that gaming culture both celebrates and struggles with.

The emotional beats land because Cumberbatch never begs for sympathy. When Turing endures the hormone therapy scenes, the horror is understated, just a brilliant mind being chemically dismantled by a government that owed him everything. The final montage, revealing his death and posthumous pardon, hits like a critical failure on a saving throw. You’re angry at the waste, the injustice, the sheer stupidity of destroying someone because they loved differently.

Cumberbatch earned his Oscar nomination here (losing to Eddie Redmayne’s Stephen Hawking in The Theory of Everything). It’s easy to see why: he makes a historical figure feel immediate and human, someone you’d squad up with even though, or because of, his abrasive edges. For gamers familiar with toxic teammates who are nonetheless clutch players, Turing’s contradictions feel familiar.

The Supporting Cast: Keira Knightley and the Bletchley Circle

Keira Knightley brings unexpected steel to Joan Clarke, elevating what could’ve been a token love interest into the film’s moral center. Clarke was a legitimately brilliant mathematician who scored higher on the Bletchley recruitment test than most male candidates but was relegated to “female positions” and paid a fraction of her male colleagues’ salaries. Knightley plays her frustration with quiet fury, she knows she’s smarter than half the room but must navigate 1940s sexism to contribute.

Her scenes with Cumberbatch avoid romantic cliché. Their engagement is transactional at first, protection and cover for both, but grows into genuine affection between two people who see each other clearly. When Turing confesses his sexuality and she chooses to continue the engagement anyway, it’s not martyrdom: it’s pragmatism from someone who knows her options in a patriarchal world. Clarke stayed friends with Turing until his death, a detail the film honors.

The supporting Bletchley team, Matthew Goode as Hugh Alexander, Allen Leech as John Cairncross, and Matthew Beard as Peter Hilton, function as raid party archetypes. Alexander is the charismatic leader Turing isn’t, initially clashing before becoming his defender. Leech’s Cairncross is the rogue with secrets (literally). Beard’s Hilton provides earnest support, the healer keeping team morale up during grinding sessions.

Charles Dance as Commander Denniston and Mark Strong as MI6’s Stewart Menzies add gravitas, though both characters are somewhat fictionalized. Dance plays Denniston as bureaucratic opposition, which simplifies the real commander’s actual support for Turing’s work. Strong’s Menzies is the shadowy spymaster archetype, effective in the film’s thriller moments but not deeply developed.

Direction, Cinematography, and Technical Mastery

Morten Tyldum’s Directorial Approach

Norwegian director Morten Tyldum (previously known for Headhunters) brings thriller pacing to what could’ve been a stodgy biopic. He structures the film like an action movie where the action is thinking, close-ups on spinning Enigma rotors, rapid cuts between codebreaking attempts and U-boat attacks, ticking clocks emphasizing the midnight reset deadline. It’s the editing rhythm of a puzzle game where every failure teaches you something new.

Tyldum doesn’t over-explain the mathematics. There’s a brief visual metaphor involving a crossword puzzle to illustrate pattern recognition, then the film trusts audiences to grasp the stakes without dumbing down Turing’s methods. This respect for viewer intelligence makes the breakthroughs satisfying, you might not understand the exact algorithm, but you feel the weight of success.

The intercutting between timelines could’ve been messy but Tyldum uses visual and thematic bridges. Young Turing learning about ciphers in school cuts to adult Turing applying those principles at Bletchley. The 1951 interrogation scenes frame the entire narrative, with Turing essentially speedrunning his life story to a detective who doesn’t grasp its significance.

Visual Storytelling and Period Authenticity

Cinematographer Óscar Faura shoots Bletchley Park with institutional coldness, fluorescent greens and grays that emphasize the monotony between breakthroughs. The bombe machine itself is photographed like a boss enemy: imposing, mysterious, both solution and obstacle. When it finally works, clattering through possibilities at mechanical speed, the camera lingers on its beauty, it’s steampunk computational power, the ancestor of every GPU grinding through physics calculations today.

Period authenticity is solid without being showy. Costumes by Sammy Sheldon Differ keep the focus on faces rather than fashion. Production design recreates Bletchley’s huts with detailed accuracy, papers everywhere, blackboards full of equations, the organized chaos of intellectual crisis mode. It looks like a LAN party dedicated to saving the world.

The score by Alexandre Desplat is understated, using piano and strings to build tension without overwhelming dialogue. It swells during emotional peaks, Turing’s first success, his arrest, the revelation of his death, but mostly stays out of the way. It’s the anti-Hans Zimmer approach, fitting for a film about quiet genius rather than spectacle.

Why Gamers Should Watch The Imitation Game

Alan Turing’s Legacy in Modern Computing and Gaming

Every game you’ve ever played exists because of Alan Turing. Not metaphorically, literally. His 1936 paper “On Computable Numbers” introduced the concept of the universal computing machine, now called a Turing machine, which established the theoretical limits of computation. Every processor, every line of code, every algorithm running Elden Ring or calculating bullet trajectories in CS2 is a descendant of Turing’s mathematical framework.

The Church-Turing thesis, formulated with Alonzo Church, defines what problems are computationally solvable. When game developers talk about optimization, they’re working within constraints Turing identified 90 years ago. When AI behaviors in games use state machines or decision trees, they’re applying computational models Turing pioneered. Without his work on algorithms and artificial intelligence (the “Turing test” remains a benchmark for machine cognition), there’s no NPC behavior, no procedural generation, no game AI period.

The historical irony is brutal: the man who made digital entertainment possible died believing he was a criminal, never knowing his ideas would create a multi-billion dollar industry that celebrates problem-solvers and outsiders. The film captures this tragedy while showcasing why Turing’s mind was revolutionary, he saw computation as universal language before computers existed.

The Puzzle-Solving Mindset: From Enigma to Game Design

Turing’s approach to Enigma mirrors how gamers tackle complex systems. He didn’t try to solve every possible configuration (158 quintillion options, mathematically impossible). Instead, he identified patterns, exploited weaknesses in German operating procedures, and automated the grunt work so humans could focus on hypothesis testing. It’s the same methodology speedrunners use: find the exploits, optimize the execution, iterate until you clip through reality.

The film’s depiction of the bombe machine is essentially showing early automation, Turing built a tool to do repetitive calculations while he focused on strategy. Modern game design follows this principle constantly. Enemy AI handles baseline behaviors while designers script complex encounters. Procedural generation systems create content variation while artists define aesthetic rules. Turing invented the concept of letting machines handle the boring parts so human creativity can shine.

There’s a direct line from Turing’s codebreaking to modern game design puzzles. Games like The Witness, Return of the Obra Dinn, or Outer Wilds require the same pattern recognition and logical deduction Turing applied to Enigma. When you’re deciphering alien languages in Heaven’s Vault or solving murder timelines in Obra Dinn, you’re using Turing-esque analytical approaches. The film shows this mindset in action, watching Turing iterate through failures to find solutions is watching someone play a punishing puzzle game on their first playthrough.

Themes That Resonate: Persecution, Innovation, and Redemption

The film’s central tragedy isn’t just historical, it’s the recurring pattern of society destroying what it doesn’t understand. Turing saved millions of lives and his government responded by chemically castrating him for being gay. That tension between being essential yet persecuted resonates in gaming culture, which has its own complicated history with outsiders and nonconformity.

Gaming has always attracted people who don’t fit conventional molds, the awkward, the neurodivergent, the socially anxious, the queer. Turing would’ve been right at home in a Discord server, brilliant and abrasive, solving impossible problems while struggling with basic social scripts. The film doesn’t romanticize this. It shows how his inability to read social cues nearly got him fired, how his arrogance alienated allies, how his difference made him both indispensable and vulnerable.

The innovation theme cuts deep too. Turing’s bombe was rejected initially because military leadership couldn’t understand it, they wanted more human translators, not some experimental machine. It’s the classic conflict between traditional methods and disruptive technology. Gamers see this constantly: publishers resisting new genres, audiences rejecting innovative mechanics until suddenly they’re the meta, old guard gatekeepers claiming “that’s not how we’ve always done it.”

Redemption arrives too late, as it often does. Turing received a royal pardon in 2013, nearly 60 years after his death. The Bank of England now prints his face on £50 notes. The film’s final text cards deliver these facts without triumphalism, they’re cold comfort, a too-late acknowledgment that the man was right and the system was monstrous. It’s a cautionary tale about the cost of prejudice and the importance of protecting brilliant weirdos even when (especially when) they’re inconvenient.

Critical Reception and Awards Recognition

The Imitation Game premiered at the Telluride Film Festival in August 2014 to immediate acclaim. It became an awards season heavyweight, earning eight Oscar nominations including Best Picture, Best Director, Best Actor (Cumberbatch), and Best Supporting Actress (Knightley). It won one: Best Adapted Screenplay for Graham Moore’s script based on Andrew Hodges’ biography Alan Turing: The Enigma.

Critical response was largely positive, with Metacritic aggregating a score of 73/100 from major critics, indicating “generally favorable reviews.” The consensus praised the performances and emotional impact while noting historical liberties. The Guardian gave it four stars, calling it “a gripping thriller.” The Hollywood Reporter highlighted Cumberbatch’s “superlative” performance. Time magazine named it one of the top ten films of 2014.

Not everyone was convinced. Some critics found it too conventional, arguing that Tyldum’s straightforward approach didn’t match Turing’s revolutionary thinking. The New Yorker called it “dutiful and dull,” criticizing its by-the-numbers biopic structure. Historians, particularly those specializing in Bletchley Park, published detailed rebuttals of the film’s inaccuracies, with some arguing it unfairly diminished the collaborative nature of the codebreaking effort.

Commercially, the film was a sleeper hit. Made for approximately $14 million, it grossed $233 million worldwide, impressive for a period drama about mathematics. It found strong international audiences, particularly in the UK where Turing’s legacy carries national significance. Home video and streaming extended its reach, making it a fixture on “historical dramas you should watch” lists.

The film’s cultural conversation extended beyond reviews. It sparked renewed discussion about Turing’s treatment, leading to broader awareness of historic persecution of LGBTQ+ individuals. The UK government’s “Turing’s Law” in 2017, which pardoned men convicted under historic anti-homosexuality laws, was partly influenced by the film’s visibility. That’s the rare achievement: a movie that actually changes policy.

Strengths: What Makes The Imitation Game Compelling

Accessibility without dumbing down. The film makes complex mathematics and wartime intelligence comprehensible to general audiences without insulting either the material or viewers. It’s the good kind of simplification, preserving truth while removing unnecessary jargon.

Emotional weight that earns its impact. The persecution storyline could’ve been manipulative, but the film plays it devastatingly straight. When Turing’s colleague asks “What’s your poison?” in a casual pub scene, and Turing stares at his drink with foreshadowing dread, it’s gutting because it’s subtle.

Cumberbatch’s performance. This deserves its own bullet point. He makes Turing complicated, difficult, and sympathetic without leaning on quirks. It’s a portrayal that respects the real person’s complexity.

Pacing that maintains tension. For a movie about people sitting in rooms solving math problems, it never drags. Tyldum structures scenes with thriller logic, problems escalate, stakes rise, setbacks feel catastrophic, breakthroughs feel earned.

Highlighting forgotten contributions. Even though its flaws, the film brought Alan Turing’s story to millions who’d never heard of him. It also showcased women’s contributions at Bletchley Park, even if Joan Clarke’s role is somewhat fictionalized. Representation matters, especially in STEM narratives.

Technical craftsmanship. Every department, cinematography, editing, score, production design, works in harmony. It’s a well-made film by craftspeople who respected the material. No lazy shortcuts, no cheap emotional manipulation, just solid filmmaking throughout.

Weaknesses: Where the Film Falls Short

Historical inaccuracies that undermine authenticity. The most frustrating aspect for anyone who knows the real story is how the film invents conflict and diminishes collaboration. Turing wasn’t a lone genius fighting his team, he worked with talented peers in a relatively supportive environment. The film’s choice to dramatize interpersonal conflict where little existed feels cheap.

Conventional biopic structure. Multiple timelines, childhood trauma explaining adult behavior, tragic ending, posthumous redemption, it’s the standard prestige drama playbook. For a film about a revolutionary thinker, it’s surprisingly unadventurous in form. A more experimental structure might’ve better captured Turing’s unconventional mind.

Underdeveloped supporting characters. Most of the Bletchley team are sketches rather than people. Hugh Alexander gets some depth, but others exist mainly to react to Turing. Joan Clarke is better served, but even her character arcs feel abbreviated. The film is so focused on Turing that everyone else feels like NPCs.

The spy subplot feels tacked on. The John Cairncross storyline adds thriller elements but doesn’t integrate organically. It’s a distraction from the more compelling story of codebreaking and persecution. The film might’ve been stronger without it, focusing on the central tension of Turing versus the system.

Safe emotional beats. While the film has genuine power, it rarely surprises. You can see the emotional peaks coming from a mile away. The score swells on cue, the dialogue lands its points a bit too neatly, the structure is predictable. It’s effective manipulation, but manipulation nonetheless.

Limited exploration of Turing’s other contributions. The film focuses almost entirely on Enigma and his persecution, barely touching his foundational work in computer science, artificial intelligence, morphogenesis, or mathematical biology. There’s a richer, more complex story that gets compressed into “he broke codes and was persecuted.”

The Imitation Game’s Cultural Impact Over a Decade Later

More than twelve years after release, The Imitation Game remains the definitive popular introduction to Alan Turing. Ask most people who Turing was, and if they know, they probably learned it from this film. That’s both impressive and slightly concerning, the movie’s simplified, dramatized version has become the dominant narrative, potentially overshadowing more accurate historical accounts.

The film’s impact on LGBTQ+ representation in historical dramas was significant. It presented a gay protagonist whose sexuality was central to his tragedy but not his sole defining characteristic. Turing is brilliant, difficult, heroic, and flawed, he’s not a walking issue. This complexity influenced later biopics tackling queer historical figures, showing that you could center orientation without making it the only story being told.

For gaming and tech culture specifically, the film gave younger generations a face and story for the abstract concept of “computer science pioneers.” Students studying CS or game development now have a narrative hook for understanding where their field came from. Several game developers have cited the film as inspiration, the puzzle game The Turing Test (2016) was directly influenced by the film’s popularity, using Turing’s concepts as gameplay mechanics.

The phrase “Sometimes it is the people no one imagines anything of who do the things that no one can imagine” (from the film, not Turing himself) became an inspirational quote in nerd spaces, probably overused, definitely clichéd, but resonant for people who’ve felt underestimated. It’s been quoted in gaming features and convention panels, a shorthand for celebrating unconventional genius.

Streaming availability has kept the film accessible. It cycles through Netflix, Amazon Prime, and other platforms regularly, maintaining steady viewership. New audiences discover it constantly, especially students assigned it in computer science or history courses. That educational use ensures continued relevance, even as historical details are debated.

The broader conversation about AI ethics and artificial consciousness has also kept Turing’s legacy, and by extension, the film, relevant. As gaming increasingly incorporates machine learning and AI-driven systems, Turing’s foundational questions about machine intelligence feel more urgent. His “imitation game” thought experiment (can a machine convince you it’s human?) directly anticipates modern debates about NPC believability and AI-generated content.

Eventually, The Imitation Game succeeded in its apparent goal: ensuring Alan Turing is remembered not just as a footnote but as a central figure in 20th-century history. The film has flaws, but its cultural impact is undeniable. It brought a crucial story to mainstream awareness and refused to let Turing’s persecution be forgotten or forgiven. That’s the achievement that matters most, even if historians will always cringe at the dramatized bits.

Conclusion

The Imitation Game isn’t a perfect film, but it’s an essential one, especially for gamers who owe their entire hobby to the man at its center. Alan Turing’s story is a reminder that the systems we take for granted were built by difficult, brilliant people working under impossible pressure. The code we optimize, the processors running our games, the AI we fight or team up with, all of it traces back to Turing’s wartime desperation and theoretical genius.

Benedict Cumberbatch’s performance captures what makes Turing compelling: he’s not a sanitized hero, but a complicated genius whose strengths and weaknesses were inseparable. The film’s historical liberties are frustrating for purists, but they serve a purpose, making an abstract mathematical achievement feel visceral and urgent. Sometimes the emotional truth matters more than perfect accuracy, even if that’s a tradeoff worth arguing about.

Twelve years on, the film holds up because its core themes haven’t aged. Innovation still battles entrenched systems. Brilliant outsiders still face persecution for being different. Society still destroys what it doesn’t understand, then honors it decades too late. And gaming culture, built by and for people who’ve never quite fit conventional molds, still owes everything to a socially awkward mathematician who saw possibilities no one else could imagine.

If you haven’t watched The Imitation Game, add it to your queue. If you saw it years ago, it’s worth a revisit now that you’ve got more context for what computing and AI have become. It’s not a gaming documentary, but it tells the origin story of everything we play. That’s worth two hours of your time, even if you spend those hours mentally correcting the historical inaccuracies. Turing would probably appreciate the critical thinking.

The Ominous Bottle arrived in Minecraft with the 1.21 update (Tricky Trials), and it fundamentally changed how players engage with high-difficulty content. This isn’t your typical potion, it’s a consumable that deliberately inflicts the Bad Omen effect, letting you trigger harder challenges for better rewards. Whether you’re hunting rare enchantments in Trial Chambers or looking to farm emeralds from village raids, understanding how to find and use this item effectively separates prepared players from those who get overwhelmed.

This guide covers everything from obtaining Ominous Bottles in Trial Chambers to optimizing your loadout for Ominous Trials. Expect specific drop rates, gear recommendations, and combat tactics that work in the current Java and Bedrock editions.

Key Takeaways

  • The Ominous Bottle is a Minecraft 1.21 consumable that applies the Bad Omen effect for 100 minutes, enabling players to trigger harder Ominous Trials in Trial Chambers and village raids for exclusive loot.
  • Ominous Bottles drop exclusively from Trial Spawners and Vaults in Trial Chambers below Y=0, with roughly 20-30% drop rates from spawners and up to 40% from Ominous Vaults during Ominous Trials.
  • Bad Omen has five levels that scale difficulty; most players target level III for balanced risk-reward, while level V trials offer the highest drop rates for Heavy Cores and exclusive enchantments like Wind Burst and Breach.
  • Essential gear for Ominous Trials includes full Netherite armor with Protection IV, a Sharpness V sword with Looting III, and at least 2 stacks of food, plus proper positioning in spawner hallways to manage mob waves effectively.
  • Heavy Core is the critical Ominous Bottle reward needed to craft the Mace weapon, which deals up to 150+ damage based on fall distance and is essential for gravity-based combat builds.
  • Stacking bottle consumption resets your Bad Omen duration to 100 minutes, allowing you to chain clear multiple Trial Chambers in one session and maximize emerald and XP farming potential.

What Is the Ominous Bottle in Minecraft?

The Ominous Bottle is a consumable item introduced in Minecraft 1.21 that applies the Bad Omen status effect when consumed. Unlike traditional potions that enhance or protect your character, this bottle deliberately debuffs you to unlock harder challenge modes in specific structures.

Think of it as an opt-in difficulty modifier. Normal Trial Chambers already provide combat challenges and loot, but using an Ominous Bottle transforms them into Ominous Trials, ramping up mob difficulty, spawn rates, and vault quality. The same Bad Omen effect also triggers village raids when you enter a village, making this bottle a strategic tool for both PvE content and resource farming.

How the Ominous Bottle Works

When you drink an Ominous Bottle, you receive the Bad Omen effect for 1 hour and 40 minutes (100 minutes). The effect has five levels (I through V), and the level you receive depends on which variant of the bottle you consume. Each level increases the difficulty of the events you trigger.

Here’s the breakdown by bottle type:

  • Ominous Bottle (I): Bad Omen I for 100 minutes
  • Ominous Bottle (II): Bad Omen II for 100 minutes
  • Ominous Bottle (III): Bad Omen III for 100 minutes
  • Ominous Bottle (IV): Bad Omen IV for 100 minutes
  • Ominous Bottle (V): Bad Omen V for 100 minutes

You can stack bottles before consuming to reach higher Bad Omen levels, but only up to level V. Drinking additional bottles beyond that simply resets the duration. The effect icon shows a creepy villager face that pulses darker as the level increases.

Ominous Bottle vs. Other Potions: Key Differences

Unlike standard potions, the Ominous Bottle doesn’t fit into typical buff/debuff categories. Standard potions modify your stats (Strength, Speed, Regeneration) or grant temporary abilities (Fire Resistance, Invisibility). The Ominous Bottle changes the world’s behavior toward you.

Key distinctions:

  • No brewing required: You can’t craft or brew Ominous Bottles. They only drop from specific sources.
  • Environmental trigger: The effect interacts with structures (Trial Chambers, villages) rather than affecting your character directly.
  • No milk counter: While drinking milk removes Bad Omen like any effect, doing so defeats the purpose since you need Bad Omen active to start events.
  • Non-splashable: There are no splash or lingering variants. It’s consumable-only.

The bottle essentially functions as a difficulty key rather than a traditional potion.

How to Obtain the Ominous Bottle

Ominous Bottles have a single source: Trial Chambers. These new underground structures generate in the Deepslate layer (below Y=0) and are packed with Trial Spawners and Vaults. You won’t find Ominous Bottles in villages, strongholds, or any other structure type.

Finding Ominous Bottles in Trial Chambers

Trial Chambers spawn primarily in Deepslate-heavy biomes. The best approach is to explore cave systems below Y=0 or use the /locate structure trial_chambers command if you’re in creative or have cheats enabled. They’re fairly common once you reach the right depth, but they can be massive and maze-like.

Inside Trial Chambers, Ominous Bottles drop from two sources: defeating Trial Spawners and opening Vaults. The structure itself doesn’t have natural chest loot containing bottles, you have to engage with the challenge mechanics.

Defeating Trial Spawners for Ominous Bottles

Trial Spawners are modified spawner blocks that activate when players approach and deactivate after spawning a set number of mobs. Once you defeat all spawned mobs, the spawner enters a 30-minute cooldown and ejects loot.

Drop mechanics:

  • Each Trial Spawner has a loot table that includes Ominous Bottles at varying levels.
  • Drop rate varies by spawner type, but expect roughly 20-30% chance per spawner clear.
  • You can repeatedly farm the same spawner after the cooldown period expires.

The spawners typically generate mobs like Zombies, Skeletons, Spiders, Cave Spiders, Husks, Strays, or Slimes depending on the chamber variant. Mob difficulty scales with the number of nearby players, making solo clears more manageable.

Vault Rewards and Drop Rates

Vaults are locked containers scattered throughout Trial Chambers. They require an Ominous Trial Key (or regular Trial Key for standard Vaults) to unlock. Once opened, they dispense loot directly to the player and cannot be reopened.

Ominous Bottle drop rates from Vaults:

  • Standard Vaults: ~15% chance for Ominous Bottle (I-III)
  • Ominous Vaults (unlocked during Ominous Trials): ~40% chance for higher-level bottles (III-V)

Ominous Vaults only become available when you’re already running an Ominous Trial, creating a feedback loop: use bottles to trigger harder trials, earn better bottles and loot, repeat. This is the primary late-game farming method for level IV and V bottles.

Platform note: Drop rates are consistent across Java Edition and Bedrock Edition as of version 1.21.50.

Understanding the Bad Omen Effect

The Bad Omen effect is what makes the Ominous Bottle functional. Before 1.21, players obtained Bad Omen exclusively by killing Pillager captains (the banner-carrying ones). Now, the Ominous Bottle gives you manual control over when and where you apply the effect.

Different Levels of Bad Omen Explained

Bad Omen has five levels, each escalating the difficulty of triggered events:

Bad Omen I:

  • Ominous Trials spawn fewer additional mobs
  • Village raids consist of 3 waves with basic enemies (Pillagers, Vindicators)

Bad Omen II:

  • Moderate spawn increase in Ominous Trials
  • Village raids extend to 5 waves, adding Evokers

Bad Omen III:

  • Noticeable difficulty spike in both event types
  • Raids include 5 waves with higher mob counts
  • Ominous Trial Spawners activate more frequently

Bad Omen IV:

  • Ominous Trials spawn mobs with enchanted gear
  • Village raids reach maximum wave count (5-7 depending on difficulty setting)
  • Ravagers appear in raids

Bad Omen V:

  • Maximum difficulty for both systems
  • Ominous Vaults become more common in Trial Chambers
  • Village raids feature full enemy rosters including multiple Evokers and Ravagers
  • Mobs in Ominous Trials may have potion effects (Speed, Strength)

Most players target Bad Omen III for balanced risk-reward, while groups pushing for maximum loot go straight to V.

Duration and Effect Management

Bad Omen lasts 100 minutes regardless of level. That’s enough time to clear multiple Trial Chambers or trigger several village raids without reapplying.

Management tips:

  • Check your timer: The effect displays remaining duration in the status menu (default ‘E’ on Java, inventory on Bedrock).
  • Milk removes it instantly: Drinking a bucket of milk clears Bad Omen if you accidentally consumed a bottle or need to enter a village safely.
  • Effect doesn’t stack past V: Drinking additional bottles at max level just refreshes the 100-minute timer.
  • Death doesn’t remove it: You’ll respawn with Bad Omen still active, which can be dangerous if you respawn near a village.

One underrated strategy: consume your bottle right before fast-traveling to a Trial Chamber. The timer keeps running during exploration, so you’ll have plenty of duration even after looting multiple rooms.

Triggering Ominous Events with the Bottle

Bad Omen interacts with two main systems: Trial Chambers and villages. Both offer distinct rewards and require different approaches.

Starting Ominous Trials in Trial Chambers

Once you have Bad Omen active, simply approach any Trial Spawner in a Trial Chamber. The spawner detects the effect and automatically converts to an Ominous Trial Spawner, indicated by a darker appearance and orange-red particle effects.

What changes during an Ominous Trial:

  • Increased spawn rates: Trial Spawners activate faster and spawn more mobs per cycle
  • Mob buffs: Enemies may spawn with enchanted equipment or potion effects
  • Ominous Vaults appear: Special orange-colored Vaults generate in rooms, requiring Ominous Trial Keys
  • Better loot tables: Both spawners and Vaults drop higher-tier items, including Heavy Core (for maces), unique enchantments, and additional Ominous Bottles

The Ominous Trial state persists for that specific Trial Chamber as long as you have Bad Omen active. If the effect expires or you drink milk mid-run, remaining spawners revert to normal difficulty.

You can trigger multiple Trial Chambers in one Bad Omen duration. Speedrunners often map out 3-4 nearby chambers and chain-clear them within the 100-minute window.

Activating Raids in Villages

Entering a village with Bad Omen triggers a Raid, a wave-based defense event where Illagers attack the village. This mechanic existed before Ominous Bottles, but the bottles give you control over when and where raids happen.

Raid mechanics with Ominous Bottles:

  • Wave count scales with Bad Omen level: Level I triggers 3 waves, while Level V triggers up to 7 waves on Hard difficulty
  • Loot drops from defeated raiders: Emeralds, enchanted gear, Totems of Undying (from Evokers), and crossbows
  • Hero of the Village buff: Successfully defending the village grants trading discounts and free items from villagers

Strategic use: Many players building secure bases intentionally trigger raids near enclosed villages to farm emeralds and Totems. Set up a defensive position with clear sightlines, let the waves come to you, and collect loot after each clear.

Critical note: Raids are village-dependent. If you accidentally enter a village with Bad Omen active and aren’t ready to fight, leave immediately or drink milk before the raid bar appears at the top of your screen.

Best Strategies for Ominous Trials

Ominous Trials are the primary endgame content for Ominous Bottles. They’re significantly harder than standard Trial Chambers, and showing up unprepared gets you killed fast.

Essential Gear and Preparation Tips

Minimum recommended loadout for Ominous Trial III+:

  • Armor: Full Netherite with Protection IV or specialized enchants (Blast Protection for Creepers, Projectile Protection for Skeletons)
  • Weapon: Netherite Sword with Sharpness V, Sweeping Edge III (Java only), and Looting III for better drops
  • Ranged: Bow with Power V and Infinity, or Crossbow with Quick Charge III and Multishot
  • Food: Golden Carrots or Steak (at least 2 stacks)
  • Potions: Strength II, Regeneration II, and situational Fire Resistance if spawners include Blazes
  • Shield: Essential for blocking Skeleton volleys and Vindicator axes
  • Blocks: 2 stacks of cheap blocks (Cobblestone, Dirt) for pillar escapes and spawner blocking

Optional but highly effective:

  • Totem of Undying: Clutch save if you get swarmed
  • Ender Pearls: Quick repositioning in large chambers
  • Water Bucket: MLG saves and negating fall damage

Bring a Bed (non-Nether/End) to reset your spawn point near the Trial Chamber entrance. Deaths are common in level V trials, and respawning at world spawn wastes time.

Combat Tactics for Ominous Trial Mobs

Ominous Trial mobs hit harder and spawn faster than normal. Here’s how to handle them:

Positioning:

  • Don’t fight in the spawner room center. Back into a hallway or corner to limit angles of attack.
  • Use blocks to create chokepoints. A 2-block-wide corridor forces mobs into single file.

Priority targets:

  1. Creepers first: They destroy terrain and create chaos. Bow them down from range.
  2. Skeletons second: Sustained ranged damage adds up. Shield their shots while closing distance.
  3. Melee mobs last: Zombies and Husks are manageable with sword sweeps (Java) or focused strikes.

Spawner management:

  • You can’t break Trial Spawners, but you can block line-of-sight with cheap blocks to pause activation.
  • Clear spawned mobs before the next wave triggers. Don’t let mob counts stack.

Ominous-specific threats:

  • Enchanted gear mobs: Skeletons with Power bows deal 4-6 hearts per hit even through Netherite. Prioritize them.
  • Potion-buffed enemies: Speed Zombies close distance fast. Kite backward while attacking.
  • Increased spawn density: Sweeping Edge (Java) or splash potions (both versions) handle群 clumps efficiently.

Advanced tactic from competitive communities on Game8: place a Campfire at your feet before engaging. Mobs that reach you take passive fire damage, thinning crowds without sword swings.

Maximizing Loot from Ominous Vaults

Ominous Vaults are the real prize. They drop Heavy Cores (needed for crafting Maces), exclusive enchantments, and stacks of valuable materials.

Key farming points:

  • Ominous Trial Keys drop from Ominous Trial Spawners: Each spawner clear has ~30% chance to drop a key. You need these to unlock Ominous Vaults.
  • Don’t waste keys on standard Vaults: Save Ominous Trial Keys exclusively for the orange-colored Ominous Vaults.
  • Looting III matters: Higher Looting level on your sword increases key drop rates from spawner mobs.

Loot priority from Ominous Vaults:

  1. Heavy Core: Required for Mace (best melee weapon in 1.21+)
  2. Enchanted Books: Wind Burst, Breach, Density, exclusive to Trial Chamber loot pools
  3. Emeralds and Diamonds: Bulk quantities, great for trading and gear crafting

If you’re specifically hunting Heavy Cores, Bad Omen V trials have the highest drop rate (~8% per Ominous Vault). Expect to clear 4-6 chambers on average to get one.

Rewards and Benefits of Using Ominous Bottles

Ominous Bottles aren’t just about harder fights, they’re the gateway to Minecraft’s best loot in the current patch cycle.

Unique Items and Enchantments

Ominous Trials provide access to items unavailable anywhere else:

Heavy Core:

  • Only source for crafting the Mace, a new weapon type added in 1.21
  • Mace deals damage based on fall distance before impact (up to 150+ damage from high drops)
  • Essential for gravity-based combat builds and speedrun strategies

Exclusive Enchantments:

  • Wind Burst: Bow enchantment that launches you upward when firing at the ground (rocket-jump equivalent)
  • Breach: Reduces enemy armor effectiveness, stackable for tank-busting
  • Density: Mace-exclusive, increases damage per block fallen

These enchantments don’t appear in standard Enchanting Tables or village trading. Ominous Vaults are the only consistent source.

Other high-value drops:

  • Enchanted Golden Apples: Rare even in Ominous Vaults (~3% drop rate), but farmable
  • Music Discs: Trial Chamber-exclusive discs for collectors
  • Saddles and Horse Armor: Reliable renewable source

Experience Points and Farming Potential

Ominous Trials are one of the best XP farms in survival Minecraft post-1.21:

XP rates:

  • A full Ominous Trial III clear (5-6 spawners) yields 600-800 XP
  • Level V trials can exceed 1,200 XP per chamber
  • Combine with Looting III for additional drops to trade for more XP

Emerald farming:

Village raids triggered by Ominous Bottles drop 0-3 emeralds per raider. A Level V raid with 7 waves can yield 40+ emeralds plus Totems of Undying.

Many players build dedicated raid farms using Ominous Bottles as the trigger mechanism. The bottles’ 100-minute duration allows multiple back-to-back raids, making emerald-per-hour rates competitive with traditional villager trading halls.

Efficiency comparison:

Method XP/Hour Emeralds/Hour Unique Loot

Ominous Trial V | 4,000-5,000 | 15-20 (from selling drops) | Heavy Core, exclusive enchants

Village Raids (V) | 2,500-3,000 | 80-100 | Totems of Undying

Standard mob grinding | 1,500-2,000 | 0 | None

For players min-maxing progression, Ominous Bottles are non-negotiable.

Common Mistakes to Avoid

Even experienced players screw up Ominous Bottle usage. Here are the pitfalls that’ll waste your bottles or get you killed.

Using Ominous Bottles at the Wrong Time

Mistake 1: Drinking bottles before locating a Trial Chamber

Bad Omen’s 100-minute timer starts immediately. If you consume a bottle on the surface and spend 40 minutes mining down to find a chamber, you’ve wasted nearly half your duration. Always locate your target structure first, then drink the bottle at the entrance.

Mistake 2: Triggering raids near important villages

Raids can kill villagers and destroy infrastructure. According to strategies shared on Twinfinite, never drink an Ominous Bottle near a village you’re actively using for trading unless you’ve built proper defenses. Designate a “raid village” separate from your main base.

Mistake 3: Using high-level bottles too early

Bad Omen V trials are brutal. Don’t jump straight to level V bottles if you’re in Diamond gear. Work your way up, start with level II or III, learn the spawner patterns, then attempt higher difficulties once you have Netherite and practice.

Mistake 4: Not checking your inventory space

Ominous Vaults dump loot directly into your inventory. If you’re full, items drop on the ground and can despawn in the chaos of combat. Clear at least 10 inventory slots before starting a trial.

Being Unprepared for Ominous Events

Gear failures:

  • Bringing a nearly-broken sword or bow. Ominous Trials shred durability. Always start with full-health gear or bring backups.
  • Forgetting a shield. Skeleton spawners in Ominous Trials can spawn 8+ Skeletons simultaneously. Without a shield, you’ll get stunlocked by arrows.

Resource mistakes:

  • Running out of food mid-trial. Regeneration depends on saturation, and prolonged fights drain it fast. Bring at least 32 high-saturation food items (Golden Carrots, Steak).
  • No blocks for building. You can’t edit Trial Chamber structure blocks, but you can place your own. Forgot cobblestone? You can’t create chokepoints or block spawner line-of-sight.

Escape plan failures:

Many players don’t set a spawn point near the Trial Chamber. When they die deep in an Ominous Trial V run, they respawn at world spawn or their base thousands of blocks away. The Bad Omen effect stays active, but all progress is lost. Always bring and place a bed at the chamber entrance.

Not clearing the area first:

Trial Chambers can have ambient hostile mobs (standard cave spawns). Clear the chamber of regular mobs before activating Ominous Trial Spawners. Fighting Creepers and Cave Spiders while an Ominous Spawner is active is a death sentence.

Advanced Tips and Tricks

Once you’re comfortable with basic Ominous Trials, these advanced techniques push efficiency to the next level.

Stacking Ominous Bottles for Higher Difficulty

You can’t exceed Bad Omen V, but you can optimize your bottle consumption to maintain uptime:

Technique: Duration stacking

If you drink a second bottle of any level while Bad Omen is active, the timer resets to 100 minutes. Use this to extend farming sessions:

  1. Start with an Ominous Bottle III
  2. Clear 2-3 Trial Chambers over 60-70 minutes
  3. Drink another bottle (any level) to refresh duration
  4. Continue farming without downtime

This is especially efficient in multi-chamber clusters. Some Deepslate regions have 4-5 Trial Chambers within 500 blocks of each other.

Technique: Level jumping

If you have multiple bottle levels, you can strategically ramp difficulty:

  • Clear easy chambers with Bad Omen I for practice and Trial Keys
  • Drink a level III bottle for moderate challenge and better loot
  • Use level V bottles only on chambers with confirmed Ominous Vault spawns

This conserves high-level bottles for maximum return.

Combining with Other Game Mechanics

Ominous Trials + Looting farms:

Some players use modded setups or community-created farms (Nexus Mods for Java modifications) to optimize Ominous Trial loot rates. Even in vanilla, Looting III swords dramatically increase Ominous Trial Key drops, which directly translates to more Ominous Vault access.

Raid + Trading hall synergy:

After defending a raid triggered by an Ominous Bottle, you receive the Hero of the Village effect. This grants massive trading discounts (up to 50% off) and can be stacked with cured Zombie Villagers for near-free trades. The loop:

  1. Drink Ominous Bottle near a raid farm village
  2. Complete the raid, earning emeralds and Hero of the Village
  3. Trade emeralds for high-value items (Mending books, enchanted Diamond gear) at discounted rates
  4. Use gear to clear more Ominous Trials

Ender Pearl teleportation:

Ominous Trial Spawners can’t detect you if you’re outside their activation range. Advanced players use Ender Pearls to quickly scout Trial Chambers, mark Ominous Vault locations, then teleport back to the entrance to drink their bottle. This prevents wasting Bad Omen duration on chambers with poor Vault spawns.

Beacon buffs:

If you’re farming a Trial Chamber cluster repeatedly, bring materials to build a Beacon nearby. Regeneration II or Strength II from a Beacon stacks with potions and significantly reduces combat difficulty in Ominous Trials. The setup cost is high, but it pays off after 5+ clears.

Mace + Ominous Trial farming:

Once you obtain a Heavy Core and craft a Mace, you can use it to farm subsequent Ominous Trials more efficiently. The Mace’s fall-damage mechanic lets you one-shot most Ominous Trial mobs by dropping from chamber ceilings. Pair with Wind Burst bow for vertical mobility, and you’ve got a high-skill, high-reward combat loop.

Conclusion

The Ominous Bottle turned Minecraft’s endgame on its head. Instead of passively stumbling into harder content, you now control when and where you face the toughest challenges, and the loot reflects that agency. From Heavy Cores for Maces to exclusive enchantments that change how you move and fight, Ominous Trials reward preparation and skill in ways few other Minecraft mechanics do.

Start with lower Bad Omen levels to learn spawner patterns and refine your gear. Once you’re clearing level III trials consistently, push to V and focus on Ominous Vault farming for the rarest items. Whether you’re building out a god-tier gear set or just stockpiling emeralds and XP, the Ominous Bottle is your key to Minecraft’s best renewable loot in 2026.

Lapis lazuli remains one of Minecraft’s most recognizable resources, that distinctive blue ore that’s been a staple since the game’s early development. Whether you’re a new player setting up your first enchanting table or a veteran optimizing your mining routes, understanding where to find lapis lazuli and how to use it efficiently can significantly impact your progression. Unlike diamonds or emeralds, lapis serves multiple purposes, it’s your gateway to enchanting, a vibrant dye for creative builds, and a tradeable commodity with certain villagers. This guide covers everything from optimal Y-levels in the current version to farming strategies, enchanting requirements, and common pitfalls that waste your time underground. Let’s dig into what makes this blue gem essential to your Minecraft experience.

Key Takeaways

  • Lapis lazuli Minecraft mining is most effective between Y=-1 and Y=15, where spawn rates peak and deepslate mining is minimized.
  • Use a Fortune III pickaxe to maximize lapis drops to 9–36 pieces per ore block, dramatically increasing your efficiency compared to unenchanted tools.
  • Lapis lazuli serves multiple purposes: enchanting tools and armor, crafting blue dye for decorative builds, and trading with clerics for emeralds.
  • Avoid common mistakes like mining with Silk Touch, using wrong tool tiers, and ignoring water buckets near lava—these errors waste valuable resources.
  • Establish a dedicated branch mining operation with Fortune III pickaxe, Mending enchantment, and nearby ender chest storage for sustainable lapis collection throughout your playthrough.

What Is Lapis Lazuli in Minecraft?

Lapis lazuli is a blue-colored ore and resource material in Minecraft, primarily used for enchanting items at an enchanting table. When mined, lapis lazuli ore drops 4–9 pieces of lapis lazuli (without Fortune), making it more abundant per ore block than most other minerals.

The ore generates in the Overworld at varying depths, appearing as blue-flecked stone blocks. In its item form, lapis lazuli is a deep blue material that stacks up to 64 units. Players can craft nine pieces into a lapis lazuli block for compact storage or decorative building.

Since the 1.3.1 update back in 2012, lapis has been the mandatory fuel for the enchanting table, you need 1–3 pieces per enchantment, depending on the level. This mechanic makes lapis one of the few resources you’ll consistently need throughout the entire game, from early-game iron tools to late-game netherite gear.

Beyond enchanting, lapis functions as a blue dye for wool, concrete, terracotta, glass, and other dyeable blocks. It’s also a minor trading item with certain villager types and can be used in firework stars for blue burst effects.

Where to Find Lapis Lazuli Ore

Lapis lazuli ore generates in the Overworld using a triangular distribution pattern, meaning it’s more common at certain depths and tapers off above and below those levels. Understanding spawn mechanics saves hours of aimless digging.

Best Y-Levels for Lapis Lazuli Mining in 2026

As of Minecraft Java Edition 1.21 and Bedrock Edition 1.21, lapis lazuli ore spawns most frequently between Y-levels -64 and 64, with the highest concentration around Y=0. The distribution follows a triangle pattern that peaks at Y=0 and decreases symmetrically toward both Y=64 and Y=-64.

For practical mining, target Y=-1 to Y=15 for the best results. This range keeps you close to the peak spawn rate while avoiding the deepslate-heavy zones below Y=0, where mining takes longer due to increased block hardness. Strip mining at Y=11 or Y=6 also gives you a decent chance at diamonds and redstone in the same runs.

Deepslate lapis lazuli ore (found below Y=0) is functionally identical to stone-variant lapis ore but takes longer to mine. If you’re using a Silk Touch pickaxe for ore collection, be prepared for slower harvesting in deep caves.

Biome Distribution and Spawn Rates

Lapis lazuli ore generates uniformly across all Overworld biomes, there’s no biome bonus or penalty. Whether you’re mining under a desert, forest, or mountain, the spawn rates remain consistent as long as you’re within the correct Y-level range.

One exception: dripstone caves and lush caves can offer better visibility for ore spotting due to their unique generation patterns, but they don’t actually increase lapis spawn rates. Cave systems at the right depth can speed up collection by exposing more ore blocks without manual digging.

How to Mine Lapis Lazuli Efficiently

Efficient lapis mining isn’t just about finding the ore, it’s about maximizing drops per hour and minimizing wasted effort. The right tools and techniques make a massive difference.

Required Tools and Enchantments

You need at minimum a stone pickaxe to mine lapis lazuli ore. Using a wooden or gold pickaxe will break the block but yield nothing, a common mistake for new players rushing into caves.

For maximum efficiency, prioritize these enchantments:

  • Fortune III: Increases lapis drops to 9–36 pieces per ore block (compared to 4–9 without Fortune). This is the single most impactful enchantment for lapis farming. With Fortune III, one ore vein can fill your inventory slot in seconds.
  • Efficiency IV or V: Dramatically speeds up mining, especially useful when breaking through deepslate lapis ore below Y=0.
  • Unbreaking III: Extends pickaxe durability, reducing the need for repairs or replacements during long mining sessions.
  • Mending: Pairs with an XP farm to keep your Fortune III pickaxe operational indefinitely.

Avoid Silk Touch for lapis collection unless you’re specifically gathering ore blocks for decoration. Silk Touch negates Fortune, meaning you’ll get one ore block instead of dozens of lapis pieces.

Mining Strategies for Maximum Yield

Branch mining at Y=6 or Y=11 remains the most reliable method. Dig a central corridor, then create 2-block-high branches every 3–4 blocks on each side. This pattern exposes the maximum number of blocks per tunnel length and catches ore veins that might otherwise go unnoticed.

Cave exploration at the right depth can be faster if you’re comfortable navigating hostile mobs. Large cave systems between Y=-10 and Y=20 expose thousands of blocks without manual digging. Bring torches, food, and backup gear, dying with a full inventory of lapis hurts.

Chunk mining (clearing entire 16×16 chunk columns down to bedrock) is overkill for lapis specifically, but it’s worth mentioning for completionists. You’ll gather every resource in that chunk, including lapis, diamonds, and ancient debris if you go deep enough. This approach works best with a Haste II beacon and Efficiency V pickaxe.

Whatever method you choose, always carry a water bucket for lava lake management and an ender chest to secure valuable drops if you’re mining far from your base.

All Uses for Lapis Lazuli

Lapis lazuli isn’t a one-trick pony. While enchanting dominates its utility, the material supports several other gameplay systems that creative and survival players alike should understand.

Enchanting: The Primary Use

Every enchantment applied at an enchanting table consumes 1–3 lapis lazuli, depending on the enchantment level shown in the interface. Level 1 enchantments cost 1 lapis and 1 XP level, level 2 costs 2 lapis and 2 levels, and level 3 costs 3 lapis and 3 levels.

This means you’ll burn through lapis quickly when enchanting full armor sets, tools, and weapons. A single fully enchanted netherite loadout (helmet, chestplate, leggings, boots, sword, pickaxe, axe, shovel, bow) can easily consume 30–50 lapis lazuli if you’re cycling enchantments for optimal rolls.

Keep a dedicated chest near your enchanting setup with at least a stack of lapis. Running out mid-session breaks your flow, especially when you’re trying to hit specific enchantment combinations before the table’s RNG resets.

Dyeing and Decorative Applications

Lapis lazuli functions as blue dye for a wide range of blocks and items. Specific applications include:

  • Wool, carpet, and beds: Dye sheep directly or craft blue wool for builds.
  • Concrete and terracotta: Create vibrant blue structures with concrete powder (requires water contact to harden) or glazed terracotta patterns.
  • Glass and glass panes: Blue-tinted glass for windows, greenhouses, or decorative map rooms.
  • Banners and shields: Apply blue patterns for custom designs and faction markers.
  • Leather armor: Dye leather armor pieces blue for aesthetic customization or team identification on multiplayer servers.
  • Shulker boxes: Organize storage with color-coded shulker boxes, blue for farms, another color for redstone, etc.

Many builders incorporate lapis blocks and dyed blue materials for builds inspired by ocean temples, night skies, or fantasy architecture. The deep blue contrasts well with white blocks like quartz, concrete, or wool in modern or abstract designs.

Crafting Lapis Lazuli Blocks

Nine lapis lazuli pieces craft into one lapis lazuli block, a decorative block with a rich blue appearance. This block is purely cosmetic in survival mode, it can’t be used in crafting recipes beyond reversing the process (breaking one block yields nine lapis).

Lapis blocks are popular in creative builds for floors, pillars, and accent walls. They also serve as compact storage: if you’re swimming in lapis from Fortune III mining, converting excess pieces into blocks frees up inventory and chest space.

Trading with Villagers

As of version 1.21, apprentice-level cleric villagers buy lapis lazuli in exchange for emeralds (1 emerald for 24 lapis). This trade isn’t particularly lucrative compared to pumpkin or melon farms, but it’s a useful emerald sink if you’ve automated lapis collection and need a consistent trading option.

Clerics also sell items like ender pearls, redstone, and glowstone, making them valuable trading partners in the mid-to-late game.

Alternative Ways to Obtain Lapis Lazuli

Mining isn’t the only source of lapis lazuli. Chest loot and villager trades can supplement your supply, especially in the early game or when you’re exploring structures anyway.

Chest Loot Locations

Lapis lazuli appears as loot in several naturally generated structures across the Overworld:

  • Mineshafts: Loot chests in abandoned mineshafts have a 14.5% chance to contain 4–9 lapis lazuli.
  • Shipwrecks: Treasure chests in shipwrecks offer a 61.5% chance for 1–10 lapis, making them one of the best early-game sources if you spawn near an ocean.
  • Village chests: Temple chests (in desert and jungle villages) and other village storage can contain lapis, though spawn rates vary by chest type and structure.
  • Trial chambers (added in 1.21): Reward chests in trial chambers can drop lapis lazuli alongside other mid-tier loot.

Chest loot is unreliable for sustained enchanting needs, but it’s a nice bonus when exploring early on. Community-created loot tables on sites like Game8 offer detailed breakdowns of chest spawn rates across structure types, useful for optimizing exploration routes.

Villager Trading Methods

While clerics buy lapis rather than sell it, you can indirectly obtain lapis through emerald trading chains and purchase other enchanting materials like bookshelves or enchanted books. This doesn’t directly solve lapis shortages, but it streamlines your enchanting workflow by reducing the need for manual book crafting and XP grinding.

How to Build an Effective Lapis Lazuli Farm

Strictly speaking, lapis lazuli can’t be “farmed” in the renewable sense like crops or mob drops, it’s a finite ore resource in each world. But, you can optimize collection to the point where it feels automated.

The closest thing to a lapis farm is a dedicated mining operation with these components:

  1. Branch mine at optimal Y-levels: Set up a permanent mining area between Y=0 and Y=15 with evenly spaced tunnels. Mark the entrance with signs or beacons so you can return easily.
  2. Fortune III pickaxe with Mending: Keep this pickaxe exclusively for lapis, diamond, redstone, and coal to maximize drops. Repair it at an XP farm (mob grinder, furnace XP bank, or guardian farm) to maintain efficiency.
  3. Haste II beacon (optional but powerful): A beacon with Haste II near your mining operation dramatically increases block break speed, letting you clear more stone per hour. This requires a level 2 beacon pyramid (34 iron/gold/diamond/emerald/netherite blocks) and proximity to your mining tunnels.
  4. Ender chest for remote storage: Place an ender chest in your mining area and another at your main base. Deposit lapis directly into the ender chest inventory to avoid long trips back to storage.
  5. TNT duping (Java Edition technical players): If you’re comfortable with technical Minecraft, TNT duping machines can clear massive volumes of stone quickly, exposing ore veins far faster than manual mining. Note that this exploits a game bug and may not align with every server’s rules or personal playstyle.

For truly renewable lapis in modded Minecraft, certain mods on platforms like Nexus Mods introduce ore generation mechanics or transmutation systems that let you convert other materials into lapis. Vanilla Minecraft doesn’t support this, but it’s worth exploring if you’re running a modded instance.

In survival, the key is consistency: dedicate 30–60 minutes per session to branch mining with Fortune III, and you’ll build a lapis stockpile that lasts hundreds of enchantments.

Storage and Organization Tips

Lapis lazuli accumulates quickly if you’re mining with Fortune III. Without proper storage, you’ll waste time sorting through cluttered chests or hauling excess materials.

Store lapis in dedicated enchanting area chests within 2–3 blocks of your enchanting table. Label the chest with a sign or item frame holding lapis so you can grab it quickly mid-session. Many players prefer a single chest split between lapis, bottles o’ enchanting, and backup books for convenience.

If you’re drowning in lapis (common after extended mining trips), convert excess pieces into lapis lazuli blocks for compact storage. One chest of lapis blocks holds 9× more lapis than a chest of loose pieces. Store blocks in your main warehouse and keep one stack of pieces near your enchanting table.

Shulker box organization takes this further: dedicate a blue shulker box to enchanting supplies (lapis, books, grindstone-ready gear). Carry the shulker with you when mining or exploring so you can enchant new finds on the spot if you bring a portable enchanting setup.

For multiplayer servers or large-scale builds, use item sorting systems with hoppers to auto-route lapis from mining hauls into specific chests. Redstone sorters filter lapis into an enchanting supply chest while sending other ores (diamonds, emeralds, redstone) to their respective storage units.

Common Mistakes to Avoid When Collecting Lapis Lazuli

Even experienced players fall into traps that waste lapis or mining time. Here’s what to watch for.

Mining with Silk Touch instead of Fortune: This is the most costly error. Silk Touch pickaxes yield one ore block per lapis vein instead of 4–9 (or up to 36 with Fortune III). Always carry a separate Fortune III pickaxe for ores unless you specifically need ore blocks for decoration.

Ignoring optimal Y-levels: Mining at Y=60 or Y=-50 dramatically reduces lapis spawn rates. Stick to the Y=-1 to Y=15 range for consistent results. F3 debug screen (Java Edition) or coordinate display (Bedrock Edition) keeps you on target.

Breaking ore with the wrong tool tier: Using a wooden or gold pickaxe on lapis ore destroys the block without dropping anything. Stone or higher is mandatory. This seems obvious but happens often when players grab the wrong tool during panicked cave fights.

Not carrying a water bucket: Lapis veins sometimes generate near or in lava lakes, especially around Y=11. Breaking ore without clearing lava first incinerates the drops. A water bucket converts lava to obsidian, securing your lapis.

Enchanting without checking lapis stock: Running out of lapis mid-enchanting session forces you to leave the table, breaking immersion and wasting time. Always verify you have at least 20–30 lapis before starting a gear upgrade session.

Overlooking chest loot in structures: Early-game players often skip mineshaft or shipwreck chests, missing easy lapis spawns. A single shipwreck treasure chest can provide enough lapis for your first few enchantments, delaying the need for deep mining.

Detailed guides on Twinfinite often highlight version-specific quirks and common player mistakes, useful for troubleshooting if you’re encountering unexpected behavior with ore drops or enchanting costs.

Lapis Lazuli Changes Across Game Versions

Lapis lazuli mechanics have evolved significantly since its introduction in Beta 1.2 (January 2011). Understanding version history helps contextualize current mechanics and explains why older guides may contain outdated advice.

Beta 1.2 to 1.2.5 (2011): Lapis was introduced purely as a blue dye with no enchanting function. Ore generated between Y=0 and Y=32, making it relatively rare.

1.3.1 (August 2012): Lapis became the required material for enchanting table use. This update transformed lapis from a niche decorative item into a core progression resource, spiking demand overnight.

1.8 (Bountiful Update, 2014): Minor tweaks to ore generation improved lapis spawn rates slightly, though exact Y-levels remained similar to earlier versions.

1.17 and 1.18 (Caves & Cliffs, 2021): The world height expansion to Y=-64 through Y=320 completely overhauled ore distribution. Lapis shifted to a triangular distribution peaking at Y=0, replacing the older uniform distribution. Deepslate lapis ore was introduced for blocks below Y=0.

1.21 (current as of 2026): Lapis distribution remains consistent with 1.18+ mechanics. Trial chambers added a new chest loot source, marginally increasing passive lapis acquisition for players exploring these structures.

Players on older versions (pre-1.18) should target Y=10 to Y=20 for lapis mining, as the triangular distribution doesn’t apply. Console editions and legacy platforms may also follow older generation rules depending on the version. Always check your F3 screen or world settings to confirm which generation system your world uses.

If you’re playing modded Minecraft or custom maps, ore generation can vary wildly. Some mod packs increase lapis rarity to rebalance enchanting difficulty, while others add renewable lapis sources through magical or technological systems.

Conclusion

Lapis lazuli sits at the intersection of progression and creativity in Minecraft, it’s your enchanting fuel and your decorative blue dye, essential for both survival optimization and aesthetic builds. Master the Y-level sweet spots, prioritize Fortune III for mining, and keep a steady stockpile near your enchanting table. Whether you’re branch mining at Y=6, looting shipwrecks, or converting excess lapis into blocks for storage, the strategies in this guide should keep you supplied through every stage of the game. The ore distribution hasn’t changed since the Caves & Cliffs update, so these techniques will carry you well into future versions. Now grab your pickaxe, head to the right depth, and start turning that blue ore into enchanted dominance.

Minecraft’s modding scene has always thrived on creativity, but few mods embrace pure unpredictability like Broken Script. If you’ve ever wanted to turn Minecraft’s orderly block-by-block gameplay into a carnival of randomness, where pigs explode on contact, gravity inverts without warning, or every broken block spawns a hostile mob, this mod delivers exactly that kind of controlled chaos. Unlike traditional mods that add new biomes, mobs, or mechanics with predictable outcomes, Broken Script lets players script their own brand of madness, making every session feel like a glitch-filled fever dream that you’re somehow directing.

Whether you’re a content creator hunting for viral moments, a veteran player craving fresh challenges, or someone who just wants to watch the world burn (digitally, of course), Broken Script offers a sandbox within a sandbox. This guide walks through everything from installation and basic setup to advanced script editing and multiplayer mayhem, so you can maximize the chaos without completely breaking your game, or at least know how to fix it when you do.

Key Takeaways

  • Broken Script Minecraft mod injects customizable randomness and scripted chaos into gameplay, letting players define triggers and consequences that transform predictable survival into unpredictable entertainment.
  • Installation is straightforward—download the mod file, place it in your mods folder, and configure scripts through the config directory using a simplified syntax that doesn’t require advanced programming knowledge.
  • The mod works with both Forge (1.12.2–1.20.1) and Fabric loaders, though multiplayer requires synchronized versions and careful script management to avoid performance issues and server desync.
  • Popular script combinations like ‘Mob Madness,’ ‘Block Transmutation,’ and ‘Hardcore Randomizer’ demonstrate the Broken Script community’s creativity and are freely available for download and immediate use.
  • Content creators and streamers benefit significantly from Broken Script’s unpredictability, as the mod generates organic, clippable moments and viewer engagement through interactive chaos voting and challenge runs.
  • Performance optimization—capping entity spawns, setting cooldowns, and monitoring memory usage—is essential when running Broken Script to maintain stable framerates and prevent lag spikes from overwhelming your system.

What Is the Broken Script Minecraft Mod?

Understanding the Core Concept and Purpose

Broken Script is a Minecraft mod designed to inject randomness and scripted chaos into standard gameplay. At its core, the mod allows players to create, edit, and execute custom scripts that alter game behavior in unpredictable or absurd ways. Think of it as a programmable chaos engine: you define triggers (like breaking a block, killing a mob, or jumping), and the mod executes consequences that range from mildly annoying to game-breaking hilarious.

The purpose isn’t to enhance survival gameplay or add new content in the traditional sense. Instead, it’s built for experimentation, entertainment, and creating memorable moments. Streamers love it for the sheer unpredictability, viewers never know if opening a chest will summon a wither or turn every nearby block into TNT. Casual players enjoy it as a break from the grind, while technical players treat it like a scripting playground to test complex event chains and mod interactions.

Broken Script works by hooking into Minecraft’s event system, intercepting actions, and executing user-defined responses. Scripts are written in a simplified scripting language (often Lua-based or JSON-structured, depending on the version) that doesn’t require deep programming knowledge but rewards creativity and experimentation.

How Broken Script Differs from Traditional Minecraft Mods

Most Minecraft mods fall into predictable categories: content additions (new ores, mobs, dimensions), quality-of-life improvements (minimap, inventory sorting), or gameplay overhauls (tech trees, magic systems). They’re designed with balance, progression, and stability in mind. Broken Script throws all of that out the window.

Traditional mods are deterministic, install Biomes O’ Plenty, and you’ll get new biomes every time. Install Broken Script, and you have no idea what’ll happen until you configure it. The mod doesn’t add blocks or items by default: instead, it provides the framework for players to create their own chaos. It’s closer to a modding tool than a content mod.

Another key difference is scope. Where most mods aim to integrate smoothly into vanilla or modded gameplay, Broken Script is intentionally disruptive. It’s not meant for long-term survival worlds or balanced multiplayer servers, unless chaos is the game mode. The mod shines in short-burst sessions, challenge runs, or content creation where the unexpected is the main attraction.

Finally, Broken Script’s community-driven nature sets it apart. Players share script libraries and combinations, turning the mod into a collaborative experiment. You’re not just downloading someone else’s vision of Minecraft, you’re remixing it with your own twisted logic.

Key Features and Capabilities of Broken Script

Randomization and Chaotic Gameplay Elements

The heart of Broken Script is its randomization engine, which can trigger events based on probability, player actions, or environmental conditions. Breaking a dirt block might have a 10% chance to spawn a creeper, a 5% chance to teleport you 100 blocks up, and a 1% chance to delete your entire inventory. The mod doesn’t impose these outcomes, you script them, but the framework makes it easy to stack ridiculous probabilities.

Chaos modes are pre-built templates that experienced users share. Popular examples include “Every Block is TNT” (self-explanatory), “Mob Roulette” (killing any mob spawns a random hostile creature), and “Gravity Lottery” (random gravity flips every 30 seconds). These modes demonstrate the mod’s potential without requiring users to write scripts from scratch.

Randomization isn’t limited to destruction. Some players create positive chaos: random enchantments on every item pickup, surprise loot drops from mundane actions, or environmental buffs that shift every few minutes. The mod’s flexibility means chaos can be tuned from “mildly inconvenient” to “completely unplayable,” depending on your tolerance for madness.

Customizable Scripts and Player Control

Broken Script’s standout feature is its scripting system, which gives players granular control over event triggers and outcomes. Scripts are stored as text files in the mod’s config folder, making them easy to edit, share, and version-control. The syntax is designed for accessibility, simple if/then logic, trigger definitions, and action lists that even non-coders can parse.

A basic script might look like this:


TRIGGER: player_breaks_block [stone]

ACTION: spawn_entity [zombie] [5]

This spawns five zombies whenever a player breaks stone. Advanced users stack conditions, probabilities, and multi-step actions to create complex sequences. One popular community script creates a “domino effect” where breaking a single block triggers a chain reaction across hundreds of blocks, each with escalating consequences.

Player control extends to real-time adjustments. Most versions of Broken Script include in-game commands to enable, disable, or modify scripts on the fly without restarting. This is crucial for content creators who want to ramp up chaos mid-stream or dial it back when things get too out of hand.

Compatibility with Other Mods and Versions

Broken Script is built on Forge (for versions 1.12.2 through 1.20.1) and Fabric (for 1.16+ with active development on 1.20.x), making it compatible with most major modpacks and loaders. As of early 2026, the latest stable release supports Minecraft 1.20.4, with beta builds testing 1.21 snapshot compatibility.

Compatibility with other mods is a mixed bag. Broken Script plays nicely with content mods (like Tinkers’ Construct or Twilight Forest) because it hooks into vanilla events that those mods also use. Problems arise with mods that heavily modify the event system or world generation, conflicts can cause crashes or script failures. The mod’s documentation maintains a compatibility matrix listing known issues with popular mods, and many have community-created patches available on modding platforms such as Nexus Mods.

Multiplayer compatibility depends on whether the server and all clients run identical Broken Script versions and configurations. Desync issues are common if scripts differ, leading to hilarious (or frustrating) discrepancies between what players see. Dedicated server support exists, but admins need to carefully curate scripts to avoid performance disasters, uncontrolled entity spawning can tank server TPS fast.

How to Download and Install the Broken Script Mod

System Requirements and Prerequisites

Before installing Broken Script, confirm your system meets the baseline requirements. The mod itself is lightweight, but the chaos it generates, especially heavy entity spawning or rapid block updates, can strain lower-end hardware.

Minimum specs:

  • Minecraft Java Edition 1.12.2 or newer
  • 4GB RAM allocated to Minecraft (8GB recommended for script-heavy configurations)
  • Forge or Fabric mod loader (version-matched to your Minecraft install)
  • 50MB free disk space for the mod and script libraries

Recommended specs:

  • 8GB+ RAM allocation (chaotic entity spawning is RAM-intensive)
  • Dedicated GPU (integrated graphics struggle with particle-heavy scripts)
  • SSD storage (faster chunk loading when scripts modify terrain)

You’ll also need a mod loader. Forge is the most common choice for older versions (1.12.2–1.16.5), while Fabric is preferred for 1.17+. Download the appropriate loader from their official sites and run the installer before proceeding.

Step-by-Step Installation Process

  1. Download Broken Script. Head to the official CurseForge page or the mod author’s GitHub repository. Verify the version matches your Minecraft and mod loader. Look for the file labeled “Broken-Script-[version]-[loader].jar.”

  2. Install your mod loader. If you haven’t already, run the Forge or Fabric installer for your target Minecraft version. Launch Minecraft once with the modded profile to generate necessary folders.

  3. Locate your mods folder. Navigate to your Minecraft directory (on Windows, it’s usually %appdata%.minecraft). Inside, find or create a folder named mods.

  4. Drop the mod file in. Copy the Broken Script .jar file into the mods folder. Don’t unzip it, Minecraft loads mods directly from .jar files.

  5. Launch and verify. Start Minecraft with your Forge or Fabric profile. On the main menu, click “Mods” (Forge) or check the mods list (Fabric). Broken Script should appear with version info. If it’s missing, double-check loader compatibility and game version.

  6. Configure initial scripts. The first launch generates a config/BrokenScript folder containing default scripts and settings. Browse the included examples to understand the syntax before jumping into custom scripting.

Troubleshooting Common Installation Issues

Mod doesn’t appear in the list: Verify the .jar file matches your Minecraft version and mod loader. A Forge mod won’t load on Fabric, and vice versa. Check the filename carefully, some download sites bundle multiple versions in one archive.

Crash on startup: This usually indicates a dependency issue or version mismatch. Check the crash log (located in the crash-reports folder) for references to missing libraries. Broken Script requires some versions of Minecraft to have additional API mods installed, check the mod page for dependencies.

Scripts don’t trigger: Confirm scripts are enabled in the config file (BrokenScript.cfg or similar). Some versions disable all scripts by default for safety. Also verify script syntax, one typo can break the entire file. The mod logs script errors to the console, so run Minecraft from the launcher with output visible.

Performance drops/lag spikes: Overly aggressive scripts (like spawning 100 entities per block break) will murder framerate. Start with conservative settings and scale up. Disable particle-heavy effects if you’re on older hardware. For guidance on optimizing game performance during intensive mod usage, streaming and gaming setup guides offer practical tips.

Multiplayer desync: Ensure server and client run identical Broken Script versions and share the same script files. Use file-sharing or a GitHub repo to keep configs synchronized across players.

Getting Started: Your First Experience with Broken Script

Configuring Basic Settings and Preferences

Once installed, Broken Script’s config file is your control panel. Open config/BrokenScript/settings.cfg (or .json depending on version) in any text editor. Key settings include:

  • globalChaosLevel: A master intensity slider (0.0 to 1.0) that scales all script probabilities. Set to 0.5 for moderate chaos, 1.0 for maximum mayhem.
  • enableDefaultScripts: Toggles the included example scripts. Start with this enabled to see the mod in action, then disable it when you’re ready to write custom scripts.
  • maxEntitiesPerChunk: Safety cap to prevent script-spawned mobs from tanking performance. Recommended: 50 for solo, 25 for multiplayer.
  • logScriptActions: Writes every script trigger to the console log. Essential for debugging custom scripts, but spammy, disable once things work.
  • allowRealTimEdits: Lets you modify scripts without restarting Minecraft. Extremely useful for testing, but can cause crashes if you save malformed scripts mid-session.

Save the config and launch a new creative world to test. Creative mode is ideal for initial experimentation because script-induced deaths are less punishing.

Understanding the In-Game Interface and Commands

Broken Script’s in-game interface is minimal, most interaction happens through chat commands. Press T to open chat and try these essentials:

  • /bscript reload: Reloads all script files without restarting Minecraft. Use this after editing scripts externally.
  • /bscript list: Displays all active scripts with their current status (enabled/disabled).
  • /bscript toggle [scriptname]: Enables or disables a specific script on the fly. Example: /bscript toggle mob_roulette.
  • /bscript chaos [0.0-1.0]: Adjusts the global chaos level in real time. Great for ramping up intensity during streams.
  • /bscript debug: Toggles debug mode, which displays on-screen notifications every time a script triggers. Helps identify which script caused that sudden explosion.

Some versions include a GUI overlay (default keybind: K) showing active scripts, trigger counts, and quick toggles. It’s lightweight and doesn’t clutter the screen, making it perfect for content creators who want viewers to see the chaos unfold.

Start by enabling one or two simple scripts, something like “random item drop” or “mob spawn on jump.” Get a feel for how triggers work and how often they fire. Then gradually layer on complexity.

Advanced Customization and Script Editing

Creating Your Own Custom Scripts

Writing custom scripts is where Broken Script transitions from novelty to personal chaos laboratory. Navigate to config/BrokenScript/scripts/ and create a new .txt or .json file (depending on your version’s syntax). Start simple:

Example: Lightning Strike on Sneak


TRIGGER: player_sneaks

PROBABILITY: 0.2

ACTION: summon_lightning [player_position]

This gives a 20% chance to summon lightning at your position every time you sneak. Save the file, run /bscript reload, and test it in-game.

Advanced scripting involves chaining actions, using conditional logic, and referencing variables. Many versions support:

  • Conditional triggers: IF player_health < 5 THEN [action]
  • Multi-action sequences: Execute a list of actions in order or simultaneously
  • Variable storage: Track custom data (kill counts, blocks broken, etc.) to trigger events after thresholds
  • Area-of-effect targeting: Apply effects to all entities/blocks within a radius

Community script repositories (often hosted on GitHub or shared via Discord) offer hundreds of pre-written scripts. Download a few complex ones and reverse-engineer them to understand advanced syntax. The Broken Script wiki (maintained by the community) includes a full syntax reference and function library.

Popular Script Combinations and Community Favorites

The Broken Script community has developed signature script packs that showcase the mod’s potential:

“Hardcore Randomizer”: Every action has a chance to trigger something beneficial or catastrophic. Breaking a block might heal you, damage you, spawn a mob, or teleport you. It’s RNG hell, and players love it for challenge runs.

“Mob Madness”: Killing any mob spawns 1–3 random hostile mobs at the death location. Creates escalating difficulty as mob kills snowball into more spawns. Popular for arena-style gameplay.

“Block Transmutation”: Placing any block has a chance to transform it into a random block type. Trying to build a house becomes a comedy of errors as wood planks turn into lava or obsidian.

“Environmental Chaos”: Time-based triggers that alter weather, spawn rates, or gravity every few minutes. Keeps players on their toes, what works now might be useless in five minutes.

“Loot Explosion”: Every chest opened or ore mined triggers a loot shower of random items. Balanced for modded playthroughs where inventory management becomes part of the challenge.

These packs are downloadable as complete script sets. Drop them in your scripts folder, reload, and you’re instantly playing a different game. Many content creators on platforms like Twitch and YouTube build entire series around these community packs, and gaming coverage sites such as Shacknews occasionally feature standout scripts in mod round-ups.

Best Ways to Use Broken Script for Maximum Fun

Solo Gameplay Ideas and Challenges

Broken Script turns solo Minecraft into a roguelike experience. Here are proven setups for maximum entertainment:

“Chaos Survival”: Start a new survival world with moderate chaos settings. Every game action has consequences, mining spawns mobs, crafting consumes random items, sleeping teleports you. The goal is to beat the Ender Dragon under these conditions. It’s brutally difficult and wildly unpredictable.

“One Block, One Consequence”: Script every block type to trigger a unique event when broken. Stone summons a skeleton, dirt gives you food, diamond ore spawns a wither. Memorizing block effects becomes a meta-game.

“Countdown Chaos”: Use time-based scripts that increase chaos level every 10 minutes. Start peaceful, end in absolute madness. Can you complete specific goals before the game becomes unplayable?

“Randomizer Speedrun”: Speedrun categories with Broken Script scripts are emerging in the community. Breaking blocks teleports you randomly, crafting items have random outputs, and mob drops are shuffled. It’s less about optimization and more about adapting to absurdity.

Solo play lets you tune chaos to your exact tolerance and experiment with scripts that would ruin multiplayer balance.

Multiplayer Chaos and Server Applications

Broken Script on multiplayer servers is pure, unfiltered mayhem, if everyone’s on board. Here’s how to make it work:

“Chaos PvP”: All players compete with the same chaotic scripts active. Environmental hazards level the playing field, and the best adapter wins. Popular in tournament-style events where luck and skill blend.

“Co-op Survival Chaos”: Teams work together against the chaos. Scripts spawn increasingly difficult challenges, and coordination is key to survival. Think of it as a co-op roguelike where the environment is actively hostile.

“Prank Wars”: Server admins can toggle scripts targeting specific players or areas. Used sparingly, it’s hilarious. Overused, it’s griefing. Know your audience.

Server performance warning: Multiplayer chaos requires tight script management. Unlimited entity spawning or rapid block updates will crash servers or cause unbearable lag. Use entity caps, cooldowns, and test scripts in single-player before deploying server-wide. Many server owners run Broken Script on a separate “chaos realm” dimension to isolate performance hits.

Content Creation and Streaming Opportunities

Broken Script is content gold. The unpredictability creates organic reactions that audiences love, and no two sessions play out the same.

Stream interaction: Some versions support Twitch integration or external control via console commands. Viewers can vote on which scripts activate next, or channel point redeems trigger specific chaos events. This interactivity drives engagement and keeps streams dynamic.

Highlight-reel moments: Script-induced disasters, sudden explosions, mob swarms, gravity flips, generate clippable moments. Creators often run “chaos challenges” where they attempt specific tasks (build a house, kill the Wither) under maximum chaos settings.

Series concepts: Multi-episode series like “100 Days of Chaos” or “Can I Beat Minecraft with Broken Script?” perform well. The mod provides built-in narrative tension because viewers know disaster is always one block break away.

Collaboration content: Invite other creators into a chaos server for co-op or competitive play. The shared suffering (and laughter) creates memorable content that often outperforms scripted collaborations.

Common Issues and How to Fix Them

Performance Problems and Lag Solutions

Broken Script can punish your hardware if scripts go unchecked. Here’s how to keep performance stable:

Entity spam lag: The most common culprit. If scripts spawn mobs or items without limits, entity count skyrockets and framerate plummets. Solutions:

  • Set maxEntitiesPerChunk in the config to a hard cap (25–50 is safe)
  • Add cooldowns to spawn-heavy scripts (e.g., COOLDOWN: 5 prevents the script from triggering more than once every 5 seconds)
  • Use /kill @e[type=.player] periodically to clear entities if things get out of hand

Block update lag: Scripts that modify many blocks simultaneously (like “turn everything within 50 blocks into TNT”) cause massive block update calculations. Limit area-of-effect sizes and avoid chain reactions in loaded chunks.

Memory leaks: Some script versions don’t properly clean up variables or logged events, leading to memory bloat over long sessions. Restart Minecraft every few hours during extended chaos sessions, and disable logScriptActions unless actively debugging.

Render distance conflicts: High chaos with large render distances compounds performance issues. Drop render distance to 8–12 chunks when running script-heavy configs.

If you’re streaming or recording, allocate extra RAM (10–12GB) and use performance mods like Optifine or Sodium alongside Broken Script to mitigate the hit.

Script Conflicts and Compatibility Errors

Multiple scripts triggering on the same event can create conflicts or unintended behavior. Here’s how to troubleshoot:

Overlapping triggers: If two scripts both activate on player_breaks_block, they’ll both fire. Sometimes that’s fine: other times, it creates cascading chaos you didn’t intend. Review your script files and consolidate triggers or use conditional logic to prevent overlap.

Mod incompatibility crashes: Broken Script can clash with mods that override the same events (world generation mods, event-driven automation mods). Check the crash log for “NullPointerException” or “ConcurrentModificationException” errors referencing Broken Script. Try:

  • Disabling suspected conflicting mods one by one
  • Updating Broken Script to the latest version (compatibility patches are frequent)
  • Checking the mod’s issue tracker or Discord for known conflicts

Syntax errors breaking all scripts: One malformed script file can prevent the entire mod from loading scripts. Enable debug logging (logScriptActions: true) and check the console for parsing errors. The log will usually point to the specific file and line causing issues.

Version mismatches in multiplayer: Clients and servers must run identical Broken Script versions. Even minor version differences can cause desync, duplicate triggers, or crashes. Use a modpack manager (like CurseForge or ATLauncher) to ensure everyone’s synced.

When all else fails, delete the entire BrokenScript config folder and let the mod regenerate defaults. Then re-add custom scripts one at a time, testing after each addition.

Alternatives and Similar Mods Worth Exploring

If Broken Script’s chaos appeals to you, several other mods explore similar territory:

Chaos Awakens: A content-focused chaos mod that adds unpredictable mobs, biomes, and items. Less customizable than Broken Script, but polished and balanced for longer playthroughs. Great if you want chaos baked into progression rather than scripted randomness.

Random Patches: A lightweight mod that introduces small random tweaks every session, altered recipes, shifted mob stats, randomized loot tables. It’s chaos-lite, perfect for players who find Broken Script too extreme but want some unpredictability.

MineColonies with Chaos Scripts: Some players combine colony management mods with light Broken Script chaos for emergent storytelling. Random disasters (mob raids, resource shortages triggered by scripts) create dynamic challenges for your colony to overcome.

Custom NPCs + Broken Script: Custom NPCs allows scripted NPC behavior. Paired with Broken Script’s event system, you can create quest chains that respond to chaos triggers, an NPC appears after you’ve survived 10 random disasters, for example.

Data Pack Randomizers: Vanilla Minecraft’s data pack system supports some randomization without mods. While less powerful than Broken Script, data packs are server-friendly and don’t require client-side installation. Check community repositories for “random loot” or “chaos crafting” packs.

RLCraft (modpack): Not a single mod, but the ultimate “Minecraft is too easy” experience. While RLCraft focuses on difficulty rather than randomness, the chaotic death-around-every-corner vibe shares DNA with Broken Script’s ethos.

Each alternative offers a different flavor of unpredictability. Broken Script remains the most customizable and script-driven option, but exploring these mods can inspire new script ideas or provide a break from pure chaos.

Conclusion

Broken Script isn’t for everyone, and that’s exactly the point. It’s a mod for players who’ve exhausted vanilla Minecraft’s predictability and want to inject genuine surprise back into the game. Whether you’re scripting elaborate chaos sequences, surviving against impossible odds, or just watching the world burn for content, the mod delivers on its promise: total creative control over total mayhem.

The learning curve isn’t steep, but the skill ceiling is high. Mastering script syntax, balancing chaos with playability, and understanding compatibility quirks takes time. But the payoff, those moments when a perfectly timed script creates an unforgettable disaster or an unexpected triumph, makes the effort worthwhile.

As Minecraft continues evolving through 2026 and beyond, mods like Broken Script prove the community’s creativity is far from exhausted. The game’s a canvas, and chaos is just another brush. Now go break something.

Dispensers are among the most versatile redstone components in Minecraft, capable of launching projectiles, distributing items, and powering elaborate automation systems. Whether you’re setting up arrow traps to defend your base from mobs or building a complex potion dispenser for PvP arenas, understanding the dispenser recipe minecraft players rely on is essential for taking your builds to the next level.

This guide covers everything from gathering materials and crafting your first dispenser to mastering advanced redstone circuits. By the end, you’ll know exactly how to integrate dispensers into your survival world, creative projects, and technical builds, complete with tips that seasoned players use to avoid common mistakes.

Key Takeaways

  • The minecraft dispenser recipe requires seven cobblestone, one bow, and one redstone dust arranged in a U-shape pattern around the bow on a crafting table.
  • Dispensers activate when powered by redstone signals and can shoot arrows, throw potions, place water or lava, and equip armor depending on loaded items.
  • Dispensers face away from the player when placed, so positioning matters—stand in the direction you want items dispensed to ensure correct orientation.
  • Redstone clock circuits, particularly hopper and observer clocks, enable automatic firing at adjustable rates, making dispensers ideal for arrow traps and defense systems.
  • Jungle temples naturally contain two dispensers as part of their arrow trap mechanism, offering an early-game resource alternative to crafting.

What Is a Dispenser in Minecraft?

A dispenser is a redstone-activated block that can store up to nine stacks of items and automatically deploy them when powered. Unlike a chest, it doesn’t just hold items, it shoots arrows, throws splash potions, places water or lava, dispenses armor onto players, and even triggers TNT.

Dispensers have been part of Minecraft since Beta 1.2 (released in 2011) and remain a staple in both survival and creative modes. They’re primarily used in automated farms, mob traps, and defensive systems. The block features a carved face texture resembling a carved pumpkin, which indicates the direction items will be dispensed.

How Dispensers Work in Minecraft

When a dispenser receives a redstone signal, it randomly selects one item from its inventory and dispenses it. The behavior depends on what’s loaded:

  • Arrows, eggs, snowballs, and other projectiles: Fired as if shot by a player
  • Splash potions and lingering potions: Thrown in the direction the dispenser faces
  • Armor pieces: Equipped onto a player or armor stand standing directly in front
  • Flint and steel or fire charges: Ignite the block in front
  • Water or lava buckets: Place or remove liquid sources
  • Bone meal: Applies to crops or saplings in front of the dispenser
  • TNT: Primes and drops TNT as an entity
  • Shears: Shear sheep standing in front
  • Most other items: Simply ejected as item entities

Dispensers face the player when placed, so positioning matters. They require a redstone signal to activate, buttons, levers, pressure plates, or redstone circuits all work.

Dispenser vs. Dropper: Key Differences

Many players confuse dispensers with droppers, but they serve different purposes:

Dispensers:

  • Use or activate items (shoot arrows, throw potions, place armor)
  • Interact with the environment (place water, ignite blocks)
  • Ideal for traps, farms, and automated systems that require item activation

Droppers:

  • Only drop items as entities (never activate them)
  • Can transfer items into other containers like chests or hoppers
  • Better suited for item transport and sorting systems

If you need something shot or deployed, use a dispenser. If you just need items moved or dropped, a dropper is more efficient and doesn’t waste durability on tools like shears or flint and steel.

Minecraft Dispenser Recipe: Materials You Need

Crafting a dispenser requires three materials: seven cobblestone blocks, one bow, and one redstone dust. These are all obtainable in early to mid-game survival, though the bow can be slightly tricky if you’re short on string.

Here’s the exact recipe layout for a crafting table:


[Cobblestone] [Cobblestone] [Cobblestone]

[Cobblestone] [ Bow ] [Cobblestone]

[Cobblestone] [Redstone Dust] [Cobblestone]

You’ll get exactly one dispenser per craft. Let’s break down where to find each material.

Where to Find Cobblestone

Cobblestone is one of the most abundant blocks in Minecraft. Mine any stone block with a pickaxe (wooden or better) to collect cobblestone. Stone generates naturally throughout the Overworld at Y-levels below 0 and comprises most cave systems.

If you don’t have access to natural stone, you can also create cobblestone by letting flowing water touch a lava source block. This method is slower but useful in skyblock or custom map scenarios.

How to Craft a Bow

A bow requires three sticks and three pieces of string. The crafting pattern is:


[ ] [Stick ] [String]

[Stick] [ ] [String]

[ ] [Stick ] [String]

Sticks are easy, craft them from wooden planks. String is the challenge. You can obtain string by:

  • Killing spiders or cave spiders (most common method)
  • Breaking cobwebs in mineshafts, strongholds, or igloo basements with a sword or shears
  • Looting chests in dungeons or desert temples
  • Trading with cats (they occasionally gift string as a morning present if you’re near a bed)

If you’re struggling with string, spend a night outside your base hunting spiders. They spawn frequently in low-light areas and drop 0-2 string per kill. Looting enchantments increase the drop rate.

Obtaining Redstone Dust

Redstone dust is mined from redstone ore, which spawns between Y-levels -64 and 15, with the highest concentration around Y-level -59 (as of Minecraft 1.18 and later). You need an iron pickaxe or better to mine redstone ore, stone and wooden pickaxes won’t work.

Each redstone ore block drops 4-5 redstone dust (more with Fortune enchantment). Redstone is plentiful once you start branch mining at lower levels. You can also find redstone dust in chests within dungeons, mineshafts, strongholds, and villages.

Step-by-Step Guide to Crafting a Dispenser

Once you’ve gathered seven cobblestone, a bow, and redstone dust, you’re ready to craft your dispenser. Here’s the exact process.

Crafting Table Setup

First, you’ll need a crafting table. If you don’t have one yet, craft it from four wooden planks arranged in a 2×2 pattern (you can do this in your inventory crafting grid).

Place the crafting table on the ground and right-click (or your platform’s equivalent) to open the 3×3 crafting interface.

Placing Materials in the Correct Pattern

Arrange your materials in the crafting table exactly as shown:

  1. Top row: Cobblestone, cobblestone, cobblestone
  2. Middle row: Cobblestone, bow, cobblestone
  3. Bottom row: Cobblestone, redstone dust, cobblestone

The bow goes in the center slot, redstone dust directly below it, and cobblestone fills the remaining seven slots forming a “U” shape around the bow and redstone.

Once the pattern is correct, the dispenser will appear in the result box. Click it to move it to your inventory. The bow will be consumed in the crafting process, it doesn’t matter if the bow is damaged or enchanted: any bow works.

Pro tip: If you’re crafting multiple dispensers, you’ll need multiple bows. Keep a spider farm or cobweb source handy for sustainable string collection.

How to Activate and Use a Dispenser

Crafting the dispenser is only half the equation. To make it functional, you need to power it with redstone and load it with items.

Powering Dispensers with Redstone

Dispensers activate when they receive a redstone signal. There are several ways to power a dispenser:

  • Direct power: Place a redstone torch, lever, or button directly on or adjacent to the dispenser
  • Redstone dust: Run redstone dust into the dispenser block
  • Redstone repeaters: Extend signals or add delays
  • Pressure plates or tripwires: Trigger dispensers when mobs or players step on them
  • Observers: Detect block updates and send signals
  • Redstone blocks: Provide constant power if placed next to the dispenser

The dispenser will activate once per redstone pulse. If you use a lever to provide constant power, it will only fire once when toggled on, it doesn’t continuously dispense.

For automatic firing, you’ll want a redstone clock (more on that in the advanced mechanics section).

Loading Items into Your Dispenser

Right-click the dispenser to open its inventory interface. It has nine slots, just like a dropper. Drag items from your inventory into the dispenser’s slots.

The dispenser will randomly select from loaded items each time it activates. If you want consistent output (like an arrow trap that always fires arrows), fill all nine slots with the same item type.

Important: The dispenser’s facing direction is set when you place it. It faces away from you, so stand in the direction you want items dispensed. You cannot rotate a dispenser after placement, you’ll need to break and replace it if the orientation is wrong.

Creative Dispenser Uses and Builds

Dispensers are staples in everything from simple traps to elaborate technical builds. Here are some of the most popular and practical applications.

Automatic Arrow Traps for Base Defense

Arrow dispensers are classic mob defense systems. Place a dispenser loaded with arrows facing a corridor or entrance, then connect it to a tripwire, pressure plate, or redstone clock.

When a mob (or unfortunate player) triggers the input, arrows fire automatically. For maximum damage, use a rapid-fire clock circuit to shoot multiple arrows in quick succession. Position multiple dispensers in a line for concentrated firepower.

Tip: Arrow dispensers have perfect accuracy and infinite durability, unlike bows. They’re especially effective in securing underground bases where mobs funnel through narrow passages.

Potion and Splash Potion Dispensers

Dispensers can throw splash potions and lingering potions, making them invaluable in PvP arenas and boss fight preparation areas. Load splash potions of Healing for a quick health station, or Harming potions for an offensive trap.

Lingering potions create area-of-effect clouds that persist for several seconds. Use them with tipped arrows or standalone for area denial in combat scenarios.

Item Sorting and Distribution Systems

While droppers are more common in item sorting, dispensers can distribute items to players automatically. Set up a dispenser loaded with tools, food, or gear at your base entrance, activated by a button.

For advanced item distribution, combine dispensers with hoppers and redstone comparators to create conditional dispensing systems that only activate when specific inventory thresholds are met.

Fire Charge and Lava Dispensers

Dispensers loaded with fire charges shoot fireballs that ignite blocks and deal damage, similar to blaze attacks. They’re perfect for dramatic trap designs or mob farm kill chambers.

Lava dispensers can place and remove lava sources when activated. This is useful for toggling lava blade traps in mob grinders or creating retractable lava moats around your base. Just make sure the dispenser is loaded with a lava bucket, it will place lava on the first pulse and retract it on the second.

Water dispensers work identically and are handy for automatic crop irrigation systems or fire suppression in redstone builds.

Advanced Dispenser Mechanics and Redstone Circuits

Once you’ve mastered basic dispenser usage, you can integrate them into sophisticated redstone contraptions. Here are two essential circuit types.

Clock Circuits for Automatic Firing

A redstone clock generates repeating pulses, causing a dispenser to fire continuously at set intervals. The simplest clock is a hopper clock:

  1. Place two hoppers facing each other
  2. Put 1-5 items in one hopper (more items = slower clock)
  3. Use a redstone comparator reading from one hopper to output a signal
  4. Connect the signal to your dispenser

The comparator will pulse on and off as items cycle between hoppers. This creates a reliable, adjustable firing rate.

For faster firing, use an observer clock:

  1. Place two observers facing each other
  2. Run redstone from either observer to your dispenser

This creates a rapid pulse (approximately 2 ticks or 0.1 seconds between shots). Perfect for high-DPS arrow traps.

Players looking for automated defense systems often rely on these clock designs to maintain constant pressure on mobs.

Observer-Based Dispenser Triggers

Observers detect block updates and emit a redstone pulse. You can create conditional dispenser systems by pairing observers with various block changes:

  • Crop growth: Observer facing a farmland block detects when crops reach maturity, triggering a dispenser to apply bone meal or harvest with water
  • Player detection: Observer watching a door or trapdoor detects when it opens, firing a dispenser
  • Piston movement: Observer facing a piston detects extension/retraction, creating complex sequential circuits

Observers have a one-tick output delay and can face any direction, making them incredibly versatile for compact, responsive dispenser systems.

Common Dispenser Mistakes to Avoid

Even experienced players make these dispenser errors. Here’s what to watch out for:

Wrong facing direction: Dispensers face away from the player when placed. If your arrows are shooting into a wall instead of down a corridor, break and replace the dispenser while standing in the correct position.

Mixing dispensers and droppers: Droppers look similar but won’t shoot arrows or place water. Double-check your recipe, dispensers require a bow: droppers don’t.

Insufficient redstone signal: Dispensers need a direct or adjacent redstone signal. Redstone dust loses power after 15 blocks: use repeaters to extend signals in longer circuits.

Forgetting durability on special items: When dispensers use tools like shears, flint and steel, or hoes, those items lose durability. Eventually, they’ll break. Stock extra tools or use mending gear in long-term automatic systems.

Loading incompatible items: Not all items have special dispenser behavior. Blocks like dirt or cobblestone just pop out as entities, they won’t be placed. Check the Minecraft wiki for comprehensive lists of dispenser-compatible items if you’re unsure.

Powering continuously instead of pulsing: A lever that stays on only triggers one dispense. For repeated firing, you need a clock circuit or repeated button presses.

Placing dispensers in unloaded chunks: If your dispenser is in a chunk that unloads when you walk away, it won’t fire. Keep important dispenser systems within your base’s loaded area or use chunk loaders in modded environments.

Where to Find Dispensers Naturally in Minecraft

If you’re exploring instead of crafting, dispensers generate naturally in a few structures. Finding them can save resources in early game.

Jungle Temples

Jungle temples (also called jungle pyramids) spawn in jungle biomes and always contain dispensers as part of their arrow trap mechanism. When you enter the temple, there’s a hidden tripwire near the entrance that triggers dispensers loaded with arrows.

You’ll find exactly two dispensers inside each jungle temple. They’re typically hidden behind vines or in the walls near the entrance hallway. Breaking them gives you the dispenser block plus any remaining arrows inside.

Jungle temples also contain chests with loot, making them worth exploring even beyond the dispensers.

Woodland Mansions and Other Structures

While jungle temples are the most reliable source, dispensers may appear in other contexts depending on world generation and version updates:

  • Custom maps and adventure maps frequently use dispensers for puzzles and traps
  • Player-built structures on multiplayer servers
  • Occasionally in modded structures if you’re using gameplay mods from sources like Nexus Mods

As of 2026, jungle temples remain the only vanilla structure guaranteed to have dispensers. If you’re speedrunning or playing a resource-scarce challenge map, raiding a jungle temple for dispensers is a legitimate strategy.

Conclusion

Mastering the dispenser recipe in Minecraft opens the door to automation, defense, and creative problem-solving that transforms how you approach both survival and technical builds. From gathering cobblestone and hunting spiders for string to wiring complex observer circuits, every step builds your redstone literacy.

Whether you’re setting up your first arrow trap or designing a full-scale potion distribution system, dispensers remain one of the game’s most reliable and versatile blocks. Experiment with different redstone inputs, test firing patterns, and don’t be afraid to break and rebuild, that’s how the best contraptions are born.

Now grab your pickaxe, hunt down some redstone, and start building. Your base defense (and your friends in multiplayer) will thank you.

Have you noticed how often people in Australia use their phones for almost everything these days? 

From paying bills to watching live sports, the smartphone has become part of daily life. It is no surprise that mobile gaming has also grown quickly. One of the biggest areas seeing this growth is online casinos. 

More Australians are choosing to play casino games directly from their mobile devices, and this shift has changed how digital entertainment works across the country.

The Growth Of Mobile Gaming In Australia

Mobile gaming has expanded rapidly over the last decade. Faster internet speeds, affordable smartphones, and easy access to apps have made gaming more convenient than ever. Australians are comfortable using mobile technology, so playing games on https://nodepositcasinoffer.com a phone feels natural.

Smartphones As Entertainment Devices

In the past, gaming was mostly done on desktop computers or gaming consoles. Now, smartphones are powerful enough to handle advanced graphics and smooth gameplay. Online casino platforms have adapted to this change by creating mobile-friendly websites and apps.

These platforms are designed to load quickly and run smoothly on different screen sizes. Buttons are clear, menus are simple, and navigation feels easy. Even someone new to online casinos can quickly understand how to register, deposit funds, and start playing.

Internet Access Across The Country

Improved mobile network coverage has also supported this rise. Many Australians have access to reliable 4G and 5G networks, allowing games to run without interruption. This stable connectivity makes mobile casino gaming comfortable and consistent.

Why Mobile Online Casinos Appeal To Players

The appeal of mobile online casinos goes beyond technology. It connects directly with lifestyle and convenience.

Play Anytime And Anywhere

One of the strongest reasons for the rise is flexibility. Players can log in while relaxing at home, during travel, or even during short breaks in the day. There is no need to sit at a desk or visit a physical location.

This convenience matches modern Australian life. Busy schedules make flexible entertainment attractive. With mobile access, gaming fits easily into daily routines.

Wide Variety Of Games On Mobile

Mobile online casinos offer a broad selection of games. Players can choose from pokies, card games, roulette, and live dealer tables. The experience on mobile is often similar to desktop versions, just adjusted for smaller screens.

Technology Driving The Mobile Shift

Behind the scenes, technology plays a major role in supporting mobile casino growth.

Optimised App And Web Design

Online casinos now use responsive design. This means the platform automatically adjusts to fit any screen size. Whether using a small smartphone or a larger tablet, the layout remains clear and functional.

Touchscreen controls also make gameplay smooth. Instead of clicking with a mouse, players simply tap or swipe. This makes the experience feel natural and interactive.

Secure Mobile Transactions

Security remains a priority. Mobile platforms use encryption systems to protect financial and personal data. Players can deposit and withdraw funds using common payment options such as bank cards and digital wallets.

Clear transaction processes and secure systems help build trust. When players feel confident about security, they are more comfortable using mobile platforms regularly.

Live Gaming On Mobile

One of the most impressive developments is live dealer gaming on smartphones. Using high-quality streaming technology, players can join real-time games hosted by professional dealers. View details

Real-Time Interaction

Live games allow players to watch cards being dealt or the roulette wheel spinning in real time. Many platforms include chat functions so players can interact during the session. This brings a social element into mobile gaming.

The combination of live streaming and mobile access creates an interactive experience that feels modern and convenient.

Responsible Features On Mobile Platforms

As mobile access grows, responsible gaming tools remain important.

Many platforms offer features that help players manage time and spending directly through the app.

Personal Control Tools

Players can set deposit limits, session reminders, or cooling-off periods. These tools are easy to access within account settings. Having these options available supports balanced and controlled play.

This focus on user control strengthens confidence in mobile platforms.

The Future Of Mobile Online Casinos In Australia

The rise of mobile gaming is likely to continue as technology advances. Faster networks, improved graphics, and more powerful devices will further improve the experience.

Virtual reality and enhanced streaming quality may add new layers to mobile casino gaming in the future. Developers are constantly refining user interfaces to make platforms even smoother and more engaging.

As Australians continue to rely on smartphones for everyday tasks, mobile online casinos are expected to remain a steady part of digital entertainment.

Final Thoughts

Mobile gaming has played a major role in the rise of Australia online casinos. With convenient access, a wide range of games, secure systems, and interactive features, mobile platforms align perfectly with modern lifestyles. As technology continues to improve, mobile online casinos are set to remain a popular and accessible entertainment option across Australia.