
133 Results

node

Search

So you want to cruise around your Minecraft world in style? Whether you’re envisioning a sleek sports car tearing down a custom highway or a rugged off-roader bouncing through jungle biomes, building vehicles in Minecraft has become one of the community’s most creative challenges. The catch? Vanilla Minecraft doesn’t include cars, at least not in the traditional sense.

But that hasn’t stopped millions of players from engineering everything from static builds that look photo-realistic to fully functional vehicles using mods, command blocks, and creative redstone wizardry. In 2026, the options for car enthusiasts in Minecraft span across Java Edition mods, Bedrock add-ons, and vanilla-friendly techniques that blur the line between decoration and gameplay.

This guide covers it all: building your first car with basic blocks, installing the best vehicle mods, programming actual movement, and even setting up multiplayer racing servers. Whether you’re on PC, console, or mobile, there’s a method here that’ll get you behind the wheel.

Key Takeaways

  • A Minecraft car can be built three ways: as a purely aesthetic vanilla build using blocks, with functional movement through mods like MrCrayfish’s Vehicle Mod on Java Edition, or with command blocks and display entities for advanced vanilla servers.
  • Vanilla Minecraft car builds require smart material choices like Quartz Stairs for hoods, Black Concrete for tires, and Glass Panes for windows, combined with symmetry and real-car references to achieve realistic proportions.
  • MrCrayfish’s Vehicle Mod remains the top choice for Java Edition, offering 16+ drivable vehicle types with crafting systems, fuel mechanics, realistic physics, and WASD controls compatible with multiplayer servers.
  • Building realistic Minecraft cars involves three phases—frame construction with wheels and base, body panels with windows and roof shape, and detailed finishing with headlights, grilles, and interior cockpit elements.
  • Minecraft car gameplay thrives in multiplayer environments through racing servers like Grand Theft Minecart and Blockdrop, which offer GTA-style gameplay, circuit racing, and competitive minigames with vehicle customization.
  • Roads and racing tracks amplify car builds’ impact by using layered concrete materials, lane markers, realistic intersections, and varied terrain elevation to create authentic driving environments and multiplayer experiences.

Understanding Cars in Minecraft: Vanilla vs. Modded Gameplay

Before diving into construction, it’s crucial to understand what Minecraft offers natively versus what requires external tools. The difference determines your building approach, available features, and even which platform you’ll play on.

What Vanilla Minecraft Offers for Vehicle Creation

Out of the box, Minecraft provides no drivable cars. There are no steering wheels, engines, or vehicle entities in the base game. What vanilla does offer is an incredibly flexible building system that lets players construct car models using blocks, stairs, slabs, and decorative items.

These builds are purely aesthetic, they sit in your world as impressive stationary structures. Think of them as sculptures. Players use blocks like Quartz Stairs for curved hoods, Black Concrete for tires, Glass Panes for windshields, and Buttons or Levers for door handles.

The closest vanilla gets to vehicle movement is minecarts on rails. Clever builders sometimes hide minecart systems beneath car builds to create the illusion of driving, though the movement is limited to preset rail paths. It’s functional for themed parks or city builds, but don’t expect open-world driving.

Vanilla building works across all platforms, Java, Bedrock, console, mobile, making it the most accessible starting point. The trade-off is realism: your Ferrari might look incredible, but it won’t move an inch without mods or commands.

How Mods Transform Transportation in Minecraft

Mods fundamentally change the game by introducing actual vehicle entities with physics, controls, and functionality. On Java Edition, mods like MrCrayfish’s Vehicle Mod and Flan’s Mod add cars you can craft, fuel, drive with WASD controls, and even customize with different parts.

These aren’t block structures pretending to move, they’re proper game entities with hitboxes, acceleration curves, turning radiuses, and sometimes even damage models. Some mods add roads that increase vehicle speed, fuel systems requiring gasoline or biofuel, and upgrade trees for engines and suspensions.

Bedrock Edition uses add-ons instead of traditional mods, which are less powerful but still effective. Add-ons can introduce rideable entities that function as cars, though they typically require more compromise on features and control precision.

The modded experience is primarily a Java Edition advantage, as that version supports deep code modification through Forge, Fabric, and NeoForge mod loaders. Console and mobile players on Bedrock can access marketplace add-ons or free community packs, but the selection and functionality are narrower.

If you want true driving simulation, complete with drift mechanics, working headlights, and tire marks, mods are the only real answer. Vanilla building remains king for creative expression, but modded gameplay owns the functional vehicle space.

Building Your First Minecraft Car Without Mods

Starting with a vanilla build teaches fundamental design skills that translate to modded projects later. Plus, these builds work on any platform without downloads or technical setup.

Essential Materials and Blocks for Realistic Car Designs

The key to convincing car builds is block variety and smart substitution. Here’s a starter palette:

  • Body panels: Smooth Stone, Quartz Blocks, Concrete (any color), Terracotta
  • Tires: Black Concrete, Black Wool, Coal Blocks
  • Windows: Glass, Glass Panes, Tinted Glass
  • Details: Buttons (headlights), Trapdoors (grilles), Slabs and Stairs (curves), Item Frames (license plates)
  • Interior: Chairs (Stairs facing inward), Carpet (floor mats), Redstone Lamps (dashboard lights)

Modern builds increasingly use Deepslate Tiles, Blackstone, and Polished blocks for sleeker aesthetics. The 1.19+ updates added Mangrove Wood and Mud Bricks that work surprisingly well for rustic or vintage vehicles.

Color consistency matters. Pick 2-3 main colors for the body and stick with them. Real cars don’t mix six different shades randomly, neither should yours.

Step-by-Step Construction: From Frame to Finishing Touches

Start with the footprint. Most cars fit within a 4-6 block width and 8-12 block length. Lay out your base with the body color, marking where wheels will sit.

Frame phase:

  1. Build the undercarriage, the flat bottom where wheels attach
  2. Place wheel blocks (3-block tall cylinders work for most scales)
  3. Add the lower body panels connecting the wheels
  4. Establish the roofline height (usually 2-3 blocks above the base)

Body phase:

  1. Fill in side panels using full blocks, slabs, or stairs for angles
  2. Install windows using glass panes (use trapdoors as frames)
  3. Shape the hood and trunk, stairs and slabs create curves
  4. Add a roof (can be flat, angled, or convertible with trap doors)

Detail phase:

  1. Place buttons on front/rear for headlights and taillights
  2. Add trapdoors as grilles or vents
  3. Use banners, signs, or item frames for license plates
  4. Install doors (actual doors work, or use fence gates)
  5. Add interior seating with inward-facing stairs

Symmetry tools or counting blocks as you place helps maintain proportion. Many builders work from reference images of real cars, adapting the shapes to Minecraft’s grid.

Adding Functional Movement with Minecarts and Rails

To make your static car “drivable,” hide a minecart rail system underneath. This technique is popular in theme park builds and city roleplay servers.

Basic setup:

  1. Excavate a 1-block deep channel following your desired route
  2. Lay powered rails and regular rails (use powered rails every 8-10 blocks)
  3. Place your car build on top using barriers or structure blocks to suspend it over the track
  4. Position a minecart at the starting point

When a player sits in the minecart, the car appears to move. It’s convincing from a distance. For tighter control, use detector rails to trigger redstone events like opening gates or changing traffic lights.

Alternatively, build the car around the player sitting in a minecart using armor stands and display entities (Java 1.19.4+). This creates a mobile build that rides the rails while looking like a complete vehicle.

Limitations: you’re locked to rail paths, can’t turn freely, and speed is capped by minecart mechanics. But for parade floats, city tours, or fixed-route transit systems, it’s a solid vanilla solution that resembles functional vehicle concepts players use in other defensive builds.

Top Minecraft Car Mods and Add-Ons in 2026

If you’re ready to move beyond decorative builds, these mods and add-ons deliver the real driving experience. Current as of Minecraft 1.21 (Java) and Bedrock 1.21.30.

MrCrayfish’s Vehicle Mod: Features and Installation

MrCrayfish’s Vehicle Mod remains the gold standard for Java Edition vehicle gameplay. As of version 0.60.1 (February 2026), it includes:

  • 16+ vehicle types: Cars, ATVs, go-karts, planes, boats, and shopping carts
  • Customization system: Paint jobs, engine upgrades, wheel types
  • Fuel mechanics: Craft gasoline or biofuel to power vehicles
  • Realistic physics: Acceleration, braking, drifting, and damage modeling
  • Multiplayer support: Drive with friends: vehicles sync across servers

Vehicles are crafted at a Workbench using the mod’s custom items: engines, wheels, chassis. The mod adds its own crafting GUI separate from vanilla tables.

Installation (Java Edition):

  1. Download Forge or NeoForge for Minecraft 1.21
  2. Download MrCrayfish’s Vehicle Mod from CurseForge or the official GitHub
  3. Place the .jar file in your mods folder
  4. Launch Minecraft with the Forge profile
  5. Verify the mod loaded in the Mods menu

Controls use WASD for movement, Shift for brake, Space for handbrake. Right-click to enter/exit vehicles. The mod includes a key binding menu for remapping controls.

Performance impact is moderate, expect 5-10 FPS drop on mid-range systems with multiple vehicles active. Compatible with most major mods but can conflict with other transportation mods that modify entity movement.

Flan’s Mod: Military and Civilian Vehicles

Flan’s Mod takes a different approach, focusing on content packs that add themed vehicles. The core mod is a framework: you download separate packs for WW2 tanks, modern jets, civilian cars, or mechs.

As of version 5.10 (updated January 2026 for MC 1.20.6), Flan’s Mod offers:

  • Content pack system: Mix and match vehicle sets
  • Combat features: Working guns, armor plating, ammo management
  • Team mechanics: Built-in team assignment for PvP gameplay
  • Extensive vehicles: 100+ vehicles across all packs combined

Popular packs include the Simple Parts Pack (basic cars and trucks), Manus Civil Package (sports cars and sedans), and WW2 Pack (tanks and military jeeps). Each pack requires separate download and installation.

Pros: Unmatched vehicle variety, especially for military/combat builds. Great for server minigames.
Cons: More complex setup than MrCrayfish’s mod. Some packs haven’t updated past 1.12.2, though the community maintains ports.

Installation follows the same Forge process, but you’ll need both the core mod and at least one content pack to see vehicles in-game.

Bedrock Edition Add-Ons for Console and Mobile Players

Bedrock players can’t use Java mods but have access to Marketplace add-ons and free community packs:

Official Marketplace options:

  • City Life (670 Minecoins): Adds cars, buses, and traffic systems
  • Ultimate Car Mod (550 Minecoins): 12 drivable vehicles with customization
  • Super Kart Racers (750 Minecoins): Racing-focused with power-ups

These are fully supported, work on all Bedrock platforms (Xbox, PlayStation, Switch, Mobile, Windows 10/11), and include multiplayer compatibility.

Free community add-ons:

Sites like MCPEDL host free .mcaddon files you can install manually:

  1. Download the .mcaddon file to your device
  2. Open with Minecraft (double-click on PC, tap on mobile)
  3. The add-on imports automatically
  4. Apply it to worlds in the World Settings > Add-Ons menu

Popular free options include Real Cars Addon and Advanced Vehicles, though quality and update frequency vary. Many free add-ons use retextured horses or boats as vehicle entities, which limits physics realism but provides basic functionality.

Bedrock add-ons generally perform better than Java mods on lower-end hardware, making them ideal for mobile play. But, customization depth and control precision typically lag behind Java alternatives.

Advanced Building Techniques for Realistic Car Models

Once you’ve mastered basic construction, these techniques push builds into showcase territory, the kind that end up featured in gaming community galleries and YouTube build tours.

Creating Different Car Types: Sports Cars, Trucks, and Off-Road Vehicles

Each vehicle class has signature proportions and details:

Sports cars:

  • Low profile (2 blocks from ground to roof)
  • Wide stance (4-5 blocks width)
  • Aggressive angles using stairs and slabs
  • Minimal ground clearance, wheels sit flush with body
  • Use sleek blocks: Smooth Quartz, White Concrete, Light Gray Concrete

Trucks:

  • High ground clearance (2+ blocks between axle and body)
  • Boxy cab design with distinct hood
  • Large wheel wells using stairs to create arches
  • Bed area 4-6 blocks behind cab
  • Rugged blocks work best: Stone Bricks, Dark Oak Planks, Iron Blocks

Off-road vehicles (Jeeps, SUVs):

  • Medium height (3 blocks)
  • Visible suspension, use fences or walls beneath body
  • Exposed wheel arches with larger tires
  • Roof racks made from trapdoors or fences
  • Earth tone palettes: Browns, greens, grays

Scale consistency matters, mixing a 10-block sedan with a 6-block truck looks wrong even if both are technically accurate to their own scales. Pick a scale (typically 1:2 or 1:3) and stick with it across your builds.

Interior Design and Cockpit Details

Most builders neglect interiors, but detailed cockpits separate good builds from great ones:

Dashboard and controls:

  • Use item frames with custom items for gauges
  • Buttons or levers as ignition/controls
  • Daylight sensors work as speedometer faces
  • Carpet on the floor in matching color

Seating:

  • Stairs facing inward = bucket seats
  • Add signs on the sides with “RECARO” or custom text for racing seats
  • Slabs behind the seats create headrests

Steering wheel:

  • Item frame with a clock or custom texture
  • Alternatively, use a single oak fence post for a minimalist wheel

Center console:

  • Upside-down stairs between seats
  • Trapdoors as armrests
  • Buttons as radio controls

For convertibles or cars with removable roofs, design the interior to be visible from above. Add details like gear shifters (levers), cup holders (flower pots), and even passengers (armor stands with custom heads).

Lighting, Wheels, and Exterior Customization

Advanced lighting techniques:

  • Headlights: Use Sea Lanterns, Redstone Lamps, or End Rods (angled headlights) behind glass blocks for glow effect
  • Taillights: Red Concrete + Redstone Lamp creates brake lights: add a button/lever to activate
  • Interior lighting: Glowstone under carpet or hidden Shroomlights cast ambient cockpit glow
  • Under-glow: For that Fast & Furious look, place colored concrete with light sources underneath the chassis

Wheel detailing:

Basic builds use solid black blocks, but advanced wheels incorporate:

  • Rims: Dark Gray Concrete center with Black Concrete tire ring
  • Spokes: Use item frames with player heads or custom textures for rim designs
  • Rotation effect: Place item frames at 45° rotations to suggest motion in screenshots

Paint jobs and decals:

  • Use concrete powder for matte finishes, concrete for gloss
  • Racing stripes: 1-block width down the center or offset
  • Numbers: Use maps in item frames with custom rendered numbers
  • Banners work as hood decals or door logos
  • Combine multiple colors in geometric patterns for livery designs

Aerodynamic elements:

  • Rear spoilers: Fences, walls, or slabs angled upward
  • Side skirts: Trapdoors along the lower body edge
  • Hood scoops: Upside-down stairs with trapdoors as vents
  • Exhaust pipes: End Rods or Dark Oak Fences exiting rear bumper

Weathering and damage can add character: mix Cracked Stone Bricks into the body for rust, use cobwebs for “abandoned” cars, or place vines growing over stationary builds in jungle settings.

Making Your Minecraft Car Actually Drive

This is where vanilla Minecraft gets technical. True driving without mods requires command blocks, redstone, and sometimes creative entity manipulation, not for beginners, but extremely rewarding.

Command Block Programming for Vehicle Movement

Command blocks can teleport entities in incremental steps, creating smooth movement illusion. This technique powers custom vehicles on vanilla servers.

Basic movement system (Java Edition):

  1. Build your car around an armor stand (the “anchor” entity)
  2. Place a command block on repeat mode running: /execute as @e[type=armor_stand,tag=car1] at @s run tp @s ^ ^ ^0.2
  3. Tag your armor stand: /tag @e[type=armor_stand,limit=1,sort=nearest] add car1
  4. Add rotation commands: /execute as @e[tag=car1] at @s run tp @s ~ ~ ~ ~2 ~ (turns right)

This teleports the armor stand forward 0.2 blocks per tick. Build your car using armor stands with blocks (requires additional commands to attach blocks) or use the display entities system introduced in Java 1.19.4.

Display entities method (recommended for 1.19.4+):

Display entities are designed specifically for decorative moving objects:

  1. Create a block_display entity for each part of your car
  2. Set transformations to position blocks relative to a parent entity
  3. Use /execute to move the parent, which moves all child displays
  4. Commands like /data modify entity @e[type=block_display,limit=1] transformation control position and rotation

For player control, use carrot-on-a-stick detection:


/execute as @a[nbt={SelectedItem:{id:"minecraft:carrot_on_a_stick"}}] at @s run function car:forward

The function file increments movement when the player right-clicks the carrot.

Full vehicle systems require dozens of command blocks handling acceleration, turning, collision detection, and passenger positioning. Marketplace maps like “Vehicle Command Framework” provide templates you can reverse-engineer.

Performance warning: Command-based vehicles cause server lag with multiple instances. Limit to 3-5 simultaneous vehicles max on multiplayer servers.

Redstone Mechanisms for Interactive Features

While redstone can’t directly move vehicles, it adds interactive elements:

Working doors:

  • Pressure plates inside trigger pistons that open actual doors
  • Trapped chests with comparators detect when trunk opens

Headlight system:

  • Lever/button on dashboard activates redstone lamps in front
  • Use repeaters to create a “turn signal” blink effect (clock circuit)

Horn:

  • Button wired to note blocks plays honking sound
  • Different wood types produce different pitches

Engine sounds:

  • Dropper clocks feeding into note blocks create rumble effect
  • Increase clock speed when “accelerating” using piston doors

Some builders hide entire redstone systems within car bodies, though this requires larger-scale builds (1:1 or bigger) to accommodate wiring.

Using Armor Stands and Display Entities for Smooth Animation

For static showcases with animated elements (not full driving, but rotating wheels or opening hoods):

Rotating wheels:

  1. Create 4 armor stands (one per wheel) with custom heads textured as rims
  2. Run command: /execute as @e[tag=wheel] at @s run tp @s ~ ~ ~ ~10 ~
  3. Wheels rotate continuously, suggesting motion even while car is stationary

Opening hoods/trunks:

  1. Build hood as separate block_display entity
  2. Use /data modify commands to change transformation pitch
  3. Create gradual animation with 20+ command blocks on chain mode
  4. Result: hood smoothly tilts open when triggered

Drifting/skidding particles:

  • /particle commands spawn smoke or dust at wheel positions
  • Trigger when turning to simulate tire friction
  • Example: /particle minecraft:smoke ~ ~ ~ 0 0 0 0.01 20

The techniques described in comprehensive building tutorials often overlap with these animation systems, as both require understanding entity manipulation and command syntax.

For Bedrock Edition, equivalent systems use behavior packs and entity JSON files instead of command blocks, which is more complex but achieves similar results. The Bedrock documentation on Microsoft’s site covers entity animation controllers.

Building Roads, Highways, and Racing Tracks

Cars need roads. Even the most impressive vehicle looks awkward sitting on grass. Proper infrastructure makes car builds feel purposeful and integrated into your world.

Designing Realistic Road Networks for Your World

Material choices for different road types:

  • Highways: Smooth Stone Slabs (main lanes) + White Concrete (lane markers) + Stone Brick borders (shoulders)
  • City streets: Concrete or Asphalt (modded) with Quartz or White Terracotta lines
  • Rural roads: Coarse Dirt, Path blocks, or Gravel with grass edges
  • Gravel roads: Gravel base with Stone Button “pebbles” scattered randomly

Road width standards:

  • Single lane: 3 blocks
  • Two-way street: 7 blocks (3+1+3 with center line)
  • Highway: 11+ blocks (multiple lanes each direction plus median)

Realistic details:

  • Lane markers: Use White Concrete in dashed patterns (2 blocks line, 3 blocks gap)
  • Double yellow center lines: Two parallel Yellow Concrete lines
  • Shoulders: 2-block wide Stone or Gravel strips on each side
  • Curbs: Andesite Slabs or Smooth Stone Stairs at street edges
  • Street lamps: Every 10-15 blocks using Sea Lanterns on fence posts
  • Signs: Use actual signs or item frames with custom maps for stop signs, speed limits, highway numbers

Intersections:

  • Four-way stops: Use Stone Pressure Plates or Carpets for stop lines
  • Traffic lights: Redstone lamps (Red, Yellow, Green) on fence posts with sequencing circuit
  • Roundabouts: Circle of road with grass/concrete center: 12-15 block diameter minimum

Tunnels and bridges:

  • Tunnels should be 5+ blocks tall (room for car + clearance)
  • Bridges need support pillars every 8-10 blocks for realism
  • Use Stone Brick or Concrete for modern bridges, Nether Brick or Blackstone for industrial vibes

Road networks feel most natural when they follow terrain contours rather than cutting straight lines. Use gradual slopes (1 block elevation change per 5-8 horizontal blocks) to match landscape.

Creating Custom Racing Circuits and Stunt Courses

Racing tracks are perfect for testing modded vehicles or hosting multiplayer competitions.

Circuit design principles:

  • Lap length: 400-800 blocks for good race duration (2-4 minutes with modded cars)
  • Track width: 10-12 blocks allows overtaking
  • Corner variety: Mix tight hairpins, sweeping curves, and chicanes
  • Elevation changes: Hills and dips add challenge (nothing steeper than 30°)
  • Runoff areas: 3-5 block buffer zones past corners (use Red Sand to indicate danger)

Materials for racing surfaces:

  • Main track: Black Concrete or Blue Ice (Blue Ice = speed boost)
  • Pit lane: Quartz or Light Gray Concrete
  • Rumble strips: Alternating Red and White Concrete at corner edges
  • Barriers: Stone Brick Walls, Fences, or Glass Panes
  • Tire barriers: Black Wool stacks at dangerous corners

Starting grid:

  • Checkered pattern using Black and White Concrete
  • Numbered positions with item frames or maps
  • Start/finish line clearly marked with different color

Stunt courses:

For more extreme gameplay:

  • Jumps: Ramp up at 45° using stairs, land on slime blocks for bounce or Hay Bales for safe landing
  • Loop-de-loops: 10-block diameter minimum: requires mods with proper vehicle physics
  • Corkscrews: Spiral track rotating 360° over 15-20 blocks length
  • Wallrides: Vertical sections require mods with anti-gravity or magnetic wheels
  • Obstacles: Moving pistons, falling sand/gravel, TNT hazards (set to not destroy blocks)

Spectator areas:

  • Grandstands using Stairs and Slabs
  • Viewing platforms every 50-100 blocks around circuit
  • Banners and flags for decoration
  • Scoreboards using /scoreboard commands displaying lap times

Many race-focused servers use WorldEdit to copy/paste track sections or MCEdit to import real-world racing circuits converted to Minecraft coordinates. The Monaco Grand Prix circuit and Nürburgring Nordschleife have both been recreated at full scale by the community.

Multiplayer Car Gameplay: Servers and Minigames

Cars really shine in multiplayer environments where racing, roleplay, and competition bring vehicle builds to life.

Best Minecraft Servers with Drivable Cars

As of March 2026, these servers offer robust car gameplay:

Java Edition:

  • Grand Theft Minecart (play.gtm.network): GTA-inspired gameplay with 40+ drivable vehicles, drug manufacturing, heists, and police chases. Uses MrCrayfish’s Vehicle Mod with custom tweaks. Avg. 200-400 players.
  • Earth MC (earthmc.net): Geopolitical server on a 1:1000 scale Earth map. Custom vehicle system for continental travel. Requires no client-side mods. Avg. 100-300 players.
  • Blockdrop (blockdropnetwork.com): Racing minigames including Mario Kart mode with power-ups. Custom resource pack required. Avg. 50-150 players.
  • Hypixel Housing: Players can download vehicle datapacks and use command blocks in their personal Housing plots to create car showcases or mini-racetracks.

Bedrock Edition:

  • Lifeboat Network: Featured Servers tab on Bedrock. Includes “Car Racing” mode with simplified controls.
  • The Hive: Occasional limited-time car racing events, usually during seasonal updates.
  • NetherGames: “Speed Racers” minigame with checkpoint racing and vehicle customization.

Most serious car servers run on Java Edition due to mod support. Bedrock options tend to be simpler, using custom entities or texture swaps for vehicle gameplay.

Server etiquette tips:

  • Read the rules, many car roleplay servers ban reckless driving in spawn zones
  • Respect parking areas and don’t block roads
  • In racing servers, avoid intentional collision griefing
  • Some servers require specific resource packs: enable server textures in settings

Popular Car-Based Minigames and Challenges

Racing formats:

  • Sprint races: Point-to-point with no laps (common on adventure maps)
  • Circuit races: 3-5 laps on closed loops
  • Time trials: Solo runs for fastest lap: leaderboards via /scoreboard
  • Elimination races: Last place eliminated each lap until one winner remains
  • Relay races: Teams alternate drivers at pit stops

Car soccer/Rocket League:

Multiple servers replicate Rocket League using cars to hit a slime block “ball” into goals. Physics rely on mods or command blocks simulating ball momentum. Search “Minecraft Rocket League” on YouTube for server IPs.

Cops and Robbers:

Popular on GTA-style servers:

  • Robbers complete heists and escape police
  • Cops chase in faster vehicles
  • Territory control mechanics
  • Wanted levels affecting spawn rates

Car parkour:

Precision challenges requiring careful acceleration/braking:

  • Navigate narrow platforms
  • Jump gaps without falling
  • Avoid obstacles like moving pistons
  • Complete in fastest time

Demolition derby:

Last car standing wins:

  • Arena surrounded by barriers
  • Vehicles take damage from collisions
  • Last functional car wins round
  • Requires mods with damage systems

Build competitions:

Servers host timed build challenges:

  • Theme announced (“build a muscle car in 30 minutes”)
  • Players work in isolated plots
  • Community votes on winner
  • Prizes often include in-game currency or ranks

Custom map downloads:

Planet Minecraft and CurseForge host hundreds of downloadable car-focused maps:

  • “City of Newisle” (urban exploration with 50+ car models)
  • “Speed Racers” (15 unique circuits)
  • “Parking Master” (puzzle maps about parking cars correctly)

These maps often include pre-installed datapacks or require specific mods listed in the download description. Always scan downloads for malware and read installation instructions carefully.

Troubleshooting Common Car Building and Mod Issues

Even experienced builders hit roadblocks. Here’s how to solve the most frequent problems.

Fixing Mod Compatibility and Performance Problems

“Mod won’t load” errors:

  • Wrong Minecraft version: Verify mod version matches game version exactly (e.g., mod for 1.20.1 won’t work on 1.21). Downgrade or wait for updates.
  • Missing dependencies: MrCrayfish’s Vehicle Mod requires Obfuscate library. Check mod page for required libraries.
  • Mod loader mismatch: Forge mods don’t work on Fabric and vice-versa. Download correct version or use Sinytra Connector (Fabric-on-Forge compatibility layer).
  • Conflicting mods: Two mods editing the same game systems crash on load. Use a binary search method, disable half your mods, test, then narrow down the conflicting pair.

Performance issues (low FPS, lag):

  • Too many active vehicles: Limit simultaneous cars to 5-10 depending on system specs. Each adds entity rendering load.
  • Particle overload: Vehicle mods spawn exhaust, tire, and crash particles. Reduce particles in Video Settings or edit mod configs.
  • Render distance: Lower from 16 chunks to 8-10 when driving fast to reduce terrain generation lag.
  • Allocate more RAM: Edit launcher profile to allocate 4-6GB instead of default 2GB (if your system has 8GB+ total).
  • OptiFine conflicts: Some vehicle mods clash with OptiFine shaders. Disable shaders or switch to Sodium+Iris (Fabric) for better performance.

Vehicles not crafting:

  • Check if you’re using the correct workbench, many mods add custom crafting stations
  • Enable recipe book hints by pressing ‘U’ in JEI (Just Enough Items) or REI (Roughly Enough Items)
  • Some vehicles require progression, check if mod has achievement/unlock system

Controls not responding:

  • Verify key bindings in Options > Controls > scroll to mod section
  • Conflicts with other mods using same keys, rebind one
  • Controller support varies by mod, MrCrayfish’s supports controllers via Controllable mod

Bedrock add-on issues:

  • “Unable to import”: File may be corrupt. Re-download from original source, avoid sketchy mirror sites.
  • Add-on not appearing in-world: Make sure it’s applied in World Settings > Resource Packs AND Behavior Packs (vehicles need both).
  • Experimental gameplay required: Many add-ons need “Experimental Features” toggled in world settings. This disables achievements.
  • Crashes on mobile: Some add-ons are too resource-heavy for phones. Try on PC/console first.

Optimizing Builds for Different Platforms

Java Edition optimization:

  • Use Sodium (Fabric) for 2-3x better FPS than vanilla or OptiFine
  • Install Lithium and Starlight for better server performance with vehicles
  • Entity Culling mod prevents rendering vehicles behind walls
  • Use LOD mods (Distant Horizons) to maintain visual quality at lower render distance

Bedrock Edition optimization:

  • Lower “Render Distance” and “Simulation Distance” separately (new in 1.18+)
  • Disable “Beautiful Skies” and “Smooth Lighting” for mobile play
  • Use texture packs at 16x or 32x resolution max, higher res packs tank FPS on mobile
  • Clear cache regularly (storage settings > Minecraft > clear cache)

Console-specific tips:

  • PlayStation/Xbox: Limit world to 3-5 active add-ons simultaneously. More causes startup crashes.
  • Switch: Lower render distance to 6-8 chunks. Switch hardware struggles with complex vehicle entities.
  • Split-screen: Disable vehicle mods if playing split-screen, doubled render load usually crashes game.

Mobile optimization:

  • Play on Wi-Fi, not cellular, when on servers (reduces latency lag)
  • Close background apps before launching Minecraft
  • Enable “Lower Resolution” option in video settings (Android)
  • External controllers (MFi on iOS, Bluetooth on Android) improve driving controls significantly

Cross-platform multiplayer:

  • Bedrock allows Xbox, PlayStation, Switch, Mobile, and Windows 10/11 players on same server
  • All players need identical add-ons installed to see vehicles correctly
  • Host should enable “Require Accepted Resource Packs” to auto-install add-ons to joining players
  • Java and Bedrock cannot play together natively, requires third-party server software like Geyser

World size considerations:

Large car-focused builds consume significant storage:

  • City with roads and 50+ vehicles: 500MB-1GB world size
  • Racing circuit with 10 tracks: 200-400MB
  • Use structure blocks to save/load specific builds instead of keeping massive worlds
  • Regularly prune unused chunks with tools like MCASelector (Java) or reset portions in Bedrock world settings

Conclusion

Building cars in Minecraft pushes the limits of what a game about blocks can achieve. Whether you’re hand-placing concrete for a static showpiece, installing MrCrayfish’s mod for authentic driving physics, or programming command block vehicles that shouldn’t technically be possible, there’s a method that fits your platform and skill level.

The community continues innovating. In 2026, display entities have unlocked new animation possibilities, Bedrock’s marketplace keeps expanding, and modders refine vehicle physics closer to dedicated racing sims. Your first car might be a simple 4×8 sedan, but give it time. Eventually you’ll be drift-tuning a custom sports car or designing an entire metropolitan highway system.

The beauty is that every approach works. Vanilla builders create museum-worthy sculptures. Modded players race on custom circuits with friends. Command block engineers achieve the “impossible.” All three groups are building cars, just different ones.

So pick your platform, choose your method, and start building. Your Minecraft world needs better transportation than walking everywhere.
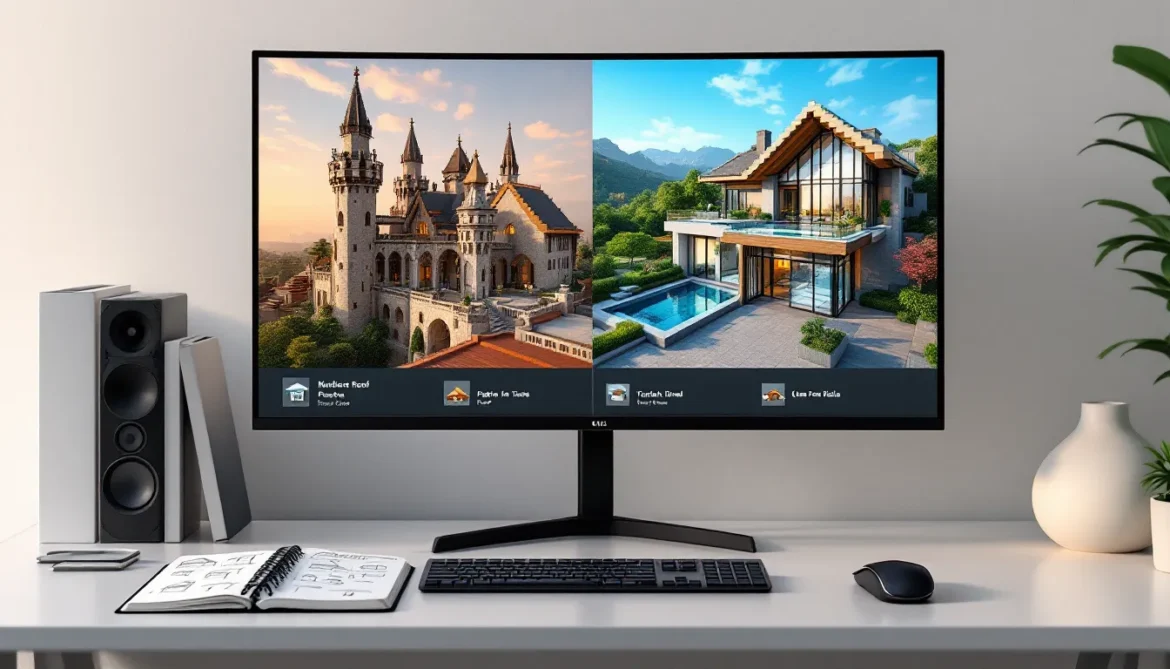

A great roof can make or break your Minecraft build. You’ve spent hours laying the foundation, perfecting the walls, and detailing every window, only to slap on a flat wood plank roof that screams “starter house.” Been there? We all have. But here’s the thing: roofs aren’t just functional caps on your structures. They define silhouettes, establish architectural style, and separate amateur builds from portfolio-worthy creations.

Whether you’re crafting a medieval fortress, a sleek modern villa, or a whimsical treehouse, the roof is where personality lives. In 2026, Minecraft builders have more blocks, more techniques, and more inspiration than ever before. This guide breaks down 25+ roof ideas across multiple styles, from timeless classics to experimental concepts, complete with material recommendations, building techniques, and pro tips to avoid the rookie mistakes that plague even experienced players. Let’s turn that bland box into something worth screenshotting.

Key Takeaways

  • Minecraft roof ideas define architectural style and visual impact—well-designed roofs transform functional boxes into distinctive, memorable builds that stand out from distance.
  • Master classic roof styles like gable, flat, and hip roofs, then experiment with advanced designs such as pagodas, domes, and asymmetrical roofs to match your build’s unique aesthetic.
  • Use material selection strategically: spruce and dark oak for medieval builds, concrete and quartz for modern designs, and copper or prismarine for fantasy and specialized themes.
  • Avoid common mistakes like poor scaling, inconsistent materials, ignoring interior space, and flat roof edges—these details separate amateur builds from portfolio-worthy creations.
  • Add depth and realism through layering, chimneys, overhangs, and living roofs with greenery, while always matching your roof design to your build’s core architectural vision.
  • Plan roof interiors alongside exteriors to maximize usable space, incorporate proper lighting to prevent mob spawning, and test designs on small sections before committing to full materials.

Why Roof Design Matters in Minecraft

Roofs do more heavy lifting than most builders realize. They’re the first thing visible from a distance, the element that defines your structure’s profile against the skyline. A well-designed roof communicates intent: is this a cozy cottage or an imposing cathedral? A futuristic lab or a rustic barn?

From a gameplay perspective, roofs prevent mob spawning inside your base (assuming proper lighting), provide shelter from phantoms during those long building sessions, and create usable interior space when done right. A roof that’s too steep wastes valuable room for upper floors. Too flat, and it lacks visual interest.

But beyond function, roofs establish architectural cohesion. They tie together wall materials, complement window placement, and create opportunities for detailing, chimneys, dormers, overhangs, and texture variation. The difference between a decent build and a stunning one often comes down to those final roofing decisions. Neglect this stage, and even the most detailed walls feel unfinished.

Essential Materials and Blocks for Stunning Roofs

Traditional Roofing Materials

The classics exist for a reason, they’re versatile, accessible, and instantly recognizable. Oak planks, spruce planks, and dark oak planks form the backbone of most early-game roofs, with spruce offering the richest, most roof-like color. Pair them with their corresponding stairs and slabs for proper slope and layering.

Terracotta variants, especially red, orange, and brown, deliver that iconic clay tile look for Mediterranean or Spanish-style builds. They’re blast-resistant too, a bonus for survival players tired of creeper damage. Brick blocks and brick stairs work beautifully for industrial or Victorian architecture, though gathering clay can be tedious without a mesa biome nearby.

Stone bricks and andesite provide weight and durability for castle or fortress roofs, while deepslate tiles (added in 1.17 and refined through subsequent updates) offer a darker, more dramatic alternative. Don’t sleep on stripped logs, their clean texture works surprisingly well for rustic or cabin-style roofing when laid horizontally.

Modern and Unique Block Choices

For contemporary builds, concrete in white, light gray, or black creates sharp, minimalist rooflines. Smooth stone slabs deliver an ultra-clean aesthetic, perfect for flat or low-slope modern designs. Quartz blocks and quartz stairs scream luxury but require nether grinding, worth it for high-end builds.

Copper blocks and their oxidized variants have become favorites since their 1.17 introduction, offering dynamic color shifts from orange to teal over time. Wax them at your preferred oxidation stage for consistent color. Prismarine variants work for underwater or ocean-themed structures, while purpur blocks bring an otherworldly vibe to End-inspired builds.

Experimental builders are pushing boundaries with glazed terracotta patterns, amethyst blocks for magical structures, and even sculk blocks for ominous, ancient ruins. The building techniques from modern creators continue to expand what’s possible with each update. Moss blocks and azalea leaves have unlocked living roof concepts, blending structures into natural environments.

Classic Roof Styles Every Builder Should Master

The Gable Roof

The bread-and-butter of Minecraft architecture. Gable roofs feature two sloping sides meeting at a central ridge, forming a triangular profile. They’re structurally intuitive, material-efficient, and work at any scale.

Build them by placing stairs facing inward from opposite walls, meeting at the center. Adjust pitch by varying how quickly you step up, one block in, one block up creates a steep 45-degree slope, while spreading the rise over more horizontal blocks produces gentler angles. Add slabs along the edges for proper eaves and visual weight.

Gable roofs suit medieval houses, suburban homes, barns, and churches. They maximize interior headroom and pair well with dormer windows or attic spaces. The symmetry makes them forgiving for beginners but versatile enough for advanced detailing.

The Flat Roof

Minimalism at its finest. Flat roofs use slabs or full blocks to create level surfaces, ideal for modern architecture, desert buildings, or structures where rooftop gardens and terraces matter more than traditional aesthetics.

Layer slabs on top of walls, add a one-block parapet around the perimeter for definition, and you’re done. The challenge lies in making flat roofs visually interesting, incorporate skylights, HVAC-style details using iron bars and stone buttons, or rooftop gardens with planter boxes.

Flat roofs work brilliantly for modular builds, multi-story complexes, and any design drawing from Brutalist or contemporary influences. They’re also the fastest to build, a consideration for large-scale survival projects.

The Hip Roof

Hip roofs slope on all four sides, converging at the top without gable ends. They’re more complex than gables but create elegant, finished profiles from every angle.

Start by placing stairs along all four walls, stepping inward and upward until they meet. The corners require careful stair orientation, place corner stairs or use slabs to fill transitions. Hip roofs demand more materials and planning but reward you with buildings that photograph well from any direction.

They’re perfect for standalone structures, gazebos, towers, or Asian-inspired architecture where multiple roof planes matter. The continuous slope provides excellent mob-proofing with no flat gable surfaces to worry about.

Medieval and Fantasy Roof Designs

Towering Spires and Conical Roofs

Nothing says “fantasy castle” like a proper spire. Conical roofs spiral upward from circular towers, creating dramatic vertical elements. Build them by gradually stepping stairs inward in a circular pattern, narrowing the diameter as you ascend.

Use stone brick stairs or deepslate stairs for imposing fortresses, spruce stairs for woodland keeps. Top spires with pointed dripstone blocks (since 1.17) for sharp finials, or construct custom spire tips using fences, walls, and end rods. Many players working on castle projects swear by odd-numbered diameter towers (7-block, 9-block) for easier centering.

Multiple spires at varying heights create dynamic skylines. Pair them with crenellated walls, flying buttresses, and dramatic overhangs for maximum medieval impact.

Thatched and Rustic Cottage Roofs

Thatched roofs bring cozy village vibes using unconventional blocks. Hay bales are the traditional choice, offering that straw texture. Layer them thick, 2-3 blocks deep, with stairs carved into the surface for a lumpy, organic appearance.

Alternatives include dried kelp blocks, yellow concrete powder, or even yellow wool for villages where fire spread isn’t a concern (disable fire spread in creative builds). Mix in oak or spruce stairs along ridges and edges to suggest structural support and prevent the monochrome blob effect.

Steep pitches work best for thatched roofs, they shed rain visually and create inviting interiors. Add visible rafters inside using fences and dark oak beams. These roofs pair beautifully with cobblestone walls, exposed timber framing, and wildflower gardens.

Castle Battlements and Crenellations

Technically roof alternatives, battlements and crenellations define defensive structures. Alternate solid blocks (stone bricks, cobblestone) with gaps atop walls, creating the classic up-down tooth pattern.

Make crenellations functional by ensuring gaps are one block wide for safe archer positions. Add slabs inside the gaps as floor surfaces so defenders can stand at proper height. Walls (the decorative fence-like blocks) placed atop solid battlements create narrower, more detailed crenellations suitable for larger builds.

Combine battlements with steeply pitched gable or hip roofs on interior structures, castles rarely have entirely flat defensive roofs. Layer defenses: outer walls with crenellations, inner keeps with proper roofs, towers with conical tops.

Modern and Contemporary Roof Ideas

Sleek Flat Roofs with Garden Terraces

Modern architecture embraces functional rooftops. Build a flat roof using smooth stone slabs or white concrete, then transform it into usable space. Add planter boxes using spruce trapdoors as borders filled with dirt and flowers. Install modern furniture using quartz stairs, concrete slabs, and armor stands with invisible textures.

Incorporate glass panes as transparent railings around the perimeter for safety without blocking views. Place lanterns or sea lanterns embedded in the roof surface for ambient evening lighting. Water features using contained pools with lily pads and blue ice underneath create visual interest.

These roofs work brilliantly for penthouses, beachside villas, or any build where outdoor living space matters. They’re also prime spots for solar panel details using daylight sensors and black concrete.

Asymmetrical and Angular Designs

Break the symmetry rule. Asymmetrical roofs use multiple planes at different heights and angles, creating dynamic, sculptural profiles. One side might feature a steep pitch while the other extends in a shallow slope. Sections might jut out over entryways or step down over wings.

Build these by planning your roof in distinct zones, each area gets its own slope and height. Connect zones using deliberate transitions: internal valleys where planes meet, or clean breaks where one roof clearly sits atop another. According to recent architectural showcase articles, asymmetrical designs have surged in popularity since 2024.

Angular roofs take this further with sharp, non-traditional slopes using stair and slab combinations that create unusual angles. They’re challenging to execute but photograph spectacularly. Use them for art museums, contemporary galleries, or avant-garde homes.

Glass and Transparent Roof Concepts

Light-flooded interiors define luxury builds. Glass roofs use glass blocks, glass panes, or tinted glass (since 1.17) to create transparent or translucent ceilings. Frame them with dark oak trapdoors, iron bars, or end rods for structural definition.

Stained glass transforms practical skylights into art pieces, create geometric patterns, gradients, or even pixel art visible from inside. Layer different glass colors for depth and light filtering. Tinted glass offers privacy while maintaining the bright, open feel.

Greenhouses, conservatories, atriums, and modern penthouses benefit most from glass roofs. Combine with living walls (vines, moss) for biophilic design, or go full sci-fi with purpur and end rod framing. Just remember: mobs can spawn under glass roofs in unlit areas, so light those interiors properly.

Asian-Inspired Roof Architectures

Pagoda-Style Curved Roofs

Pagoda roofs curve upward at the edges, creating that iconic swooping silhouette. They’re complex but stunning, requiring careful stair placement. Start with a standard hip roof, then extend the corners outward and upward using stairs placed at angles. The outer edges curve up while the center remains lower, creating concave curves.

Use dark oak stairs or spruce stairs for traditional coloring, paired with nether brick or red terracotta accents. Layer multiple roof tiers, each slightly smaller than the one below, separated by horizontal bands of quartz slabs or smooth stone.

Place fences or end rods at roof corners as decorative finials. These roofs demand height and space, pagodas work best as standalone structures or focal points. The detailed building guides often feature pagoda construction as advanced build challenges.

Japanese Temple Roof Designs

Japanese temple roofs balance gentle slopes with pronounced overhangs. Build a low-pitch hip roof using dark oak stairs, extending the eaves outward by 2-3 blocks using slabs supported by fences or dark oak trapdoors as brackets.

Layer the roof structure: a stone or concrete base representing temple walls, a visible support layer using stripped spruce logs, then the roof itself. The gap between walls and roof edge creates the signature deep overhang that protects temple exteriors.

Add upturned corners using stair arrangements similar to pagoda techniques, though more subtle. Use red concrete or red terracotta for accent bands, and place lanterns under eaves for ambient lighting. Temple roofs pair beautifully with bamboo gardens, stone lanterns (crafted from stone brick walls and slabs), and water features.

Creative and Unique Roof Concepts

Domed and Spherical Roofs

Domed roofs challenge builders with circular geometry. Start with a circular base using online circle generators as reference, then step inward and upward, gradually reducing diameter. Use stairs facing outward for the outer surface, slabs for smoothing transitions.

Small domes (7-11 block diameter) work for turrets and gazebos. Large domes (21+ blocks) suit capitol buildings, observatories, or religious structures. Quartz blocks create classical Roman aesthetics, prismarine works for underwater domes, terracotta variants suit desert temples.

Geodesic domes using triangular patterns push complexity further, alternate concrete and glass panels in geometric patterns for futuristic installations. These roofs maximize interior volume while creating memorable exteriors.

Living Roofs with Greenery and Gardens

Living roofs blur the line between structure and landscape. Cover roofs with grass blocks, moss blocks, podzol, or rooted dirt, then plant flowers, saplings, and shrubs directly into them. Use azalea bushes and flowering azalea for lush, blooming coverage.

Builders creating creative structures often incorporate living roofs for environmental integration. Build up soil depth using hidden dirt layers beneath visible moss or grass, preventing the thin-roof look. Edge roofs with spruce trapdoors or dark oak fences to contain soil and define boundaries.

Add pathways using stone slabs or gravel, integrate beehives for functionality, or plant small trees for vertical interest. Living roofs work for cottages, earth-sheltered homes, hobbit holes, and eco-focused builds. They naturally blend into forest or plains biomes.

Multi-Level and Layered Roof Systems

Complex buildings deserve complex roofs. Multi-level roofs stack multiple roof planes at different heights, creating depth and visual hierarchy. A main hip roof might cover the central structure, with lower gable roofs over wings, and flat roofs over porches or extensions.

Plan these by identifying distinct building sections, then assigning each its own roof that connects logically to neighbors. Where roofs meet, create deliberate valleys (use inverted stairs) or overlaps (one roof clearly extends over another). Add flashing using trapdoors or slabs in contrasting materials where transitions occur.

Layering also means stacking roof materials, a stone brick base layer visible from below, capped with terracotta stairs for the exterior surface. This adds depth and realism. Use multiple roof levels on mansions, compound structures, or any build where saying “this is one big box” would be a disservice.

Advanced Roof Detailing Techniques

Adding Chimneys and Smokestacks

Chimneys add life and realism. Build them using brick blocks, stone bricks, or cobblestone, extending 3-4 blocks above the roof peak. Top them with slabs as chimney caps, leaving a one-block gap for smoke aesthetics.

Place campfires inside at ground level (use trapdoors to prevent fall damage) so smoke particles rise through the structure and out the chimney. For industrial builds, create smokestacks using dark oak logs or stone brick walls, placing cobwebs at the top for visual smoke effects.

Position chimneys logically, they should sit above fireplaces, furnace rooms, or kitchens. On sloped roofs, integrate them into the slope rather than awkwardly perching them on peaks. Use matching materials with slight variations (brick chimney on a terracotta roof, stone chimney on a wood roof) for visual interest.

Incorporating Overhangs and Eaves

Overhangs prevent roofs from looking like they’re painted onto walls. Extend roof blocks outward by 1-2 blocks past the wall line, using stairs or slabs. Support deep overhangs (3+ blocks) with visible brackets: fences, trapdoors, or wooden buttons arranged as decorative corbels.

Underside detailing matters, the space beneath overhangs is visible from ground level. Place upside-down stairs to create coffered ceilings, or use slabs in contrasting wood tones. Add lanterns or chains with hanging lights for functional and aesthetic value.

Eaves (the horizontal edges where roof meets wall) benefit from layering. Instead of a single stair edge, use a stair with a slab beneath it, then another slab stepped out. This triple-layer approach creates shadow depth and architectural weight.

Using Stairs, Slabs, and Trapdoors for Depth

Flat surfaces look flat. Texture breaks monotony. On large roofs, alternate full stair blocks with slab lines running horizontally, this suggests roof tiles or shingles. Place trapdoors in contrasting colors along roof ridges as decorative trim or to simulate metal flashing.

Create dormer windows by cutting into the roof slope: build a small gable protrusion with its own mini-roof, insert a window, and frame it with roof materials. Use stairs sideways as decorative elements, they create interesting geometry when placed non-standardly.

For weathered looks, scatter individual slabs or trapdoors in slightly different materials across uniform roofs, suggesting repairs or age. Place moss carpets in patches on old structures, or vines growing up from edges. Builders working on detailed builds often use these micro-details to distinguish professional work.

Common Roof Building Mistakes to Avoid

Scaling errors top the list. Roofs that are too small make buildings look squashed: too large, and they dwarf the structure. General rule: roof height should be roughly one-third to one-half the wall height, depending on style. Test proportions before committing to materials.

Inconsistent materials break visual cohesion. If you’re using spruce stairs for the main roof, don’t randomly switch to oak on the dormers unless it’s a deliberate design choice. Commit to your palette. Conversely, too much uniformity creates boring roofs, mix stairs with slabs, add trim in contrasting tones, incorporate texture.

Ignoring interior space happens constantly. Builders create gorgeous steep roofs, then realize the second floor has no headroom. Plan interiors alongside exteriors, know where your ceilings are. Use slabs for half-height floors in attic spaces to maximize usability.

Flat roof edges scream amateur. Even modern flat roofs need parapets, railings, or subtle edging to define boundaries. Letting concrete just… end at the wall line looks unfinished.

Symmetry addiction limits creativity. Not every roof needs perfect bilateral symmetry. Real buildings grow organically, with additions and modifications. Your Minecraft builds can too. Break symmetry intentionally, especially on larger or more complex structures.

Neglecting lighting invites mob spawns. Roof interiors, attics, crawl spaces under stairs, need light sources even if they’re not living areas. Place hidden torches, lanterns, or glowstone to keep spawn-proofed without compromising aesthetics. Sea lanterns hidden under carpets work for modern builds: shroomlights behind trapdoors suit fantasy styles.

Tips for Matching Roofs to Your Build Style

Context drives choices. A spruce plank roof feels right on a woodland cabin but jarring on a concrete skyscraper. Start by identifying your build’s core aesthetic, then select roof materials that reinforce it.

Medieval builds lean on dark oak, stone bricks, terracotta, and steep pitches. Add asymmetry, visible support beams, and chimneys. Modern structures favor concrete, quartz, smooth stone, and clean lines, flat roofs or low slopes with precise detailing.

Fantasy architecture gives you freedom: experiment with unusual colors, mixed materials, exaggerated proportions. Prismarine for underwater kingdoms, purpur for End cities, copper for steampunk, blackstone for nether fortresses. When planning survival fortress projects, roof choice impacts both aesthetics and mob-proofing effectiveness.

Color theory matters. Warm roof colors (reds, oranges, browns) pair with warm wall materials (wood, terracotta, sandstone). Cool roofs (grays, blues, blacks) complement cool materials (stone, concrete, prismarine). High contrast, dark roofs on light buildings, creates drama. Low contrast creates cohesion.

Test before committing. Build a small section, one corner or side, with your planned materials and design. View it from multiple angles, different times of day. Does it read clearly from distance? Does it complement the walls? Is the pitch right? Adjust before building the entire roof.

Reference real architecture but don’t slavishly copy it. Minecraft’s blocky medium interprets real styles rather than replicating them. A Victorian roof might inspire your design, but you’ll adapt it to blocks. The same applies whether you’re building temporary shelters or permanent bases.

Conclusion

Roofs transform builds from functional to memorable. They’re the signature move, the final flourish that says you didn’t just throw blocks together, you crafted something intentional. Whether you’re laying terracotta tiles on a Mediterranean villa, curving pagoda eaves skyward, or cultivating a living roof on a hobbit hole, the roof is where architectural personality crystallizes.

The techniques and styles covered here give you a toolkit, not a rulebook. Mix medieval spires with modern materials. Combine Asian curves with Western symmetry. Test unconventional blocks, push pitch limits, layer materials for depth. Minecraft’s building meta evolves with every update, new blocks, new possibilities, new combinations waiting to be discovered.

Your next build deserves better than a basic box with a flat cap. Plan that roof with the same care you’d give the walls. Proportion it properly, detail it thoroughly, and match it to your vision. The skyline of your world is waiting.

Playdead’s Inside remains one of the most atmospheric puzzle-platformers ever made, blending dystopian storytelling with environmental puzzles that demand both observation and timing. Whether you’re stuck on a specific section or hunting down the 14 hidden orbs for the alternate ending, this inside game walkthrough covers every puzzle solution, secret location, and strategic approach you need.

Unlike linear action games, Inside punishes brute force and rewards patience. One wrong step in the water sections means instant death from the siren creature. Miss a single orb, and you’ll need to replay entire segments to unlock the secret bunker. This guide breaks down the entire journey, from the opening forest chase to the unsettling final sequence, with exact solutions, orb coordinates, and tips for a death-free playthrough.

Key Takeaways

  • Inside rewards patience and observation over brute force, with precise timing and pattern-learning required to avoid death in puzzle sections like searchlights, water sequences, and shockwave zones
  • Finding all 14 hidden orbs throughout the inside walkthrough unlocks a secret bunker and alternate ending that reveals the boy was being controlled all along, reframing the entire narrative
  • The game uses minimalist controls and environmental storytelling to teach mechanics naturally—grab buttons work contextually on boxes, levers, and ropes without separate input prompts
  • Mind control helmets and husk AI puzzles require simultaneous multi-point solutions, such as positioning workers on pressure plates while navigating to safety during dangerous sections
  • The main ending on the beach is deliberately ambiguous and reward-less, while the secret ending provides narrative closure by revealing the player’s role in the game’s story
  • Critical audio cues like shockwave humming and siren screeching telegraph danger and provide split-second warnings, making headphones essential for mastering difficult sections

Understanding Inside’s Core Mechanics and Controls

Inside operates on minimalist controls that hide surprising depth. The boy can run, jump, grab objects, and interact with environmental elements, that’s it. But the game’s genius lies in how these simple inputs combine with physics-based puzzles.

Movement is context-sensitive. Holding the grab button near a box lets the boy push or pull it. Near a lever, he’ll yank it. Near a rope, he’ll hang and swing. There’s no separate button for each action, which keeps the focus on observation rather than memorization.

Momentum matters more than in most platformers. Jumps have realistic weight: you can’t change direction mid-air. Running starts add distance to leaps. Water slows movement dramatically, and swimming requires timed button presses to surface for air. Death is instant and frequent, but checkpoints are generous, usually just seconds before each fatal mistake.

Environmental storytelling replaces tutorials. The game never pauses to explain mechanics. If you see a box, you’re meant to move it. If husks stand near a platform, you’ll likely need to mind-control them. This design philosophy rewards players who experiment and observe patterns rather than waiting for prompts.

Early Game Walkthrough: The Forest and First Encounters

The opening section establishes Inside‘s tone: you’re prey, and the world wants you dead. The boy emerges in a dark forest with no explanation, and within seconds, armed men and dogs begin hunting him.

Escaping the Searchlights

The first real puzzle involves searchlights that trigger instant death if they spot you. When you reach the hillside with the truck-mounted spotlight, timing is everything. Wait for the beam to sweep past, then sprint to the next piece of cover. Don’t stop mid-dash, the light moves faster than it appears.

The second spotlight section adds a hanging rope. Grab it to swing across the gap, but watch the beam pattern. It sweeps low, then high. Jump onto the rope during the high sweep, swing immediately, and release before it completes the arc. Hesitation gets you caught.

The Cornfield Chase Sequence

After clearing the farmhouse window, you’ll hit the cornfield chase, a scripted sequence where timing matters more than speed. Men and dogs pursue you through the corn rows. Run continuously, but don’t panic. The path is linear, and the game won’t kill you if you maintain forward momentum.

The trick comes at the log trap near the end. A fallen tree blocks the path, and you need to slide under it while dogs close in. Hold down while sprinting to slide, don’t jump. The exit appears immediately after in the form of a drainage pipe. Crawl through to safety and catch your breath before the next section.

Mid-Game Progression: The Farm and Water Sections

The farm areas introduce animal-based puzzles and the first extended water sequences. The difficulty curve steepens here, with timing windows that punish hesitation.

Navigating the Chick Hatchery Puzzle

The chick hatchery is one of Inside‘s most unsettling moments. You’ll enter a factory where baby chicks are processed on conveyor belts. The solution requires you to blend in with the chicks to cross motion-sensor beams.

First, pull the lever on the left to stop the conveyor. Jump onto the belt and crouch-walk behind the group of chicks moving toward the sensor. The detector only triggers on objects taller than the chicks, so staying low is critical. When the chicks pass the sensor, you pass with them.

The second part adds a box puzzle. Drag the wooden crate from the right side to the left platform, then use it to reach the upper ledge. The exit door requires you to pull a chain while standing on a pressure plate, position the crate on the plate, pull the chain, and slip through before the door closes.

Underwater Survival and the Siren Creature

The game’s first major water section introduces the siren, a long-haired creature that drowns you on contact. When you drop into the flooded building, she’ll patrol the area in a predictable pattern.

Hug the bottom of the pool and move only when she swims away from you. The key is breaking line of sight. When she turns left toward the far wall, swim right to the underwater doorway. If she spots you, there’s no escape, restart from the checkpoint and study her movement pattern more carefully.

The locker puzzle comes next. You’ll find metal lockers you can enter to hide from the siren. Use them as safe zones while planning your next move. The sequence requires three locker hops: enter the first locker on the left, wait for the siren to pass, swim to the middle locker, wait again, then make a final dash to the wooden platform on the right. Pull yourself up quickly, she can grab you even as you’re climbing out.

The City and Mind Control Puzzles

The urban sections mark a tonal shift. The environment becomes industrial, and the game introduces mind control helmets, devices that let you command husks (zombie-like workers) to solve puzzles.

Using Husks to Solve Environmental Puzzles

Your first helmet sits on a pedestal in a warehouse. Put it on, and nearby husks will follow your movement. They’ll walk where you walk, jump when you jump. The catch? You can only control them within the helmet’s range, indicated by a faint glow.

The first mind control puzzle requires three husks to activate a weight platform. Guide them to the marked floor panel, then position yourself on the adjacent panel. The combined weight opens the gate. To release control, step outside the helmet’s range or remove it at a pedestal.

Later puzzles stack mechanics. One sequence demands you guide husks through a deadly area while staying safe yourself. Position them on pressure plates to hold doors open, then sprint through before the doors close. If a husk dies, restart from checkpoint, you need all of them alive for the final platform.

The deeper you progress in city environments, the more complex these scenarios become. Guides covering puzzle-heavy adventure games often highlight Inside‘s mind control sections as some of the most innovative uses of follower AI in the genre.

The Shockwave Blasts and Safe Room

Midway through the city, the game introduces shockwave devices, machines that emit periodic blasts destroying anything in the open. You’ll hear a rising hum before each blast, giving you roughly three seconds to find cover.

The warehouse safe room puzzle combines this mechanic with husk control. You need to guide mind-controlled workers through a shockwave zone to a distant platform. The solution:

  1. Put on the helmet and move husks to the first safe room (a windowed alcove on the left).
  2. Wait for the shockwave to pass.
  3. Sprint them to the second safe room before the next blast.
  4. Position them on the far platform’s pressure plate.
  5. Remove the helmet, navigate the safe rooms yourself, and rejoin the husks.

Timing is unforgiving. If you’re caught between safe rooms when the hum starts, you’re dead. Listen for audio cues and never commit to a sprint unless you’re certain you’ll make the next shelter.

Late Game Walkthrough: The Facility and Laboratory

The final third takes place in a scientific facility where the puzzles blend physics, water navigation, and precise timing. Expect to die repeatedly while learning each section’s rhythm.

The Water Tank and Gravity Puzzles

The glass water tank is one of Inside‘s most memorable set pieces. You’ll enter a massive cylindrical tank filled with water, with platforms at various heights. The goal is to manipulate water levels using switches while avoiding the siren, who reappears here.

First, drain the tank using the floor lever. This exposes a crawlspace on the lower left. Swim through to find a second lever that partially refills the tank. The water level rises just enough to reach the mid-level platform.

The siren returns when you pull the third lever. She’ll patrol the tank aggressively. The trick is using the underwater pipes as hiding spots. When she approaches, swim into a pipe opening and wait until she loses interest. This section is trial-and-error, memorize her patrol route and move during her turns.

The gravity puzzle near the lab entrance flips the entire room. You’ll enter a chamber where pulling a lever inverts gravity, sending loose objects flying upward. Position a crate under the ceiling vent before pulling the lever. When gravity inverts, the crate “falls” to the ceiling, giving you a platform to reach the vent.

Breaking Into the Central Chamber

The central chamber breach is the game’s climax puzzle. You’ll face a locked door requiring three simultaneous inputs: a lever, a chain, and a pressure plate. You don’t have three bodies, so you need to improvise.

Backtrack to the previous room and find the mobile cart. Push it to the central chamber and position it on the pressure plate. Next, grab the chain and pull it down as far as possible, then wedge a nearby metal beam under the chain to hold it in place.

Now pull the lever. The door opens, but only for a few seconds. Sprint through immediately, there’s no margin for hesitation. If you’re too slow, you’ll need to reset all three mechanisms.

Many players get stuck here because they try to solve it in sequence rather than simultaneously. Detailed walkthroughs for atmospheric platformers emphasize this puzzle as a difficulty spike, so don’t feel bad if it takes multiple attempts.

The Final Sequence and Main Ending Explained

After breaching the chamber, the game shifts from puzzle-solving to pure spectacle. You’ll discover the Huddle, a massive, fleshy blob made of fused human bodies. When you approach it, the boy is absorbed into the mass, and you gain control of the Huddle itself.

The Huddle moves by rolling and smashing through obstacles. There’s no precise platforming here, just momentum and destruction. Crash through glass walls, break down doors, and ignore the scientists fleeing in panic. The controls are intentionally clumsy: the Huddle is a force of nature, not a precise tool.

Eventually, you’ll smash through the facility’s outer wall and tumble down a hillside, finally rolling to a stop on a sunlit beach. The Huddle lies motionless. The screen fades to black. Credits roll.

This is the main ending, and it’s deliberately ambiguous. Is this freedom or death? Was the boy a puppet all along, or did he achieve something by merging with the Huddle? Playdead offers no answers, which is exactly the point. The ending rewards interpretation over exposition.

But there’s another ending, one that requires finding all 14 hidden orbs scattered throughout the game.

Finding All 14 Secret Orbs for the Alternate Ending

The secret orbs are glowing spheres hidden in background or obscured areas. Breaking all 14 unlocks a hidden door early in the game, leading to the alternate ending. None are required for the main story, so most players miss them entirely on a first playthrough.

Orb Locations: Forest and Farm Areas

Orb 1: In the second forest area, after escaping the first spotlight, look for a background path hidden behind trees on the left. Walk into the screen to find the orb.

Orb 2: In the barn with the hanging pig carcasses, climb to the upper rafters. The orb is in the far right corner, obscured by shadows.

Orb 3: During the cornfield chase, there’s a brief moment where you can veer right into the corn instead of following the main path. The orb is buried in the stalks.

Orb 4: In the chick hatchery, before solving the conveyor puzzle, drop into the lower pit on the right. The orb is behind the chick chute.

Orb 5: After the first water section with the siren, exit the pool and check the background. There’s a doorway partially hidden by a support beam. The orb is inside.

Orb Locations: City and Facility Sections

Orb 6: In the first mind control area, guide husks to the left side of the room instead of the marked platform. They’ll pull a hidden chain, revealing the orb.

Orb 7: During the shockwave section, enter the third safe room and check the ceiling vent. Jump repeatedly to dislodge the orb.

Orb 8: In the underwater facility, there’s a section with three vertical pipes. Swim down the middle pipe instead of up. The orb is at the bottom, past a hidden passage.

Orb 9: In the water tank with the siren, drain the water completely and check the floor grate. The orb is visible through the grate but requires a specific swimming angle to break.

Orb 10: Near the gravity inversion puzzle, there’s a vent on the floor. Enter it and navigate the crawlspace to find the orb in a dead-end.

Orb 11: In the laboratory hallway with the rolling carts, push one cart all the way to the left wall. It reveals a hidden alcove with the orb.

Orb 12: Before the central chamber, backtrack to the observation room. There’s a breakable window on the upper left. Smash it and grab the orb.

Orb 13: During the Huddle sequence, instead of smashing forward immediately, roll left. The orb is in a side room that’s easy to miss during the chaos.

Orb 14: On the hillside descent near the end, there’s a hidden path on the right. Roll the Huddle into it to find the final orb.

Resources like comprehensive collectible guides provide visual maps for orb hunting, which can save hours of backtracking if you’re stuck on a specific location.

Unlocking the Secret Bunker and True Ending

Once all 14 orbs are destroyed, restart the game from the beginning. In the first cornfield area, you’ll notice a previously locked hatch is now open. Drop inside.

The bunker contains a single room with glowing cables connected to a central plug. Walk up to the plug and pull it. The screen goes black. When it returns, the boy collapses, lifeless. The camera pulls back, revealing he was being controlled all along, possibly by the player.

This alternate ending reframes the entire game. The boy wasn’t a hero or rebel. He was a puppet, and by pulling the plug, you’ve ended the loop. It’s bleaker than the main ending but offers a form of closure the beach scene lacks.

Tips and Strategies for a Perfect Playthrough

Attempting a no-death or speed run? These strategies will smooth out the roughest sections:

Learn audio cues. The game telegraphs danger through sound. The shockwave hum, the siren’s screech, the dogs barking, each gives you a split-second warning. Play with decent headphones to catch these cues.

Experiment with physics. If a puzzle seems unsolvable, try unconventional approaches. Push objects off ledges to see if they break. Pull chains at different angles. The game rewards creative problem-solving.

Use chapter select for orbs. After completing the game once, chapter select unlocks. This lets you jump directly to orb locations without replaying the entire game. Grab missed orbs, then reload your final save.

Watch enemy patterns before moving. Every threat, searchlights, dogs, the siren, follows a fixed pattern. Observe two full cycles before committing to movement. Rushing gets you killed.

Don’t skip checkpoints. If you barely survive a section, pause and breathe. The game checkpoints frequently, so there’s no penalty for taking a moment to reset your focus.

Backtrack for secrets. Many orbs are in areas you can revisit before moving to the next zone. If an area feels too easy or too short, check for hidden paths.

Replay for alternate ending context. The secret ending hits harder after experiencing the main ending. Do a blind first playthrough, then hunt orbs on the second run. The narrative payoff is worth the effort.

Conclusion

Inside earns its reputation through environmental storytelling and puzzles that respect player intelligence. Whether you’re chasing the main ending or hunting down every secret orb for the alternate conclusion, the game delivers a singular experience that lingers long after the credits.

The puzzles don’t hold your hand, the atmosphere never breaks tension, and the dual endings offer genuinely different perspectives on the same journey. Few games achieve that balance, and fewer still do it without a single line of dialogue.

If you got stuck on a specific section or missed an orb, this inside walkthrough should get you back on track. The answers are here, but the experience, that’s still yours to live through.

McDonald’s Happy Meal toys have been a cultural phenomenon for decades, but when they partnered with Minecraft, one of the best-selling games of all time, collectors and fans went into overdrive. These miniature blocky figures aren’t just nostalgia fuel: they’re tangible pieces of gaming history that bridge the gap between fast food memorabilia and one of the most influential games ever created.

Whether someone’s a seasoned collector hunting for that elusive regional exclusive or a parent who grabbed a Happy Meal and now wonders what they’ve got, understanding the full landscape of Minecraft McDonald’s toys matters. Values fluctuate, rarity varies by region, and knowing which series dropped when can mean the difference between a $2 trinket and a $50 collectible.

This guide breaks down every Minecraft McDonald’s toy release, from the initial 2019 series through the latest 2023 collection, plus regional exclusives that never made it stateside. Expect exact release dates, character breakdowns, market values, and practical advice for building or completing a collection in 2026.

Key Takeaways

  • McDonald’s released Minecraft McDonald’s toys across three main series (2019, 2021, 2023), with the 2019 initial release remaining the most recognizable and widely collected among fans and collectors.
  • Rare variants like the Gold Axolotl (2023), Japan Ender Dragon (2020), and regional exclusives command premium prices of $25–$120+, while common toys typically sell for $2–$12 loose on the secondary market.
  • Building a complete Minecraft McDonald’s toy collection in 2026 requires strategic secondary market shopping through eBay, Mercari, and Facebook Marketplace, with buyers saving money by purchasing lots rather than individual pieces.
  • Regional exclusives from Japan, UK, Australia, and Brazil created unique collectibles that never reached US markets, making international trading and import communities essential for completing comprehensive collections.
  • Proper storage in climate-controlled environments away from sunlight, combined with creative biome-themed displays and LEGO integration, helps collectors preserve value and showcase their Minecraft McDonald’s toys effectively.

The History of Minecraft McDonald’s Happy Meal Toys

When Did Minecraft First Appear in Happy Meals?

Minecraft officially landed in McDonald’s Happy Meals in November 2019 across the United States and select international markets. The timing wasn’t random, Minecraft’s 10th anniversary had just passed in May 2019, and the game was riding a massive resurgence thanks to YouTube creators and the nostalgia wave hitting millennials who’d grown up mining and crafting.

The initial 2019 series featured 10 toys representing iconic Minecraft characters and mobs: Creeper, Steve, Alex, Enderman, Zombie, Skeleton, Spider, Mooshroom, Pig, and a TNT block. Each toy included interactive elements, some had spring-loaded actions, others featured spinning parts or accessories. McDonald’s marketed them as “buildable” figures, though they came pre-assembled with minimal actual building required.

Subsequent releases followed in 2021 and 2023, each expanding the roster with different mobs and characters. The 2021 series leaned into biome themes, while 2023 introduced Nether-focused designs coinciding with the game’s ongoing content updates.

Why McDonald’s and Minecraft Make the Perfect Partnership

On paper, pairing a pixelated sandbox game with fast food seems odd. In practice, it’s marketing genius.

Minecraft’s demographic, kids aged 6-14 as the core, with substantial crossover into teens and adults, overlaps perfectly with McDonald’s Happy Meal target. Parents who played Minecraft in middle school now buy Happy Meals for their own kids, creating a two-generation appeal that few franchises can match.

The game’s blocky, simplified aesthetic translates exceptionally well to small-scale toys. Unlike detailed action figures that require precision molding, Minecraft’s cube-based design keeps production costs low while maintaining brand recognition. A 2-inch Creeper is instantly identifiable, even in cheap plastic.

McDonald’s also benefits from Minecraft’s evergreen status. Unlike movie tie-ins that fade after theatrical runs, Minecraft remains culturally relevant year after year. The game averages over 140 million monthly active players as of 2026, ensuring that any Minecraft promotion reaches an engaged, active audience rather than banking on nostalgia alone.

Complete List of Minecraft McDonald’s Toy Collections

2019 Minecraft Happy Meal Toy Series

The inaugural series set the standard for what these toys would become. Released in November 2019, this 10-toy lineup remains the most recognizable and widely collected.

Complete 2019 roster:

  1. Steve – The default player character with a pickaxe accessory and rotating arm
  2. Alex – Female player character variant with a sword, articulated at the waist
  3. Creeper – Spring-loaded head that “explodes” when pressed
  4. Enderman – Tall figure with removable grass block
  5. Zombie – Shambling mob with movable arms
  6. Skeleton – Bow-wielding figure with pull-back shooting action (simplified, non-projectile)
  7. Spider – Eight-legged mob with spinning body mechanism
  8. Mooshroom – Red mushroom cow with detachable mushroom pieces
  9. Pig – Saddled variant with rolling wheels
  10. TNT Block – Push-down explosive with spring-loaded pop action

Each toy came with a small cardboard base featuring Minecraft terrain graphics. The packaging featured QR codes linking to Minecraft.net content, though most of these promotional pages are now defunct.

2021 Minecraft Happy Meal Toy Series

The second wave dropped in June 2021, coinciding with the Caves & Cliffs update hype. This 12-toy series introduced biome theming and expanded beyond the core overworld mobs.

Complete 2021 roster:

  1. Steve (Mining Variant) – Different pose from 2019, holding diamond pickaxe
  2. Alex (Explorer Variant) – Equipped with torch and map accessories
  3. Creeper (Charged) – Blue-tinted variant with light-up feature (battery-powered)
  4. Drowned – Underwater zombie with trident
  5. Strider – Nether mob with warped fungus on stick
  6. Bee – Flying mob with bobbing antenna
  7. Ocelot – Jungle cat with fish accessory
  8. Panda – Sitting pose with bamboo
  9. Dolphin – Water-squirting action (squeeze-powered)
  10. Llama – Wearing decorative carpet, spitting action
  11. Parrot – Perched on shoulder stand
  12. Iron Golem – Larger figure with swinging arms

The 2021 series marked a quality upgrade. Materials felt sturdier, paint applications were cleaner, and the interactive features were more sophisticated. The charged Creeper with working LED remains a standout piece.

2023 Minecraft Happy Meal Toy Series

The most recent series launched in March 2023, timed with the 1.20 Trails & Tales update. This 10-toy collection leaned heavily into Nether content and newer mobs introduced in recent updates.

Complete 2023 roster:

  1. Steve (Netherite Armor) – Decked out in late-game gear
  2. Alex (Elytra Wings) – Flight-themed with detachable wings
  3. Creeper (Jungle Variant) – Green with vine texture, exploding action
  4. Piglin – Gold-obsessed Nether mob with gold ingot
  5. Hoglin – Hostile Nether beast with charging action
  6. Warden – Deep Dark mob with opening mouth feature
  7. Allay – Flying helper mob with note block accessory
  8. Frog – Swamp mob with extending tongue
  9. Goat – Mountain mob with ramming action
  10. Axolotl – Underground water mob in multiple color variants (pink, blue, gold, randomly distributed)

The Axolotl variants created immediate collector frenzy. Only one color came per toy, making complete color sets difficult to obtain without trading or buying multiples. Gold Axolotls were reportedly less common, though McDonald’s never confirmed official rarity ratios.

Regional Exclusive Minecraft McDonald’s Toys

Several markets received exclusive toys or variant designs not available in the US.

Notable regional exclusives:

  • Japan (2020): A special 8-toy series featuring chibi-style designs with exaggerated proportions. The Ender Dragon mini-figure from this set never appeared elsewhere.
  • UK (2021): Concurrent with the US 2021 series but included a Phantom toy not distributed in North America.
  • Australia (2022): A smaller 6-toy “Minecraft Adventures” set focusing on player characters in different biome outfits.
  • Brazil (2023): Featured alternative color variants of the Creeper, including a rare white “snow biome” Creeper that collectors actively seek.

These regional exclusives typically surface on secondary markets at premium prices, especially if they feature mobs or characters unavailable in standard releases.

Most Valuable and Rare Minecraft McDonald’s Toys

The Rarest Toys and What Makes Them Special

Rarity in McDonald’s toys comes from several factors: limited distribution, regional exclusivity, production errors, and cultural demand.

Top rare Minecraft McDonald’s toys:

  1. Gold Axolotl (2023) – Anecdotally the least common color variant: collectors report getting 3-4 pink/blue for every gold.
  2. Japan Ender Dragon (2020) – Japan-exclusive mini-dragon figure, never officially released elsewhere.
  3. Charged Creeper (2021, non-working battery variant) – Early production runs had LED issues: working versions command higher prices.
  4. UK Phantom (2021) – Exclusive to UK markets, highly sought by US collectors completing mob rosters.
  5. Brazil Snow Creeper (2023) – White variant distributed only in select Brazilian regions during a limited promo window.
  6. Misprinted/Error Toys – Occasional factory errors produce wrong colors, missing paint apps, or swapped parts. These are genuinely rare and unpredictable.

The common thread? Scarcity combined with recognizability. Casual fans might not care about a regional Mooshroom variant, but an exclusive Ender Dragon hits different, it’s a boss mob, a status symbol in the game, and a toy that most collectors can’t just walk into McDonald’s to grab.

Current Market Values for Collectors

Prices fluctuate based on condition, packaging, and demand cycles, but as of early 2026, here’s the landscape:

Standard US release toys (loose, no packaging):

  • Common mobs (Pig, Zombie, Skeleton): $2-5
  • Player characters (Steve, Alex): $5-8
  • Popular mobs (Creeper, Enderman): $8-12
  • Specialty features (Charged Creeper, Iron Golem): $12-18

Mint in Package (MIP):

  • Add 50-100% to loose values for unopened packaging
  • Complete series sets (all 10-12 toys) MIP: $150-250 depending on series

Regional exclusives and rare variants:

  • Gold Axolotl: $25-40 loose, $60-80 MIP
  • Japan Ender Dragon: $75-120 depending on condition
  • UK Phantom: $30-50
  • Brazil Snow Creeper: $40-65
  • Misprints/errors: Wildly variable, $20-200+ based on the error

Market research from collector communities shows steady demand for complete sets rather than individual pieces. Someone completing a 2021 series will pay premium for that final missing toy, while standalone pieces languish at lower prices.

Platforms like eBay, Mercari, and Facebook Marketplace host most transactions. Prices spike when new Minecraft content releases (like major updates or Minecraft Live events) and dip during quiet periods.

How to Start Your Minecraft McDonald’s Toy Collection

Where to Find Minecraft McDonald’s Toys

Starting fresh in 2026 means relying mostly on secondary markets, though occasional unsold stock surfaces.

Primary sources:

  1. Secondary market platforms:
  • eBay: Largest selection, but prices skew higher due to competition and seller fees
  • Mercari: Better deals on bulk lots: less curated than eBay
  • Facebook Marketplace: Local pickup options can save shipping costs: quality varies wildly
  • Reddit (r/McDonalds toys, r/Minecraft): Trading communities where collectors swap duplicates
  1. Thrift stores and garage sales:
  • Hit-or-miss but potentially lucrative. Happy Meal toys often get donated in bulk when kids outgrow them.
  • Goodwill, Savers, and local thrift chains occasionally have toy bins worth digging through.
  1. Collector conventions and swap meets:
  • Regional toy shows sometimes feature McDonald’s toy vendors.
  • Anime/gaming conventions occasionally have booths selling cross-genre collectibles, including game-related Happy Meal toys.
  1. International McDonald’s locations:
  • If traveling abroad, checking current Happy Meal promotions can yield region-exclusive finds.
  • Not practical as a primary strategy but worth remembering for opportunistic collecting.

Tips for Buying on Secondary Markets

The secondary market is where most collectors build their sets, but it requires smart navigation.

Buying strategies:

  • Buy lots, not singles: Purchasing complete or partial sets costs less per toy than buying individually. Even if duplicates come along, they’re trade fodder.
  • Watch auction endings: eBay auctions ending at odd hours (late night, weekday mornings) get less bidding competition.
  • Filter by “newly listed”: Jump on fresh listings before other collectors notice. Set up alerts for “Minecraft McDonald’s toys” on platforms that support them.
  • Check international sellers: Buying from Japan, UK, or Australian sellers can access regional exclusives, though shipping costs add up. Group multiple items from the same seller to maximize value.
  • Negotiate on Mercari/Facebook: Unlike eBay auctions, these platforms allow offers. Polite lowballing on older listings often works.
  • Avoid obvious overpricing: A common Skeleton toy listed at $25 is either a scam or a seller testing the waters. Reference sold listings (eBay’s “Sold” filter) for realistic pricing.

Several gaming outlets, including those tracking toy collecting trends, note that patience is the collector’s best friend. Prices drop when multiple sellers list the same item simultaneously.

Authenticating Genuine McDonald’s Minecraft Toys

Knockoffs exist, especially for popular mobs like Creepers and Endermen.

Authentication checklist:

  1. McDonald’s branding: Genuine toys have the McDonald’s “M” logo stamped on the underside or back, usually near the copyright info.
  2. Mojang/Microsoft copyright marks: Look for “© Mojang” or “© Microsoft” molded into the plastic, typically on the feet or base.
  3. Production quality: Official toys have clean mold lines and consistent paint application. Bootlegs often show rough edges, misaligned parts, or sloppy paint.
  4. Packaging clues: Original packaging includes McDonald’s branding, Happy Meal graphics, and safety certifications (small text on the bag). Generic plastic bags or unmarked boxes signal third-party sellers repackaging.
  5. Weight and material: McDonald’s uses specific plastic types (usually polypropylene or ABS). Knockoffs sometimes feel lighter or flimsier.
  6. Interactive features match descriptions: If a toy is supposed to have spring-action or spinning parts, verify it works. Non-functional features might indicate a defective official toy or a non-functional bootleg.

When in doubt, cross-reference photos from confirmed collections. Online communities dedicated to McDonald’s toy collecting often maintain photo databases showing authentic examples from all angles.

For high-value regional exclusives like the Japan Ender Dragon, request multiple photos showing branding and ask sellers for provenance (where/when they obtained it). Legitimate collectors usually provide this willingly.

Displaying and Preserving Your Collection

Best Storage Methods to Maintain Value

Proper storage prevents degradation and maintains resale value for collectors who might eventually trade or sell.

Storage best practices:

  • Keep packaging when possible: Mint-in-package (MIP) toys hold significantly higher value. If already opened, store the packaging separately in acid-free plastic sleeves or ziplock bags.
  • Avoid direct sunlight: UV exposure fades paint and yellows plastic over time. Display cases should be positioned away from windows or use UV-filtering acrylic.
  • Climate control: Extreme heat warps plastic: cold can make it brittle. Room temperature (65-75°F) with moderate humidity (40-60%) is ideal.
  • Individual compartments: For bulk storage, use tackle boxes or craft organizers with adjustable dividers. This prevents paint rubs and part breakage.
  • Dust regularly: Accumulated dust becomes difficult to remove without water and soap, which risks decal damage on some toys. Light dusting with a microfiber cloth or compressed air works best.
  • Silica gel packets: Toss a few into storage containers to control moisture, especially in humid climates.

Serious collectors often invest in display cases with individual slots, shadow boxes or clear acrylic tiered stands work particularly well for McDonald’s-scale toys. These range from $15-50 depending on size and quality.

Creative Display Ideas for Minecraft Collectors

Minecraft’s aesthetic lends itself to themed displays that go beyond simple shelving.

Display concepts:

  1. Biome dioramas: Use craft foam, painted cardboard, or even actual Minecraft terrain printouts as backdrops. Group toys by biome, Overworld, Nether, End, and add DIY terrain features like foam grass blocks or paper lava flows.

  2. Floating shelf grids: Mount small cube shelves in a grid pattern mimicking Minecraft’s block-based world. Each toy occupies one “block” space, creating a pixelated display wall.

  3. LEGO integration: Collectors who also own LEGO Minecraft sets often integrate McDonald’s toys into LEGO builds. The scale isn’t perfect, but the aesthetic meshes surprisingly well.

  4. Shadow box scenes: Create mini scenes inside deep shadow boxes, Steve mining near a Creeper, Alex riding a Pig, etc. Add LED strip lighting for dramatic effect.

  5. Rotating display turntable: Battery-powered turntables (sold for model displays) slowly rotate toys, showcasing 360-degree views and making interactive features visible.

  6. Themed risers: 3D-print or craft risers resembling Minecraft terrain (grass blocks, stone bricks, Nether rack). Many STL files for Minecraft-themed risers exist in online 3D printing communities.

The key is balancing accessibility (for dusting and reorganizing) with protection (from falls, dust, and UV). Many collectors photograph their displays and share them in online communities, turning the collection itself into participatory fandom.

What’s Next for Minecraft McDonald’s Collaborations?

As of early 2026, no official announcements exist for a fourth Minecraft McDonald’s toy series, but patterns suggest another collaboration is likely.

Historically, McDonald’s revisits successful franchises every 2-3 years. The 2019-2021-2023 cadence points toward a potential 2025 or 2026 release, though nothing has materialized yet. Delays could stem from licensing negotiations, McDonald’s shifting Happy Meal strategies, or simply waiting for significant Minecraft content updates that warrant a themed promotion.

Minecraft’s ongoing development keeps it promotion-worthy. The game continues receiving major updates every 6-12 months, introducing new mobs, biomes, and mechanics that could translate into toy designs. Potential future sets might feature:

  • Deep Dark expansion: More Warden variants, Sculk-themed toys, or ancient city elements
  • Cherry Blossom biome: Sniffer mob, cherry wood aesthetics, new passive animals
  • Archaeology theme: Brush tools, pottery sherds, decorative armor trims
  • Modded content crossovers: Unlikely but not impossible, popular mods sometimes influence official content

Industry watchers note that McDonald’s has been experimenting with digital tie-ins for Happy Meal promotions, QR codes unlocking in-game content, AR experiences via smartphone apps, or redeemable codes for Minecraft Marketplace items. A future collaboration might blend physical toys with digital unlocks, offering exclusive skins, emotes, or texture packs.

Regional variations will likely continue. Markets outside the US often get different rosters or extended promotions, creating ongoing opportunities for international collectors.

For collectors, this uncertain timeline means two things: current sets retain value due to no immediate replacement flooding the market, and staying plugged into Minecraft and McDonald’s announcement channels (official social media, press releases, leaker communities) becomes essential for catching the next wave early.

Conclusion

Minecraft McDonald’s toys occupy a unique niche, affordable enough for casual collecting, rare enough to create genuine hunting excitement, and tied to a game that refuses to fade into irrelevance. Whether someone’s chasing that elusive gold Axolotl, completing a full 2021 biome set, or just appreciating the clever design of a spring-loaded Creeper, these toys offer tangible connections to one of gaming’s most enduring worlds.

The collector landscape in 2026 favors patience and research. Values remain stable for complete sets, regional exclusives hold premium status, and smart secondary market navigation makes building a collection accessible without very costly. As Minecraft continues evolving and McDonald’s inevitably returns to the franchise for future promotions, the toys released so far gain historical significance, snapshots of what Minecraft meant to players in specific years.

For anyone sitting on a box of old Happy Meal toys or considering diving into Minecraft collecting, now’s the time to catalog, preserve, and maybe snag those missing pieces before the next collaboration drops and shifts the market all over again.

Running an MC business empire in GTA Online can either be your ticket to millions or a frustrating grind that barely covers your ammunition costs. With the 2026 economy updates and inflation adjustments in Los Santos, choosing the right motorcycle club businesses and optimizing their setup has never been more critical. While many players chase the latest DLC content or grind repetitive heists, a well-managed MC operation generates consistent passive income that stacks with other money-making methods. This guide breaks down exactly which MC businesses are worth your investment, where to place them, and how to maximize profits without burning out on supply runs. Whether you’re starting fresh or revamping an existing setup, these strategies will help you build a criminal enterprise that prints money while you focus on the fun parts of GTA Online.

Key Takeaways

  • Cocaine Lockup is the top MC business in GTA Online, generating $345,000 net profit per cycle with a 5-hour production time, making it essential for any serious criminal operation.
  • Equipment and Staff upgrades ($1,550,000 combined) are mandatory investments that double production speed and increase product value by 60-70%, tripling profits compared to unupgraded businesses.
  • Nightclub integration transforms MC businesses into exceptional passive income streams—assigning technicians to your cocaine, meth, and cash operations generates $800k-$1M per 24 hours with zero supply costs or raids.
  • Always prioritize central or southern MC business locations over cheaper Paleto Bay properties to avoid brutal 15+ minute delivery times that waste hours over hundreds of sales runs.
  • Sell at 1.5 product bars or less as a solo player to guarantee single-vehicle deliveries, and rotate sales between businesses rather than waiting for full stock to minimize raid frequency.
  • A fully optimized five-business MC empire (Cocaine, Meth, Cash, Weed, Forgery) costs $10-15 million but generates $1.6M-$2M daily through combined active and passive income streams.

Understanding MC Businesses in GTA Online

How MC Businesses Work

MC businesses operate on a simple production cycle: purchase supplies, wait for production, then sell the finished product. Each business requires an initial property purchase, then operates from a bunker-style location where supplies are converted into product over time. Players can either steal supplies through missions (time-consuming but free) or buy them directly for $75,000 per full supply bar.

The production happens in real-time while you’re online, with different businesses having varying production speeds and profit margins. A full product bar takes anywhere from 2 to 5 hours of active playtime to fill, depending on the business type and upgrades. When you’re ready to sell, you’ll trigger a delivery mission that ranges from simple solo-friendly runs to multi-vehicle operations requiring crew help.

One crucial mechanic: raids. If your product stock gets too high or you spend too long as MC President, your business can get raided by NPCs. Failing to defend results in product loss, making regular sales essential for maintaining profits.

MC Business vs. Other Money-Making Methods

Compared to newer content like the Agency or Auto Shop, MC businesses offer lower per-hour profits but shine when combined with passive income streams. A Cayo Perico heist earns $1-1.8 million in about an hour of focused gameplay, while MC businesses generate around $80-200k per sale but require minimal active engagement.

The real advantage comes from Nightclub integration. Once you own a Nightclub with technicians assigned, your MC businesses feed product into the Nightclub warehouse automatically, no supplies needed, no raids, pure passive income. This synergy makes MC businesses profitable even for players who rarely touch the actual production facilities.

MC businesses also provide more consistent revenue streams than heists, which require setup missions and coordination. For solo players balancing multiple income sources, the set-it-and-forget-it nature fits perfectly between active grinding sessions.

Ranking the Best MC Businesses for Maximum Profit

Cocaine Lockup: The Top Earner

Cocaine Lockup dominates the MC business hierarchy with the highest profit margins and fastest ROI. With full upgrades (Equipment and Staff), a single batch of cocaine sells for $420,000 to Los Santos buyers or $588,000 to Blaine County buyers (distant sales offer 50% more profit but involve longer, riskier deliveries).

Production time for a full stock sits at roughly 5 hours of active gameplay with purchased supplies costing $75,000. The net profit from local sales reaches approximately $345,000 per full production cycle, far exceeding other MC businesses. For Nightclub integration, cocaine generates the second-highest passive income tier, making it essential for any serious operation.

The only downside is the initial investment: property costs range from $975,000 to $1,852,500 depending on location, plus $1,550,000 for both critical upgrades. Still, the lockup pays for itself faster than any other MC business.

Meth Lab: High Returns with Moderate Effort

Coming in second place, the Meth Lab offers excellent returns without the premium price tag of cocaine. Fully upgraded, a meth sale generates $357,000 locally or $500,400 for distant sales. Net profit after supply costs lands around $282,000 per cycle, respectable earnings for a business that costs between $910,000 and $1,500,000 to purchase.

Production time mirrors cocaine at about 5 hours for full stock. The meth lab also contributes solid passive income through Nightclub operations, ranking third in the warehouse hierarchy. Many experienced players run both cocaine and meth as their core MC businesses, rotating sales to maintain consistent cash flow.

The main consideration is sale mission variety. Meth occasionally triggers the notorious Post Op van missions, widely despised for their slow vehicle speed and multiple delivery stops. Solo players should sell at 1.5 product bars or less to guarantee single-vehicle deliveries.

Counterfeit Cash Factory: Solid Mid-Tier Option

Counterfeit Cash Factory serves as the reliable middle child of MC businesses. With full upgrades, it produces $294,000 worth of product locally or $411,600 for distant sales. After subtracting supply costs, net profit reaches around $219,000 per cycle, decent but noticeably behind cocaine and meth.

The factory’s main advantage is accessibility. Property prices range from $845,000 to $1,605,000, making it more budget-friendly than top-tier businesses. Production time stretches slightly longer at around 5.5 hours, which isn’t ideal but manageable.

For Nightclub integration, counterfeit cash ranks fourth in passive income generation. It’s worth owning if you’re running a full five-business Nightclub setup, but as highlighted in various gaming strategy guides, it’s often the first business veteran players consider dropping when optimizing their empire.

Weed Farm: Budget-Friendly but Lower Profits

The Weed Farm exists in an awkward profit zone. Fully upgraded, it generates $252,000 locally or $352,800 on distant sales, netting approximately $177,000 after supply costs. Production takes about 6 hours for full stock, the longest wait time for the lowest returns.

Property costs between $676,500 and $1,218,000, and while that seems affordable, spending $1,550,000 on upgrades for such modest returns doesn’t make financial sense. The math simply doesn’t favor weed farms in 2026’s economy.

That said, the weed farm does contribute to Nightclub passive income, ranking fifth in the warehouse. Some players purchase it solely for Nightclub integration without ever running actual supply or sale missions. If you’re on a tight budget and want to fill out your Nightclub technicians, it’s acceptable. Otherwise, your money’s better invested elsewhere.

Document Forgery Office: Skip This One

The Document Forgery Office is hands-down the worst MC business investment. Even fully upgraded, it produces only $210,000 locally or $294,000 for distant sales, netting a pathetic $135,000 after supply costs. Production time matches the weed farm at 6 hours, making it both slow and unprofitable.

Property costs range from $650,000 to $1,100,000, and dropping another $1,550,000 on upgrades for such minimal returns borders on financial self-harm. The forgery office also generates the lowest Nightclub passive income of any business type.

Experienced players universally recommend skipping document forgery entirely. Even if you’re aiming for a complete Nightclub setup, the five worthwhile businesses (cocaine, meth, cash, weed, and bunker/cargo warehouse) provide better passive income. Don’t waste your capital here.

Best Locations for Your MC Businesses

Why Location Matters for Profit and Efficiency

Location directly impacts sale mission difficulty and time investment. MC businesses require delivery to various drop points across Los Santos and Blaine County, and starting from a central or southern location dramatically reduces travel time. The difference between a 10-minute sale and a 20-minute slog adds up quickly over hundreds of runs.

Sandy Shores and northern Paleto Bay locations are consistently cheaper but punish you with brutal delivery distances. Selling product from Paleto Bay to the city can push delivery times to 15+ minutes for single-vehicle runs and becomes nearly impossible solo with multi-vehicle missions. Meanwhile, businesses near Grand Senora Desert or La Mesa offer balanced proximity to both city and countryside buyers.

Location also affects resupply missions. Stealing supplies involves traveling to mission points, and northern businesses force longer drives both ways. For players who buy supplies, this matters less, but it’s still annoying when responding to raids or switching between businesses.

Top Recommended Locations by Business Type

For Cocaine Lockup, the Morningwood location (near the Maze Bank Arena) at $1,852,500 is pricey but offers the fastest access to city buyers. Budget-conscious players should grab the Alamo Sea lockup at $1,098,000, it’s central enough for reasonable delivery times without the premium cost.

The Meth Lab shines at the Grand Senora Desert location ($1,050,000), providing excellent highway access and balanced distances to all delivery zones. Avoid the Paleto Bay lab at $910,000: the $140,000 saved will cost you hours of frustration.

For Counterfeit Cash Factory, the Vespucci Canals location ($1,605,000) sits perfectly for city deliveries but drains your wallet. The Grand Senora Highway factory at $1,020,000 offers the best value-to-convenience ratio.

Weed Farm and Document Forgery (if you ignore advice and buy them anyway) follow the same logic: avoid Paleto Bay, prioritize Grand Senora or southern locations. Detailed business location breakdowns show exact delivery time differences, but the rule remains consistent, pay a bit more upfront to save countless hours later.

Upgrades That Actually Matter

Equipment and Staff Upgrades

Equipment Upgrade ($1,100,000) and Staff Upgrade ($450,000) are non-negotiable for profitable MC businesses. Together they double production speed and increase product value by approximately 60-70%. Running a business without these upgrades extends production time to 10+ hours and slashes profits so severely that you’d earn more running contact missions.

The Equipment upgrade reduces production time per unit of product, while Staff upgrade boosts the value of finished goods. Both work multiplicatively, creating the massive profit gap between upgraded and stock businesses. For example, an unupgraded cocaine lockup nets around $150,000 per sale versus $345,000 fully upgraded, that’s a $195,000 difference per cycle.

Never run an MC business seriously without both upgrades. If you can’t afford them yet, save your money and wait. Operating unupgraded businesses wastes time and supplies for negligible returns.

Security Upgrades: Are They Worth It?

The Security Upgrade ($495,000) reduces raid frequency but doesn’t eliminate them entirely. Raids trigger based on two factors: time spent registered as MC President and current product stock levels. Security upgrade raises the threshold slightly, but dedicated MC grinders will still face raids eventually.

For casual players who sell regularly and spend minimal time as MC President, security upgrades are skippable. Your money’s better invested in starting a second business or saving for Nightclub equipment. But, players who let product accumulate to full stock or frequently stay registered as MC President (perhaps running MC contracts or helping crew members) might find value in the reduced raid frequency.

The general consensus: skip security unless you’re swimming in cash with nothing else to buy. Successfully defending a raid takes 5-10 minutes and doesn’t cost product if you win. Failed defenses hurt, but they’re infrequent enough that the $495,000 investment rarely pays for itself through saved product.

How to Maximize Your MC Business Profits

Solo vs. Crew Operations

Solo players should never let product stock exceed 1.5 bars (roughly $126,000 value) for guaranteed single-vehicle deliveries. Selling at this threshold ensures you won’t trigger the dreaded 3-4 vehicle missions that are nearly impossible to complete alone within the time limit. Yes, you’ll sell more frequently, but successful deliveries beat failed missions every time.

Crew operations unlock the full profit potential. With 3-4 reliable players, you can safely sell full stock for maximum earnings per time investment. The 50% distant sale bonus becomes actually feasible since crew members can split vehicle duties. A coordinated crew can knock out a full cocaine sale in 12-15 minutes and immediately rotate to the next business.

Communication tools like Discord are essential for crew coordination. Call out vehicle types when the sale starts, Helicopters, Boats, Garbage Trucks, or Post Op Vans require different strategies. Some crews even force-restart sales if they get particularly bad mission types, losing a small product amount but saving 20+ minutes of aggravation.

Timing Your Sales for Maximum Returns

Selling during 2x MC Business weeks (typically 1-2 times per quarter based on Rockstar’s event schedule) effectively doubles your profit margins. A cocaine lockup jumps from $420,000 to $840,000 local sale value during these events. Savvy players stockpile supplies and time their sales to these bonus weeks when possible.

The tradeoff is risk versus reward. Letting businesses sit idle until bonus weeks means no income during the waiting period. For most players, consistent regular sales outperform trying to time the market, but it’s worth checking the weekly event updates every Thursday.

Another timing consideration: server population. Selling in solo public lobbies (achievable through various network tricks depending on platform) eliminates the risk of other players destroying your product. Public lobby sales offer small bonus payments per additional player, but the grief potential usually isn’t worth it unless you’re running with a full protective crew.

Combining MC Businesses with Nightclub Passive Income

This is where MC businesses transform from decent to exceptional. The Nightclub warehouse generates product based on businesses you own, requiring zero supplies and suffering zero raids. Once you assign a technician to your cocaine lockup, the Nightclub produces cocaine goods completely independently from your actual lockup operations.

You can run both simultaneously: manually resupply and sell your MC businesses for active income, while Nightclub technicians quietly accumulate passive stock in the background. A fully optimized Nightclub with five businesses (Cocaine, Meth, Cash, Cargo, Bunker) generates roughly $800,000-$1,000,000 per 24 hours of playtime.

The key is owning the businesses, they don’t need to be actively producing. Players often buy cocaine, meth, and cash properties with full upgrades for manual sales, then grab cheap weed and document forgery locations without upgrades purely for Nightclub technician assignments. This hybrid approach maximizes both active and passive income streams without overspending on unprofitable upgrades.

Common Mistakes to Avoid with MC Businesses

Buying Paleto Bay locations tops the mistake list. The $150-200k saved on property costs translates to dozens of extra hours wasted on deliveries. Always prioritize location over initial savings.

Skipping upgrades while trying to run businesses is the second fatal error. Players see the $1,550,000 upgrade cost and try operating unupgraded to “test it out.” This guarantees a miserable experience with terrible profits, leading them to conclude MC businesses aren’t worth it when the real problem was running them half-built.

Staying registered as MC President for extended periods triggers unnecessary raids. Register only when needed for MC business activities, sales, or resupply missions. Switch to CEO or retire to normal player status when you’re done. This simple habit drastically reduces raid frequency.

Stealing supplies might seem smart but wastes time on low-value missions. A steal mission takes 10-15 minutes and delivers partial supplies. Buying supplies for $75,000 takes 10 seconds and lets you spend those 15 minutes running a heist prep, Agency contract, or another money-making activity that earns more than $75k. The math favors buying supplies unless you’re completely broke.

Ignoring Nightclub integration leaves massive passive income on the table. Some players run MC businesses manually for years without realizing the Nightclub can generate product from those same businesses with zero input. As covered in comprehensive profit guides, the Nightclub synergy is what makes owning multiple MC businesses truly profitable in 2026.

Letting product max out invites raids and creates impossible solo sale missions. Sell at regular intervals instead of waiting for full stock unless you have a dedicated crew ready.

The Optimal MC Business Setup Strategy for 2026

Beginner Setup: Starting with Limited Budget

New players should focus on a single cocaine lockup first. Purchase the Alamo Sea location ($1,098,000) for balanced delivery distances, then immediately save for Equipment ($1,100,000) and Staff ($450,000) upgrades before running your first serious production cycle.

Total investment: approximately $2,650,000. This sounds steep, but a single Cayo Perico heist plus some starter content gets you there. Once operational, the cocaine lockup generates $345,000 net profit per cycle, recovering your investment in about 8 production runs (roughly 40 hours of playtime spread across several days).

Run this single business until you’re comfortable with the mechanics and have built a cash reserve. Don’t expand to additional businesses until you can afford them with full upgrades. One profitable business beats three underperforming ones.

When ready to expand, add the Grand Senora Desert Meth Lab ($1,050,000 + $1,550,000 upgrades). This two-business setup provides steady income rotation, sell cocaine while meth produces, then sell meth while cocaine produces.

Advanced Setup: Maximizing Your Empire

Endgame MC operations revolve around Nightclub synergy. The optimal setup includes:

  1. Cocaine Lockup (best location you can afford, fully upgraded)
  2. Meth Lab (Grand Senora Desert, fully upgraded)
  3. Counterfeit Cash Factory (Grand Senora Highway, fully upgraded)
  4. Weed Farm (cheapest location, NO upgrades, Nightclub use only)
  5. Document Forgery (cheapest location, NO upgrades, Nightclub use only)

Alternatively, skip weed and document forgery entirely and substitute Bunker and CEO Cargo Warehouse for Nightclub technicians. Many players prefer this approach since Bunker and Cargo offer better standalone profits than weed or documents.

The advanced strategy involves manual sales on cocaine, meth, and cash (rotating between them daily), while letting the Nightclub accumulate all five business types passively. This creates multiple income streams:

  • Active MC sales: $800k-1M per day of focused grinding
  • Nightclub passive: $800k-1M per 24 hours of playtime
  • Bunker sales: $210k-1M depending on effort investment

Total investment for the full advanced setup runs $10-15 million depending on location choices, but it generates the most consistent passive income in GTA Online. Players with this setup established can essentially fund any vehicle, property, or DLC content through passive earnings while focusing on the actual fun content.

Conclusion

Building a profitable MC business empire in GTA Online comes down to smart investments and strategic operation. Cocaine and meth lockups form the core of any serious setup, offering the highest returns when fully upgraded and properly located. Avoid the temptation of cheap northern properties and always prioritize Equipment and Staff upgrades over expanding to additional businesses.

The real game-changer is Nightclub integration, transforming MC businesses from decent active income into exceptional passive earnings that stack with other money-making methods. Whether you’re running a lean two-business operation or a fully optimized five-business empire, regular sales and smart management will keep your Los Santos bank account growing faster than the in-game inflation can drain it.

Now get out there and build your criminal empire. Those cocaine bricks won’t sell themselves.

If you’re a Switch owner browsing the eShop for the next great baseball sim, you’ve probably noticed a glaring omission: MLB The Show isn’t there. For years, Nintendo fans have watched PlayStation and Xbox players jump into Sony San Diego Studio’s flagship baseball franchise while they’re stuck on the sidelines. It’s frustrating, especially when the game went multiplatform back in 2021 and expanded to Xbox and even made the jump to newer platforms. But what’s the actual story here? Can you play MLB The Show on Switch right now, or is there a workaround? And if not, what are your alternatives? This guide breaks down the complete history of MLB The Show’s platform availability, why Nintendo’s handheld-hybrid console got left out, what performance looks like where the game is available, and what Switch owners can realistically do if they’re craving some diamond action in 2026.

Key Takeaways

  • MLB The Show is not available on Nintendo Switch as of March 2026, despite the franchise expanding to PlayStation, Xbox, and PC platforms since 2021.
  • The Switch’s aging Tegra X1 hardware cannot handle MLB The Show’s performance demands, which would require 30 fps at 720p docked with significant visual compromises compared to console versions running at 60 fps.
  • Super Mega Baseball 4 is the best simulation baseball alternative for Switch owners, offering online multiplayer, franchise modes, and customization tools without MLB licensing.
  • Switch players can stream MLB The Show through Xbox Cloud Gaming with a Game Pass Ultimate subscription, though input lag makes competitive ranked play frustrating.
  • The Nintendo Switch 2 could potentially support MLB The Show if it reaches PlayStation 4-level hardware capabilities, but no port is confirmed for the current Switch generation.

The History of MLB The Show and Nintendo Switch Compatibility

Why MLB The Show Wasn’t Available on Switch Initially

MLB The Show launched as a PlayStation exclusive back in 2006, developed by Sony’s own San Diego Studio. For over a decade, it remained locked to PlayStation consoles, PS2, PS3, PS4, and eventually PS5. This wasn’t just a licensing quirk: Sony owned the developer outright, making it a first-party exclusive designed to sell PlayStations.

The Switch launched in March 2017, but by then, MLB The Show was deeply entrenched in the PlayStation ecosystem. Sony had no incentive to port their marquee sports franchise to a competitor’s hardware, especially when the game was a system-seller for their own consoles. The Switch’s unique hybrid architecture and less powerful hardware also presented technical challenges that Sony wasn’t motivated to solve.

Major League Baseball itself held the exclusive simulation baseball game license, which Sony San Diego Studio had secured. This meant no other developer could create a realistic MLB sim for Switch or any other platform, at least not without MLB’s blessing. For Nintendo fans, this was a double whammy: the best baseball game was locked to PlayStation, and no viable alternative could emerge.

The Multiplatform Expansion: Breaking PlayStation Exclusivity

Everything changed in December 2019 when Major League Baseball and Sony announced a groundbreaking deal: starting with MLB The Show 21, the franchise would go multiplatform. The game launched on Xbox One, Xbox Series X

|

S, PS4, and PS5 on April 20, 2021, marking the first time a Sony-published game appeared on rival hardware.

This expansion was driven by MLB, not Sony. The league wanted to maximize the franchise’s reach and revenue, especially as sports gaming became increasingly dependent on microtransactions and ultimate team modes like Diamond Dynasty. More platforms meant more players, which meant more stubs sold and more engagement.

MLB The Show 22 (April 5, 2022) and MLB The Show 23 (March 28, 2023) continued this multiplatform approach, adding full cross-platform progression and cross-play. By MLB The Show 24 (March 19, 2024), the game had refined its multiplatform experience across PlayStation and Xbox ecosystems, with optimized builds for last-gen and current-gen consoles.

But notice what’s missing from that list: Nintendo Switch. Even though breaking the PlayStation wall, Sony San Diego Studio never ported the game to Nintendo’s hybrid console. The reasons became increasingly clear as the franchise evolved, technical demands that the Switch’s Tegra X1 chip simply couldn’t meet without massive compromises.

Current Availability: Can You Play MLB The Show on Nintendo Switch?

Let’s cut to the chase: No, MLB The Show is not available on Nintendo Switch as of March 2026, and there’s been no official announcement suggesting it will come to the platform.

MLB The Show 25 launched on March 18, 2025, exclusively on PS4, PS5, Xbox One, Xbox Series X

|

S, and made its debut on PC via Steam. Yes, you read that right, the franchise hit PC before Switch. The Steam version marked a significant expansion, offering keyboard/mouse support, uncapped frame rates on capable hardware, and full cross-platform progression with console versions.

The current install base sits on these platforms:

  • PlayStation 4 – Supported but with reduced graphics and 30 fps cap
  • PlayStation 5 – Native 4K at 60 fps, ray-traced stadium reflections
  • Xbox One (including One S/X) – Comparable to PS4 version
  • **Xbox Series X

|

S** – Series X matches PS5: Series S runs 1440p/60 fps

  • PC (Steam) – Variable performance based on specs: minimum GTX 1060 required

The absence of a Switch version isn’t an oversight or a delayed release, it’s a deliberate omission based on the hardware gap between Nintendo’s platform and what the game engine requires. San Diego Studio has never publicly tested or shown footage of MLB The Show running on Switch hardware, and no datamined files or leaks have suggested a port is in development.

Switch owners searching the eShop for “MLB The Show” will find nothing except a handful of arcade alternatives and legacy titles that don’t come close to the simulation depth of Sony’s franchise. That gap has persisted for five years since the multiplatform shift, and all signs point to it continuing.

Performance and Graphics: How MLB The Show Runs on Switch Hardware

Frame Rate and Resolution Comparisons

Since MLB The Show doesn’t exist on Switch, we can only project what it would look like based on the console’s hardware capabilities and how other multiplatform titles perform.

The Switch’s Nvidia Tegra X1 chip (a modified version from 2015) is significantly weaker than even the base PS4 and Xbox One, which themselves struggle to maintain 60 fps in MLB The Show’s newer entries. MLB The Show 24 runs at 1080p/60 fps on PS5 and Series X during gameplay, dropping to 4K/30 fps for replays and menus to preserve visual fidelity. On PS4 and Xbox One, the game targets 1080p/30 fps with dynamic resolution scaling that can dip to 900p during busy moments.

A hypothetical Switch version would likely run at:

  • Docked mode: 720p at 30 fps with aggressive LOD (level of detail) scaling
  • Handheld mode: 540p at 30 fps with further texture and shadow downgrades
  • Stadium crowds: Replaced with 2D cardboard cutouts or low-poly models (similar to early PS3 versions)
  • Lighting and reflections: Baked lighting only: no real-time ray tracing or dynamic shadows

For a sports sim where tracking a 95 mph fastball depends on frame timing and visual clarity, 30 fps on Switch would fundamentally alter gameplay feel. Hitting mechanics in MLB The Show rely on millisecond-precise timing windows, the difference between 60 fps (16.67 ms per frame) and 30 fps (33.33 ms) is massive when you’re trying to catch up to a high fastball.

Handheld vs. Docked Mode Performance

The Switch’s handheld mode clocks the GPU at 307.2 MHz compared to 768 MHz when docked, a 60% reduction in graphical horsepower. Games like NBA 2K and FIFA on Switch demonstrate how sports titles handle this gap: resolution drops from 720p to sub-720p, crowds become static images, and frame rate targets get reduced to maintain playability.

MLB The Show pushes significantly more complex rendering than those titles. The game simulates 40,000+ fans with individual animations, real-time weather systems affecting ball physics, dynamic field wear throughout a nine-inning game, and photorealistic player models with sweat and dirt accumulation. Even with massive cuts, handheld mode would struggle to maintain 30 fps, likely requiring a cap at 20 fps or introducing noticeable stuttering during pivotal moments.

Load Times and Technical Limitations

One underrated challenge: load times. MLB The Show 24 on PS5 loads into a game in roughly 8-12 seconds thanks to the SSD. On PS4 with its mechanical hard drive, that same load stretches to 35-45 seconds. The Switch uses slower flash storage than either, which would push load times past a minute for full stadium environments.

The Switch’s 4GB of RAM (compared to 8GB on PS4/Xbox One and 16GB on current-gen) would force aggressive asset streaming and lower-resolution textures. Commentary audio would likely repeat more frequently due to limited memory for storing dynamic call variations, and player likeness detail would take a hit to fit within memory constraints.

These aren’t minor compromises, they’d fundamentally reshape the experience in ways that could damage the franchise’s reputation. When critics on platforms like Metacritic scrutinize technical performance alongside gameplay depth, a compromised Switch port could drag down the series’ overall perception.

Game Modes and Features Available on Switch

Diamond Dynasty and Cross-Platform Progression

Since MLB The Show isn’t on Switch, these features remain inaccessible to Nintendo players. But it’s worth understanding what they’re missing and why cross-platform progression matters to the modern sports gaming landscape.

Diamond Dynasty is The Show’s ultimate team mode, think FIFA Ultimate Team or Madden Ultimate Team, but with significantly more free-to-play-friendly progression. Players build dream rosters by earning or purchasing player cards, completing moments and conquest maps, and competing in ranked seasons. The mode generates the bulk of The Show’s post-launch revenue through stub purchases (the in-game currency).

Starting with MLB The Show 21, Sony implemented full cross-platform progression: your Diamond Dynasty squad, Road to the Show career, and collected items carry across PS4, PS5, Xbox One, Xbox Series X

|

S, and now PC. Log in on any platform, and your progress syncs via your linked Sony San Diego Studio account.

If a Switch version existed, this system would theoretically extend there too. But here’s the problem: Diamond Dynasty’s card art, animations, and stadium creator assets require significant rendering power and storage space. The mode has grown more visually complex each year, and paring it back for Switch would create a fractured experience where Switch players face disadvantages in cross-play scenarios.

Road to the Show and Franchise Mode

Road to the Show is the career mode where players create a custom ballplayer and grind through the minors to MLB stardom. It’s tied directly to Diamond Dynasty, your created player’s attributes and archetype can be used in both modes, creating a unified progression loop.

The mode features fully simulated minor league seasons, detailed player development systems, relationship dynamics with teammates and coaches, and dynamic call-ups based on performance. On current hardware, simulating a full 162-game season with realistic stat tracking takes processing power that the Switch would struggle to deliver without long wait times between games.

Franchise Mode lets players manage an MLB team through multiple seasons, controlling everything from rosters and budgets to scouting and draft strategies. MLB The Show 24 overhauled this mode with deeper financial systems, improved trade logic, and enhanced scouting reports that track hundreds of minor leaguers with dynamic development curves.

These modes depend on large databases and simulation engines running in the background. The Switch’s memory and CPU limitations would force simplified versions, potentially removing features like live roster updates, detailed minor league systems, or multi-season simulation depth.

Online Multiplayer and Cross-Play Capabilities

MLB The Show’s online infrastructure supports cross-play across all platforms, meaning a PS5 player can face an Xbox Series X opponent in ranked Diamond Dynasty or casual online play. The netcode prioritizes low latency and inputs over visual fidelity, dynamically adjusting graphical details to maintain connection stability.

Switch owners would theoretically benefit from this, if the game existed on the platform. But, Nintendo’s online infrastructure historically lags behind PlayStation Network and Xbox Live in terms of server stability and matchmaking sophistication. Games like Super Smash Bros. Ultimate and Splatoon 3 have shown that the Switch can handle competitive online play, but peer-to-peer connections and Nintendo Switch Online’s limited features create inconsistencies.

MLB The Show uses dedicated servers for ranked play and peer-to-peer for casual matches. A Switch version would need to integrate with Sony’s server infrastructure while working within Nintendo’s online ecosystem, a technical and corporate challenge that may not be worth solving for a potentially small player base.

Best Baseball Games Available on Nintendo Switch

Super Mega Baseball Series

If you can’t have MLB The Show, Super Mega Baseball 4 (released September 2023) is the closest you’ll get to a quality baseball sim on Switch. Developed by Metalhead Software, the series ditched the cartoony art style of earlier entries for a more grounded, realistic presentation while keeping the tight, skill-based gameplay intact.

Super Mega Baseball 4 features:

  • Franchise mode with multi-season progression, player development, and salary management
  • Online multiplayer including cross-platform play between Switch, PS, Xbox, and PC
  • Customization tools allowing players to create teams, logos, and entire leagues
  • Ego system: A difficulty slider from 1-100 that granularly adjusts challenge without arbitrary stat boosts

The game runs at 1080p/30 fps docked and 720p/30 fps handheld on Switch, not ideal for fast-twitch hitting, but playable. Reviews praised the gameplay depth, though the lack of MLB licensing means generic teams and players. You won’t be striking out Aaron Judge with Gerrit Cole, but the fundamentals of pitching, hitting, and fielding are remarkably well-tuned.

Metalhead has consistently updated the game post-launch with balance patches and new customization options, making it the go-to option for Switch owners craving baseball simulation depth.

R.B.I. Baseball Franchise

R.B.I. Baseball was MLB’s official arcade-style alternative for years, published by MLB Advanced Media themselves. The series appeared on Switch from 2018 through R.B.I. Baseball 21, offering full MLB licensing, all 30 teams, real players, and streamlined gameplay designed for pick-up-and-play sessions.

But here’s the reality: the R.B.I. series was critically panned for stiff animations, dated visuals, and shallow gameplay systems. Outlets covering gaming news, including IGN, consistently rated entries in the 4-5/10 range, citing unresponsive controls and AI that made baffling decisions. The series was essentially abandoned after 2021, with no new entries announced since.

If you can find a cheap copy of R.B.I. Baseball 21, it offers nostalgic arcade fun and the novelty of playing as your favorite MLB team on Switch. Just don’t expect simulation depth or smooth presentation.

Alternative Sports and Arcade Baseball Titles

Beyond those two, the Switch’s baseball offerings get slim:

  • Baseball Superstars 2020: A mobile port with RPG-lite mechanics and gacha elements. Fine for casual mobile-style sessions but lacking depth.
  • Out of the Park Baseball 25: The definitive baseball management sim, available on Switch as of 2024. Pure text-based simulation with zero on-field action, perfect if you love spreadsheets and roster construction, terrible if you want to actually play baseball.
  • Retro arcade compilations: Games like Arcade Archives: Baseball or Neo Geo Classics offer primitive, nostalgic takes on the sport. Fun for historical curiosity, not serious play.

The honest truth is that Switch owners don’t have a great simulation baseball option with MLB licensing. According to sources covering Nintendo’s eShop library like Nintendo Life, baseball remains one of the weakest genres on the platform compared to soccer, basketball, and football alternatives.

Workarounds for Playing MLB The Show If You Only Own a Switch

Cloud Gaming Services and Remote Play Options

So you’ve only got a Switch, but you want MLB The Show. There are workarounds, though none are perfect.

Xbox Cloud Gaming (Game Pass Ultimate) is the most viable option. MLB The Show 24 and 25 are included in Xbox Game Pass, and with a Game Pass Ultimate subscription ($16.99/month as of March 2026), you can stream the game to smartphones, tablets, and PCs via the cloud. You’ll need:

  • A stable internet connection (minimum 10 Mbps, 20+ Mbps recommended)
  • A compatible controller (Xbox, PlayStation, or third-party)
  • A device with the Xbox app or browser access

Streaming quality depends heavily on your connection. Input lag is noticeable, especially for timing-based hitting mechanics. Cloud gaming works better for slower modes like Franchise or Diamond Dynasty team management, but ranked online play becomes frustrating when your connection hiccups during a crucial at-bat.

PlayStation Remote Play allows PS4/PS5 owners to stream their console games to other devices, including phones, tablets, and PCs. You could theoretically use a laptop or phone to stream MLB The Show while traveling, but you can’t stream to a Switch, Sony’s Remote Play app isn’t available on Nintendo’s eShop.

Steam Link could work if you own MLB The Show 25 on PC and have a powerful gaming rig at home. Stream from your PC to a laptop or mobile device, though again, not directly to Switch. Performance depends on your home network quality and whether you’re streaming locally or over the internet.

Bottom line: cloud gaming is a stopgap, not a true solution. For a timing-sensitive game like MLB The Show, input delay can ruin the experience.

Alternative Console Options for MLB The Show Fans

If you’re serious about playing MLB The Show and the cloud options don’t satisfy, you’ll need to invest in another platform. Here’s the cost breakdown as of March 2026:

  • PlayStation 5 (disc version): $499, regularly available without stock issues
  • PlayStation 5 (digital edition): $449, often bundled with Game Pass or MLB The Show
  • Xbox Series S: $299, compact and affordable with Game Pass access
  • Xbox Series X: $499, full 4K performance and disc drive
  • Gaming PC: Variable cost, minimum ~$700 for a build that runs MLB The Show 25 smoothly at 1080p/60 fps

For budget-conscious players, the Xbox Series S + Game Pass Ultimate combo is the most economical. You get MLB The Show included in the subscription (no additional $69.99 purchase), access to hundreds of other games, and decent performance at 1440p/60 fps. The Series S lacks a disc drive, but since The Show is a digital-first title with constant live roster updates, physical media isn’t essential.

If you’re PlayStation-loyal or want the absolute best performance, PS5 is the way to go. The game is optimized on Sony’s hardware first, and exclusive features like adaptive trigger feedback (feeling the tension of a pitch grip via the DualSense controller) add immersion.

For pure performance and flexibility, a gaming PC offers the highest frame rates, mod support potential, and the ability to use any controller or input device you prefer. MLB The Show 25 on PC supports ultrawide monitors, uncapped frame rates, and NVIDIA DLSS for performance boosts on compatible GPUs.

Will MLB The Show Ever Come to Nintendo Switch? Future Outlook

Developer Statements and Official Announcements

Sony San Diego Studio has never publicly addressed a potential Switch port. In interviews around the multiplatform expansion in 2020-2021, developers emphasized their commitment to delivering a “premium experience” across platforms without compromising core gameplay.

Ramone Russell, the studio’s longtime community manager and game designer, mentioned in a 2021 PlayStation Blog post that platform decisions are made in collaboration with MLB and Sony Interactive Entertainment, balancing technical feasibility with player demand. Since then, silence on Switch.

MLB itself has expressed interest in maximizing the game’s reach, but the league’s priority is revenue growth via microtransactions and engagement metrics. If a Switch version would require significant downgrades that hurt player retention or spending, it’s not financially attractive, even with the Switch’s 140+ million install base.

In early 2025, when Sony announced the PC version of MLB The Show 25, they specifically highlighted the platform’s ability to match or exceed console performance. The messaging was clear: expanding to platforms that can handle the game’s technical demands, not just chasing install base numbers.

Technical Feasibility and Nintendo’s Sports Game Market

Could MLB The Show technically run on Switch? Sure, if you’re willing to accept a version that looks and plays like the PS3/Xbox 360 era. MLB The Show 13 and 14 ran on those platforms at 1080p/60 fps with stripped-back features. A heavily modified version could squeeze onto Switch with enough compromises.

But here’s the reality: Nintendo’s sports game market skews heavily toward arcade-style, family-friendly titles. Nintendo Switch Sports, Mario Strikers, and Mario Golf dominate the sports genre on the platform. Simulation sports games, FIFA, NBA 2K, Madden, have consistently underperformed on Switch compared to PlayStation and Xbox.

FIFA Legacy Edition on Switch is a perfect case study. EA releases the same version year after year with only roster updates, no gameplay improvements, and outdated modes. It sells a fraction of what it does on other platforms, reinforcing EA’s decision not to invest in full feature parity.

MLB The Show going to Switch would follow a similar fate: a compromised version with limited sales that doesn’t justify the porting costs. Sony San Diego Studio would need to maintain a separate codebase, optimize for weaker hardware, and support a platform where the sports sim audience is small.

The Nintendo Switch 2 (or whatever Nintendo’s next hardware is called) could change this equation. Rumors suggest it’ll feature significantly more powerful hardware, possibly matching or exceeding base PS4 specs. If that’s true, and if cross-gen support continues, MLB The Show 26 or 27 could feasibly target the new Nintendo platform without compromising the core experience.

But until Nintendo’s next console launches and its specs are confirmed, expecting MLB The Show on current Switch hardware is wishful thinking. The silence from Sony, the lack of leaks, and the clear technical gap all point to the same conclusion: it’s not happening on this generation of Switch.

Conclusion

MLB The Show remains unavailable on Nintendo Switch in 2026, and all signs suggest that won’t change for the current-gen hardware. The technical gap is too wide, the market too uncertain, and Sony San Diego Studio has shown no interest in pursuing a compromised port. Switch owners looking for baseball have to settle for Super Mega Baseball 4’s solid but unlicensed simulation or rely on cloud gaming workarounds that introduce frustrating input lag.

The multiplatform expansion that brought The Show to Xbox and PC was driven by platforms that could match PlayStation’s performance envelope. Switch sits outside that club, at least for now. If you’re serious about playing the franchise, investing in a secondary platform, whether that’s a budget Xbox Series S with Game Pass or a full PS5 setup, remains the most realistic path forward.

As for the future? Keep an eye on Nintendo’s next console. If it closes the hardware gap, and if MLB The Show continues its aggressive platform expansion, there’s a chance. But for the Switch you’re holding right now, diamond dreams stay out of reach.

Pufferfish might be one of the most underrated, and dangerous, mobs in Minecraft. These spiky little fish pack a nasty punch if you’re careless, but they’re also surprisingly useful once you know what to do with them. Whether you’re hunting for potion ingredients, feeding your pet axolotl, or just trying to avoid a painful death by toxic fish, understanding pufferfish behavior is essential for any player diving into ocean biomes.

In this guide, we’ll break down everything you need to know about pufferfish in Minecraft: where they spawn, how to catch them safely, what they’re actually good for, and how to avoid getting poisoned in the process. Let’s immerse, just watch out for the spines.

Key Takeaways

  • Pufferfish in Minecraft are passive mobs found in warm and lukewarm ocean biomes that inflate within a 5-block radius to deal poison damage, making them dangerous despite their harmless appearance.
  • The primary use for pufferfish is brewing Potions of Water Breathing, which allows players to explore underwater structures like ocean monuments for 3–8 minutes.
  • You can catch pufferfish efficiently using a fishing rod with Lure III enchantment or by scooping them into water buckets directly from warm oceans.
  • AFK fish farms with automatic reel mechanisms provide a hands-off way to accumulate pufferfish at roughly a 13% catch rate from the fishing loot table.
  • Avoid eating pufferfish as food since they inflict Hunger III, Poison IV, and Nausea II while restoring only 1 hunger point—drinking milk instantly removes the poison effect if you’re exposed.

What Is a Pufferfish in Minecraft?

A pufferfish is a passive mob that spawns naturally in ocean biomes. It’s part of Minecraft’s aquatic ecosystem and has been in the game since the Update Aquatic (Java Edition 1.13 / Bedrock Edition 1.4.0) back in 2018. But don’t let the “passive” label fool you, pufferfish have a unique defense mechanism that makes them one of the few mobs that can hurt you without technically being hostile.

When a player gets too close, pufferfish inflate to nearly double their size, extending venomous spines that deal Poison damage. This inflation happens automatically within a short range, so even if you’re just swimming by, you can take damage. The pufferfish itself doesn’t attack in the traditional sense, but proximity is all it takes.

Visually, pufferfish are small, orange fish with a rounded body. In their deflated state, they look harmless and will swim around like any other fish. Once inflated, they become a spiky ball of danger. They’re also one of the few fish mobs that can be caught with a fishing rod or scooped up with a water bucket, a mechanic that’s key to farming them.

Pufferfish drop themselves as an item when killed, and that item can be used for brewing, trading, or even eating (though we’ll get to why that’s a terrible idea later).

Where to Find Pufferfish in Minecraft

Pufferfish don’t spawn everywhere. You’ll only find them in specific ocean biomes, and knowing which ones saves you a lot of time if you’re hunting for them.

Warm Ocean Biomes

Warm ocean biomes are the primary spawning grounds for pufferfish. These biomes have a distinct aqua-blue water color and are typically located near desert, jungle, or savanna landmasses. You’ll recognize them by the abundance of tropical fish, coral reefs, and sea pickles.

Pufferfish spawn in groups of 1–3 in warm oceans, making them relatively easy to find if you’re in the right area. The spawn rate is decent, so you don’t need to search for hours, just cruise around a warm ocean and you’ll spot them soon enough.

Lukewarm Ocean Biomes

Lukewarm ocean biomes also support pufferfish spawns, though they’re slightly less common here. Lukewarm oceans have a lighter blue water color compared to regular oceans and usually border temperate or colder biomes. You’ll find some kelp and cod here, along with the occasional pufferfish.

If you’re having trouble locating a warm ocean, lukewarm oceans are a solid backup. The spawn rates are similar, and you can still gather pufferfish efficiently.

Pro tip: Use the /locate biome command (Java Edition 1.16+) to find warm or lukewarm oceans quickly if you’re not opposed to using commands. Otherwise, just head toward tropical-looking coastlines and you’re probably close.

How to Catch Pufferfish

There are two main methods for catching pufferfish in Minecraft, and both have their pros and cons depending on what you’re after.

Fishing Rod Method

The most straightforward way to catch a pufferfish is with a fishing rod. Pufferfish are classified as “junk” in the fishing loot table, but they have a roughly 13% chance of being caught when fishing in any ocean biome (not just warm or lukewarm). This means you don’t even need to be near where they spawn, you can fish them up from a regular ocean, deep ocean, or frozen ocean.

Just cast your line, wait for the bobber to dip, and reel in. You might catch cod, salmon, or actual junk items like leather boots, but pufferfish will eventually show up. This method is great if you’re setting up an AFK fish farm or just want to multitask while gathering resources.

Water Bucket Method

If you want a live pufferfish for transportation or display, use a water bucket. Right-click (or use the interact button) on a pufferfish with an empty bucket, and you’ll scoop it up as a “Bucket of Pufferfish.” This works the same way as bucketing tropical fish or axolotls.

The bucket method is faster if you’re already in a warm ocean and want to grab a few pufferfish to bring back to your base. You can place them in a custom aquarium or use them later for specific purposes. Just be careful when releasing them, they’ll inflate if you get too close, even in a controlled environment.

Best Enchantments for Catching Pufferfish

If you’re fishing for pufferfish, a few enchantments make the process much faster:

  • Luck of the Sea III: Increases the chance of treasure and reduces junk, but pufferfish are technically junk, so this doesn’t help. Skip it if you’re specifically hunting pufferfish.
  • Lure III: Reduces wait time between bites by up to 15 seconds. This is the best enchantment for fast pufferfish farming.
  • Unbreaking III / Mending: Keeps your rod in good shape for long fishing sessions or AFK farms.

For maximum efficiency, prioritize Lure III. It won’t change the loot table, but it’ll speed up your catch rate significantly.

Understanding Pufferfish Behavior and Defense Mechanism

Pufferfish behavior is simple but deadly if you’re not paying attention. Here’s how their defense mechanism works and how to avoid taking unnecessary damage.

Inflation and Poison Damage

When a player (or most other mobs) comes within a 5-block radius, a pufferfish will begin to inflate. The inflation takes about a second, and once fully puffed, the pufferfish deals Poison damage and contact damage to anything that touches it.

  • Poison II for 7 seconds (Java Edition) or Poison for 5 seconds (Bedrock Edition)
  • 1 heart of direct damage per contact

The Poison effect drains your health over time, turning your health bar green and dealing damage every 1.25 seconds. Combined with the direct contact damage, a pufferfish can kill an unarmored player pretty quickly if you’re not careful.

Pufferfish will also damage other mobs, including guardians and drowned, making them a minor hazard in ocean combat situations. They deflate after the threat leaves their range, returning to their normal, harmless state.

How to Avoid Getting Poisoned

Avoiding pufferfish damage is straightforward once you know their range:

  • Keep your distance: Stay more than 5 blocks away if you’re just swimming through.
  • Use a fishing rod: Catch them from a boat or shore to avoid proximity altogether.
  • Wear armor: Full iron or diamond armor negates most of the contact damage, though Poison will still chip away at your health.
  • Drink Milk: If you do get poisoned, drinking milk instantly removes the Poison effect. Keep a bucket on your hotbar if you’re working near pufferfish.
  • Use a shield: Blocking with a shield prevents contact damage, though it won’t stop the Poison effect if you’re within range.

If you’re setting up an aquarium with pufferfish, build it with glass walls and make sure players can’t accidentally swim into the tank. Pufferfish in captivity are just as dangerous as wild ones.

Uses for Pufferfish in Minecraft

Pufferfish aren’t just a novelty, they have several legitimate uses, though some are more practical than others.

Brewing Potions of Water Breathing

The primary use for pufferfish is brewing Potions of Water Breathing. These potions let you breathe underwater for 3 minutes (8 minutes with Redstone), which is essential for exploring ocean monuments, underwater caves, or long mining sessions beneath the sea.

To brew a Potion of Water Breathing:

  1. Place a Water Bottle in the brewing stand.
  2. Add Nether Wart to create an Awkward Potion.
  3. Add a Pufferfish to create the Potion of Water Breathing.
  4. (Optional) Add Redstone to extend duration to 8 minutes.

This is the most efficient way to handle underwater exploration, especially if you’re clearing out an ocean monument or farming prismarine. Many players rely on detailed brewing guides to optimize their potion setups for long underwater sessions.

Trading with Villagers

Master-level Fisherman villagers will buy 1–4 pufferfish for 1 emerald (Java Edition). This isn’t the most lucrative trade, but it’s a decent way to offload excess pufferfish if you’ve been fishing a lot. Fishermen are easy to level up with raw fish trades, so this is a low-effort source of emeralds.

Feeding Axolotls

You can’t breed axolotls with pufferfish, but you can feed pufferfish to an axolotl to trigger its regeneration ability. After an axolotl kills a mob, feeding it a pufferfish (or any tropical fish or bucket of fish) removes its cooldown, letting it hunt again immediately. This is niche but useful if you’re using axolotls for guardian farming or underwater mob grinding.

Food Source (Warning: Not Recommended)

Technically, you can eat a pufferfish. But you really, really shouldn’t.

Eating a pufferfish gives you:

  • Hunger III for 15 seconds
  • Poison IV for 60 seconds
  • Nausea II for 15 seconds
  • Restores 1 hunger point (half a drumstick)

You’ll lose way more health than you gain, and the nausea effect makes your screen wobble, which is disorienting. The only time eating pufferfish makes sense is for achievements, challenges, or trolling your friends on a server. Otherwise, stick to cooked fish.

How to Farm Pufferfish Efficiently

If you need a steady supply of pufferfish for potions or trading, setting up a farm is the way to go. There are two main approaches: AFK fishing and manual fishing with optimization.

Setting Up an AFK Fish Farm

AFK fish farms have been a staple of Minecraft for years, though Mojang has nerfed them in recent updates. As of Java Edition 1.16+, you need to fish in an “open water” area for the farm to work properly, basically, a 5×5×5 area of water with no obstructions.

To build an AFK fish farm:

  1. Dig a 5×5×5 pool of water (or use an ocean).
  2. Set up a note block and hopper mechanism to auto-reel your fishing rod (look up a current design, as mechanics vary by version).
  3. Hold down right-click (or weigh down your mouse/controller button).
  4. Walk away and let it run.

You’ll catch pufferfish along with other fish, enchanted items, and junk. The drop rate for pufferfish is about 13%, so you’ll get a decent haul over time. Just make sure your design is updated for your version, older 1×1 farms don’t work anymore in Java Edition.

Optimizing Your Fishing Setup

If you prefer manual fishing or want to speed up your catch rate:

  • Use Lure III to cut wait times between bites.
  • Fish in any ocean biome, you don’t need to be in a warm ocean since pufferfish are part of the general fishing loot table.
  • Set up a small fishing dock or boat so you can fish comfortably without drowning or dealing with drowned mobs.
  • Pair fishing with other tasks, like smelting or organizing inventory, to maximize your time.

Some advanced players use modded fishing setups to automate or enhance the process, especially on PC. Mods can add custom fish farms, loot table tweaks, or quality-of-life improvements that make fishing less tedious.

Pufferfish vs Other Ocean Mobs: Key Differences

Minecraft’s oceans are full of aquatic life, but pufferfish stand out in a few key ways. Here’s how they compare to other ocean mobs:

Pufferfish vs Tropical Fish:

Tropical fish are purely decorative and harmless. They come in dozens of color patterns and are popular for aquariums. Pufferfish, on the other hand, are dangerous and functional, they’re used for brewing and trading, not just decoration.

Pufferfish vs Cod/Salmon:

Cod and salmon are basic food sources with no special abilities. You can cook them for a solid 5–6 hunger points, and they’re easy to farm. Pufferfish can’t be cooked and are terrible as food, but they’re the only fish that brews potions.

Pufferfish vs Guardians:

Guardians are hostile mobs that shoot laser beams and spawn in ocean monuments. They’re far more dangerous than pufferfish and drop prismarine shards/crystals. Pufferfish are passive and only hurt you if you get too close, making them more of a nuisance than a real threat.

Pufferfish vs Axolotls:

Axolotls are tameable mobs that attack other underwater hostiles (except turtles and dolphins). They’re useful allies in combat and can be bred with tropical fish. Pufferfish can be fed to axolotls to reset their attack cooldown, but they can’t be used for breeding.

Pufferfish fill a unique niche: they’re dangerous enough to be a hazard, but useful enough to be worth farming. No other ocean mob does both.

Tips and Tricks for Working with Pufferfish

Here are some advanced tips and lesser-known tricks for dealing with pufferfish in Minecraft:

Build a pufferfish trap for base defense:

Place pufferfish in a narrow water channel near your base entrance. Any player or mob that swims through will take Poison damage. It’s not foolproof, but it’s a fun and unexpected deterrent on multiplayer servers.

Use pufferfish for potion brewing bulk runs:

If you’re prepping for an ocean monument raid, brew a double chest of Water Breathing potions beforehand. Combine pufferfish farming with a brewing station setup, and you’ll never run out mid-raid.

Keep a backup bucket of milk:

If you’re working in a pufferfish-heavy area (like a custom aquarium build), always carry milk. The Poison effect can sneak up on you, especially if you’re placing blocks near the tank.

Don’t bother with pufferfish as mob bait:

Some players try to use pufferfish to damage hostile mobs, but the poison effect is weak and inconsistent. Stick to traditional mob grinders or traps, pufferfish aren’t worth the effort for combat.

Collect pufferfish early for potion stockpiles:

If you’re planning any major underwater projects, start fishing for pufferfish as soon as you have a decent rod. You’ll want at least 10–20 on hand before tackling monuments or building underwater bases. Guides on optimizing underwater exploration often recommend stocking up early to avoid mid-project supply runs.

Use creative mode for aquarium testing:

If you’re building a decorative tank with pufferfish, test the layout in creative first. Make sure players can’t accidentally fall in or get too close to the glass. Pufferfish will inflate even in captivity, and the last thing you want is a death trap in your living room.

Conclusion

Pufferfish in Minecraft are a perfect example of risk and reward done right. They’re dangerous if you’re careless, but they’re also one of the few renewable sources for Water Breathing potions, an essential tool for any serious ocean explorer. Whether you’re farming them with a fishing rod, scooping them up with buckets, or just trying to avoid getting poisoned while swimming, understanding pufferfish behavior makes your ocean adventures a lot smoother.

Catch them smart, brew them into potions, and respect the 5-block rule. And whatever you do, don’t eat one unless you’re going for an achievement. Your health bar will thank you.

Los Santos doesn’t reward hesitation. In 2026, GTA Online’s economy is more complex than ever, with over a dozen business options competing for your attention, and your startup capital. Drop $2 million on the wrong property, and you’ll spend weeks grinding just to break even. Choose wisely, though, and you’ll be printing cash while you sleep.

The question isn’t whether you should invest in businesses, it’s which ones deserve your time and money. Some operations demand constant attention, turning your gaming session into a second job. Others generate passive income while you’re robbing Cayo Perico or terrorizing the streets. Understanding the difference separates players who scrape by from those who finance Oppressor MK IIs in cash.

This guide breaks down the best business in GTA Online from every angle: initial cost, profit margins, time investment, and scalability. Whether you’re a solo grinder or running with a crew, you’ll learn exactly which businesses belong in your portfolio and which ones are traps for beginners. Let’s turn that criminal empire from a dream into a money-printing machine.

Key Takeaways

  • The Agency is the best business in GTA 5 for solo players, combining high active income ($277,500/hour with Payphone Hits and Security Contracts) with consistent passive safe income of $250,000 maximum.
  • The Nightclub is the ultimate passive income generator at $50,000 per real hour AFK, requiring a $5-8 million investment but paying for itself within 30-40 sales while feeding from your other businesses.
  • A hybrid portfolio combining the Agency for active income, Bunker for background production, and Vehicle Cargo using the Top Range Only method generates $800K-$1M+ daily with smart time management.
  • Avoid common traps including running MC businesses actively in 2026 (only use them as unupgraded Nightclub feeders), overpaying for business locations, and selling valuable stock in public lobbies without crew protection.
  • The best business strategy prioritizes profit-per-hour of actual gameplay over raw profits, meaning a business generating $150,000 in 30 minutes of engaging gameplay beats one making $200,000 in two hours of tedious work.
  • Start building wealth with Cayo Perico Heist runs before investing in businesses, then systematically build toward a multi-business empire that generates passive and active income simultaneously.

Understanding GTA 5 Business Mechanics and Profitability

Before dropping millions on properties, players need to grasp how GTA Online’s business ecosystem actually functions. Not all income streams are created equal, and the difference between passive and active earnings can mean the gap between financial freedom and constant grinding.

How Passive vs. Active Income Works

Passive income accumulates while you’re doing literally anything else in the game. Your Nightclub warehouse fills up whether you’re racing, doing heists, or AFK watching TV in your apartment. These businesses require minimal interaction, maybe a sale mission every few hours, but generate steady returns without monopolizing your playtime.

Active income demands hands-on participation. Vehicle Cargo, for instance, requires you to source cars, deliver them without damage, and manage cooldowns between sales. The profit per hour can be stellar, but you’re working for every dollar. It’s the difference between owning rental properties and working hourly.

The smartest players in 2026 run hybrid portfolios: passive businesses churning in the background while they actively grind higher-margin operations. A maxed Nightclub generates $50,000/hour completely AFK, while you’re simultaneously running Payphone Hits for $85,000 a pop.

Initial Investment vs. Long-Term Returns

GTA Online’s business landscape punishes impatience. A fully upgraded Bunker costs around $3.5 million total, but that investment pays for itself in roughly 15-20 supply runs. Compare that to an Arcade, which costs $2-3 million and generates only $5,000/in-game day passively, though it unlocks the Casino Heist, which changes the calculation entirely.

Breakeven points matter:

  • Agency: Pays for itself in approximately 20-25 Security Contracts plus passive safe income
  • Nightclub: Requires 30-40 sales to recover the $5-8 million total investment, but then prints money indefinitely
  • Bunker: Breaks even after about 12-15 full stock sales with upgrades
  • MC Businesses: Cocaine Lockup breaks even in roughly 20 sales: others take longer and aren’t worth the hassle

The key metric isn’t just profit per sale, it’s profit per hour of your actual attention. A business that makes $200,000 but takes two hours of tedious work is worse than one making $150,000 in 30 minutes of engaging gameplay. Your time has value, even in a virtual criminal economy.

The Agency: Top-Tier Profits With Minimal Effort

Introduced in the Contract DLC, the Agency has quietly become the best business to buy in GTA 5 for players who value their time. It combines consistent active income with genuinely enjoyable missions, a rarity in GTA Online’s often-tedious business landscape.

Why the Agency Dominates in 2026

The Agency delivers what most businesses promise but fail to provide: high returns without soul-crushing repetition. Security Contracts pay $30,000-$85,000 for missions that take 5-15 minutes. They’re varied enough to stay engaging, rescue missions, asset protection, gang termination, and you can launch them on demand with zero supply costs or prep work.

But the real genius is the passive income. The Agency safe accumulates $20,000 per in-game day (48 real minutes), maxing at $250,000. Just AFKing overnight fills your safe with free money. For players running efficient grinding routines, this passive stream adds up to $5,000 per real hour without lifting a finger.

Total cost ranges from $2.01 million (Vespucci Canals location) to $2.83 million (Rockford Hills), with minimal upgrade costs. You don’t need staff upgrades or equipment improvements, the Agency is profitable immediately.

Security Contracts and Payphone Hits Breakdown

Security Contracts come in three tiers:

  • Low-tier: $30,000-$45,000, roughly 5-8 minutes
  • Mid-tier: $45,000-$60,000, around 8-12 minutes
  • High-tier: $60,000-$85,000, typically 12-15 minutes

The missions themselves are designed for solo play but work equally well with a crew. Asset Protection might have you defending a client’s yacht from waves of enemies. Gang Termination sends you to wipe out specific NPCs across multiple locations. Vehicle Recovery tasks you with stealing and delivering high-value rides.

Payphone Hits are the crown jewel, available after completing the Contract story missions. Franklin calls with assassination contracts paying $85,000 if you meet the bonus objective (which is almost always achievable). Hit the lawyer with a car during his jog. Snipe the target during a specific window. These take 3-5 minutes for experienced players and have a 20-minute cooldown.

The math is simple: one Payphone Hit ($85,000) plus two mid-tier Security Contracts ($100,000) nets $185,000 in under 40 minutes. That’s $277,500/hour, competitive with any active business and infinitely more enjoyable than MC supply runs.

Add the passive safe income, and the Agency becomes the cornerstone of any smart portfolio. It’s not just the gta online best business for raw profit, it’s the best for profit per unit of fun, which matters when you’re trying to enjoy a game, not work a virtual job.

Nightclub: The Ultimate Passive Income Generator

If the Agency is the best active business, the Nightclub is the undisputed king of passive income. It’s the only business that generates product across multiple ventures simultaneously without any supply runs, steal missions, or resupply headaches. Once configured correctly, it’s a fire-and-forget money printer.

Setting Up Your Nightclub for Maximum Efficiency

The Nightclub works by having Warehouse Technicians accrue goods from your other businesses, but here’s the catch: those businesses only need to be active, not stocked. Your Bunker can be completely empty, yet your Nightclub technician assigned to Sporting Goods will still generate stock.

Essential purchases for maximum efficiency:

  • Nightclub property: $1.08M-$1.7M depending on location (Downtown Vinewood is the sweet spot for $1.32M)
  • Equipment Upgrade: $1.425M (increases accrual rate by roughly 50%, absolutely essential)
  • Staff Upgrade: $475K (reduces popularity decay, only matters if you care about the club’s separate passive income)
  • Five Warehouse Technicians: $1.425M total (you start with one, need four more at various prices)
  • Storage Floors: $1.35M for all three (maxes warehouse capacity at 360 units)

Total investment: $5-8 million depending on location and whether you buy the optional extras. It’s expensive upfront, but the returns justify every dollar.

A fully upgraded Nightclub generates approximately $50,000 per real-world hour completely AFK. Leave your character watching TV in your apartment overnight, wake up to $400,000+ in stock. No supply runs. No defend missions. No stress.

Which Businesses to Link and Why

This is where players screw up. Your Nightclub can link to seven business types, but only five matter for profitability. Assign technicians to these in priority order:

  1. Cargo and Shipments (Special Cargo Warehouse) – $10,000/unit, 70 hours to fill, $700K value
  2. Sporting Goods (Bunker) – $10,000/unit, 66.6 hours to fill, $700K value
  3. South American Imports (Cocaine Lockup) – $20,000/unit, 20 hours to fill, $200K value
  4. Pharmaceutical Research (Meth Lab) – $11,500/unit, 20 hours to fill, $115K value
  5. Cash Creation (Counterfeit Cash) – $7,000/unit, 20 hours to fill, $70K value

Notice the pattern: the top two take forever to fill but have massive value. The bottom three fill quickly but contribute less. Together, a full warehouse across these five categories is worth $1,785,000 with a high-demand bonus.

The two you should ignore:

  • Organic Produce (Weed Farm) – Poor value, not worth the technician slot
  • Printing & Copying (Document Forgery) – Absolute garbage tier, skip entirely

Critically, you don’t need to actively run the underlying businesses. Your Cocaine Lockup doesn’t need supplies. Your Bunker can be shut down. As long as they’re technically “active” (not fully shut down via the laptop), the Nightclub technicians accrue product. This is why seasoned players own MC businesses but never resupply them, they exist solely to feed the Nightclub.

Sell strategy: Solo players should sell around $900K-$1M stock to guarantee a single vehicle. Crews can wait for max capacity and run multi-vehicle sales for the full $1.785M. The sale missions are straightforward, far easier than MC business deliveries.

Bunker: Gunrunning for Serious Cash Flow

The Bunker remains one of the most reliable gta 5 best business options in 2026, balancing strong profit margins with reasonable time investment. It’s also the foundation for your Nightclub’s Sporting Goods accrual, making it a double-value purchase.

Optimizing Research vs. Manufacturing

When you first buy a Bunker, you’ll face a choice: allocate staff to Research, Manufacturing, or split them. Here’s the reality: Research is a money pit until you’ve unlocked what you need.

The Research track unlocks 51 items randomly, weapon upgrades, liveries, and the critical Oppressor MK II missiles. Fast-tracking a single research project costs $225,000. Completing all research naturally while manufacturing costs you millions in lost product.

Optimal strategy for new Bunker owners:

  1. Set to Manufacturing only immediately
  2. Run stock until you’ve made back your investment
  3. If you desperately need specific unlocks (explosive rounds, thermal scopes), fast-track only those items
  4. Switch to Research only if you’re drowning in cash and want to complete the tree

Once Research is done, permanently set to Manufacturing. A full supply bar ($75,000 if purchased) converts to $210,000 local sale value or $315,000 remote sale value with upgrades. That’s $240,000 profit per full cycle remote, minus the Oppressor fuel you burned making the delivery.

Critical upgrades:

  • Equipment Upgrade ($1.155M): Boosts production speed and value significantly
  • Staff Upgrade ($598.5K): Increases production rate
  • Security Upgrade ($351K): Reduces raid chance (less important, but nice if you’re sitting on full stock)

Total cost for Chumash Bunker (best location) plus upgrades: ~$3.5M. It pays for itself in 15-20 full sales, which sounds like a lot but accumulates faster than you’d think.

Solo vs. Team Sales Strategy

Here’s where the Bunker gets tricky. Sale missions assign vehicles based on stock value:

  • Under $175K (local) / $262.5K (remote): Guaranteed single vehicle
  • Above those thresholds: 2-4 vehicles possible

Solo players should buy one supply bar ($75K), let it convert, then sell remote for $240K profit. This guarantees one vehicle and takes about 2.5 real hours to produce. You can run other activities while it cooks.

The worst missions:

  • Dune FAVs: Slow, fragile, awful
  • Marshall Monster Trucks: Equally terrible, avoid at all costs

The best missions:

  • Phantom Wedge: Single truck, smash through traffic, glorious
  • Single Insurgent drop-offs: Multiple drops but manageable solo

If you get Dune FAVs or Marshalls and you’re solo, consider finding a new session. You’ll lose a small amount of stock (about 7-14K) but save yourself 20 minutes of agony. Organizations running with money-making strategies often coordinate Bunker sales to handle multi-vehicle deliveries efficiently.

For crews, fill the Bunker completely ($1.05M value with upgrades) and run the sale with 3-4 players. Everyone gets the same payout, making it one of the better crew activities for shared profit.

Cargo Warehouse: High Risk, High Reward Grinding

Special Cargo is GTA Online’s purest test of grinding endurance. It’s not passive, it’s not particularly fun, but the profit ceiling is higher than almost any other business. In 2026, it remains the choice for players who want maximum returns and don’t mind repetitive sourcing missions.

The concept: Buy crates through your office computer, source them via missions, store them in your warehouse, sell in bulk. Simple in theory, tedious in execution.

Small vs. Medium vs. Large Warehouse Comparison

Small Warehouse (16 crate capacity):

  • Purchase cost: $250K-$360K
  • Max stock value: $240K
  • Profit after costs: ~$144K
  • Time to fill: 5-6 hours of active sourcing

Medium Warehouse (42 crate capacity):

  • Purchase cost: $880K-$1.05M
  • Max stock value: $735K
  • Profit after costs: ~$483K
  • Time to fill: 14 hours of sourcing

Large Warehouse (111 crate capacity):

  • Purchase cost: $1.9M-$3.5M
  • Max stock value: $2.22M
  • Profit after costs: ~$1.5M
  • Time to fill: 37 hours of active grinding

The math heavily favors large warehouses once you’ve got the capital. The profit margin increases with volume, you’re paying the same sourcing costs but getting better returns per crate on large sales.

Sourcing strategy: Always buy three crates per run ($18K cost). Single crate purchases ($2K) are terrible value for your time. Two crates ($8K) are marginally better. Three crates maximize profit per mission, even accounting for the higher cost.

The missions themselves are the definition of grind: steal crates from gangs, pick them up from scattered locations, defend against NPCs. Some require aircraft, others just a fast car and good aim. After dozens of runs, they blur together into a monotonous cycle.

Why players still run Cargo in 2026: The numbers don’t lie. A full large warehouse nets $1.5M profit. Run two warehouses simultaneously (source for one while the other’s on cooldown), and you’re looking at $3M every couple of days of active grinding. Publications like IGN have featured Special Cargo as a cornerstone strategy for players building wealth.

The downside: It’s the most vulnerable business to griefers. A full warehouse sale in a public lobby attracts Oppressor MK IIs like blood in water. You can sell in solo public lobbies (method varies by platform), but you’ll miss the small high-demand bonus. Most serious Cargo grinders use MTU settings on PlayStation or suspend process tricks on PC to create solo publics.

Is it worth it? If you can stomach the repetition and protect your sales, absolutely. If you value variety and fun, there are better options.

Vehicle Cargo: Precision Work for Premium Payouts

Vehicle Cargo represents GTA Online’s attempt at quality over quantity. Instead of mindlessly sourcing crates, you’re stealing specific high-end cars, delivering them without damage, and selling for premium prices. It’s engaging, skill-based, and surprisingly profitable per hour, if you know the trick.

Basic operation: Source vehicles through your Vehicle Warehouse, store up to 40 cars, export them for profit. Damage reduces your payout, so precision driving matters. Standard and Mid-Range cars sell for less: Top Range vehicles are where the real money lives.

The Top Range Only Method Explained

Here’s where Vehicle Cargo separates casual players from optimizers. The game’s source algorithm pulls from a pool of 32 possible vehicles: 10 Standard Range, 10 Mid Range, 12 Top Range. Critically, it won’t give you duplicates of cars you already own.

The exploit:

  1. Source vehicles until you have one of every Standard Range car (10 total)
  2. Source until you have one of every Mid Range car (10 total)
  3. Never sell Standard or Mid Range cars, just let them sit in your warehouse
  4. Now when you source, the game can only give you Top Range vehicles
  5. Source and sell Top Range exclusively for maximum profit

With the Top Range Only method active:

  • Source mission: Free (aside from time)
  • Typical damage during source: $0-$2K if you’re careful
  • Export to specialist dealer: $100K revenue
  • Export modification cost: $20K
  • Net profit per car: $80K

Timing: Source and export missions take 15-20 minutes total for experienced players. That’s $80K per 20 minutes, or $240K/hour, competitive with any business and far more engaging than MC resupplies.

Pro tips for minimizing damage:

  • Four waves of NPC enemies spawn during source missions: they stop after you trigger the fourth wave and lose line of sight
  • For export missions, drive a few blocks, get out, and kill the four waves of NPCs that spawn, then deliver with zero pursuit
  • Use Cargobob if you own one to bypass traffic and NPCs entirely (though it’s slower)
  • Avoid the Cargobob method for sourcing, too many missions don’t support it well

Vehicle Warehouse costs $1.5M-$3.1M depending on location. La Mesa ($1.5M) is perfectly fine: don’t overpay for Vinewood or Airport locations. No upgrades required, you’re profitable immediately.

The main drawback: Export cooldown. After selling a car, you wait 20 minutes before exporting again. Smart players run Vehicle Cargo alongside VIP Work (Headhunter, Sightseer) or Payphone Hits during cooldowns, creating a continuous income loop.

Is it the what is the best business in gta 5 overall? Not quite, but it’s the best active business for solo players who enjoy driving and want consistent hour-to-hour returns without mind-numbing repetition.

Motorcycle Club Businesses: Are They Still Worth It?

MC businesses were once the backbone of GTA Online’s economy. In 2026, they’re mostly obsolete for active income, but they still serve a critical purpose as Nightclub feeders. The question isn’t whether to own them, but whether to actually run them.

Cocaine Lockup and Meth Lab Performance

Of the five MC businesses, only two deserve consideration if you’re running them actively:

Cocaine Lockup (best MC business):

  • Purchase: $975K-$1.85M depending on location
  • Upgrades (Equipment + Staff): ~$1.4M
  • Full stock value: $420K (remote sale)
  • Supply cost: $75K per bar
  • Profit per full sale: ~$345K
  • Production time: 5 real hours for one supply bar

Meth Lab (distant second):

  • Purchase: $910K-$1.55M
  • Upgrades: ~$1.4M
  • Full stock value: $357K (remote sale)
  • Supply cost: $75K per bar
  • Profit per full sale: ~$282K
  • Production time: Similar to Cocaine

The other three, Counterfeit Cash, Weed, and Document Forgery, have such poor profit margins that they’re not worth your time to run actively. Even fully upgraded, their profit-per-hour can’t compete with Bunker, Agency, or Vehicle Cargo.

The real killer for MC businesses: raids and sale missions. Unlike the Bunker, MC businesses trigger raids more frequently and at lower stock thresholds. The sale missions are notoriously awful, PostOp vans that drive like cement trucks, Trash Trucks, or the infamous multi-drop sales that take 30+ minutes solo.

Running MC businesses actively in 2026 is generally masochistic. The profit-per-hour is mediocre, the missions are tedious, and the raid mechanic punishes you for letting stock accumulate.

So why own them at all?

Nightclub integration. Your Nightclub technicians need underlying businesses to accrue goods from. Cocaine, Meth, and Cash feed three of your five Nightclub technician slots. You need to own these MC businesses, but you don’t need to supply or run them.

Optimal MC strategy for 2026:

  1. Buy Cocaine Lockup and Meth Lab in the cheapest locations (Paleto Bay is actually fine since you’re not running sales)
  2. Do not buy equipment or staff upgrades, you’re not producing product
  3. Simply keep the businesses active (don’t fully shut down via the laptop)
  4. Assign Nightclub technicians to accrue from them
  5. Ignore them forever and collect passive Nightclub profit

This approach costs about $2M total for Cocaine and Meth in cheap locations, and they immediately start feeding your Nightclub. Compare that to $4-5M for fully upgraded active operations that generate barely more profit than a Bunker with worse missions.

If you’re absolutely committed to running MC businesses actively, only run Cocaine and only if you need something to do during Bunker production time. The returns don’t justify the suffering otherwise.

Arcade: Steady Passive Income Plus Heist Access

The Arcade occupies a weird niche in GTA Online’s business ecosystem. As a passive income generator, it’s mediocre. As a heist hub that also generates some side cash, it’s actually worthwhile, especially for players who run the Casino Heist regularly.

Purchase cost: $1.235M-$2.53M depending on location. Videogeddon in La Mesa ($1.875M) offers the best balance of price and convenience.

The passive income: The Arcade safe accumulates money based on how many arcade machines you own and their popularity. Realistically, even with all arcade games purchased (which costs another $4M+), you’re looking at about $5,000 per in-game day, or roughly $50K per real week. It’s not impressive.

Comparisons:

  • Agency safe: $20K/day, $250K max
  • Arcade safe: ~$5K/day, $100K max
  • Nightclub safe (from popularity): ~$10K/day if you maintain max popularity

The Arcade’s passive income alone doesn’t justify the investment. Most players never bother buying arcade machines beyond what’s needed for awards.

So why buy one?

The Casino Heist. The Arcade serves as your planning room for what’s still one of the best heists in the game. The Casino Heist can net $2-3M+ depending on approach and target, and while Cayo Perico has slightly better solo profits, Casino is more varied and engaging.

Also, the Arcade Master Control Terminal ($1.74M) lets you manage all your businesses from one location, resupplying Bunker, checking Nightclub stock, sourcing Vehicle Cargo, all without traveling across the map. For players running multiple businesses, this convenience is worth the price.

When to buy:

  • Early in your progression: Skip it unless you’re ready to run Casino Heists
  • Mid-game: Consider it if you’re expanding your business portfolio and want the Master Control Terminal
  • Late-game: Essential for convenience and completeness

The Arcade won’t carry your income like the Agency or Nightclub, but it’s a solid supporting piece in a diversified portfolio. Think of it as infrastructure that enables efficiency rather than a primary money-maker.

Combining Businesses: Building the Perfect Money-Making Empire

Individual businesses are good. Synchronized business portfolios are elite. The difference between earning $200K/hour and $500K/hour isn’t working harder, it’s working smarter by running complementary operations simultaneously.

The Ideal Business Portfolio for Solo Players

Foundation tier (first $5-6M investment):

  1. Agency ($2-3M): Your active income workhorse. Security Contracts and Payphone Hits generate immediate cash while the safe accumulates passively.

  2. Bunker ($3.5M with upgrades): Buy one supply bar, let it cook while you run Agency missions. Sell every 2.5 hours for $240K profit. Feeds your future Nightclub.

  3. Vehicle Warehouse ($1.5M+): Set up Top Range Only method. Export during Bunker production time and between Payphone Hit cooldowns.

Expansion tier (next $6-8M):

  1. Nightclub ($5-8M fully upgraded): The crown jewel of passive income. Requires Bunker, Cargo Warehouse, and MC businesses to reach full potential.

  2. Special Cargo Warehouse ($2-3.5M for large): Feeds Nightclub while offering high-volume sale opportunities when you want to grind.

  3. Cocaine Lockup & Meth Lab ($2M total, unupgraded): Pure Nightclub feeders. Never resupply them.

Optimization tier (another $2-3M):

  1. Arcade with Master Control Terminal ($3-4M total): Manage everything from one location plus Casino Heist access.

Daily solo routine with full portfolio:

  1. AFK overnight with Nightclub accumulating (~$400K)
  2. Sell Nightclub when convenient (15-20 minutes)
  3. Buy Bunker supplies ($75K), start production
  4. Run Payphone Hit ($85K, 5 minutes)
  5. Run 2-3 Security Contracts ($150K, 25 minutes)
  6. Export Vehicle Cargo during cooldowns ($80K per 20 minutes)
  7. Sell Bunker when full ($240K)
  8. Collect Agency safe periodically ($250K max)

This routine generates $800K-$1M+ in active play over 2-3 hours, plus the Nightclub passively accumulating for the next day. Publications like GamesRadar frequently highlight similar efficient grinding loops for maximizing income.

Best Setup for Crew-Based Operations

Running with a consistent crew changes the math entirely. Suddenly, max-capacity sales become viable, and heist profit-sharing can exceed any business.

Crew-optimized portfolio:

  1. Agency (shared Security Contracts, everyone earns)
  2. Bunker (full $1.05M sales with multiple vehicles, all players paid)
  3. MC Businesses (run actively with crew covering sales, profit split)
  4. Large Cargo Warehouses (multiple warehouses, crew helps source and defend sales)
  5. Arcade (coordinate Casino Heists with optimized cuts)

Crew rotation strategy:

  • Member A sells full Bunker, crew assists (everyone gets $1.05M)
  • Member B sells 111-crate warehouse, crew protects (B gets $2.2M, pays helpers)
  • Run Casino or Cayo Perico heists with optimized cuts
  • Agency missions can be run cooperatively for shared income

A coordinated four-player crew running back-to-back sales and heists can generate $2-3M per player in a focused 3-4 hour session. The key is organization, someone manages the schedule, everyone respects the rotation, and griefers get demolished before they can interfere.

The crew advantage isn’t just speed, it’s security. Oppressor griefers think twice about attacking a sale when four armed players are providing escort. contested lobbies become manageable, and high-demand bonuses actually become attainable.

Common Mistakes to Avoid When Running GTA 5 Businesses

Even experienced players sabotage their own profits through easily avoidable mistakes. Here’s what not to do:

Buying businesses before heists: New players often rush to buy a Bunker or MC business when they barely have $2M total. Wrong move. Your first $2M should go toward a Kosatka submarine for Cayo Perico Heist access. Run Cayo 3-4 times, build a $5-6M bankroll, then start buying businesses. Businesses are investments that take time to pay off: heists are immediate income.

Skipping upgrades: A non-upgraded Bunker or MC business produces at roughly half the rate and value of an upgraded one. You’ll waste hours grinding for mediocre returns. If you can’t afford the business plus equipment and staff upgrades, you can’t afford the business period. Save up or stick to what you have.

Running MC businesses actively in 2026: We covered this earlier, but it bears repeating: MC businesses (except maybe Cocaine) are not worth running actively. The missions suck, the profit-per-hour is mediocre, and raids are constant. Own them for your Nightclub, but don’t torture yourself resupplying them.

Ignoring location: Paying $700K extra for a “better” Vehicle Warehouse location is stupid, you’re driving to random source points anyway. But for the Bunker, location matters enormously. Paleto Bay is dirt cheap but adds 10+ minutes to every sale mission. Chumash or Farmhouse cost more but save you hours of driving over time. According to discussions on Shacknews and other gaming communities, location optimization can improve efficiency by 20-30%.

Selling in full public lobbies without protection: The high-demand bonus (1% per rival player, max 25%) sounds tempting. An extra $200K on a full Nightclub sale. But one Oppressor MK II can destroy hours of work in 30 seconds. Unless you’re in a friendly crew lobby or have serious backup, sell in solo publics. The bonus isn’t worth the risk for most players.

AFKing incorrectly: If you’re going to leave your character idle to accrue Nightclub or Bunker stock, do it right. Watch TV in your apartment or sit on a security camera, these prevent idle kicks. Leaving your character standing in the open results in disconnects or, worse, getting killed and charged hospital fees repeatedly.

Not using the Master Control Terminal: Once you own it, use it. Flying across the map to resupply your Bunker wastes 10 minutes you could spend making money. The Terminal pays for itself in saved time within weeks.

Hoarding stock during 2x events: When Rockstar runs double-money events on specific businesses, that’s your cue to go hard on those operations. A 2x Special Cargo week turns your large warehouse into a $3M profit engine. Ignoring these events means leaving millions on the table.

Buying Shark Cards: The ultimate mistake. Everything in this guide is achievable through smart play. Spending real money on GTA$ is paying premium prices for what you can earn with a little patience and strategy. Run Cayo Perico a few times, build your portfolio, and you’ll never need to consider Shark Cards again.

Conclusion

The best business in GTA Online in 2026 isn’t a single property, it’s a portfolio tailored to how you play. Solo grinders thrive with the Agency and Nightclub handling active and passive income. Crews dominate with coordinated Bunker and Cargo sales. Players who value their sanity avoid MC businesses and focus on high-quality operations like Vehicle Cargo.

The common thread: smart investment and efficient time management. Buy businesses that complement each other, upgrade them properly, and create routines that maximize profit per hour of actual attention. GTA Online’s economy rewards players who think like investors, not workers.

Start with an Agency for immediate returns and engaging missions. Add a Bunker for steady background income. Build toward a fully-linked Nightclub for elite passive generation. Expand with Vehicle Cargo or Special Cargo based on whether you prefer precision or volume grinding. Avoid the traps, expensive locations that don’t matter, MC businesses run actively, and sales in hostile lobbies without backup.

Your criminal empire isn’t built in a day, but with the right strategy, you’ll be printing millions while actually enjoying the game instead of treating it like a second job. Los Santos rewards the smart, punishes the impatient, and makes millionaires out of players who understand the difference.

Modern architecture has taken over the Minecraft building scene, and it’s not hard to see why. Clean lines, bold color contrasts, and massive glass panels create homes that look straight out of an architect’s portfolio, except you built them with your own hands, block by block. Whether you’re returning to Minecraft after years away or you’ve been grinding survival mode since the Caves & Cliffs update, modern houses offer a satisfying build experience that balances creativity with structure.

This guide covers everything from material selection and design principles to step-by-step construction and interior design. You’ll learn how to plan layouts that actually make sense, avoid the mistakes that make modern builds look awkward, and add those finishing touches that separate amateur builds from showcase-worthy creations. Let’s break down what makes modern houses work in Minecraft and how to build one that’ll make your friends ask for a tour.

Key Takeaways

  • Modern house designs dominate Minecraft building communities because clean lines, geometric shapes, and the block-based system align perfectly, making modern builds faster and more scalable than traditional styles.
  • Essential modern house materials include white and gray concrete for walls, glass panes for windows, dark wood accents, and flat roofing materials, with 3-4 color palette restraint being critical for a cohesive aesthetic.
  • Successful modern house layouts prioritize asymmetry, proper proportions (16×16 to 20×20 block footprints with 4-5 block ceiling heights), and clean lines that give purpose to every block placement.
  • Advanced modern house techniques like cantilevered sections, floor-to-ceiling glass facades, and split-level designs on slopes create architectural drama and visual depth that separate impressive builds from amateur structures.
  • Common modern house building mistakes include using too many materials, creating overly small windows, overdoing symmetry, and neglecting landscaping and hidden lighting that complete the professional aesthetic.
  • Modern house interiors work best with minimalist furniture, hidden lighting sources (sea lanterns under carpet, glowstone behind stained glass), and optional redstone automation for smart home features like motion-activated lights.

Why Modern Houses Are the Most Popular Build Style in Minecraft

Modern houses dominate Minecraft building communities for reasons that go beyond aesthetics. The style works exceptionally well with Minecraft’s block-based building system, straight edges and geometric shapes align perfectly with the game’s grid.

Unlike medieval castles or fantasy builds that require extensive terraforming and organic shaping, modern architecture embraces the rigid structure. A well-executed modern house can be completed faster than traditional builds while still looking impressive. The style also scales beautifully: a simple modern starter home uses the same design language as a sprawling luxury villa.

The popularity surge really took off around 2019-2020 when builders started showcasing sleek contemporary homes on YouTube and Reddit. The introduction of concrete blocks in version 1.12 gave builders the perfect material for smooth, clean walls. Newer blocks like blackstone, deepslate, and tuff (added in recent updates) expanded the palette even further.

Modern builds also photograph well for screenshots and videos. The high contrast between white concrete, black glass panes, and dark oak creates visual punch that stands out in thumbnails and social media posts. For players who want their builds to get noticed, modern architecture delivers.

Essential Materials for Modern Minecraft Houses

Best Blocks for Contemporary Aesthetics

Concrete is the foundation of modern Minecraft architecture. White concrete, light gray concrete, and black concrete form the core palette for most builds. Unlike wool, concrete doesn’t burn and has a smooth, matte finish that reads as plaster or painted walls.

Quartz blocks offer a slightly different white texture with more depth. Smooth quartz and quartz pillars add subtle variation to large white surfaces. They’re pricier in survival mode, requiring Nether runs, but the visual payoff is worth it.

Glass and glass panes are non-negotiable for modern builds. Standard glass works, but many builders prefer white stained glass panes or light gray stained glass panes for a subtle tint that reduces the harsh transparency. Black stained glass panes create dramatic window frames.

Polished blackstone, deepslate tiles, and smooth stone work as accent materials and flooring. Polished blackstone especially shines for dark exterior sections and modern fireplaces.

Wood choices matter more than you’d think. Dark oak planks and stripped dark oak logs provide rich contrast against white walls. Stripped birch or acacia work for lighter, Scandinavian-inspired modern builds.

For roofing, smooth stone slabs, concrete slabs, or even dark oak slabs create the flat or low-pitch roofs that define contemporary design. Avoid traditional steep roofs, they break the modern aesthetic immediately.

Color Palettes That Define Modern Architecture

The classic modern palette is monochrome: white concrete walls, black concrete accents, gray glass, and dark oak trim. This combination never fails and works in any biome.

Warm modern builds use white concrete with orange concrete or terracotta accents, stripped acacia wood, and light gray glass. This palette suits desert and savanna locations perfectly.

Cool modern leans into light blue concrete, cyan concrete, white concrete, and stripped birch. Think minimalist Scandinavian design. This works beautifully in snowy biomes or near water.

Dark luxury modern uses black concrete, gray concrete, polished blackstone, and minimal white accents. Add in some crying obsidian for exterior lighting if you’re feeling bold.

The key is limiting your palette to 3-4 main materials. Modern architecture is about restraint. Too many colors or textures make the build look busy instead of sophisticated.

Planning Your Modern House: Design Principles and Layout

Asymmetry and Clean Lines

Modern architecture thrives on controlled asymmetry. Unlike symmetrical medieval builds, modern houses use offset sections, varying heights, and cantilevered volumes to create visual interest.

Start by sketching (even on paper) a basic floor plan with rectangular rooms of different sizes. Stack them in interesting ways, a two-story section next to a single-story wing, a protruding second floor over a recessed ground floor. The goal is creating depth and shadow play.

Clean lines mean avoiding unnecessary decoration. No random blocks sticking out, no cobblestone texture variation, no vines or clutter on exterior walls. Every block placement should have a purpose. Window frames should align horizontally across facades. Rooflines should be crisp and intentional.

Many builders working on simple modern structures focus on keeping horizontal and vertical elements perfectly aligned. Use scaffolding or temporary marker blocks while building to maintain straight lines.

Optimal Dimensions and Room Spacing

Modern houses need proper proportions to avoid looking cramped or awkwardly stretched. For a starter modern home, aim for a 16×16 to 20×20 block footprint with ceiling heights of 4-5 blocks in main living areas.

Living rooms should be at least 8×10 blocks to accommodate minimal furniture without feeling empty. Bedrooms can be smaller, 6×8 blocks, since modern design favors efficiency. Kitchens need 6×8 minimum for counters and island placement.

Hallways should be 2 blocks wide for that spacious modern feel. Single-block hallways feel cramped and break immersion.

For multi-level homes, plan vertical circulation carefully. Modern staircases often run along exterior glass walls or occupy central voids. Allocate a 3×6 block area minimum for stairwells.

Floor-to-ceiling ratios matter. A room that’s 12 blocks wide should have at least a 4-block ceiling height. Going higher (5-6 blocks) creates that airy, open-plan feeling modern architecture is known for.

Step-by-Step: Building a Simple Modern House for Beginners

Foundation and Frame Construction

Start by clearing and flattening your build site. Modern houses look best on level terrain or gentle slopes. Mark out a 16×12 block rectangle with temporary blocks, this will be your footprint.

Lay the foundation using smooth stone or polished andesite one block deep. This gives you a clean base and prevents grass from growing inside later.

Build the frame using concrete or quartz. Place corner posts first, single block columns at each corner, 4 blocks tall for the ground floor. Modern builds don’t need thick walls: single-block-thick walls are standard.

Connect the corners with horizontal blocks to create the outline. You now have a 4-block-tall rectangular frame. For a two-story build, extend the corner posts to 8-9 blocks and add a second floor outline at the 5-block height.

Adding Walls, Windows, and Roof

Fill in the walls with white concrete, leaving gaps for windows. Modern houses use large windows, so plan for 3-4 block wide horizontal windows or floor-to-ceiling glass sections.

For windows, use glass panes instead of full blocks, they’re thinner and look more refined. Frame windows with black concrete or polished blackstone for contrast. A typical modern window might be 4 blocks wide and 2-3 blocks tall, starting at ground level.

Create a front entrance by leaving a 2-block tall, 1-block wide opening. Use dark oak doors or iron doors for the modern aesthetic. Add a small overhang above the door using concrete slabs extended 2 blocks out.

For the roof, modern houses typically use flat roofs or very subtle slopes. Place smooth stone slabs or concrete slabs across the top of your frame, flush with the walls. For added detail, create a slight parapet by extending the walls 1 block above the roof level on some sides.

Add exterior lighting using lanterns recessed into walls or sea lanterns built into the ground along pathways. Modern builds avoid torches, they break the clean aesthetic.

Advanced Modern House Techniques for Experienced Builders

Multi-Level Structures and Cantilevered Sections

Once you’ve mastered basic modern builds, cantilevered sections add serious architectural drama. A cantilever is a section that extends outward without visible support underneath, think a second-story bedroom jutting out over the first floor.

To build a cantilever, construct your ground floor as normal, then extend the second floor 3-5 blocks beyond the first-floor walls. This creates an overhang that provides shade for windows below and adds depth to the facade.

For structural believability, use thicker support columns (2×2 or even 3×3) at strategic points on the ground floor. Even though Minecraft doesn’t require actual physics, the visual weight distribution matters for aesthetics.

Split-level designs create interest in modern homes built on slopes. Build one wing at ground level, then step up 3-4 blocks for the next section. This follows the terrain naturally while maintaining the modern aesthetic. According to building communities on Game8, split-level modern homes consistently rank among the most impressive player-created structures.

Connect different levels with interior staircases built from concrete stairs and slabs. Glass railings (using glass panes and fence posts) keep sightlines open.

Glass Facades and Floor-to-Ceiling Windows

Full glass walls are the signature of high-end modern builds. To create a floor-to-ceiling glass facade, frame a wall section with concrete or quartz pillars spaced 4-6 blocks apart. Fill the entire space between pillars with glass panes from floor to ceiling.

For even cleaner aesthetics, some builders use white stained glass panes which provide privacy while maintaining brightness. The slight tint makes interiors visible but not overexposed.

Corner windows require special attention. Use glass panes instead of blocks at corners to avoid thick intersections. The panes create thin mullions that look intentional rather than clunky.

For truly advanced builds, create double-height glass atriums. Build a two-story open space and install glass walls spanning both floors. Add an interior balcony overlooking the atrium for luxury villa vibes.

Remember that large glass sections need interior lighting to look good at night. Embed sea lanterns in floors or ceilings, or use glowstone hidden behind furniture.

Interior Design Ideas for Modern Minecraft Homes

Minimalist Furniture and Décor

Modern interiors embrace the “less is more” philosophy. Unlike cluttered medieval halls, modern rooms use carefully placed furniture with clean lines.

For seating, use quartz stairs or smooth stone stairs as chairs with white concrete slabs as backs. Arrange them around a dark oak trapdoor or polished blackstone slab coffee table. A simple L-shaped arrangement seats 4-5 players comfortably.

Kitchen counters work best as polished blackstone or smooth stone slabs raised on quartz blocks or white concrete. Add stone buttons as knobs, item frames with plates as stovetops, and a cauldron as a sink. Keep it minimal, one continuous counter along a wall looks more modern than broken-up sections.

For beds, use white or gray beds and frame them with dark oak planks or stripped dark oak logs as side tables. A single flower pot with a plant or a candle on each side table provides all the decoration needed.

Shelving can be created with dark oak fences as vertical supports and oak slabs as shelves. Space them 2 blocks apart vertically. Place books, plants in pots, or decorative heads sparingly, 3-4 items per room maximum.

Avoid clutter. Modern design means empty space is part of the aesthetic. A room with two pieces of well-placed furniture looks better than one crammed with details.

Smart Lighting and Redstone Automation

Modern homes demand sophisticated lighting. Visible torches are banned, use hidden lighting sources instead.

Embed sea lanterns or glowstone in floors and cover them with white carpet or light gray carpet. This creates ambient floor lighting perfect for hallways and living rooms. In bathrooms and kitchens, place light sources behind white stained glass panes in walls or ceilings for diffused panel lighting.

Redstone automation elevates modern builds from static structures to functional smart homes. A daylight sensor connected to interior lights automatically turns them on at night. Place the sensor on the roof and run redstone to redstone lamps hidden in ceilings.

For automatic doors, place pressure plates (stone or weighted) in front of entrances. This works especially well for glass sliding doors using sticky pistons and glass blocks.

Advanced builders incorporate hidden piston doors that retract walls into floors or ceilings. This requires more redstone knowledge but creates jaw-dropping effects. Resources on Twinfinite cover detailed redstone circuits for modern home automation.

Motion-activated lighting in hallways uses observer blocks detecting player movement. When you walk past, lights turn on for 10-15 seconds before shutting off. This requires a bit of redstone repeater timing but looks incredibly futuristic.

Landscaping and Exterior Features for Modern Builds

Pools, Patios, and Outdoor Living Spaces

Modern houses aren’t complete without outdoor living areas. An infinity pool is the ultimate modern flex. Dig a rectangular pool 2-3 blocks deep, line it with white concrete or light blue concrete, and fill it with water. For the infinity edge, let water flow over one edge into a lower catch basin, this creates the visual effect of water extending to the horizon.

Surround the pool with smooth stone slabs or quartz slabs as decking. Add lounge chairs using quartz stairs with white concrete slabs as backs. Place potted bamboo or flowering azalea in corners for minimal greenery.

Patios should use the same materials as the house to create visual continuity. A polished blackstone or dark oak plank patio off the living room extends the indoor space outside. Add a simple seating area and perhaps a fire pit (campfire surrounded by polished blackstone or concrete).

For covered outdoor areas, extend the roof overhang 3-4 blocks and support it with slender pillars. This creates shaded outdoor dining spaces perfect for multiplayer servers.

Modern Garden Design and Pathways

Modern landscaping is about geometry and restraint. Forget wild flower gardens, think curated planters and clean pathways.

Create raised planter boxes using dark oak planks or concrete frames, 1-2 blocks tall. Fill them with dirt and plant bamboo, flowering azalea, or birch saplings. Space planters 4-6 blocks apart in straight lines or geometric patterns.

Pathways should be straight or make clean 90-degree turns. Use smooth stone slabs, polished andesite, or concrete for path materials. A popular technique involves laying a 2-block-wide path with a different material (like polished blackstone) as a 1-block center stripe.

Builders who excel at white block aesthetics often use white concrete pathways bordered by black concrete for maximum contrast.

For lawn areas, keep grass trimmed (using shears to prevent random grass growth) or replace with moss blocks or short grass. Modern lawns are manicured, not wild.

Exterior lighting should be minimal and architectural. Recessed ground lights work well, dig down 1 block, place a sea lantern or glowstone, and cover with a white carpet or light gray carpet. Space these every 4-5 blocks along pathways.

Top Modern House Design Ideas and Inspiration

Beachfront Modern Villas

Beachfront modern villas take full advantage of ocean views with massive glass walls facing the water. Build these on white sand beaches using white concrete and light gray concrete as primary materials.

Design a ground floor that’s mostly open-plan, a combined living, dining, and kitchen area with a glass facade spanning the entire ocean-facing wall. Use polished diorite or white concrete for flooring.

Add a wooden deck extending 8-10 blocks toward the water using stripped dark oak logs as support posts and dark oak planks for decking. Include built-in seating (dark oak stairs) and a fire pit for evening ambiance.

Second-story master bedroom should cantilever over the deck, with floor-to-ceiling windows providing sunrise views. A small balcony accessed through glass doors adds luxury.

Incorporate a rooftop terrace with a small pool and lounge area. The white-on-blue color scheme against the ocean creates postcard-worthy screenshots.

Mountain Contemporary Retreats

Mountain modern homes work beautifully with natural stone and wood combinations. Use polished andesite or stone for lower levels and dark oak or spruce for upper sections.

Build into the slope rather than flattening everything, let the terrain inform the design. A split-level home with the entrance on the upper level and bedrooms stepping down the slope feels organic.

Large windows framing mountain views are essential. Position living areas to face valleys or peaks. Use birch wood or stripped spruce for ceiling beams visible from below, adding warmth while maintaining modern aesthetics.

Stone fireplaces work well in mountain retreats. Build a double-height fireplace wall using polished blackstone or deepslate tiles with a fireplace (use netherrack with fire on top, framed in stone). Players familiar with bunker construction often adapt similar stone-working techniques for mountain builds.

Add a wraparound deck using spruce planks with glass pane railings for unobstructed views.

Urban Modern Townhouses

Townhouses are perfect for multiplayer servers and city builds. Design tall, narrow structures, 8-10 blocks wide and 20-25 blocks tall, built side-by-side sharing walls.

Use black concrete and white concrete in bold geometric patterns for facades. One townhouse might be primarily white with a black accent column, while the next reverses the scheme.

Ground floors should include large windows for storefronts or living spaces. Use iron doors with buttons or pressure plates for entries. Second and third floors can be residential, with balconies (2-3 blocks deep) using iron bars or glass panes as railings.

Rooftop access is a must, add a small terrace with minimal furniture and potted plants. Some builders create rooftop gardens with grass blocks and flowering plants for a green space in the urban environment.

Townhouses look best when designed as a series, build 3-5 in a row with slight variations in height and facade details while maintaining design consistency.

Common Mistakes to Avoid When Building Modern Houses

Using too many materials is the most frequent error. Modern design requires discipline. Stick to 3-4 block types maximum for exteriors. Switching between quartz, concrete, stone, and wood all in one build creates visual chaos instead of cohesion.

Overly small windows break the modern aesthetic. Those single-block windows suitable for castle builds don’t work here. Modern homes need windows at least 3 blocks wide and 2 blocks tall. Go bigger when possible, floor-to-ceiling glass walls are a modern signature.

Symmetry overdose makes modern builds boring. Yes, some modern homes are symmetrical, but the best ones use offset elements, varying heights, and unexpected angles. A perfectly symmetrical box with windows looks like an office building, not a home.

Ignoring proportion creates awkward structures. A 30-block-tall house that’s only 8 blocks wide looks like a tower, not a modern home. Similarly, sprawling single-story mansions without height variation read as flat and uninspiring. Aim for pleasing proportions, roughly 1:1.5 or 1:2 width-to-height ratios for multi-story builds.

Clunky rooflines ruin otherwise solid builds. Modern architecture uses flat roofs, subtle slopes, or clean geometric roof shapes. Traditional steep A-frame roofs don’t belong on modern houses. If you want pitch, keep it minimal, 1-2 block rise over 10-12 blocks of horizontal run.

Forgetting interior-exterior connection is a missed opportunity. Modern architecture blurs the line between inside and outside. If your interior floor level is 2 blocks below exterior ground level, it looks wrong. Maintain level transitions and use large windows/doors to create flow.

Poor lighting kills the vibe at night. Visible torches stuck on walls are build-killers. Take time to plan hidden lighting, recessed fixtures, floor lighting under carpet, or redstone lamps in ceilings. The effort transforms a build from amateur to professional.

Neglecting the landscape around your modern house makes even great builds look unfinished. Wild grass growing against clean white walls, uneven terrain, random trees too close to the structure, all these break immersion. Clear the area, level ground, add pathways and minimal landscaping that complements the architecture.

Conclusion

Modern houses in Minecraft offer the perfect balance of challenging design and achievable execution. The principles are clear, clean lines, limited materials, bold geometry, and generous windows, but the application allows endless creativity. Whether you’re building a beachfront villa, mountain retreat, or urban townhouse, the fundamentals remain consistent.

The beauty of modern architecture in Minecraft is how well it scales with your skill level. Beginners can create impressive builds using simple rectangular forms and smart material choices. Advanced builders can push the style with cantilevered sections, complex multi-level layouts, and redstone automation that makes homes feel alive.

Remember that modern design rewards restraint. Every block should have a purpose. Every window placement should consider both interior function and exterior aesthetics. The empty spaces matter as much as the filled ones.

As you build, don’t be afraid to iterate. Modern architecture is forgiving in that way, if a section doesn’t work, the clean geometry makes it easy to tear down and rebuild without losing the overall structure. Start with a simple design, get comfortable with the material palette, then gradually incorporate advanced techniques.

Your modern house will become a landmark on any server or in any single-player world. It’s the build other players will teleport to for inspiration, the house that looks incredible in screenshots, and the base you’ll actually want to spend time in. Now grab some concrete, clear a build site, and start laying that foundation.

Item frames might not have the flashy appeal of diamond armor or enchanted weapons, but they’re one of Minecraft’s most versatile tools for personalizing builds. Whether you’re labeling storage systems, creating custom art galleries, or building detailed interiors that feel lived-in, item frames turn functional spaces into something memorable. They’ve been part of the game since Java Edition 1.4.2 and Bedrock Edition Alpha 0.15.0, and players continue finding new ways to push their creative boundaries.

This guide covers everything from basic crafting to advanced techniques like invisible frames and redstone integration. If you’ve ever wondered how to rotate items precisely, create glowing displays, or use frames in ways that make your builds stand out, you’re in the right place. Let’s break down how these small but mighty blocks work and how to use them effectively in both survival and creative modes.

Key Takeaways

  • Item frames in Minecraft are versatile decorative blocks that display items with eight rotation positions, making them essential for labeling storage systems, creating art galleries, and building detailed interiors.
  • Crafting an item frame requires just 8 sticks and 1 leather, making them easy to produce early in survival mode by setting up a simple cow farm for sustainable leather farming.
  • Glow item frames, introduced in the Caves & Cliffs Update, emit a subtle light effect on displayed items and are crafted by combining a standard item frame with a glow ink sac from glow squids.
  • Item frames emit redstone signals (strength 0–8) based on rotation position, enabling advanced contraptions like combination locks, puzzle doors, and custom control panels.
  • Invisible item frames created through commands display floating items without visible borders, making them perfect for immersive builds and custom wall art installations.
  • Strategic item frame placement can reduce storage search time by up to 70% when used as visual labels for chests, and they work on any solid surface including walls, floors, and ceilings.

What Is an Item Frame in Minecraft?

An item frame is a decorative block entity that displays whatever item you place inside it. Think of it as a customizable picture frame that can hold nearly any object in the game, from tools and blocks to food and maps.

Item frames attach to solid surfaces and occupy a single block space, though they’re technically entities rather than full blocks. This means they don’t obstruct movement or block light, making them ideal for decorative purposes without compromising functionality. You can place them on walls, floors, ceilings, and even the sides of other blocks.

What makes minecraft item frame mechanics interesting is their rotation system. Items placed in frames can be rotated through eight different positions (45-degree increments), letting you position compasses, clocks, and other items exactly how you want them. This rotation feature unlocks creative possibilities for pixel art, directional signs, and visual storytelling within your builds.

Frames also interact with redstone. When an item inside is rotated, the frame emits a redstone signal with strength corresponding to the rotation position (0-8). This opens up opportunities for hidden doors, combination locks, and other contraptions that blend seamlessly into decorated walls.

How to Craft an Item Frame

Materials You’ll Need

Crafting item frames requires just two basic materials that are easy to gather, even in early-game survival:

  • 8 Sticks: Obtained by placing two wooden planks vertically in a crafting grid. Any wood type works.
  • 1 Leather: Dropped by cows, horses, donkeys, mules, llamas, and hogs. You can also get leather from fishing as junk loot or by trading with leatherworker villagers.

Leather is the only material that might require a bit of hunting if you’re in a biome without passive mobs nearby. Setting up a cow farm early in survival makes item frame crafting sustainable.

Step-by-Step Crafting Recipe

Once you have your materials, open your crafting table (3×3 grid) and arrange them like this:

  1. Place sticks in all eight outer slots, forming a square border.
  2. Place one piece of leather in the center slot.
  3. Collect your item frame from the output slot.

This recipe yields one item frame per craft. If you’re planning a large decorative project like a map wall or storage label system, you’ll want to stock up on leather. Consider breeding cows or setting up an automated cow farm to keep materials flowing.

In creative mode, item frames are available directly from the decoration blocks tab in the creative inventory, saving you the crafting step entirely.

How to Place and Use Item Frames

Placing Item Frames on Different Surfaces

Item frames attach to any solid block face, walls, floors, ceilings, you name it. To place one, hold the frame in your hand and right-click (or use your platform’s equivalent interact button) on the surface where you want it.

The frame’s orientation depends on which surface you click. Wall-mounted frames face outward, floor frames lie flat facing up, and ceiling frames hang facing down. This flexibility lets you create displays from any angle, perfect for ceiling-mounted maps in cartography rooms or floor signs in hallways.

You can place multiple frames side-by-side on the same wall without gaps, making them ideal for creating seamless map walls or grid-based pixel art. They don’t need supporting blocks beneath them since they’re entities, so floating displays are totally possible.

One quirk to remember: item frames can’t be placed on transparent blocks like glass or leaves. They need solid surfaces to attach to, though slabs and stairs work fine.

Adding and Rotating Items

To add an item, hold it in your hand and right-click the frame. The item appears centered inside, and you’ll hear a subtle click sound confirming placement.

Rotation is where things get interesting. Each right-click rotates the displayed item 45 degrees clockwise through eight positions before cycling back. This works with any item, though the effect is most noticeable with directional objects like:

  • Compasses and clocks: Show different needle positions
  • Tools and weapons: Change their angle and orientation
  • Books and maps: Rotate for different visual effects
  • Food items: Create varied arrangements in kitchen builds

For precision work like pixel art or detailed interiors, getting rotation exactly right matters. Take your time clicking through positions until it looks perfect.

Removing Items and Breaking Frames

To remove an item without breaking the frame, left-click it once while your hand is empty. The item pops out as a collectible entity, and the frame stays mounted.

Breaking the frame itself requires another left-click. Both the frame and any item inside drop as separate items you can pick up. If you accidentally break a frame in survival mode, you’ll need to recraft it, there’s no undo button.

In creative mode, middle-clicking an item frame picks up an exact copy with the same item and rotation already set. This is massively useful for duplicating patterns or repeating designs across large builds without manually placing and rotating each item.

Glow Item Frames: What They Are and How to Make Them

Crafting Glow Item Frames

Glow item frames were added in the Caves & Cliffs Update Part I (Java 1.17 / Bedrock 1.17.0) and do exactly what their name suggests, they illuminate the items placed inside them.

The crafting recipe combines two materials:

  • 1 Item Frame (standard, already crafted)
  • 1 Glow Ink Sac (dropped by glow squids)

Place both in a crafting grid (shapeless recipe), and you’ll get a glow item frame. The process is simple, but finding glow squids can take some effort. They spawn in complete darkness below Y=30 in ocean biomes, often in underwater caves. Bring a Potion of Night Vision and a sword with Looting III to maximize glow ink sac drops.

Glow item frames don’t appear naturally anywhere in the world, so crafting is your only option unless you’re playing in creative mode.

Key Differences Between Standard and Glow Item Frames

Visually, glow frames have a subtle teal border that distinguishes them from regular brown leather frames. But the real difference shows when you add an item: the displayed object appears brightly lit, regardless of surrounding light levels.

This effect doesn’t actually emit light that affects nearby blocks, it’s purely visual. Your glow frame won’t prevent mob spawns or illuminate dark corners. What it does do is make items visible in low-light conditions, perfect for:

  • Highlighting important items in dimly lit storage rooms
  • Creating luminous art displays that pop in dark-themed builds
  • Marking paths or important locations without adding light sources that might clash with your aesthetic

Many builders working on underground bunkers use glow frames for emergency item access or visual waypoints without compromising the moody atmosphere.

The glow effect works on any item, though it’s most dramatic with colorful blocks, enchanted gear, or custom map art. In survival, glow frames cost exactly the same resources as regular frames (plus one glow ink sac), so there’s no performance or durability difference, just the visual upgrade.

Creative Uses for Item Frames in Your Builds

Decorative Wall Art and Custom Paintings

Item frames let you create custom artwork that goes far beyond Minecraft’s built-in paintings. Place banners with custom patterns, dyed leather armor, or colorful blocks inside frames to design unique wall decorations that match your build’s theme.

Some players use blocks like white concrete or quartz in frames to create minimalist modern art installations. Others arrange flower pots, coral, or prismarine shards for oceanic themes. The eight rotation positions give you control over each piece’s orientation, letting you create asymmetrical or geometric patterns.

For themed rooms, item frames displaying relevant items reinforce the atmosphere, swords and shields in an armory, golden apples in a treasury, or elytra wings in an aviation hangar.

Creating Maps and Map Walls

Maps are probably the most iconic item frame use case. When you place filled maps in adjacent frames, they automatically align to create one continuous image, perfect for cartography rooms or navigation halls.

To build a map wall:

  1. Explore and fill multiple maps covering adjacent areas
  2. Place item frames in a grid on your wall (3×3, 4×4, etc.)
  3. Add maps in the correct order
  4. Watch them seamlessly connect

Level 4 maps (created by combining paper with a map in a cartography table) show the most detail and work best for large walls. Players often build map rooms near their spawn points, marking important locations with banners that appear on the maps.

Some technical players combine this with structure-based map art, creating pixel images by carefully building structures that show up as colored pixels when mapped.

Building Functional Item Displays and Storage Labels

In survival mode, organization is everything. Item frames transform generic chest rooms into intuitive storage systems by showing what’s inside each container.

Place a frame above or beside each chest and add a representative item, cobblestone for the building blocks chest, wheat for the farming supplies, iron ingots for metals. According to community guides on organization, visual labeling reduces search time by up to 70% compared to unlabeled storage.

Some players take this further with color-coded systems using stained glass, wool, or concrete in frames, creating hierarchical categories that make sense at a glance.

Making Custom Furniture and Detailed Interiors

Item frames are secret weapons for interior decorators. With creative placement and the right items, you can craft furniture pieces that feel detailed and functional:

  • Tables and counters: Place plates (pressure plates) or bowls in floor frames for place settings
  • Shelves: Wall-mounted frames displaying books, potions, or tools create lived-in shelving
  • Kitchen details: Frames with bread, fish, or vegetables on counters suggest active cooking spaces
  • Bathroom fixtures: White concrete or quartz blocks in specific arrangements mimic sinks or toilets
  • Tech details: Frames with clocks, compasses, or buttons suggest control panels

The key is layering frames with other decorative blocks like trapdoors, slabs, and stairs to create depth. A single frame might not look like much, but three frames with rotated items on a stair-step arrangement suddenly becomes a convincing bookshelf or display case.

Advanced Item Frame Techniques and Tricks

Making Invisible Item Frames

Invisible item frames are a game-changer for builders who want items to appear floating or integrated directly into walls without visible borders. This isn’t a crafting recipe, it requires commands.

In Java Edition, use this command:


/give @p minecraft:item_frame{EntityTag:{Invisible:1b}}

In Bedrock Edition, the process is slightly different and typically requires behavior packs or add-ons, as Bedrock doesn’t support NBT data in commands the same way.

Invisible frames retain all normal functionality, you can place items, rotate them, and interact normally. The frame itself just doesn’t render. This is perfect for:

  • Custom paintings: Items appear to float on walls
  • Hidden storage labels: Only the item shows, not the frame
  • Seamless decorations: Armor stands or tool displays without visual clutter

Many content creators and map makers rely on invisible frames for immersive environments that don’t scream “this is made of blocks.”

Using Item Frames in Redstone Contraptions

Item frames output redstone signals based on rotation position. When you rotate an item, the frame emits a signal strength from 0 to 8:

  • Position 1 (first rotation): Signal strength 1
  • Position 2: Signal strength 2
  • … and so on up to signal strength 8

This mechanic enables combination locks where specific rotation patterns unlock doors. For example, a three-frame lock with positions set to 3-7-2 could trigger a piston door when all three match.

You can also use frames as adjustable dials for lighting systems, mob farm controls, or sorting machines. Community builders on modding platforms have created elaborate puzzle maps using item frame-based redstone exclusively.

The signal outputs through a comparator placed behind the block the frame is attached to. Build the frame on a solid block, place a comparator reading from that block, and you’re set.

Creating 3D Art and Pixel Art Displays

Frames arranged in grids with carefully chosen blocks create impressive pixel art. The rotation feature adds a third dimension, you can angle blocks to catch light differently or create shading effects impossible with standard block placement.

For 3D effects:

  1. Use blocks with distinct faces (like hay bales or logs) that show different textures when rotated
  2. Vary rotation across adjacent frames to create depth perception
  3. Mix regular and glow frames for highlighted areas
  4. Layer multiple frame walls with slight offsets for true 3D sculptures

Some technical builders create animated displays by using armor stands, invisible frames, and command blocks to cycle items through rotations, simulating movement. This is advanced stuff, but detailed guides walk through the process for players ready to experiment.

Item Frame Tips for Survival and Creative Modes

Survival Mode Strategies

In survival, every resource counts, so efficient item frame use matters:

Prioritize leather farming early. A simple cow pen with wheat for breeding produces steady leather for frames without competing with your exploration time. Two cows plus wheat equals infinite item frames eventually.

Use frames strategically for navigation. Place frames with arrows (the craftable item, not ammunition) at intersections in your mine system pointing toward exits or important areas. This costs less than signs and provides clearer directional info.

Protect frames in public areas. If you’re on a multiplayer server, item frames are vulnerable to trolls. Place them in protected regions or use plugins/mods that lock decorative entities. Some servers have built-in frame protection, check with admins.

Glow frames for emergency supplies. Mark your emergency chest (the one with backup gear near your base entrance) with a glow item frame displaying a golden apple or totem of undying. It’ll stand out when you respawn in a panic.

Create visual depth without lag. Unlike entities like armor stands, item frames are relatively light on performance. You can use dozens in decorated builds without significant fps drops, though hundreds in one chunk might cause issues on lower-end hardware.

Creative Mode Best Practices

Creative mode removes resource limits but introduces different challenges:

Middle-click to duplicate configured frames. This copies the frame with its current item and rotation, saving massive time on repetitive builds. Set up one frame perfectly, then duplicate it across your entire wall.

Use invisible frames liberally. Since commands are readily available in creative, invisible frames should be your default for most decorative work. They look cleaner and more professional.

Experiment with unconventional items. Try displaying spawn eggs, structure blocks, or even barriers in frames for abstract art. Creative inventory includes items that don’t exist in survival, some make surprisingly good decorations.

Combine with other entities. Layer frames with armor stands, item displays (added in 1.19.4), and custom heads for complex decorative scenes. The more elements you combine, the more detailed your build becomes.

Test redstone before finalizing. If your build includes frame-based redstone mechanics, test thoroughly in creative before attempting in survival. Getting the rotation-to-signal-strength mapping right takes iteration.

Common Item Frame Problems and How to Fix Them

Problem: Items keep disappearing from frames

This usually happens in multiplayer environments or when chunk borders are involved. Item frames are entities, so if they’re on a chunk border and one chunk unloads while the other stays loaded, weird behavior can occur. Solution: Place important frames at least two blocks away from chunk boundaries (press F3+G in Java Edition to see chunk borders).

Problem: Can’t place frames on certain blocks

Frames require solid block faces. Glass, leaves, ice, and most transparent blocks won’t work. Solution: Place a solid block like stone or wood behind transparent blocks if you want the frame to appear on glass walls or similar surfaces.

Problem: Frames break when I try to rotate items

This happens when you left-click instead of right-click. Left-click breaks the frame: right-click rotates the item. On console or mobile, it’s easy to accidentally use the break button instead of interact. Solution: Be deliberate with your button presses, and consider adjusting controller mapping if this happens frequently.

Problem: Glow frames aren’t glowing

If your glow frame looks like a regular frame, you might have crafted it wrong or placed a regular frame by mistake. Solution: Double-check your inventory, glow frames have a distinct teal border. If you’re certain it’s a glow frame but it’s not glowing, make sure you’ve actually placed an item inside it. Empty glow frames don’t show the effect.

Problem: Redstone signal from frame isn’t working

The comparator needs to read from the block the frame is attached to, not the frame itself. Solution: Place your comparator facing away from the solid block behind the frame. Also verify the item is rotated to the position you want, empty frames or items at default rotation output signal strength 0.

Problem: Map wall doesn’t align properly

Maps only auto-align if they’re consecutive filled maps of adjacent areas. If you created maps in the wrong order or with gaps between explored areas, they won’t connect visually. Solution: Use a cartography table to create maps systematically, ensuring each new map borders the previous one.

Conclusion

Item frames have come a long way from simple decorative blocks to essential tools in both survival organization and creative expression. Whether you’re labeling chests, building map rooms, creating pixel art, or designing invisible floating displays, understanding frame mechanics opens up hundreds of possibilities for personalizing your builds.

The beauty of minecraft item frame design is its flexibility, there’s no single “right” way to use them. A survival player might focus on practical storage labels and navigation markers, while a creative builder might push frames to their limits with 3D art installations and redstone-integrated puzzles. Both approaches are valid and rewarding.

As you experiment with item frames in your own projects, don’t be afraid to try unconventional ideas. Some of the most impressive builds happen when players ignore traditional uses and ask “what if?” That weird combination of rotated items might be exactly what your build needs to go from good to unforgettable.