133 Results

node

Search

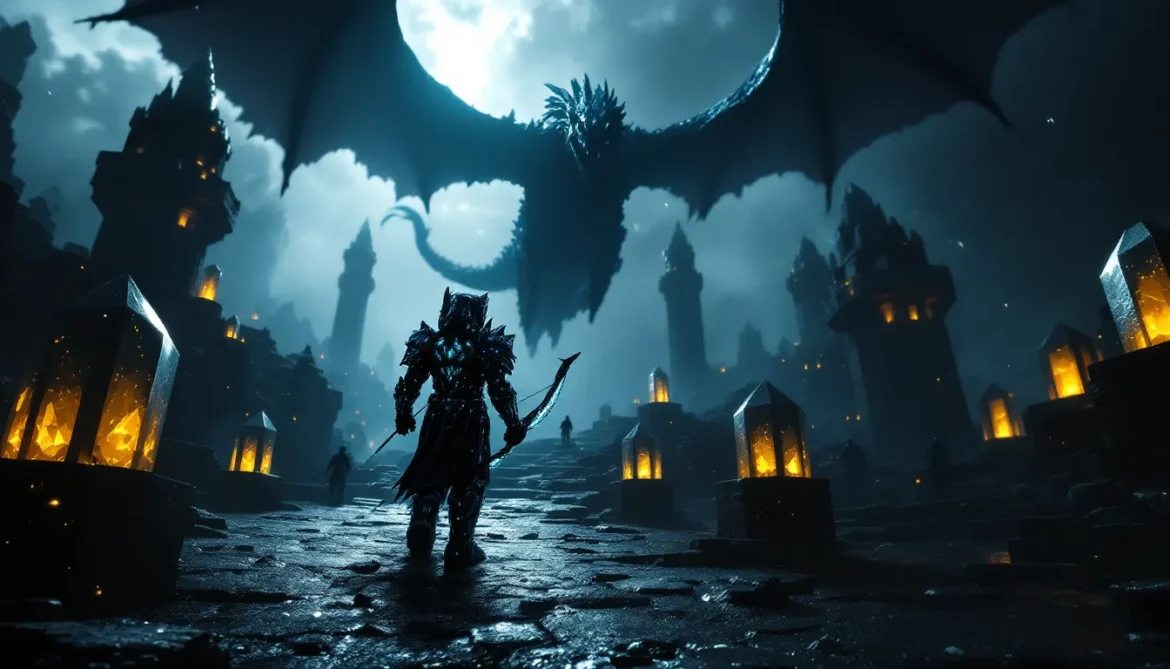
The End isn’t just another dimension, it’s Minecraft‘s ultimate endgame challenge. This dark, hostile realm floating in the void is where players face the Ender Dragon, claim the game’s most coveted loot, and earn bragging rights that matter. Whether you’re a first-timer gearing up for the journey or a veteran looking to optimize your strategy, understanding The End’s mechanics and dangers is crucial.

This guide covers everything from locating the stronghold and activating the portal to defeating the dragon, exploring outer islands, and securing rare items like the Elytra and Shulker boxes. Let’s break down exactly what it takes to conquer Minecraft‘s final frontier.

Key Takeaways

  • The End in Minecraft is the final dimension where you face the Ender Dragon, a mandatory fight to unlock the game’s most powerful tools and claim victory.
  • Locating a stronghold requires Eyes of Ender crafted from Blaze Powder and Ender Pearls, which you throw to track the nearest stronghold across the Overworld.
  • Destroying all 10 End Crystals on obsidian pillars must be your first priority before engaging the dragon, since they heal her faster than you can deal damage.
  • The Elytra and Shulker Boxes found in outer End cities fundamentally change how you play, enabling creative-mode-style flight and providing 27-slot portable storage respectively.
  • Bring essential gear including full Diamond or Netherite armor with Protection enchantments, a bow with Power IV-V, Feather Falling boots, beds as explosives, and 8-12 Ender Pearls for emergencies.
  • Defeating the dragon opens access to 20 End Gateways that teleport you to distant outer islands, where you’ll find End Ships containing the game-changing Elytra in item frames.

What Is The End in Minecraft?

The End is Minecraft‘s third and final dimension, a barren realm of floating islands suspended over an infinite void. Unlike the Overworld’s vibrant biomes or the Nether’s fiery chaos, The End is stark, minimalistic, and intensely hostile. It’s built from End Stone, a pale yellow block, and populated almost exclusively by Endermen and the game’s boss mob: the Ender Dragon.

Unlike other dimensions, you can’t just build a portal frame anywhere. The End is accessed exclusively through pre-generated End Portals hidden in strongholds scattered across the Overworld. Once you enter, there’s no turning back until you either defeat the dragon or die trying.

The End’s Unique Environment and Landscape

The End consists of two distinct zones: the central island and the outer islands. The central island is a roughly circular landmass where the Ender Dragon spawns, surrounded by obsidian pillars topped with End Crystals that heal the dragon during combat. This island is isolated, no other land is visible until the dragon is defeated.

Beyond the central island lies the outer End, a sprawling archipelago of islands separated by vast voids. These outer islands are home to End Cities, which house valuable loot like Elytra and Shulker boxes. Chorus Plants, the only flora in The End, grow here, offering a food source and teleportation mechanic when consumed.

Visibility in The End is limited by a perpetual dark sky with no day-night cycle. The void below is instantly fatal, making one wrong step a game-ender.

Why The End Matters in Your Minecraft Journey

Beating The End is Minecraft’s unofficial victory condition. Defeating the Ender Dragon triggers the End Poem and rolls credits, marking the completion of the game’s primary progression arc. But for most players, the real reward isn’t just the XP drop or the dragon egg, it’s what comes after.

The outer End islands contain gear that fundamentally changes how you play. The Elytra enables creative-mode-style flight in survival, trivializing travel across even the largest maps. Shulker boxes grant portable storage that keeps items safe even when broken, revolutionizing inventory management. Many cool Minecraft builds become far more practical once you’ve secured these tools.

Without conquering The End, players miss out on the most powerful mobility and storage options in the game. It’s not just a milestone, it’s a gateway to late-game efficiency.

How to Find and Activate an End Portal

Finding The End requires locating a stronghold, which can spawn anywhere in the Overworld, sometimes thousands of blocks from spawn. There’s no shortcut here: you’ll need Eyes of Ender to track one down.

Locating Strongholds Using Eyes of Ender

Eyes of Ender are crafted by combining Blaze Powder (from Nether Fortress Blazes) with Ender Pearls (dropped by Endermen). When thrown, they float toward the nearest stronghold, making them your compass for this hunt.

Here’s the process:

  1. Throw an Eye of Ender and watch its trajectory. It’ll fly in a specific direction and hover briefly before dropping (or breaking, roughly 20% chance per throw).
  2. Follow the direction and repeat every 10-15 blocks. As you get closer, the Eye will angle downward, signaling the stronghold is below you.
  3. Triangulate if needed. If you’re far from the stronghold, throw from multiple positions to narrow the search area.
  4. Dig down carefully once the Eye consistently points downward. Strongholds generate between Y-levels -32 and 48 in Java Edition (as of 1.18+), so expect to dig deep.

Bring 12-15 Eyes of Ender minimum, you’ll need extras both for navigation and portal activation. Mark your coordinates once you find the stronghold: losing your way underground is a common rookie mistake.

Activating the End Portal Frame

The End Portal is located in the stronghold’s portal room, identifiable by a pool of lava, a silverfish spawner, and a 12-frame portal structure. The portal frame is indestructible and always oriented the same way, you can’t move or rebuild it.

To activate:

  • Place Eyes of Ender in each of the 12 frame blocks. Some frames may already contain Eyes (randomly generated), so check before using your supply.
  • Face the center of the portal when placing Eyes. If you place them from the wrong angle, they won’t insert correctly.
  • Once all 12 frames are filled, the portal activates instantly, displaying a starry void. Jump in to enter The End.

There’s no “deactivating” the portal once it’s open, and you can’t place blocks inside the portal itself. Make sure you’re fully prepared before jumping in, once you’re through, the only way back is victory or death.

Essential Preparations Before Entering The End

The End is a one-way trip until the dragon dies. Going in unprepared is a fast track to losing hours of progress and all your gear to the void. Here’s what you absolutely need.

Recommended Gear and Equipment

Your loadout should prioritize survivability, ranged damage, and mobility. Here’s the minimum recommended kit:

Armor:

  • Full Diamond or Netherite armor with enchantments. Protection IV across all pieces is ideal, but at minimum get Protection III.
  • Feather Falling IV boots are non-negotiable. The dragon’s knockback can launch you off the island, and fall damage is a constant threat.

Weapons:

  • Bow with Power IV-V and Infinity (or Unbreaking III with plenty of arrows). You’ll need ranged damage for the End Crystals and aerial dragon attacks.
  • Sword with Sharpness IV-V for melee. Smite and Bane of Arthropods are useless here, Sharpness is the only relevant damage enchant.

Tools:

  • Pickaxe (Diamond/Netherite) for mining End Stone and caging the dragon egg. Iron works but breaks faster.

Optional but Helpful:

  • Slow Falling potions counter the dragon’s knockback and void falls. They’re lifesavers for newer players.
  • Strength II and Regeneration potions accelerate the fight significantly.
  • Pumpkin helmet prevents Endermen aggro if you accidentally look at them, though it limits your field of view.

Inventory Essentials and Backup Supplies

Don’t just bring weapons, pack contingencies. Here’s what to carry:

  • Blocks (at least 2 stacks): Cobblestone or End Stone for pillaring up to End Crystals and bridging gaps. Avoid sand or gravel, they fall.
  • Food (1-2 stacks): Golden Apples (regular, not enchanted) and cooked meat. Healing is critical.
  • Arrows (64+ or Infinity bow): You’ll burn through arrows fast on crystals and dragon passes.
  • Ender Pearls (8-12): Emergency teleportation if you get knocked off the island. They’re literal lifesavers.
  • Beds (6-8): Yes, beds. They explode in The End (like the Nether), dealing massive damage. Experienced players use them as makeshift explosives against the dragon, just place and right-click from behind cover.
  • Water bucket: Counters Enderman attacks and negates fall damage in a pinch. Works everywhere in The End.

Leave valuables at home. Don’t bring your Mending gear, rare blocks, or anything you can’t afford to lose. The void is permanent.

Strategies for Defeating the Ender Dragon

The Ender Dragon isn’t mechanically complex, but she’s deadly if you don’t respect the fight. Her attacks deal heavy damage, she knocks players around like ragdolls, and the End Crystals heal her faster than most players can DPS. Here’s how to take her down efficiently.

Destroying the End Crystals Safely

The End Crystals perched on obsidian pillars heal the dragon whenever she’s nearby. As long as they’re active, you’re fighting a losing battle. Destroying them is step one, but they explode on impact, so careless destruction will kill you.

Here’s the safest approach:

  1. Shoot crystals from range with your bow. Most pillars are short enough to hit from ground level. Aim carefully, each crystal explosion deals significant damage if you’re too close.
  2. Pillar up for caged crystals. Some towers have iron bar cages protecting the crystal. You’ll need to build up with blocks, break the bars, then destroy the crystal. Drop back down immediately after, don’t stand on the tower when the dragon passes.
  3. Use Slow Falling potions when pillaring. If the dragon rams you mid-climb, you’ll survive the fall.
  4. Prioritize the tallest towers first. They’re the most dangerous to climb and easiest to put off. Get them out of the way early.

Once all 10 crystals are gone, the dragon can’t heal. Now the real fight begins. Some players familiar with games covered on sites like Twinfinite treat this phase like a classic boss DPS check, burn her down fast before mistakes pile up.

Combat Tactics and Attack Patterns

The Ender Dragon cycles through four attack patterns:

  1. Perching: She lands on the central bedrock fountain. This is your DPS window, rush in and land hits with your sword. Watch out for the Dragon’s Breath attack (purple acid cloud). Don’t stand in it.
  2. Strafing: She flies at or near your altitude, breathing Dragon’s Breath or charging directly at you. Dodge left/right and shoot arrows during her pass.
  3. Charging: She dives toward you at high speed. Sidestep and counterattack as she passes. Getting hit deals massive damage and knockback.
  4. Circling: She flies high above the island. Use this time to heal, reposition, and prepare for her next dive.

Key tips:

  • Keep moving. Standing still is a death sentence during strafing runs.
  • Use beds for massive damage during the perching phase. Place a bed, stand behind a block (like an End Stone pillar), and right-click to detonate. Repeat 4-6 times for a quick kill.
  • Bring Ender Pearls for emergency escapes. If you get knocked toward the void, throw a pearl back to the island immediately.
  • Ignore Endermen unless attacked. Fighting them mid-dragon-battle is a waste of time and resources.

The dragon drops 12,000 XP on death (68,000 if it’s your first kill), a dragon egg (purely decorative), and opens the exit portal. But you’re not done yet.

What Happens After Defeating the Ender Dragon

Killing the dragon doesn’t boot you out immediately. A bedrock portal structure appears at the center of the island, and if it’s your first kill, the game displays a cinematic text sequence that’s equal parts philosophical and bizarre.

The End Poem and Exit Portal

The End Poem is a lengthy, scrolling text dialogue between two unidentified entities discussing the player, the universe, and Minecraft itself. It’s pretentious, oddly moving, and skipable (press Esc). After the poem, the credits roll. You can skip those too.

The exit portal is a small bedrock structure with a central portal block. Jumping in teleports you back to your Overworld spawn point (or respawn anchor). You’ll also receive a massive XP dump, 68,000 points on your first dragon kill, 12,000 on subsequent kills.

The dragon egg appears on top of the exit portal. It’s mostly a trophy, teleports when clicked and can’t be pushed by pistons directly. To collect it, either:

  • Push it with a piston (place blocks around it first to control where it falls).
  • Let it fall onto a non-solid block like a torch, turning it into an item.

There’s only one dragon egg per world, even if you respawn the dragon.

Respawning the Dragon for Additional Battles

You can fight the dragon again, useful for XP farming or practicing speedrun strats. To respawn her:

  1. Craft four End Crystals using Glass, Eyes of Ender, and Ghast Tears.
  2. Place one End Crystal on each side of the exit portal (there are four flat bedrock edges).
  3. The dragon respawns instantly, along with all 10 End Crystals on the pillars.

Respawned dragons drop 500 XP per kill and reset the arena completely. The dragon egg does not respawn.

Exploring the Outer End Islands

The real treasure of The End isn’t the dragon, it’s the outer islands. This is where you’ll find End Cities, Shulkers, and the Elytra. But getting there requires navigating the void safely.

Finding End Gateways and Traveling Between Islands

Once the dragon dies, up to 20 End Gateways spawn around the central island. These are small floating bedrock frames with a purple portal block inside. They’re your ticket to the outer islands.

Here’s how to use them:

  • Throw an Ender Pearl into the gateway to teleport. Walking into it doesn’t work, you’ll take damage and bounce off.
  • Each gateway teleports you roughly 1,000 blocks away to a random outer island.
  • Gateways are one-way on first use. A return gateway spawns at your destination, linked back to the central island.

If you can’t find a gateway (they spawn randomly around the perimeter), you can bridge manually. Build a 1,000+ block bridge with blocks, but this is tedious and dangerous. Ender Pearls let you bridge in ~300-block increments by throwing them as far as possible.

Pro tip: Bring a lot of blocks or Ender Pearls. Running out mid-void is a death sentence.

Locating End Cities and End Ships

End Cities are tower-like structures made of purple purpur blocks and End Stone bricks. They generate randomly on outer islands, but not every island has one. Some cities are small (2-3 towers), while others sprawl across multiple connected towers.

End Ships are floating airship structures that spawn near some (not all) End Cities. They’re rarer but far more valuable, each ship contains one guaranteed Elytra in an item frame and high-tier loot chests.

How to find them:

  1. Explore systematically. Outer islands sprawl in all directions. Fly or bridge between islands methodically to avoid missing cities.
  2. Look for tall structures. End Cities tower above the landscape and are visible from a distance.
  3. Check for ships nearby. If you spot a city, scan the horizon for the ship’s purple and white hull.

End Cities are guarded by Shulkers, hostile mobs that hide in purple shells and fire homing projectiles. Each hit inflicts Levitation, which can launch you into the void or off a tower. More on dealing with them below. Players building elaborate structures, such as a survival bunker, often return here for Shulker shells to optimize storage.

Valuable Loot and Resources in The End

The End offers some of Minecraft’s most game-changing items. Here’s what to prioritize and how to get it.

Elytra: The Ultimate Flight Tool

The Elytra is Minecraft’s closest equivalent to creative flight. Equip it in your chestplate slot, jump from a height, and press space mid-air to glide. Combine with firework rockets (crafted with gunpowder and paper) for powered flight that rivals creative mode.

Elytra spawn exclusively in End Ships, which attach to some End Cities. Each ship has one Elytra displayed in an item frame near the bow. Break the frame to collect it.

Elytra durability: Elytra have 432 durability and break after extended use. Repair them with Phantom Membranes (dropped by Phantoms) or combine two damaged Elytra in an anvil. Mending is the best enchantment for Elytra, it makes them nearly indestructible with regular XP gain.

Why it matters: Elytra fundamentally change travel. Flying across thousands of blocks takes seconds instead of minutes. For builders, explorers, or anyone sick of walking, Elytra are non-negotiable.

Shulker Boxes and Shulker Shells

Shulker Boxes are portable chests that retain their contents when broken, effectively giving you 27 extra inventory slots per box. Unlike regular chests, breaking a Shulker Box drops the box with items inside.

They’re crafted using two Shulker Shells (dropped by Shulkers) and one chest. Shulkers are found only in End Cities and have a 50% drop rate for shells.

Here’s how to farm them safely:

  1. Use a shield to block Shulker projectiles. The Levitation effect is canceled if you block the hit.
  2. Sword or axe attacks work fine, but bows let you engage from safer distances.
  3. Watch for Levitation. If you get hit, don’t panic, Levitation wears off in 10 seconds. Use Slow Falling potions as insurance.
  4. Farm multiple cities to collect enough shells. You’ll want at least a dozen boxes for practical use.

Shulker Boxes stack in inventories (when empty), so you can carry dozens and fill them on-site during mining or looting trips. They’re essential for any serious storage system.

Dragon’s Breath and Other Collectibles

Dragon’s Breath is a potion ingredient collected using glass bottles during the dragon fight. When the dragon uses her breath attack (purple particle cloud), right-click with an empty bottle to collect it. Dragon’s Breath is used to brew Lingering Potions, which create area-of-effect clouds. It’s niche but required for certain potion builds.

Chorus Fruit grows on Chorus Plants found throughout the outer End. Eating it teleports you to a random nearby location (like Ender Pearls) and restores 4 hunger. It’s a decent emergency escape but unpredictable. Smelt it into Popped Chorus Fruit to craft purpur blocks for building.

End Rods are decorative light sources found in End Cities. They emit light level 14 and look clean in modern builds.

While exploring mechanics similar to The End across different game guides, resources like Game8 often detail comparable boss fights and loot systems in other titles.

Common Mistakes to Avoid in The End

The End punishes mistakes harder than anywhere else in Minecraft. Here’s what not to do:

Forgetting blocks or Ender Pearls. You’ll need them for pillaring, bridging, and escaping knockback. Bring at least two stacks of blocks and a dozen pearls.

Not destroying all End Crystals first. Fighting the dragon while crystals are active is exponentially harder. Clear them all before engaging.

Standing still during strafing attacks. The dragon’s breath and charge attacks are highly telegraphed. Keep moving laterally to dodge.

Bringing valuables. Your Mending pickaxe, rare blocks, and enchanted books have no business in The End. Leave them in a chest.

Ignoring fall damage. The island has uneven terrain and tall structures. Feather Falling IV boots are mandatory. Water buckets work as backups.

Attacking Endermen unnecessarily. They won’t aggro unless you hit them or make eye contact (without a pumpkin). Avoid them entirely during the dragon fight.

Not marking your stronghold coordinates. If you die and respawn in the Overworld, you’ll need to navigate back. Write down X, Y, Z before jumping into the portal.

Using the exit portal too early. Once you leave The End, you’ll need to return through the stronghold portal to access outer islands. Explore first, then exit.

Building with gravity-affected blocks. Sand and gravel pillars collapse if not supported. Use cobblestone or End Stone.

Advanced Tips for Experienced Players

If you’ve already beaten the dragon and looted a few cities, here are some optimizations and advanced strategies:

Bed bombing for speedruns. Beds deal massive explosion damage in The End (and Nether). Place a bed, hide behind a block, and right-click to detonate. Repeat 4-6 times during the perching phase to shred the dragon’s HP. This method is standard in speedrunning and cuts fight time significantly.

Slow Falling potions trivialize the fight. Brew them with Phantom Membranes (farm Phantoms by not sleeping for 3+ nights). Slow Falling negates all knockback danger and lets you safely drop from any height.

Crystal respawn method for farming. Respawning the dragon resets all 10 End Crystals. If you’re low on resources, you can farm End Crystals for XP before killing the dragon again.

Elytra + Riptide trident for fast travel. In rainy weather (or water), a Riptide trident lets you launch yourself forward while gliding with Elytra. It’s faster than rockets and costs no gunpowder.

Shulker farm setups. With precise positioning, you can make Shulkers duplicate when hit by another Shulker’s projectile. Search “Shulker farm tutorial” for designs, they’re complex but yield infinite shells.

End island perimeters for farms. The End’s spawn mechanics make it ideal for Enderman farms (massive XP and Ender Pearl generation). Clearing a large perimeter and building a platform optimizes spawn rates. Many technical players covered on communities like GamesRadar+ have documented these setups extensively.

Dragon egg teleportation collection. The egg teleports when clicked, but you can control its fall. Place blocks in a 5×5 perimeter around the egg, knock it off the portal with a piston, and let it land on a torch to pick it up cleanly.

Mapping outer islands for city routes. Use a map or coordinates mod to track which islands you’ve explored. Outer End generation is infinite, so systematic exploration prevents redundant searching.

Chorus fruit bridges. Eating Chorus Fruit teleports you randomly within an 8-block radius. In a pinch, you can use it to escape the void if you’re falling, though it’s unreliable compared to Ender Pearls.

Conclusion

The End is Minecraft’s ultimate test, a dimension that demands preparation, precision, and nerves of steel. From locating the stronghold and activating the portal to destroying End Crystals, defeating the dragon, and looting outer islands for Elytra and Shulker boxes, every step rewards players who respect the challenge.

Whether you’re conquering The End for the first time or optimizing your tenth dragon kill, the strategies and tips in this guide give you the edge. Gear up, bring backups, and don’t underestimate the void. Once you’ve secured that Elytra and a dozen Shulker boxes, the rest of Minecraft opens up in ways that feel like unlocking creative mode, but earned.

Leveling up your Battle Pass in Fortnite can feel like a marathon, especially if you’re juggling school, work, or just want to unlock those top-tier skins without grinding every waking hour. That’s where XP maps come in, Creative Mode islands specifically designed to flood players with experience points in a fraction of the time it takes through traditional Battle Royale matches. With Chapter 6 in full swing and Epic Games constantly tweaking XP rates, knowing which maps deliver the best returns and how to use them effectively can mean the difference between finishing the season at level 50 or hitting level 200 with weeks to spare. This guide breaks down everything players need to know about Fortnite XP maps in 2026, from the top-performing island codes to the hidden caps that could throttle your gains if you’re not careful.

Key Takeaways

  • A Fortnite XP map is a Creative Mode island designed to maximize experience point rewards by exploiting the accolade system, offering 20,000–45,000 XP per hour compared to 8,000–15,000 from standard Battle Royale matches.
  • Creative Mode enforces a daily rolling 600,000 XP cap that resets every 24 hours; once capped, accolade rewards drop to 75 XP, making further grinding pointless until reset.
  • Top-performing AFK XP maps like Cozy AFK XP (Code: 4829-3654-1027) and Sleepy Town XP Farm (Code: 9172-4863-2091) earn 20,000–30,000 XP per hour passively while interactive maps like Red vs Blue XP Wars deliver 35,000–45,000 XP for active play.
  • Combine XP map grinding with Battle Pass challenges to multiply daily progression, stacking challenge completion XP (15,000–30,000 per challenge) on top of Creative farming for 800,000–1,000,000 total XP daily.
  • Epic Games doesn’t ban players for using XP maps but actively manages the ecosystem through rate nerfs and code blacklisting; avoid obvious exploits and limit AFK sessions to 6–8 hours to minimize account flagging risk.
  • Rotate between multiple verified XP maps weekly and stay plugged into community channels (Reddit, Discord, YouTube) to access fresh codes before maps get patched or removed.

What Is a Fortnite XP Map?

A Fortnite XP map is a Creative Mode island built by the community with one primary goal: maximizing experience point rewards in the shortest time possible. Unlike standard Creative maps focused on combat practice or mini-games, XP maps exploit Creative Mode’s accolade system, the mechanism that awards XP for completing objectives, eliminating enemies, surviving rounds, or simply spending time in an island.

These maps gained massive popularity starting in Chapter 2 when players realized Creative islands could award comparable or even superior XP rates versus sweating through full Battle Royale matches. By Chapter 6 (2026), the XP map ecosystem has matured into specialized categories: AFK maps that reward passive playtime, interactive grind maps requiring light engagement, and skill-based deathrun or parkour islands that blend progression with actual gameplay.

How XP Maps Work in Creative Mode

Creative Mode awards XP through accolades, in-game achievements tracked during island sessions. These include eliminations, distance traveled, time survived, damage dealt, and custom objectives set by map creators. Each accolade grants a set amount of XP, and maps are engineered to trigger high-value accolades repeatedly and rapidly.

For example, an AFK XP map might place players in a safe zone where automated systems grant “time survived” accolades every few seconds without requiring input. Interactive maps might spawn endless waves of low-health NPCs, letting players rack up elimination accolades at machine-gun pace. Deathrun maps award completion bonuses and checkpoint accolades as players progress through obstacle courses.

Crucially, Creative XP is subject to diminishing returns and daily caps. Epic implements a rolling limit on how much XP players can earn from Creative islands within a 24-hour window, typically around 600,000 XP as of Chapter 6, Season 1 (February 2026 patch). Once you hit the cap, XP gains drop to near-zero until the timer resets. This cap exists separately from Battle Royale XP, meaning players can grind both modes in tandem.

Why Players Use XP Maps for Progression

The math is simple: time efficiency. A solid Battle Royale match lasting 20 minutes might net 8,000–15,000 XP depending on placement, eliminations, and survival time. An optimized XP map can deliver 20,000–40,000 XP in the same timeframe, and AFK maps let players earn passively while cooking dinner or watching streams.

For casual players who can’t dedicate hours daily to Fortnite, XP maps democratize Battle Pass progression. For competitive players grinding multiple accounts or content creators showcasing new skins immediately, they’re a necessity. And for anyone chasing the prestige of maxed-out bonus rewards (those extra styles unlocked past level 200), XP maps turn an impossible grind into a manageable routine.

That said, XP maps aren’t universally loved. Some purists argue they trivialize progression and dilute the accomplishment of reaching high levels. Epic’s stance has been mixed, they’ve occasionally nerfed Creative XP rates or blacklisted specific islands, but they’ve never outright banned the practice.

Best Fortnite XP Maps in 2026

The XP map meta shifts constantly as Epic patches exploits and creators iterate on designs. As of March 2026, these maps represent the current best-in-class for various playstyles. Always verify codes on social media or community hubs before queuing, Epic occasionally deactivates maps violating Creative guidelines.

Top-Rated AFK XP Maps

AFK (away from keyboard) maps remain the gold standard for passive farming. These islands require zero input after loading in, making them perfect for overnight sessions or multitasking.

1. Cozy AFK XP – Code: 4829-3654-1027

This map spawns players in a peaceful safehouse where automated systems trigger survival and exploration accolades every 5-7 seconds. Players report roughly 25,000–30,000 XP per hour before hitting daily caps. The creator updates it frequently to patch any Epic nerfs, and it’s been live since January 2026 with minimal downtime.

2. Sleepy Town XP Farm – Code: 9172-4863-2091

A newer entrant gaining traction in February 2026. Sleepy Town uses a timed challenge system that awards chunks of XP every minute for “surviving rounds” without actual threats. Slightly lower hourly rates (20,000–25,000 XP) but rock-solid stability and low ban risk since it doesn’t exploit obvious bugs.

3. Galaxy AFK Grind – Code: 5837-2940-1638

Designed for extended AFK sessions, Galaxy places players on a slow-moving platform that travels through zones triggering distance-based accolades. It’s particularly effective for overnight grinds since the movement prevents idle kick timers. Reports suggest 18,000–22,000 XP/hour, which compounds nicely over 6-8 hour sessions.

Pro tip: Rotate between two AFK maps in case one gets patched mid-session. And always disable auto-sleep settings on your console or PC to avoid interruptions.

Interactive XP Maps for Active Grinding

If you’d rather play than idle, interactive grind maps offer higher engagement and often better XP rates, assuming you can maintain focus.

1. Red vs Blue XP Wars – Code: 8264-1937-4205

A team-based elimination grind where low-health bots spawn endlessly in two lanes. Players rack up hundreds of eliminations per match, with each kill awarding elimination and damage accolades. Experienced players report 35,000–45,000 XP per hour, but it demands constant input. Popular among streamers since it looks more “legit” than AFK maps.

2. Prop Hunt XP Mega – Code: 7193-5826-3401

This map disguises XP farming as Prop Hunt gameplay. Seekers gain XP from eliminations, hiders from survival time, and both benefit from round completion bonuses. It’s a clever way to grind with friends while actually having fun. Rates hover around 28,000–33,000 XP/hour, and community feedback on platforms like IGN highlights its longevity, it’s been running with tweaks since Chapter 5.

3. Boss Battle XP Rush – Code: 6452-8179-2934

Fight waves of increasingly tough bosses with generous checkpoint accolades. Designed for squads, it awards bonus XP for teamwork mechanics like revives and assists. Solo players can still farm effectively at 25,000–30,000 XP/hour, but squads can push 40,000+ with coordination.

Deathrun and Parkour XP Maps

For players who want to improve mechanics while leveling, skill-based XP maps blend progression with practice. These won’t match AFK rates but offer legitimate gameplay value.

1. Rainbow Road XP Deathrun – Code: 9738-4261-5082

A Mario Kart-themed deathrun with 50 levels of escalating difficulty. Each checkpoint awards XP, and completing the full run grants a massive bonus (roughly 15,000 XP). Skilled players can complete it in 12-15 minutes and loop repeatedly for 30,000–35,000 XP/hour. Less experienced players might earn closer to 20,000 XP/hour but will improve their building and timing.

2. Default Deathrun XP Edition – Code: 5829-3647-1920

A no-frills deathrun optimized purely for XP. Easier than Rainbow Road with shorter completion times (8-10 minutes), but slightly lower per-run bonuses. Great for warming up mechanics before ranked sessions while still progressing your Battle Pass.

3. Parkour Pro XP Tower – Code: 4738-9261-3847

A vertical parkour challenge where height gained equals XP earned. The map tracks your personal best and awards scaling bonuses for beating it. Not the most efficient pure XP farm (18,000–23,000 XP/hour), but feedback from the community on Dexerto praises it for making you a genuinely better player while grinding levels.

How to Find and Enter XP Maps

Finding reliable XP maps requires knowing where the community shares codes and how to separate the legitimate farms from the duds or outdated islands.

Using Island Codes to Access XP Maps

Every Creative island has a unique 12-digit code assigned by Epic. To access an XP map:

  1. Launch Fortnite and select “Create” from the main menu.
  2. Choose “Island Code” from the Discovery screen.
  3. Enter the 12-digit code (format:

####-####-####) exactly as provided.

  1. Hit “Enter” or “Launch” to load into the island.
  2. Once loaded, the map’s XP systems activate automatically or after a brief countdown.

Most XP maps display instructions on-screen within the first 30 seconds, read them carefully. Some require specific actions to start the XP flow (standing on a platform, talking to an NPC, or completing a quick tutorial). AFK maps typically require nothing after the initial spawn.

Bookmark working codes: Keep a note file or screenshot gallery of verified codes. The XP map ecosystem is volatile, maps get updated, archived, or banned weekly.

Discovering Popular Maps Through Social Media and Communities

The best XP maps spread through word-of-mouth on social platforms and dedicated communities:

Twitter/X and TikTok: Search “Fortnite XP map codes” or “best Fortnite XP maps 2026” for real-time updates. Content creators post new discoveries daily, often with video proof of XP rates. Verify the post date, codes older than two weeks might be patched.

YouTube: Creators like Glitch King, TaborHill, and various Fortnite news channels release weekly “Top XP Maps” videos with codes and gameplay footage. Comment sections often contain user reports on whether codes still work.

Reddit: r/FortniteCreative and r/FortniteBR have dedicated megathreads for XP map codes. Sort by “New” to catch fresh maps before Epic’s radar. Upvote counts and comment feedback quickly separate the elite maps from mediocre ones.

Discord Servers: Join Fortnite-focused servers (search “Fortnite XP” in Discord discovery). Many have channels exclusively for sharing and verifying XP map codes, with real-time reports on cap resets and map status.

Fortnite Creative Hub: Browse the in-game Discovery tab under “XP” or “Leveling” tags. Epic occasionally features high-quality XP maps here, though these tend to have slightly nerfed rates compared to underground community favorites.

Maximizing Your XP Gains: Tips and Strategies

Raw XP map access is only half the equation. Smart players combine maps with game knowledge and timing to extract maximum efficiency from every grinding session.

Understanding Daily XP Caps and Limitations

Epic enforces a Creative Mode daily XP cap that resets on a rolling 24-hour timer from your first XP gain in Creative. As of Chapter 6, Season 1, this cap sits around 600,000 XP (approximately 4-5 Battle Pass levels depending on your current tier).

Once you hit the cap, Creative islands award only 75 XP per accolade, a 95%+ reduction. You’ll know you’ve capped when XP notifications drop from four or five digits to double digits. At that point, grinding Creative becomes pointless until the timer resets.

How to track your cap:

  • Mental math: If you’re earning 30,000 XP/hour, expect to cap after 20 hours of active grinding (realistically 3-4 hours of concentrated play across a day).
  • Visual cues: When accolade pop-ups shrink to 75 XP, you’ve capped.
  • Third-party trackers: Some community Discord bots track your playtime and estimate cap status, though these aren’t officially supported.

The cap does NOT apply to Battle Royale, Zero Build, or Save the World XP. Savvy players hit their Creative cap early, then switch modes to continue progression.

Combining XP Maps with Battle Pass Challenges

Battle Pass weekly and daily challenges award massive XP bonuses, often 15,000–30,000 XP per challenge. You can complete many of these while grinding XP maps.

For example, if a weekly challenge requires “Deal 5,000 damage to opponents,” load into an interactive XP map like Red vs Blue XP Wars (Code: 8264-1937-4205) where you’ll naturally deal that damage while farming accolades. Challenges requiring “Travel 10,000 meters” can be knocked out passively in movement-based AFK maps.

Strategic challenge stacking:

  • Review your active challenges before choosing an XP map.
  • Prioritize maps that align with multiple challenges (elimination + damage challenges pair perfectly with combat-focused grind maps).
  • Save quest-specific challenges (“Collect fish,” “Harvest wood”) for Battle Royale, but universal challenges (damage, distance, time) fit XP maps.

This approach can net an extra 100,000–150,000 XP per day beyond your Creative cap, effectively doubling your leveling speed. Guides on Game Rant frequently highlight optimal challenge-map pairings each season.

Optimal Session Length for XP Farming

Marathon grinding sounds productive, but burnout and diminishing returns make shorter, focused sessions more effective.

Recommended session structure:

  • 2-3 hour active grind: Load an interactive or skill-based XP map and grind with full focus. This hits roughly 60,000–100,000 XP (10-15% of the daily cap) without mental fatigue.
  • 4-6 hour AFK session: Set up an AFK map before bed, during work/school, or while binge-watching shows. Nets 100,000–150,000 XP passively.
  • Break and switch modes: Once you cap Creative, jump into Battle Royale or Zero Build. Even casual matches add another 50,000–80,000 XP before calling it a day.

This rhythm prevents burnout, spreads progression across modes, and maximizes total daily XP (upwards of 800,000–1,000,000 XP combining Creative cap + BR/ZB play + challenges). That’s roughly 6-8 Battle Pass levels per day, enough to finish a full season pass in under two weeks of consistent play.

Are XP Maps Against Fortnite’s Rules?

The legality of XP maps sits in a gray zone. They’re not explicitly banned, but Epic’s actions suggest they’re tolerated with limits.

Epic Games’ Stance on Creative XP

Epic has never issued a blanket ban on XP maps or punished players for using them. Creative Mode was designed to empower community-made content, and XP maps technically fall within those parameters, they’re using the Creative toolset as intended, even if the purpose (pure XP farming) wasn’t Epic’s original vision.

But, Epic actively manages the XP map ecosystem:

  • Rate adjustments: Epic periodically nerfs Creative XP rates across the board or targets specific accolades (like “time survived”) that AFK maps exploit.
  • Island blacklisting: Maps using obvious exploits (infinite loop glitches, XP multiplication bugs) get their codes deactivated. Creators receive warnings but players don’t face bans.
  • Cap enforcement: The daily XP cap exists specifically to limit Creative farming’s impact on progression balance.

Epic’s philosophy seems to be: “We’d prefer players engage with core modes, but if they’re going to farm XP in Creative, we’ll keep it from breaking progression entirely.” As of early 2026, no credible reports exist of players being banned purely for using XP maps.

Risks and Precautions When Using XP Maps

While bans are unlikely, a few risks exist:

Account flagging: Extended AFK sessions (8+ hours continuously) might trigger automated anti-cheat reviews, especially if combined with suspicious activity like rapid level jumps. To minimize risk:

  • Limit AFK sessions to 6-8 hours.
  • Alternate between AFK and active play.
  • Avoid using XP maps on new accounts, sudden level spikes on fresh profiles look bot-like.

Map scams: Some malicious creators advertise “10x XP maps” but actually just trap players in low-XP islands to farm engagement metrics. Stick to codes verified by trusted creators or community feedback.

Time investment vs. fun: The biggest “risk” isn’t a ban, it’s burning out on Fortnite by treating it like a chore. If you’re grinding XP maps so obsessively that you’re not enjoying the game, reassess your priorities. Battle Pass cosmetics aren’t worth killing your passion for the game.

TL:DR: XP maps are legal but frowned upon by Epic. Use them smartly, don’t exploit obvious glitches, and you’ll be fine.

Alternatives to XP Maps for Fast Leveling

XP maps aren’t the only path to rapid progression. Players who prefer “legitimate” gameplay or who’ve hit their Creative cap have several high-efficiency alternatives.

Battle Royale and Zero Build Strategies

Core modes still deliver solid XP when played strategically. The key is maximizing accolades per match.

Survival-focused strategy:

  • Land at low-traffic POIs (Lonely Labs, Frenzy Fields outskirts) to survive into top 25 consistently.
  • Avoid early fights unless confident, placement XP scales heavily with survival time.
  • Rotate early to stay ahead of the storm: storm damage survival awards bonus XP.
  • Aim for top 10 minimum (roughly 10,000–12,000 XP) with potential for 15,000+ if you place top 5.

Aggro grinding strategy:

  • Hot-drop popular POIs (Mega City, Reckless Railways) and hunt eliminations.
  • Each elim awards 120 XP plus damage-based accolades (500 XP per 500 damage).
  • A 5-kill game with mid placement (top 50) nets similar XP to a 0-kill top 10 finish (8,000–10,000 XP).
  • Higher variance but more engaging for mechanical players.

Zero Build advantages: Matches tend to run faster (15-18 minutes vs. 20-25 in standard BR), letting you cycle through more games per hour. Build-focused players might earn 8,000 XP per 25-minute match: Zero Build grinders can hit 7,000 XP per 15-minute match, netting higher hourly rates (28,000 vs. 24,000 XP/hour).

Supercharged XP: If you miss a day of play, Epic grants Supercharged XP, a temporary boost that doubles XP gains until you’ve “caught up” on missed progression. Stack this with Battle Royale grinding for insane rates (20,000+ XP per match).

Save the World XP Farming Methods

Save the World (Fortnite’s PvE mode) awards Battle Royale XP for mission completions. It’s often overlooked but surprisingly efficient.

Endurance mode: High-level Endurance runs (Twine Peaks, Canny Valley) award 50,000–80,000 XP for successful completions. These take 2-3 hours but can be semi-AFK with proper trap setups.

Daily missions: STW daily quests award 15,000–25,000 XP and take 15-30 minutes. Stack these with Wargames or quick Stonewood missions for easy completions.

Event missions: Seasonal STW events (Frostnite, Blockbuster) offer boosted XP rewards. During these windows, STW can rival or exceed Creative XP map rates.

Caveat: Save the World requires a separate purchase (currently $15.99 as of March 2026) or Crew subscription access. For players who already own it, it’s a goldmine. For those who don’t, the upfront cost might not justify the XP gains unless you’re interested in STW’s gameplay itself.

Common Mistakes to Avoid with XP Maps

Even experienced players fall into traps that tank their XP efficiency or waste time on dead-end strategies.

Ignoring the daily cap: The most common mistake is grinding Creative for hours after hitting the 600K cap. Once accolades drop to 75 XP, stop immediately and switch modes. Every minute past the cap is wasted, you’d earn more XP playing a single casual Battle Royale match.

Using outdated codes: XP map codes from YouTube videos or Reddit threads older than 2-3 weeks often lead to dead islands or patched maps. Always verify codes in comments/replies before wasting time loading in. If a map feels suspiciously low XP or broken, bail and find a fresh code.

AFKing in non-AFK maps: Some players try to AFK in interactive maps designed for active play, expecting passive XP. These maps typically have idle kick timers or require periodic input to trigger accolades. You’ll earn nothing and waste your session timer. Match your map choice to your availability, AFK maps for passive grinding, interactive maps when you can actively play.

Neglecting Battle Pass challenges: Focusing purely on Creative XP while ignoring weekly challenges is leaving free XP on the table. A full week of challenges can award 200,000+ XP in under an hour, that’s more efficient than most XP maps. Always clear challenges first, then grind maps.

Running XP maps on terrible internet: Creative Mode requires stable connectivity. Laggy connections cause accolade registration failures, meaning you’re grinding without earning XP. If your ping spikes above 100ms consistently, XP maps become unreliable. Fix your connection or stick to offline-friendly modes until you do.

Over-reliance on one map: When a single XP map becomes popular, it attracts Epic’s attention and gets nerfed or removed faster. Smart players rotate between 3-4 verified maps weekly, spreading their risk. If one map dies, you’ve got backups ready.

Forgetting to have fun: This isn’t a “mistake” in the traditional sense, but it’s worth repeating. Fortnite is a game. If XP grinding becomes a joyless obligation, you’re doing it wrong. Mix in actual matches, play with friends, mess around in Creative builds you enjoy. The Battle Pass cosmetics aren’t worth burning out over, you’ll earn them eventually just by playing normally over the season.

Conclusion

Fortnite XP maps have evolved from niche exploits into a core part of the progression meta in 2026. Whether you’re a casual player squeezing levels between life commitments or a grinder chasing prestige rewards, understanding the XP map ecosystem, how they work, where to find them, and how to maximize gains without hitting walls, separates efficient leveling from wasted time. The best approach combines multiple strategies: hitting your Creative cap with reliable AFK or interactive maps, knocking out Battle Pass challenges in parallel, and supplementing with Battle Royale or Zero Build sessions once Creative XP dries up. Epic’s tolerance for XP maps remains steady as long as players avoid blatant exploits, but the landscape shifts weekly, stay plugged into community channels for fresh codes and rate adjustments. Most importantly, keep progression in perspective. XP maps are a tool for efficiency, not a replacement for enjoying the game itself. Use them smart, avoid the common pitfalls, and you’ll cruise through Battle Pass tiers without sacrificing the fun that makes Fortnite worth playing in the first place.

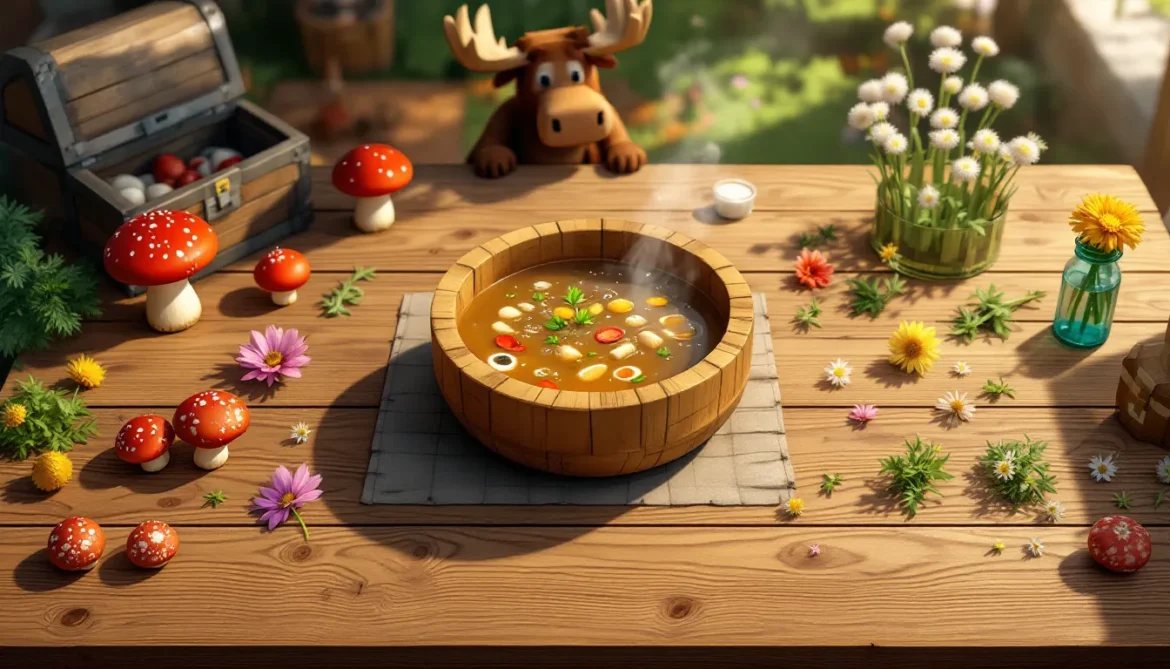
Minecraft’s food system is full of quirky mechanics, but nothing quite matches the versatility and mystery of suspicious stew. Unlike golden apples or cooked pork chops, this unassuming bowl of soup can grant status effects ranging from life-saving regeneration to debilitating poison, all depending on which flower you toss into the recipe. It’s the only food item in the game with such wildly variable outcomes, making it both a strategic tool and a potential trap.

Whether you’re prepping for a boss fight, planning a PvP ambush, or just curious about the mechanics behind Minecraft suspicious stew, this guide breaks down everything you need to know. From crafting recipes and flower-effect pairings to shipwreck loot and mooshroom farming, we’ll cover every method of obtaining it and explain when it’s actually worth using over more predictable food sources.

Key Takeaways

  • Suspicious stew in Minecraft offers unpredictable status effects based on the flower used in the recipe, ranging from beneficial buffs like Regeneration to harmful effects like Poison or Wither.
  • The crafting recipe requires one red mushroom, brown mushroom, bowl, and a specific flower—with the flower type determining the effect granted when consumed.
  • You can obtain suspicious stew through three non-crafting methods: shipwreck loot chests, villager trades, or by feeding flowers to brown mooshrooms and milking them with a bowl.
  • Suspicious stew is most valuable as an early-game alternative to potions before unlocking brewing, providing quick buffs without requiring Nether materials or extensive resources.
  • A brown mooshroom farm is the most efficient way to produce targeted suspicious stews on-demand, allowing you to feed specific flowers and consistently harvest their corresponding effects.
  • Unknown suspicious stew found in loot or from trades is a gamble—always test random stews in safe environments first to avoid being poisoned or blinded at critical moments.

What Is Suspicious Stew in Minecraft?

Suspicious stew is a consumable food item introduced in the Village & Pillage update (Java Edition 1.14, Bedrock Edition 1.10.0). When eaten, it restores 6 hunger points and 7.2 saturation, solid stats, but not exceptional compared to alternatives like steak or golden carrots.

What sets it apart is the hidden status effect. Every bowl of suspicious stew carries a single effect determined by the flower used in its recipe. These effects range from highly beneficial (like Night Vision or Regeneration) to outright harmful (Poison or Wither). The kicker? You can’t tell which effect a stew has just by looking at it. The tooltip doesn’t reveal the effect unless you crafted it yourself or know the source.

This unpredictability makes suspicious stew a double-edged sword. In controlled situations, like when you’re crafting it yourself with specific flowers, it’s a powerful tool. But random stew found in loot chests or traded from villagers can be a gamble. The lack of transparency is intentional design, rewarding players who understand the flower-to-effect mapping.

Suspicious stew doesn’t stack in your inventory, which is a major drawback. Each bowl occupies a separate slot, making it impractical for long expeditions unless you’re targeting a specific effect for a short-term goal.

How to Craft Suspicious Stew

Crafting suspicious stew is straightforward once you’ve gathered the right components. The recipe itself is shapeless, meaning you can arrange the ingredients anywhere in the crafting grid.

Required Ingredients and Materials

You’ll need exactly four items to craft one bowl of suspicious stew:

  • 1 Red Mushroom
  • 1 Brown Mushroom
  • 1 Bowl
  • 1 Flower (the type determines the effect)

Mushrooms spawn naturally in dark areas, Mushroom Fields biomes, and the Nether (for red mushrooms). Bowls are crafted from three wooden planks arranged in a “V” shape. The flower is the variable ingredient, there are over a dozen flower types in Minecraft, each tied to a specific effect.

Step-by-Step Crafting Process

  1. Gather mushrooms. Head to a dark forest, swamp, or Mushroom Fields biome. You can also farm mushrooms in low-light conditions or use bone meal on mycelium/podzol for quick spawns.
  2. Craft a bowl. Use three planks of any wood type in a crafting table.
  3. Choose your flower. This is the critical decision. Want Regeneration? Grab an Oxeye Daisy. Need Night Vision? Pick an Orchid. We’ll cover the full flower-effect list in the next section.
  4. Combine in any order. Place the red mushroom, brown mushroom, bowl, and flower in a crafting table or your 2×2 inventory grid. The stew appears instantly.

The crafting process doesn’t consume the bowl permanently, you can wash and reuse bowls by crafting more stew or other bowl-based foods. But, each crafting session produces only one stew, so mass production requires multiple sets of ingredients.

Every Flower and Its Effect: Complete Breakdown

The flower you choose dictates the status effect and its duration. Here’s the exhaustive list, organized by effect category. All durations listed are for Java Edition: Bedrock Edition mirrors these values in most cases.

Positive Effect Flowers

These flowers grant beneficial buffs that can turn the tide in survival or combat scenarios:

  • Oxeye Daisy → Regeneration (8 seconds). Heals 4 health points over the duration. Clutch for post-combat recovery.
  • Cornflower → Jump Boost (6 seconds). Increases jump height, useful for parkour or scaling walls quickly.
  • Lily of the Valley → Poison (12 seconds). Wait, this isn’t positive. It’s listed here due to its flower category in-game, but the effect is strictly negative.
  • Dandelion → Saturation (0.35 seconds). Instantly restores 1 hunger point and 2.4 saturation. The duration is near-instant.
  • Blue Orchid → Saturation (0.35 seconds). Identical effect to Dandelion.
  • Azure Bluet → Blindness (8 seconds). Another misleadingly categorized flower. The effect obscures vision and is a hindrance.
  • Allium → Fire Resistance (4 seconds). Protects against lava and fire damage, though the duration is too short for most Nether trips.
  • Tulips (all colors) → Weakness (9 seconds). Reduces melee damage dealt. Not positive, even though the flower’s aesthetics.
  • Poppy → Night Vision (5 seconds). Enhances visibility in darkness. The short duration limits its usefulness.
  • Wither Rose → Wither (8 seconds). Deals damage over time, bypassing armor. Definitively negative.

Negative Effect Flowers

Some flowers produce effects you’d never want to inflict on yourself, unless you’re setting a trap:

  • Lily of the Valley → Poison (12 seconds). Drains health down to half a heart but can’t kill you outright.
  • Wither Rose → Wither (8 seconds). Unlike Poison, Wither can kill. It deals 1 heart of damage per second.
  • Tulips → Weakness (9 seconds). Reduces your melee attack damage, making you vulnerable in combat.
  • Azure Bluet → Blindness (8 seconds). Your screen goes dark and foggy, making navigation nearly impossible.

Neutral and Unique Effect Flowers

These don’t fit neatly into “good” or “bad” categories:

  • Dandelion / Blue Orchid → Saturation (0.35 seconds). Technically positive, but the effect is so brief it’s almost negligible. Still, it’s instant hunger restoration without waiting.
  • Cornflower → Jump Boost (6 seconds). Situationally useful, but not a game-changer.
  • Allium → Fire Resistance (4 seconds). Too short to rely on, but better than nothing in a pinch.

The community modding scene has explored expanding suspicious stew mechanics, but Mojang hasn’t introduced new flower-effect pairings since the Nether Update.

How to Obtain Suspicious Stew Without Crafting

Crafting isn’t the only way to get suspicious stew. Three alternate methods exist, each with trade-offs.

Finding Suspicious Stew in Shipwrecks

Shipwrecks, those half-buried wooden vessels scattered across ocean floors, sometimes contain suspicious stew in their supply chests. The loot table gives you a roughly 54.3% chance of finding 1 stew per chest in Java Edition, and similar odds in Bedrock.

The catch? The flower (and so the effect) is randomized. You might pull Regeneration or you might get Poison. There’s no way to predict it without eating the stew or using external tools like NBT editors. This makes shipwreck stew a gamble, great for desperate hunger situations, risky if you’re already low on health.

Trading with Villagers for Suspicious Stew

Expert-level Farmer villagers offer suspicious stew as a trade option. In exchange for 1 emerald, they’ll hand over a bowl of stew. The effect is pre-determined by the villager’s internal data and won’t change, but you won’t know what it is until you consume it (or check with debugging tools).

This method is renewable and safe if you’re not in immediate danger. Farm emeralds through other villager trades, then stock up on stew. But, many survival base designs prioritize food farms over villager trading halls, so this isn’t always the most efficient route.

Brown Mooshrooms and Flower Feeding

Here’s where it gets interesting. Brown mooshrooms, the rarer variant found only in Mushroom Fields biomes or created by lightning striking a red mooshroom, have a unique mechanic. When you feed a flower to a brown mooshroom, then milk it with a bowl, you receive suspicious stew with the effect tied to that flower.

This is the most controlled non-crafting method. Steps:

  1. Locate or create a brown mooshroom.
  2. Feed it a specific flower (e.g., Oxeye Daisy for Regeneration).
  3. Immediately use a bowl on it. You’ll get suspicious stew with that flower’s effect.
  4. The mooshroom retains the flower’s data, so subsequent milkings yield the same effect until you feed it a different flower.

Brown mooshrooms are rare, but once you’ve set up a farm, this becomes the most reliable way to mass-produce specific stews. Players diving into detailed game mechanics guides often highlight this as an underutilized strategy.

Strategic Uses for Suspicious Stew in Gameplay

Suspicious stew’s niche use cases make it a sleeper pick for players who plan ahead.

Survival Mode Applications

In early-game survival, suspicious stew can substitute for potions before you’ve unlocked brewing. Need a quick heal? Oxeye Daisy stew grants Regeneration without requiring a Nether trip for blaze rods. Exploring caves? Poppy stew’s Night Vision (even for just 5 seconds) can help you spot ore veins or mobs in pitch darkness.

The Saturation effect from Dandelions or Blue Orchids is underrated. It instantly tops off your hunger bar’s hidden saturation meter, which delays hunger loss. This is clutch when you’re low on food and need to sprint or regenerate health.

PvP and Combat Advantages

Suspicious stew shines in PvP for its unpredictability. Store multiple stews with different effects, some beneficial, some harmful, and use them strategically. Chug Regeneration stew mid-fight for burst healing. Or, if you’re feeling devious, swap a harmful stew into an opponent’s inventory during looting chaos.

The Wither Rose stew is a sleeper weapon. Wither damage bypasses armor, making it deadlier than direct sword strikes in some matchups. Jump Boost stew can help you escape or gain high ground quickly.

Speedrunning and Challenge Runs

Speedrunners occasionally use suspicious stew for early-game buffs. Shipwreck stew can provide emergency healing or saturation without crafting, saving precious seconds. Some categories (like “Random Seed Glitchless”) see runners gamble on shipwreck RNG for Regeneration stew before tackling dangerous structures.

Challenge runs, like “No Brewing” or “Peaceful Mode”, rely heavily on suspicious stew since potions are restricted. According to advanced strategy resources, optimizing stew usage can shave minutes off completion times in these niche categories.

Common Mistakes to Avoid When Using Suspicious Stew

Even veteran players trip up on suspicious stew’s quirks. Here are the pitfalls:

Eating unknown stew in combat. Shipwreck or villager-traded stew with a randomized effect can poison or blind you at the worst moment. Always test unknown stews in a safe environment first.

Forgetting stews don’t stack. Unlike bread or cooked meat, each stew occupies one inventory slot. Carrying 10 stews means sacrificing 10 slots, impractical for long trips. Craft or source them on-demand instead.

Ignoring effect durations. A 5-second Night Vision buff won’t last through an entire cave system. Plan stew consumption around immediate, short-term needs rather than treating them as long-duration potions.

Confusing positive and negative flowers. Tulips look harmless but grant Weakness. Lily of the Valley is elegant but poisonous. Memorize the flower-effect chart or keep it bookmarked.

Wasting brown mooshroom potential. If you’ve gone through the effort of finding or creating a brown mooshroom, don’t just milk it randomly. Feed it the flower you need first, then milk for targeted effects. Skipping this step defeats the purpose of the mechanic.

Using stew when potions are available. Once you’ve unlocked brewing, potions almost always outclass suspicious stew. They stack (as splash/lingering variants), have longer durations, and offer stronger effects. Stew is best for pre-Nether gameplay or specific gimmicks.

Suspicious Stew vs Other Food Items: When to Choose What

Suspicious stew competes with a crowded roster of food options. Here’s how it stacks up:

vs. Steak/Cooked Pork: These restore 8 hunger points (vs. stew’s 6) and have higher saturation. They’re also stackable and easier to farm. Choose stew only if you need its status effect, not for hunger restoration alone.

vs. Golden Apples: Golden apples grant Regeneration II (5 seconds) and Absorption. They’re more powerful and reliable than stew, but require gold, a rarer resource. Use stew as a budget alternative in early-game survival.

vs. Golden Carrots: Golden carrots provide 6 hunger and 14.4 saturation, the best saturation in the game. They don’t grant effects, but they’re stackable and efficient. Stew can’t compete on efficiency, only on utility.

vs. Potions: Once brewing is available, potions dominate. Regeneration II potions last 22 seconds (or 1:30 with Redstone), far exceeding stew’s 8 seconds. Stew is a stopgap, not a replacement.

vs. Suspicious Stew (different flowers): This is where strategy matters. Oxeye Daisy stew for healing, Poppy stew for vision, Dandelion stew for saturation. Match the flower to the situation.

The verdict? Suspicious stew is a niche tool for early-game buffs, pre-brewing survival, or PvP trickery. It’s not a staple food source.

Advanced Tips and Tricks for Maximizing Suspicious Stew Benefits

Squeeze every advantage out of suspicious stew with these advanced tactics:

Build a brown mooshroom farm. Transport a brown mooshroom to your base using a lead or boat. Fence it in, then create a flower garden nearby. This lets you produce targeted stews on-demand without needing mushrooms or bowls in bulk.

Pre-craft emergency stews. Keep 2-3 Oxeye Daisy stews in an Ender Chest for emergency healing. Since Ender Chests are accessible from anywhere, you’ll always have a Regeneration source, even if your main base is far away.

Use Saturation stews before sprinting. Pop a Dandelion or Blue Orchid stew right before a long sprint. The instant saturation boost delays hunger drain, letting you cover more ground without eating again.

Combine with other buffs. Stack stew effects with potions or enchantments. For example, Regeneration stew + Strength II potion + Sharpness V sword creates a devastating combo in PvP.

Test shipwreck stew with a second player. In multiplayer, have a teammate test unknown stews first. If they get a beneficial effect, you know the stew is safe. If they get poisoned, you’ve dodged a bullet.

Farm flowers efficiently. Use bone meal on grass blocks in flower-rich biomes like Plains or Flower Forests. This spawns flowers rapidly, letting you stockpile specific types for targeted stew crafting.

Leverage stew in custom maps. Mapmakers can use suspicious stew for puzzle mechanics or hidden buffs/debuffs. Since effects aren’t visible, players must experiment to discover which stews are helpful.

Conclusion

Suspicious stew won’t replace golden apples or potions in your late-game inventory, but it carves out a unique role in Minecraft’s survival ecosystem. Its flower-based variability rewards players who learn the system, and mechanics like brown mooshroom farming unlock renewable, targeted effects without brewing.

Whether you’re speed-running, building a self-sufficient base, or just experimenting with underused mechanics, suspicious stew offers more depth than its unassuming appearance suggests. Master the flower chart, avoid the common pitfalls, and you’ll have a versatile tool that most players overlook. Just remember: always know what you’re eating before you take that first sip.

Davey Wreden’s The Beginner’s Guide dropped in 2015, and nearly 11 years later, it still sparks heated debates in gaming circles. Is it a genuine confession? A meta-commentary on player expectations? Or an elaborate fiction designed to mess with your head? Unlike typical walking simulators that guide you toward a single interpretation, this one refuses to give you easy answers. It’s a 90-minute experience that lingers for days, or weeks, after you’ve closed it.

If you’re hunting for a beginners guide game that actually challenges how you think about games, this is it. The Beginner’s Guide doesn’t hold your hand or celebrate your choices. Instead, it questions why you’re playing, what you expect from interactive narratives, and whether you have any right to interpret someone else’s creative work. It’s uncomfortable, introspective, and absolutely essential if you care about games as an art form.

Key Takeaways

  • The Beginner’s Guide is a narrative-driven exploration game that challenges players to question interpretation, creative ownership, and the ethics of sharing someone else’s work without permission.
  • Davey Wreden’s unreliable narration throughout the game forces you to confront whether his analysis of Coda’s levels reveals truth or reflects his own projections and self-serving justifications.
  • This beginner’s guide game delivers 90 minutes of linear, dialogue-driven storytelling with no traditional gameplay, combat, or puzzles—designed for introspection rather than entertainment or mechanical challenge.
  • Core themes explore the gap between creator intent and audience interpretation, the tendency to diagnose an artist’s mental state through their work, and the uncomfortable question of who owns meaning in art.
  • Essential for players interested in narrative experimentation and game criticism, but not recommended for those seeking clear answers, satisfying resolutions, or traditional gameplay mechanics.
  • Play in one sitting, avoid spoilers beforehand, and question everything Wreden says to maximize the impact of this intellectually rigorous experience that lingers long after completion.

What Is The Beginner’s Guide?

Game Overview and Developer Background

The Beginner’s Guide is a narrative-driven first-person exploration game created by Davey Wreden, who previously designed The Stanley Parable (the original 2011 mod and the 2013 commercial release). Published by Everything Unlimited Ltd. in October 2015, it’s a sharp departure from Stanley Parable’s branching comedy. Instead, you’re guided through a linear series of game prototypes supposedly created by Wreden’s friend, a developer named Coda.

Wreden narrates the entire experience, explaining each level’s context, Coda’s creative intent, and his own relationship with the work. The game runs about 90 minutes with no fail states, combat, or puzzles, just exploration and Wreden’s commentary. It’s structured like a director’s commentary track for a movie, except the director might be lying to you.

Platform Availability and System Requirements

The Beginner’s Guide launched exclusively on PC (Steam) and macOS in 2015. As of 2026, it remains available only on these platforms, no console ports have been announced or released. System requirements are minimal:

  • OS: Windows 7/8/10/11 or macOS 10.9+
  • Processor: Dual-core 2.0 GHz or equivalent
  • Memory: 2 GB RAM
  • Graphics: Integrated graphics (Intel HD 4000 or better)
  • Storage: ~1.5 GB

You can run this on a decade-old laptop without breaking a sweat. The Source engine (same as Stanley Parable) keeps things lightweight.

Understanding the Narrative Structure

The Role of the Narrator

Davey Wreden’s voice is the backbone of the beginner’s guide game experience. He presents himself as a curator and interpreter, someone who discovered Coda’s unpublished game prototypes and wants to share them with the world. His tone starts enthusiastic and reverent, explaining each level’s brilliance and what it reveals about Coda’s psyche.

But cracks appear. Wreden admits to modifying some levels, adding lights, doors, or exit paths, so players can actually finish them. He justifies these changes as necessary for accessibility, but they raise a question: if you alter someone’s work without permission, are you still sharing their art or creating your own?

Who Is Coda?

Coda is presented as a reclusive game designer who created experimental prototypes between 2008 and 2011, then stopped making games entirely. Wreden describes him as a friend who shared these projects privately, never intending them for public release. The levels range from surreal (a staircase that loops infinitely) to oppressive (a lecture hall where you’re forced to listen) to deeply personal (a machine that seems to represent creative burnout).

Here’s the catch: we never hear from Coda. We only have Wreden’s interpretation. Coda might not exist at all, he could be a fictional construct, a pseudonym for Wreden himself, or a real person whose work is being grossly misrepresented. The game never confirms which.

The Unreliable Narrator Concept

By the final chapters, Wreden’s narration becomes desperate and self-justifying. He admits Coda asked him to stop sharing the games, but he continues anyway, convinced he’s helping. This is where the beginner’s guide game pulls its sharpest trick: you realize you might be complicit. By playing, you’re participating in Wreden’s violation of Coda’s boundaries.

The unreliable narrator isn’t a twist, it’s the point. The game asks whether you can trust any interpretation, including the creator’s own claims about their work. It’s a deliberate challenge to the idea that games (or any art) have a “correct” reading.

Complete Chapter-by-Chapter Walkthrough

Early Chapters: Whisper, Backwards, Stairs, and Exiting

The first four chapters ease you into the format. Whisper is a simple maze where Wreden explains Coda’s design philosophy. Backwards is a Counter-Strike map played in reverse, with Wreden interpreting it as a commentary on violence. Stairs introduces the looping, Escher-like architecture that defines many later levels, a staircase that goes nowhere, symbolizing futility or creative block depending on Wreden’s mood.

Exiting is the first sign something’s off. It’s a series of rooms where every door leads to another identical room. Wreden admits he modified this one heavily, adding an escape route because the original was “unfinishable.” You start to wonder: what did Coda actually intend?

There’s no interactivity beyond walking and looking. Just move forward, listen, and try to form your own opinions before Wreden shapes them for you.

Mid-Game Chapters: Tower, Islands, and Mobius

Tower is a vertical climb where Wreden argues Coda was obsessed with isolation. You ascend a narrow structure, reaching a small room at the top with a single chair. It’s minimalist and eerie, but Wreden’s interpretation feels forced, like he’s projecting his own fears onto the work.

Islands is a series of floating platforms, each with a small scene or object. Wreden interprets this as Coda’s loneliness, but it’s also just a neat environmental experiment. The gap between Wreden’s overwrought analysis and the simple geometry is intentional dissonance.

Mobius is a looping hallway that traps you until Wreden admits he added an exit. This is the clearest example of his meddling, and his justification, “I just wanted people to see it”, starts to sound selfish.

Final Chapters: Lecture, Machine, and Epilogue

Lecture is brutal. You’re stuck in an auditorium, forced to listen to a droning voice while Wreden talks over it, explaining how Coda used games to process frustration. You can’t skip it. You can’t leave. It’s designed to make you uncomfortable, and it works.

Machine is the emotional climax. You navigate a massive, oppressive structure filled with moving parts and dead ends. Wreden breaks down, confessing that he needs Coda’s validation, that sharing these games was selfish, that maybe Coda stopped creating because of him. The machine itself might represent creative burnout or the suffocating weight of external expectations.

The Epilogue is a quiet, empty space. Wreden’s gone silent. You walk through a featureless void, then the game ends. No resolution, no closure, just the echo of Wreden’s confession and your own uncertainty.

Core Themes and Meaning Explained

Creative Interpretation vs. Creator Intent

The Beginner’s Guide asks a question game criticism usually avoids: who owns meaning? Wreden insists Coda’s games mean specific things, loneliness, frustration, despair, but Coda never confirms this. In fact, if Coda exists, he explicitly rejected Wreden’s interpretations by asking him to stop.

This mirrors real-world creator-audience dynamics. Players and critics constantly project their own experiences onto games, sometimes ignoring or contradicting what developers actually intended. The beginner’s guide game forces you to confront that habit by making Wreden’s projections increasingly desperate and self-serving.

The Ethics of Sharing Someone Else’s Work

By the end, the game’s central conflict is ethical, not artistic. Wreden admits Coda didn’t want these games public. He shared them anyway, justifying it as preservation or celebration. But if someone creates something privately, do you have the right to recontextualize and distribute it without permission?

This theme resonates differently in 2026 than it did in 2015. With AI scraping, content farms, and the erosion of creative control, the question of consent in art feels more urgent. The game doesn’t answer it, it just makes you sit with the discomfort.

Mental Health and Artistic Expression

Wreden repeatedly describes Coda as depressed, isolated, and creatively blocked. He uses the games as evidence, diagnosing Coda’s mental state through environmental design. But this is wildly presumptuous. A dark game doesn’t mean a depressed creator: a looping hallway doesn’t prove existential despair.

The game critiques the tendency to treat art as therapy-by-proxy, where audiences assume they understand a creator’s mental health based on their output. It’s a trap critics and fans fall into constantly, and The Beginner’s Guide exposes how damaging that can be.

Gameplay Mechanics and What to Expect

Walking Simulator or Interactive Narrative?

If you’re allergic to the term “walking simulator,” you’ll hate this. There are no mechanics, no jumping puzzles, no collectibles, no branching paths. You move forward, look around, and listen. The interactivity is minimal by design. Early on, reviewers at IGN categorized it alongside titles like Dear Esther and Gone Home, but that undersells how confrontational it is.

Unlike those games, which use exploration to reveal narrative, The Beginner’s Guide actively questions why you’re exploring at all. The lack of traditional gameplay isn’t a limitation, it’s a statement about what games can do when they strip away everything except voice and space.

Playtime and Replayability

Expect 90 minutes for a full playthrough. There’s no reason to replay it immediately unless you want to reconsider Wreden’s commentary with fresh perspective. Some players revisit it years later and find entirely new meanings, but it’s not designed for multiple runs the way The Stanley Parable was.

One playthrough is enough to understand the structure. The real “replay value” happens in your head over the following days. You’ll keep turning it over, questioning what was real, what was performance, and whether you were manipulated.

How The Beginner’s Guide Compares to The Stanley Parable

Similarities in Design Philosophy

Both games use narration to interrogate player agency. Both are built in Source and lean heavily on voice acting to shape tone. Both are short, focused experiences that reject traditional game loops in favor of conceptual experimentation. And both were created by Davey Wreden (though William Pugh co-designed The Stanley Parable).

They share a fascination with unreliable narrators and meta-commentary, and both games ask you to question the voice guiding you. If you loved Stanley Parable’s humor and branching structure, you’ll recognize the DNA in this the beginners guide game, even if the execution is completely different.

Key Differences in Tone and Message

The Stanley Parable is playful, absurd, and eventually optimistic about player choice (even when mocking it). The Beginner’s Guide is introspective, uncomfortable, and deeply pessimistic about interpretation and creative relationships. Stanley Parable invites you to laugh at the futility of choice: this one asks you to wrestle with guilt and complicity.

Stanley Parable has multiple endings and rewards exploration. This doesn’t. It’s linear, somber, and doesn’t care if you’re having fun. If you expected another comedy, you’ll be blindsided. If you want something that challenges you emotionally rather than mechanically, this is the better pick.

Critical Reception and Community Interpretations

What Critics Said at Launch

Reviews in late 2015 were polarized. Some outlets praised its ambition and emotional honesty. Others found it pretentious and self-indulgent. Rock Paper Shotgun published a thoughtful piece exploring whether the game was autobiographical or entirely fictional, landing on “it doesn’t matter.” Metacritic scores hovered around 75-80, reflecting the divisive nature.

The biggest criticism was that it felt like a personal catharsis project rather than a broadly accessible experience. For some, that’s a feature, not a bug. For others, it’s 90 minutes of someone else’s therapy session.

Popular Fan Theories and Alternative Readings

The most persistent theory: Coda doesn’t exist. Wreden created all the levels himself and invented Coda as a narrative device to explore his own creative anxieties after The Stanley Parable‘s success. This reading frames the game as a meditation on imposter syndrome and the fear of disappointing an audience.

Another interpretation: Coda is real, and the game is an apology. Wreden violated a real friend’s trust and made this as a public confession, knowing Coda would never respond. This reading makes the game even darker, a performative apology that doubles as another act of exploitation.

A third angle: it’s about parasocial relationships. Wreden represents fans who over-interpret creators’ work, projecting their own needs onto art that was never meant for them. This aligns with how Twinfinite discussed the game in a 2018 retrospective, comparing it to fan communities that analyze every tweet from developers as secret lore.

None of these readings are confirmed. The game deliberately withholds that closure.

Should You Play The Beginner’s Guide in 2026?

Who Will Enjoy This Game

If you care about narrative experimentation, unreliable narrators, or games that challenge your expectations, this is essential. It’s ideal for players who want to think and feel rather than click and win. If you loved What Remains of Edith Finch, Her Story, or Disco Elysium‘s meta-commentary, this fits that lineage.

It’s also great for anyone interested in game criticism or creative ethics. If you’ve ever debated “death of the author,” argued about developer intent on Reddit, or wondered whether Let’s Players have the right to monetize someone else’s work, this game will give you a lot to chew on.

Who Might Not Connect With It

If you need clear answers, satisfying resolutions, or traditional gameplay, skip it. If you found The Stanley Parable too talky or Gone Home too boring, you’ll actively dislike this. It’s slower, more somber, and less forgiving than either.

Players who prefer action, strategy, or competitive mechanics won’t find anything here. And if you’re not in the mood for introspection or discomfort, it’ll feel like assignments. This isn’t a game you play to relax, it’s one you play to wrestle with ideas.

Tips for Getting the Most Out of Your Experience

Play it in one sitting. The game runs 90 minutes, and interruptions will kill the pacing. Treat it like a movie, dim the lights, put on headphones, and commit.

Don’t look up spoilers or analyses beforehand. The first playthrough is the only time you’ll experience Wreden’s narration without bias. Let yourself form opinions before reading what others think.

Question everything Wreden says. Don’t take his interpretations at face value. Ask yourself: is this what Coda meant, or what Wreden needs it to mean? The gap between those two things is where the game lives.

Take notes if you’re inclined. Some players jot down reactions to specific chapters or questions they want to revisit. Others just let it wash over them. Both approaches work, but if you’re the analytical type, having notes helps when you discuss it later.

Talk about it afterward. Whether you hop into a Discord, read forum threads, or debate with friends, the game opens up when you hear other perspectives. It’s designed to spark conversation, not deliver a single truth.

If you’re looking for a Battlefield 6 beginner’s experience that teaches mechanics quickly, you’re in the wrong place. But if you want a beginner’s guide game that teaches you to interrogate narratives and question creators, this is the gold standard.

Conclusion

The Beginner’s Guide remains one of the most divisive and intellectually rigorous games ever made. In 2026, its questions about creative ownership, interpretation, and consent feel more relevant than ever. It’s not fun in the traditional sense, it’s challenging, uncomfortable, and refuses to give you closure. But if you’re willing to engage with it honestly, it’ll stick with you far longer than most games with ten times the budget.

Whether Coda exists, whether Wreden is telling the truth, whether you have the right to interpret any of it, those questions don’t have answers. And that’s exactly the point.

Final Fantasy XIV throws hundreds of quests at players throughout their journey across Eorzea and beyond, but some slip through the cracks even though their narrative charm or quirky objectives. “Any Way the Wind Blows” is one of those under-the-radar sidequests that might catch you off guard with its simple premise but satisfying payoff. Whether you stumbled across this quest organically or you’re working through completionist checklists, this walkthrough covers everything you need to knock it out efficiently. We’ll break down unlock requirements, step-by-step objectives, combat strategies, and the rewards waiting at the finish line. Let’s get into it.

Key Takeaways

  • “Any Way the Wind Blows” is a Dawntrail sidequest in FFXIV designed for solo completion at level 90+, requiring MSQ progression to unlock and offering 500,000–750,000 EXP plus functional loot rewards.
  • The quest involves interacting with NPCs and environmental objects, navigating wind hazards, and defeating 2–3 mob spawns—mechanics are minimal and the encounter lasts 60–90 seconds with proper positioning.
  • Avoid common mistakes like missing NPCs due to insufficient MSQ progression, pulling multiple mob packs, or underestimating gear requirements; logging out and checking your level are quick fixes.
  • Use mounts between markers, group nearby sidequests for efficiency, and choose high-burst DPS or tank jobs like Reaper, Warrior, or Paladin to complete the quest in under 20 minutes.
  • The sidequest enriches Dawntrail’s world-building by exploring indigenous weather adaptation and community resilience, making it worthwhile for lore-focused players despite offering no MSQ-critical content.
  • If the quest bugs out, relog or re-accept the quest from the NPC; if NPCs don’t appear, verify MSQ completion and try zoning out and back in to refresh spawns.

What Is the Any Way the Wind Blows Quest in FFXIV?

“Any Way the Wind Blows” is a sidequest introduced during the Dawntrail expansion cycle (Patch 7.x series), though it doesn’t tie directly into the main scenario questline. Instead, it’s a regional sidequest found in one of the expansion’s new zones, offering a slice of local flavor and a modest but worthwhile reward pool.

The quest itself revolves around assisting a local NPC with weather-related troubles, think wind-scattered goods, environmental hazards, or navigating volatile atmospheric conditions common in Dawntrail’s zones. It’s not a raid-tier challenge, but it does require some light exploration and minor combat.

Quest Overview and Requirements

Quest Type: Sidequest
Expansion: Dawntrail (Patch 7.0 or later)
Recommended Level: Level 90+
Class/Job: Any (No class restrictions)
Prerequisites: Completion of the Dawntrail MSQ up to a certain point (usually mid-expansion access to the relevant zone)

You won’t need any special attunements or crafting classes unlocked. If you can access the zone and meet the level requirement, you’re good to go. The quest is designed for solo completion, so no party coordination required.

How to Unlock Any Way the Wind Blows

To unlock the quest, head to the designated zone in Dawntrail, most commonly reported as Urqopacha or Yak T’el, depending on your MSQ progression. Look for a blue quest marker (sidequest icon) near a small settlement or outpost.

The quest giver is typically a named NPC standing near wind-worn structures or weather-monitoring equipment. The exact spawn depends on your MSQ completion: some sidequests don’t appear until you’ve cleared specific story beats. If you’re not seeing the marker, push a bit further in the main story and circle back.

Once you spot the blue marker, interact with the NPC to trigger the quest acceptance dialogue. The quest log entry will confirm objectives and provide a general zone marker for your first task.

Step-by-Step Walkthrough: Completing Any Way the Wind Blows

This quest follows a linear structure with clearly marked objectives, but a few steps can trip up players unfamiliar with the zone layout or mob spawn patterns. Here’s the full breakdown.

Speaking with the Quest Giver

After accepting the quest, the NPC will explain the situation: winds have disrupted local operations, scattered supplies, or endangered nearby travelers. Your job is to investigate, recover items, and deal with any threats that emerge.

Pay attention to the dialogue, FFXIV often hides hints about enemy weaknesses or optimal routes in quest text. In this case, the NPC might mention specific wind currents or environmental hazards that affect traversal.

Locating and Interacting with Key NPCs

The first objective usually involves traveling to a marked location within the same zone. Open your map and follow the quest tracker. You’ll need to interact with one or more secondary NPCs or environmental objects (crates, weather vanes, damaged equipment).

These interactions are typically simple: approach the glowing object, press the interact key, and watch a brief cutscene or dialogue snippet. Some objectives require you to use the Duty Action button (default: varies by platform) to inspect or manipulate objects. If nothing happens when you approach a marker, check your hotbar for a temporary action button.

In “Any Way the Wind Blows,” you might be asked to:

  • Inspect wind-damaged supply crates (3–5 locations)
  • Speak to stranded travelers or merchants
  • Activate environmental anchors or stabilizers

Each interaction updates your quest log. If you’re speed-running, mount up between markers, the quest doesn’t force dismount except during cutscenes.

Navigating the Quest Objectives

Mid-quest, you’ll likely encounter a light puzzle or environmental challenge. Dawntrail zones love verticality and weather gimmicks, so expect to:

  • Use Aether Currents or terrain features to reach elevated platforms
  • Time your movement between wind gusts (some zones have periodic knockback effects)
  • Follow directional clues from NPCs or quest text

If you’re stuck, double-check your minimap for elevation indicators. Many Japanese game announcements and community sites emphasize FFXIV’s layered map design in Dawntrail, which can be disorienting at first.

The quest tracker will update as you clear each objective. Don’t skip cutscenes if you care about lore, this quest ties into local zone stories and occasionally references broader Dawntrail themes.

Combat Encounters and Enemy Strategy

Eventually, you’ll hit a combat segment. Expect 2–3 mob spawns or a single mini-boss encounter. Enemies are usually themed around the zone’s aesthetic, elemental creatures, wildlife, or low-tier voidsent.

Enemy Details:

  • Level Range: 90–92 (scales to your level in some zones)
  • Type: Standard overworld mobs or single elite
  • Mechanics: Minimal: expect standard telegraphed AoEs and cleaves

For DPS jobs, burn them down fast. Tanks and healers can face-tank most attacks without cooldown management. The real “strategy” is positioning, some enemies cast knockback abilities that can punt you off cliffs or into hazard zones.

Tips:

  • Stay near terrain edges to avoid knockback deaths
  • Interrupt any cast bars with stun or silence if available (not required, just faster)
  • If you’re undergeared for endgame, pop a defensive cooldown or potion

Combat rarely lasts more than 60–90 seconds. Once enemies are down, loot any quest items from their corpses or nearby sparkles, then return to the quest giver or proceed to the next marker.

Quest Rewards and What You’ll Earn

Sidequests in FFXIV aren’t known for game-changing loot, but “Any Way the Wind Blows” offers solid filler rewards for players leveling alt jobs or filling out glamour collections.

Experience Points and Gil

Experience: Approximately 500,000–750,000 EXP (exact amount depends on your level at completion). This is decent for a sidequest but won’t move the needle if you’re already capped. Great for leveling secondary jobs in the 90–92 range.

Gil: Around 5,000–10,000 Gil. Not a fortune, but it adds up when you’re clearing zone sidequests in batches. Players farming for housing funds or materia purchases will appreciate the passive income.

Item Rewards and Gear

You’ll receive one or more of the following upon completion:

  • Accessory or Armor Piece: Typically iLevel 620–630 (Dawntrail leveling quality). Stats are generic but serviceable if you’re undergeared.
  • Crafting Materials: Occasionally rewards zone-specific mats used in Dawntrail recipes (leathers, ores, cloths).
  • Consumables: Hi-Potions, Elixirs, or food items (stacks of 3–5).

Nothing here is BiS or endgame-viable, but the gear can fill gaps while you’re progressing through MSQ or dungeons. If you’re a completionist, the quest also grants Achievement Progress toward zone-specific sidequest counts.

Common Mistakes and How to Avoid Them

Even straightforward quests can hit snags. Here’s what trips up players most often.

Missing Critical NPCs or Locations

Problem: Quest markers disappear or NPCs don’t spawn.
Cause: You haven’t progressed far enough in the MSQ, or you’re in the wrong zone instance (rare in FFXIV but possible during high server load).
Fix: Check your MSQ progress. If you’re still early in Dawntrail, this quest might not unlock yet. Log out and back in to refresh zone instances if an NPC is missing.

Some players also confuse quest types, make sure you’re looking for a blue marker (sidequest) not a yellow one (MSQ) or purple (feature unlock). Many game walkthroughs stress color-coding as a common source of confusion for newer players.

Combat Preparation Errors

Problem: Dying repeatedly to the combat encounter.
Cause: Undergeared, wrong job for your playstyle, or ignoring mechanics.
Fix: If you’re struggling, swap to a tankier job or bring a Chocobo companion. Make sure your gear is at least iLevel 610+. Don’t stand in the bad, telegraphs are generous, so dodge early.

Some players try to rush and pull multiple mob packs at once. This quest doesn’t support that. Stick to one group at a time unless you’re confident in your AOE rotation and survivability.

Tips and Tricks for Efficient Completion

Want to knock this out fast? Here’s how to optimize your run.

Optimizing Your Route and Travel Time

  • Pre-position yourself: If you know the quest giver’s location, teleport to the nearest Aetheryte before starting. This cuts down on initial travel.
  • Use mounts liberally: The quest doesn’t force dismount except during cutscenes and combat. Sprint + mount between objectives.
  • Group nearby sidequests: Check your map for other blue markers in the area. You can often stack 3–4 sidequests and complete them in a loop, saving Aetheryte fees and time.

If you’re farming multiple zones, prioritize quests with overlapping objectives or adjacent markers. Efficient pathing can shave 10–15 minutes off your session.

Best Job Classes for This Quest

Technically, any job works, but some have quality-of-life advantages:

  • Reaper, Samurai, Summoner: High burst DPS for fast mob kills. Get in, nuke, move on.
  • Warrior, Paladin: Tanks can facetank everything and self-heal, minimizing downtime.
  • Red Mage, Dancer: Instant-cast mobility and decent damage. Great for repositioning quickly in wind hazard zones.
  • Avoid: Slow ramp-up jobs like Astrologian or Scholar solo unless you’re comfortable with longer TTK.

If you’re leveling an alt job, this quest is solid filler EXP. Just make sure your gear is current, Dawntrail mobs hit harder than Endwalker overworld content.

Story Context: Why This Quest Matters

Not every sidequest needs to be a lore bible, but “Any Way the Wind Blows” does add texture to Dawntrail’s world-building.

Lore Connections and Character Development

The quest explores how Dawntrail’s indigenous populations adapt to extreme weather patterns and environmental instability. The NPC you assist is often a local artisan, merchant, or researcher dealing with the fallout of living in volatile zones.

Dialogue hints at broader themes: resource scarcity, community resilience, and the tension between modernization and tradition. If you’ve been following the MSQ, you’ll notice echoes of the Turali people’s relationship with their land and the encroachment of outside forces.

This quest doesn’t introduce major characters or unlock follow-up chains, but it does contribute to the zone’s ambient storytelling. Players who skip sidequests miss out on these smaller, grounded narratives that make Eorzea feel lived-in.

How It Fits Into the Broader FFXIV Narrative

Dawntrail’s MSQ leans heavily into exploration, cultural exchange, and ecological challenges. “Any Way the Wind Blows” reinforces those motifs without beating you over the head with exposition.

It’s part of a larger network of sidequests that flesh out the expansion’s secondary zones. If you’re the type who enjoys reading every codex entry and talking to every NPC, this quest rewards that playstyle. If you’re here for loot and EXP, you can safely skip the dialogue.

For Japanese gaming news enthusiasts, Dawntrail’s sidequest design echoes earlier FF titles, less sprawling than Shadowbringers’ role quests, more intimate than Stormblood’s filler.

Troubleshooting Quest Issues and Bugs

FFXIV is generally stable, but sidequest bugs do happen, especially in newer patches.

Quest Not Progressing or Objectives Not Updating

Symptoms: You’ve completed an objective (killed mobs, interacted with an object) but the quest log doesn’t update.
Fixes:

  1. Relog: Exit to character select and log back in. This forces a server sync and often resolves stuck objectives.
  2. Abandon and re-accept: Open your quest log, right-click the quest, and select “Abandon.” Re-accept from the original NPC. You’ll lose minor progress but usually fixes soft locks.
  3. Check for competing players: If multiple players are interacting with the same object, spawns can lag. Wait 30–60 seconds and try again.

If the quest is still broken, submit a bug report via the in-game support menu. Include your current objective, zone, and any error messages.

NPC Not Appearing or Interactive Elements Missing

Symptoms: The quest giver or a required NPC is invisible or unclickable.
Fixes:

  1. Zone out and back in: Teleport to a different zone, then return. This refreshes NPC spawns.
  2. Check MSQ progress: Some NPCs don’t appear until you’ve cleared specific MSQ milestones. Verify you’re far enough in the story.
  3. Server congestion: During peak hours, NPC spawns can delay. Wait a few minutes or try during off-peak times.
  4. Graphics settings: Rarely, low object render settings can hide interactive elements. Bump up your “Objects” setting in System Configuration > Graphics Settings.

If you’ve tried everything and the quest is still bugged, check the official FFXIV forums or Reddit’s r/ffxiv for reports. Patch-specific bugs usually get hotfixed within a week.

Conclusion

“Any Way the Wind Blows” won’t redefine your FFXIV experience, but it’s a solid addition to your sidequest log, especially if you’re methodically clearing Dawntrail zones or leveling alternate jobs. The quest is straightforward, rewards are functional, and the lore adds a nice layer of world-building without demanding heavy investment. Follow the walkthrough above, avoid the common pitfalls, and you’ll have it wrapped up in under 20 minutes. Now get out there and help that NPC wrangle the wind.

Most gamers know the underdog story arc by heart. You’re outmatched, out-leveled, and everyone expects you to lose, then you pull off the impossible clutch that no one saw coming. The Greatest Game Ever Played (2005), directed by Bill Paxton, taps into that exact emotion, but it does so through the lens of early 20th-century golf instead of a ranked match or tournament bracket. At first glance, a period sports drama about golf might not scream “must-watch” for the average gamer, but this film carries themes that resonate deeply with competitive gaming culture: class gatekeeping, the grind to mastery, and the moment when raw skill trumps established hierarchy.

Released over two decades ago, the film dramatizes the true story of Francis Ouimet, a working-class caddy who shocked the world by defeating British golf legends at the 1913 U.S. Open. It’s a classic David-versus-Goliath narrative, and while it doesn’t involve headshots or frame-perfect inputs, the psychological tension and emotional payoff mirror what makes esports moments legendary. In 2026, as competitive gaming continues to grow and underdog stories like Cinderella runs at major tournaments captivate millions, revisiting this film offers a surprisingly relevant lens on what it takes to compete at the highest level.

Key Takeaways

  • The Greatest Game Ever Played successfully translates the psychological tension of underdog competition to golf, making it deeply relevant to esports and competitive gaming culture through themes of class barriers and mental fortitude.
  • Shia LaBeouf’s grounded portrayal and Bill Paxton’s focused direction avoid melodrama, delivering authentic emotional beats that mirror the discipline and composure required in high-stakes tournament play.
  • The film demonstrates that mastery requires more than raw talent—observation, intentional practice, and mentorship are essential elements in any competitive pursuit, from golf to ranked gaming.
  • Francis Ouimet’s story resonates with modern gamers by illustrating how skill and determination can overcome structural disadvantages, a principle applicable to breaking into elite circles in both traditional and esports communities.
  • While following a predictable underdog formula, the film’s earnest sincerity and expert pacing keep it engaging, delivering a 7.5/10 experience that respects audience intelligence without reinventing the genre.

What Is The Greatest Game Ever Played About?

Plot Overview and Historical Context

The Greatest Game Ever Played centers on Francis Ouimet (Shia LaBeouf), a 20-year-old amateur golfer from a working-class Massachusetts family. In 1913, golf was an elite sport dominated by British aristocracy and wealthy Americans. Francis grows up across the street from The Country Club in Brookline, teaching himself the game by watching the pros and caddying to earn money.

When the U.S. Open comes to his hometown, Francis enters as a last-minute amateur entrant. He’s pitted against Harry Vardon (Stephen Dillane), the reigning British champion and a six-time Open winner, along with other seasoned professionals. With his 10-year-old caddy Eddie Lowery (Josh Flitter) by his side, Francis defies all expectations, eventually forcing a playoff and winning in one of the most shocking upsets in sports history.

The film plays out like a tournament bracket, early rounds establish Francis’s skill and mental fortitude, mid-game sections build tension as the competition tightens, and the final playoff becomes a nail-biting showdown where every stroke matters. It’s structured like a best-of-three grand finals, complete with crowd reactions, commentary, and the weight of an entire underdog narrative hinging on a few decisive moments.

Why This Story Resonates With Gamers and Esports Fans

Francis Ouimet’s journey mirrors the trajectory of countless esports underdogs. Think of lower-bracket runs at EVO, unknown teams upsetting major-region favorites at Worlds, or solo queue grinders breaking into the pro scene. The film captures that same energy: an outsider with raw talent, no sponsorships, and everything to prove.

The class divide is especially relevant. In 1913, golf clubs were exclusive spaces where wealth and lineage mattered more than skill. Today’s gaming landscape has democratized competition in many ways, anyone with a PC or console can queue ranked, but gatekeeping still exists in the form of expensive setups, ping disadvantages, and the unspoken barriers that keep casual players from taking the leap into competitive play.

Francis’s story also emphasizes mental game, a concept every competitive gamer knows. It’s not just about mechanics: it’s about staying composed under pressure, managing tilt, and executing when it counts. The film’s depiction of Francis visualizing shots, blocking out doubt, and trusting his preparation feels remarkably similar to the pre-match routines and mental resets that top-tier players rely on today.

Performance and Direction: Bringing the Underdog to Life

Shia LaBeouf’s Portrayal of Francis Ouimet

Shia LaBeouf delivers a grounded, earnest performance that avoids the over-the-top heroics you might expect from a sports biopic. His Francis is humble, determined, and quietly confident, never cocky, but never self-doubting to the point of melodrama. LaBeouf was 19 during filming, close to Francis’s actual age, and that authenticity shows.

He captures the internal conflict of someone who’s skilled enough to compete but conditioned to believe he doesn’t belong. It’s the same tension you see in up-and-coming pros who dominate scrims but hesitate to call themselves “professional gamers” until they’ve proven it on LAN. LaBeouf’s Francis doesn’t trash-talk or showboat: he just plays his game, and that restraint makes the eventual victory feel earned rather than manufactured.

The supporting cast is solid, with Stephen Dillane as Harry Vardon providing a nuanced counterpoint. Vardon isn’t a villain, he’s a legend dealing with his own pressures and doubts. The mutual respect between Francis and Vardon adds depth, much like the sportsmanship you see between top competitors in fighting game or RTS communities after a brutal set.

Bill Paxton’s Directorial Vision

Bill Paxton, better known as an actor, directed The Greatest Game Ever Played with a clear focus on character-driven storytelling rather than flashy spectacle. He leans into the period setting without making it feel stuffy, and he frames the golf matches with surprising tension given the sport’s slower pace.

Paxton’s direction treats each shot like a critical play. Close-ups on Francis’s face, slow-motion swings, and reaction shots from the crowd all build intensity. It’s edited like a clutch moment in a high-stakes tournament, every decision matters, every mistake is costly, and the clock (or in this case, the scorecard) is always ticking.

The film also benefits from Paxton’s willingness to let quiet moments breathe. Not every scene is packed with dialogue or drama. Sometimes it’s just Francis walking the course, thinking, preparing. That reflective pacing mirrors the downtime between matches or the solo practice sessions that define the grind in competitive gaming.

Cinematography and Visual Storytelling

How the Film Captures the Intensity of Competition

Cinematographer Shane Hurlbut uses a mix of wide landscape shots and tight close-ups to convey both the beauty of the sport and the pressure on individual players. Wide shots establish the course, the crowd, and the scale of the event, while close-ups focus on hands gripping clubs, eyes tracking the ball, and the micro-expressions that reveal confidence or doubt.

The film employs slow-motion sparingly but effectively, reserving it for the most critical putts and drives. When Francis lines up a game-changing shot, the camera lingers on his preparation, the crowd’s silence, and the moment of release. It’s the visual equivalent of a tournament broadcast zooming in on a player’s hands during a match point.

One standout visual motif is the recurring image of Francis as a child watching through the fence of The Country Club, literally on the outside looking in. This imagery pays off in the final act when he walks onto that same course as a competitor. It’s a simple but effective way to externalize the internal journey from outsider to champion.

Period-Authentic Set Design and Atmosphere

The production design nails the early 1900s aesthetic without feeling like a museum exhibit. Costumes, architecture, and props all feel lived-in rather than overly polished. The film was shot on location in Massachusetts and Quebec, and the choice to use real golf courses adds authenticity.

The attention to period detail extends to the golf equipment, wooden clubs, gutta-percha balls, and the formal attire players wore even during competition. For gamers used to seeing retro titles or period settings in games like Red Dead Redemption 2 or Assassin’s Creed, the immersive historical context feels familiar and well-executed.

The film also captures the class divide visually. The wealthy club members are dressed in tailored suits and top hats, while Francis and his family wear simpler, practical clothing. The contrast is never heavy-handed, but it’s always present, reinforcing the thematic stakes.

Themes That Connect Sports and Gaming Culture

Class Barriers and Breaking Into Elite Circles

One of the film’s core themes is the rigid class structure that kept working-class players out of competitive golf. Francis isn’t just fighting opponents on the course, he’s fighting a system that believes talent and wealth are inseparable. His father explicitly tells him that golf “isn’t for people like us,” a line that echoes the discouragement many aspiring pro gamers hear from family or peers who don’t see gaming as a legitimate career.

The film doesn’t shy away from showing how these barriers manifest. Francis is denied entry to private clubs, dismissed by wealthy spectators, and treated as a novelty rather than a serious contender. It’s only through undeniable performance that he forces the establishment to take him seriously, a dynamic familiar to anyone who’s had to prove themselves in ranked lobbies, open qualifiers, or community tournaments.

In 2026, while gaming is more accessible than ever, economic barriers still exist. High-end PCs, low-latency monitors, and stable internet aren’t universal. The spirit of Francis’s story, overcoming structural disadvantages through skill and determination, remains deeply relevant.

Mentorship, Dedication, and the Grind to Master Your Craft

Francis benefits from the guidance of former golfer Arthur Ouimet and, indirectly, from watching Harry Vardon’s technique. The film emphasizes that natural talent alone isn’t enough: mastery requires observation, practice, and learning from those who’ve walked the path before you.

This mirrors the importance of coaching, VOD review, and community knowledge in competitive gaming. Whether it’s studying pro replays, joining a Discord to learn advanced tech, or grinding out thousands of hours in training mode, the path to the top is paved with intentional practice. Francis’s story reinforces that the grind isn’t glamorous, but it’s necessary.

The relationship between Francis and his caddy Eddie also highlights mentorship in reverse. Eddie’s unwavering belief in Francis helps him stay focused during moments of doubt. In gaming terms, Eddie is the supportive teammate who keeps morale high during a tough match, the coach who reminds you of your win conditions, or the community that hypes you up before a big tournament.

The Parallel Between Golf and Competitive Gaming

On the surface, golf and gaming seem worlds apart. But both are deeply strategic, require split-second decision-making under pressure, and reward consistency over flashy plays. Golf’s focus on mental composure, reading conditions, and adapting to opponents translates directly to competitive gaming.

The film also touches on the concept of tilt. Harry Vardon struggles with trauma from past failures, and his mental state affects his performance. Francis, by contrast, learns to stay present and trust his preparation. Managing emotions, avoiding autopilot mistakes, and staying clutch under pressure are universal skills across all competitive arenas.

Also, the structure of match play, where every hole (or round) is a discrete battle within a larger war, parallels best-of-three or best-of-five formats in fighting games, MOBAs, and tactical shooters. One bad hole doesn’t end the match, but every mistake compounds. The film captures that cumulative tension beautifully.

Strengths: What The Greatest Game Ever Played Gets Right

Authentic Emotional Beats and Character Development

The film avoids melodrama and lets the story’s natural drama carry the weight. Francis’s relationship with his father is strained but believable. His romance subplot is minimal and doesn’t derail the main narrative. The focus stays on the competition and Francis’s internal journey, which keeps the pacing tight and the emotional beats earned.

Character arcs feel organic. Francis doesn’t magically gain confidence overnight: he earns it through small victories and support from key people. Harry Vardon’s arc as a former champion grappling with legacy and self-doubt adds layers to what could have been a one-dimensional rival. Even Eddie, the kid caddy, has a clear motivation, he believes in Francis and wants to be part of something bigger than himself.

The film also respects its audience’s intelligence. It doesn’t over-explain every rule of golf or hold your hand through the emotional stakes. If you’re paying attention, the subtext is clear. For gamers used to reading between the lines in environmental storytelling or lore, this approach feels refreshing.

Pacing That Keeps You Engaged Until the Final Match

At just over two hours, the film doesn’t overstay its welcome. The first act efficiently establishes Francis’s background, the second act builds tension through qualifying rounds and social conflict, and the third act delivers the playoff showdown. There’s no filler or unnecessary subplots.

The playoff itself is structured like a finals match, with each hole functioning as a round. The back-and-forth scoreboard, crowd reactions, and shifting momentum create genuine suspense even if you know the outcome going in. It’s the same reason people rewatch legendary esports matches, the execution and atmosphere matter as much as the result.

Paxton’s pacing also benefits from knowing when to slow down. Quiet moments between Francis and Eddie, or Francis visualizing his shots, provide breathing room without killing momentum. It’s the editing equivalent of good map design in shooters, variety in tempo keeps the experience engaging.

Weaknesses: Where the Film Falls Short

Predictable Story Structure

As a based-on-a-true-story sports film, The Greatest Game Ever Played follows a familiar formula. Underdog faces adversity, trains hard, overcomes doubt, and wins against the odds. If you’ve seen Rocky, Rudy, or The Karate Kid, you know the beats.

The predictability isn’t necessarily a dealbreaker, sports stories thrive on familiar structures because the execution matters more than surprise. But the film doesn’t subvert expectations or add enough unique twists to make it feel fresh. There’s no major plot turn or unexpected complication in the third act. It’s a straight line from setup to payoff.

For viewers who prefer narratives with more complexity or moral ambiguity, this might feel too straightforward. It’s the cinematic equivalent of a well-designed but conventional single-player campaign, solid, satisfying, but not groundbreaking.

Limited Appeal for Non-Sports Audiences

While the themes are universal, the film’s focus on golf may alienate viewers who have zero interest in the sport. The pacing, while tight, still dedicates significant runtime to match sequences that require some investment in the competition. If you don’t care about who wins, the tension deflates.

Compared to films like Moneyball (which uses baseball as a vehicle for broader themes of analytics and innovation) or Rush (which injects high-octane visuals and personality clashes), The Greatest Game Ever Played is more grounded and traditional. It doesn’t transcend its genre in the way some sports films do.

For gamers specifically, the lack of direct gaming parallels in the dialogue or framing might make the connections feel like a stretch. The film wasn’t made with esports or gaming culture in mind, so any resonance is thematic rather than explicit. That said, the gaming industry’s growing interest in underdog narratives and competitive documentaries suggests there’s an audience willing to meet the film halfway.

How The Greatest Game Ever Played Holds Up in 2026

Comparing It to Modern Sports and Esports Films

Since 2005, the landscape of sports and competition films has evolved significantly. Documentaries like Free Solo (2018) and esports-focused films like League of Legends: Worlds coverage have raised the bar for capturing high-stakes competition. Streaming platforms have also produced series like The Last Dance and Drive to Survive, which blend sports drama with behind-the-scenes access and modern editing techniques.

The Greatest Game Ever Played predates this shift, and it shows. The film is more traditional, favoring classic narrative structure over documentary realism or meta-commentary. It doesn’t have the raw, handheld energy of Uncut Gems or the stylized intensity of Whiplash. It’s earnest, polished, and straightforward.

That said, its earnestness is also its strength in 2026. In an era of ironic detachment and cynical takes, the film’s genuine belief in hard work, respect, and sportsmanship feels almost countercultural. It doesn’t try to deconstruct the underdog story, it embraces it fully. For viewers tired of subversive narratives, that sincerity is refreshing.

Critical reception platforms like Metacritic gave the film mixed reviews upon release, with praise for performances but criticism for predictability. In hindsight, those critiques hold, but the film’s thematic resonance has aged better than its Rotten Tomatoes score might suggest.

Lessons for Today’s Competitive Gamers

Francis Ouimet’s story offers several takeaways for anyone grinding toward competitive success:

  • Mental game is half the battle. Raw mechanics matter, but composure under pressure separates good players from great ones.
  • Respect your opponents, but don’t be intimidated. Francis admired Vardon but didn’t let that admiration turn into fear.
  • Preparation beats talent when talent doesn’t prepare. Francis’s disciplined practice and course knowledge gave him an edge over more naturally gifted players.
  • Find your Eddie. Whether it’s a coach, teammate, or community, having people who believe in you makes the grind sustainable.
  • Prove it on stage. No amount of talk or pedigree matters once the match starts. Let your performance speak.

These lessons are timeless, and they apply whether you’re climbing ranked in Valorant, competing in Street Fighter 6 locals, or preparing for a Rocket League regional.

Who Should Watch The Greatest Game Ever Played?

This film is ideal for gamers who appreciate underdog stories, sports dramas, or competition narratives with emotional depth. If you enjoyed King Richard, Remember the Titans, or even the tournament arcs in anime like Haikyuu.., you’ll likely find value here.

It’s also a solid pick for players interested in the mental side of competition. If you’ve ever choked a match due to nerves, struggled with self-doubt, or wondered how pros stay calm in grand finals, Francis’s journey offers relatable insights.

Casual viewers looking for high-energy action or innovative storytelling might find it too conventional. It’s not a flashy film. But for those willing to meet it on its own terms, it delivers a well-crafted, emotionally satisfying experience.

Parents and educators might also appreciate it as a family-friendly film that emphasizes perseverance, respect, and breaking barriers, values that translate well beyond sports or gaming. Unlike many modern competitive narratives that lean into toxicity or drama, this film keeps its focus on personal growth and earned success.

Publications like Game Informer have increasingly covered the intersection of traditional sports films and esports culture, noting that narratives like Francis Ouimet’s resonate with a generation raised on competitive gaming.

Final Verdict: Is The Greatest Game Ever Played Worth Your Time?

The Greatest Game Ever Played is a competent, heartfelt sports drama that doesn’t reinvent the wheel but executes its formula with skill and sincerity. Shia LaBeouf’s grounded performance, Bill Paxton’s focused direction, and the film’s thematic resonance with competitive culture make it more than just a period piece about golf.

For gamers, the film offers a surprisingly relevant lens on what it takes to compete at the highest level. The mental fortitude, class barriers, and underdog energy all mirror dynamics in esports and competitive gaming communities. While it doesn’t explicitly reference gaming, the parallels are easy to draw and genuinely compelling.

The film’s weaknesses, predictable structure and niche subject matter, are real but not fatal. If you’re willing to invest two hours in a story about perseverance, respect, and clutch performance, you’ll walk away satisfied. It won’t blow your mind, but it will remind you why competition matters and why underdog stories never get old.

Platforms like Polygon have highlighted how traditional sports narratives continue to influence gaming storytelling, and The Greatest Game Ever Played stands as a solid example of that crossover appeal. It’s not essential viewing, but it’s far from a waste of time.

Score: 7.5/10

A well-executed underdog story with strong performances and timeless themes. Predictable but satisfying, especially for fans of competition narratives.

Conclusion

The Greatest Game Ever Played may not be on every gamer’s radar, but it deserves a spot on the watchlist for anyone who appreciates the emotional arc of competition. Francis Ouimet’s journey from outsider to champion captures the same spirit that makes esports Cinderella runs legendary, proof that skill, preparation, and heart can overcome entrenched hierarchies.

In 2026, as gaming culture continues to mature and explore its own narratives of competition and struggle, revisiting films like this one offers perspective. Not every story needs explosions, plot twists, or irony to resonate. Sometimes a straightforward, earnest underdog tale is exactly what you need, especially if you’re in the middle of your own grind.

Whether you’re a competitive player chasing your own bracket upset or a casual fan who loves a good sports movie, The Greatest Game Ever Played delivers a solid, emotionally grounded experience. It won’t change your life, but it might just remind you why you started competing in the first place.

Every year on April 1st, Mojang breaks from the usual update schedule to deliver something completely unhinged. The Minecraft April Fools update tradition has become as anticipated as major content patches, offering players a chance to experience absurd snapshots that defy logic, introduce impossible mechanics, and remind everyone why sandbox games are the perfect playground for chaos. These aren’t bug-ridden accidents, they’re carefully crafted pranks that push the engine to its limits, spawn infinite dimensions, or let you vote for mobs that will never exist.

For over a decade, these April Fools Minecraft experiments have given the community some of its most memorable moments. Whether you’ve navigated the Love & Hugs Update’s pastel nightmare or scrambled through the One Block at a Time challenge, these snapshots prove Mojang’s developers have a sense of humor as sharp as their coding skills. With 2026’s prank just around the corner, let’s break down the history, the standouts, and what you need to know to jump into this year’s madness.

Key Takeaways

  • The Minecraft April Fools update is an annual Java Edition-exclusive tradition where Mojang releases playable prank snapshots featuring absurd mechanics, impossible physics, and chaotic sandbox experiments that test the engine’s limits.
  • April Fools snapshots require manual installation through the Minecraft Launcher and are only available for a limited time; they run separately from main game installations to keep your survival worlds safe.
  • Past standout April Fools pranks include the 2016 Infinite Dimensions snapshot with procedurally generated worlds, the 2022 One Block at a Time challenge restricting player interaction to single block types, and the 2024 Vote Chaos snapshot parodying mob voting with ridiculous candidates.
  • Backup your worlds and game files before installing any Minecraft April Fools update, as snapshots are intentionally designed to break mechanics and can occasionally cause version corruption or data loss.
  • These prank updates strengthen community engagement by creating shared experiences across the player base, occasionally influence real features through mechanic testing, and demonstrate that even mature games can prioritize pure entertainment over monetization.

What Is the Minecraft April Fools Update?

The Minecraft April Fools update is an annual tradition where Mojang releases a joke snapshot exclusively for Java Edition. Unlike regular updates that add new biomes, mobs, or mechanics to the main game, these snapshots are standalone experiments designed to entertain, confuse, and sometimes break the game in hilarious ways.

These updates are typically available for a limited time, often just the day itself or a few days surrounding April 1st. They’re not part of the official version roadmap, meaning they won’t carry over to live servers or future patches. Instead, they exist as playful detours that let the dev team flex their creativity without worrying about balance, bug reports, or whether the Nether should actually be made of cheese.

What sets these apart from typical beta snapshots is intent. Regular snapshots test features destined for release. April Fools snapshots exist purely for the meme. You might encounter procedurally generated dimensions that number in the billions, gravity-defying physics, or UI elements that speak directly to the player in ways that feel borderline sentient. They’re Easter eggs at scale, built with the same engine that powers the core game but dialed up to absurdity.

Players who want to experience them need to manually install the snapshot through the Minecraft Launcher. Once activated, these versions run separately from your main game installation, so your survival worlds stay safe while you explore whatever bizarre sandbox Mojang has cooked up.

A History of Minecraft’s Best April Fools Jokes

2011-2015: The Early Pranks That Started It All

The tradition kicked off modestly in 2011 with the Locked Chest, a block that appeared in Beta 1.4 with no actual function. Notch teased it as a future store feature, which sent the community into speculation overdrive before he revealed it was a joke. The chests were later removed, but the precedent was set.

2013 brought the Minecraft 2.0 snapshot, one of the most elaborate pranks in the game’s history. This update included ridiculous features like the Etho Slab (a block with a face), Redstone Bugs (literal insects that spread redstone), and TNT that summoned lightning. Pink Withers, coal-powered horses, and torches that burned out were all part of the chaos. The sheer volume of fake patch notes made it feel almost real until players logged in and saw diamond chickens.

In 2014, Mojang went meta with Minecraft 3D, a fake announcement claiming the game would now require red-and-blue 3D glasses to play. The joke was layered, screenshots showed distorted anaglyph colors, and the blog post leaned hard into early-2000s gimmick nostalgia.

2015 skipped the snapshot but delivered the Love & Hugs Update announcement, a satirical jab at overly monetized mobile games. Fake screenshots showed heart-shaped blocks, energy bars, and microtransaction prompts. It never shipped as a playable build, but the mockups were enough to make the point.

2016-2020: Snapshot Madness and Dimension Chaos

2016 introduced 15w14a, known as the Infinite Dimensions snapshot. This update generated random dimensions with nonsensical biomes, impossible terrain generation, and color palettes that looked like corrupted GPU output. Players could access these worlds through throwable books, each leading to a procedurally named dimension with unpredictable physics. Some dimensions had inverted gravity. Others replaced dirt with obsidian or made water flow upward. It’s still considered one of the best April Fools snapshots because it was fully playable and deeply weird.

In 2017, Mojang took a different approach with the Mine & Blade Battlegear 2 snapshot, which added overly complex RPG mechanics like dual-wielding shields and weapons with absurdly specific stats. The joke was how unnecessary it all was, Minecraft thrives on simplicity, and this snapshot drowned players in menus.

2018 saw no official snapshot, but 2019 delivered Minecraft 3D (again), this time as a playable snapshot labeled 3D Shareware v1.34. It was a retro-themed build that mimicked early-90s shareware games, complete with fake limitations, restricted inventory slots, and a blue UI that screamed DOS-era computing. The attention to period-accurate design made it feel like a genuine artifact from an alternate timeline.

2020 went full chaos with the Ultimate Content snapshot, which let players enable ridiculous data packs that added features like gravity-affected gravel oceans, exploding beds in the Overworld, and mobs that dropped completely randomized loot. It was less a single prank and more a toolkit for mayhem.

2021-2025: Recent Updates and Community Favorites

2021 brought Infinite Dimensions 2.0, a spiritual successor to the 2016 snapshot with even more absurd generation. This version introduced the concept of “noodle caves” before they became an actual feature in 1.18, which led to confusion about whether Mojang was secretly testing real mechanics.

2022 leaned into community feedback with the One Block at a Time snapshot, where players could only interact with one block type per session. Breaking oak logs? That’s your whole game now. The restriction was intentionally frustrating and hilarious, especially in multiplayer.

2023 introduced a snapshot that randomized gravity direction every few minutes, making building and navigation a constant battle against physics. According to coverage on Polygon, the community response was split between players who loved the challenge and those who couldn’t stomach the motion sickness.

2024 brought the Vote Chaos snapshot, which parodied the annual mob vote by letting players vote for obviously terrible mobs like the Dirt Golem (does nothing) and the Screaming Chicken (only screams). Every mob won, and all of them were added simultaneously.

2025 went subtle with a snapshot that changed nothing except every sound effect was replaced with villager noises. Breaking blocks? Villager hum. Eating food? Villager hum. Creeper explosion? Villager hum, but louder. The minimalism was the joke.

What to Expect from the 2026 April Fools Update

Leaked Features and Community Speculation

As of late March 2026, Mojang hasn’t officially announced the snapshot, but the community is already piecing together clues from cryptic developer tweets and data mine attempts on recent Java Edition betas. One popular theory suggests this year’s prank will involve reverse crafting, where players must destroy items to create raw materials, essentially un-smelting iron ingots back into ore or breaking tools into sticks and cobblestone.

Another rumor circulating on Reddit and Discord points to a mob personality system, where every passive mob gains randomized AI traits. Imagine a cow that refuses to be milked, or a chicken that actively seeks out players to follow. Some leaks hint at sheep that dye themselves, rendering wool farming completely unpredictable.

There’s also chatter about a time-reversal mechanic that rewinds the world state every 60 seconds, forcing players to accomplish tasks in loops. If true, it’d be the most mechanically complex April Fools update yet, essentially turning Minecraft into a puzzle game with a hard reset timer.

How Mojang Keeps the Tradition Alive

Mojang’s approach to the april fools minecraft update has evolved from simple texture swaps to full-fledged alternate game modes. The team treats these snapshots as creative palate cleansers, opportunities to test wild ideas that would never fit in a live patch but are too entertaining to scrap.

Developers have mentioned in past interviews that April Fools snapshots often start as internal jokes during code reviews. A programmer adds a ridiculous debug feature, and instead of deleting it, the team builds an entire snapshot around the absurdity. That’s how you end up with updates like the one where every block was a chest, or the snapshot that made all water sources finite and evaporate over time.

The tradition also serves as a pressure valve. Minecraft’s development cycle is intense, with seasonal updates, parity fixes between Java and Bedrock, and constant balancing. One day a year, the rules don’t matter. Physics can break. Mobs can vote. Dimensions can be infinite. It’s chaos, but it’s controlled chaos, and the community loves it.

How to Download and Install April Fools Snapshots

Step-by-Step Installation Guide for Java Edition

April Fools snapshots are only available on Java Edition (PC and Mac), and they require manual installation through the Minecraft Launcher. Here’s the process:

  1. Open the Minecraft Launcher and make sure you’re logged into your Mojang or Microsoft account.
  2. Navigate to the Installations tab at the top of the launcher.
  3. Check the box labeled Snapshots in the top-right corner. This enables experimental builds to appear in your version list.
  4. Click New Installation to create a dedicated profile for the April Fools snapshot.
  5. In the version dropdown, scroll down and select the April Fools snapshot (it’ll usually have a date code like 26w14infinity or a joke name like 3D Shareware v1.34).
  6. Name your installation something recognizable (e.g., “April Fools 2026”) and choose a separate game directory if you want to keep it isolated from your main saves.
  7. Click Create, then select the new installation from the launcher’s play menu and hit Play.

Once the snapshot loads, you’ll spawn into whatever bizarre version of Minecraft Mojang has unleashed. Make sure you’ve backed up your main worlds before launching, snapshots can sometimes corrupt saves if you accidentally load them in the wrong version.

Can You Play April Fools Updates on Bedrock Edition?

Short answer: No. April Fools snapshots are exclusive to Java Edition. Bedrock players on Xbox, PlayStation, Switch, and mobile won’t see these updates appear in their launcher or marketplace.

The reason comes down to platform architecture. Java Edition snapshots are easy to distribute as standalone builds because PC players can toggle between versions freely. Bedrock Edition, which runs on consoles and mobile devices, goes through more rigid certification processes with platform holders like Sony, Microsoft, and Nintendo. Pushing a joke update through those pipelines for a one-day event isn’t practical.

That said, Bedrock players aren’t completely left out. Some community creators build custom maps and add-ons inspired by past April Fools updates, available through the in-game marketplace or third-party sites. These fan-made versions don’t capture the full chaos of the official snapshots, but they’re the closest approximation Bedrock players will get.

Hidden Easter Eggs and Secrets in Past April Fools Updates

The Infinite Dimensions Snapshot

The 2016 snapshot (15w14a) remains a treasure trove of hidden mechanics. Beyond the obvious infinite dimension generation, players discovered that certain dimension names triggered specific world types. Typing “Glacier” into a book would generate a frozen wasteland with ice spikes taller than the build limit. “Decay” created a dying world where blocks slowly turned to air.

One lesser-known Easter egg involved nametags. If you named a mob “Dinnerbone” or “Grumm” in specific dimensions, they’d not only flip upside down (the usual behavior) but also phase through blocks like ghosts. Some players found dimensions where water flowed in spirals due to corrupted fluid physics, creating natural vortexes that pulled mobs and items toward the center.

The snapshot also included impossible ores that couldn’t be mined with any tool, placed by generation algorithms that didn’t check item compatibility. Breaking them crashed the game, which became a community challenge, how fast can you find and break a crash-ore?

The One Block at a Time Update

The 2022 snapshot forced players into single-block specialization, but hidden beneath the restriction was a secret progression system. If you broke enough of one block type, the game would “unlock” a related block. Mine 100 dirt? You could now interact with grass blocks. Harvest 50 oak logs? Spruce became available.

Players who dug deep enough discovered hidden achievement notifications that weren’t listed anywhere in the UI. “The Dirt King” popped after breaking 1,000 dirt blocks. “Stone Cold” required mining 5,000 stone. These achievements did nothing mechanically, but they became community bragging rights.

The snapshot also included a rare bug-turned-feature where placing certain blocks in specific patterns summoned a phantom villager that offered trades for unobtainable items like barrier blocks and structure voids. The pattern required was never officially documented, but Reddit sleuths reverse-engineered it within hours of release.

Vote for Your Favorite Mob Mechanics

The 2024 Vote Chaos snapshot wasn’t just a parody, it was a functional voting system embedded in the game. Players could craft voting ballots using paper and dye, then right-click a special ballot box to cast their choice. The twist? The votes were tallied in real-time across all active servers, and the mob with the most votes would spawn more frequently in your world.

This led to coordinated griefing where communities would mass-vote for the Screaming Chicken just to flood rival servers with unbearable noise. According to Game Rant, some servers hit vote counts in the millions within six hours, crashing Mojang’s backend vote-tracking system.

A hidden Easter egg in this snapshot: if you voted for every mob at least once, a secret mob called the Voting Villager would appear. This NPC did nothing except stand in place and change its vote every 10 seconds, cycling through all available mobs with accompanying particle effects. Players couldn’t interact with it, but it became a screenshot magnet.

Why Minecraft April Fools Updates Matter to the Community

On the surface, these snapshots are throwaway jokes, temporary builds that vanish after a few days and leave no lasting impact on the main game. But their importance runs deeper than the mechanics they introduce.

First, they’re a developer-player trust signal. Mojang could ignore April Fools entirely or phone it in with a blog post and fake patch notes. Instead, they dedicate engineering time to building playable experiences that serve no monetization or roadmap purpose. That kind of effort, purely for entertainment, builds goodwill. It reminds players that the team behind Minecraft still enjoys making weird stuff for the sake of it.

Second, these updates act as experimental playgrounds that occasionally influence real features. The noodle caves in the 2021 snapshot bore a suspicious resemblance to the cave generation overhaul in the 1.18 Caves & Cliffs update. The 2016 dimension hopping introduced mechanics that later appeared in data pack functionality. Mojang tests ideas under the guise of a joke, gauges community reaction, and sometimes circles back to iterate on what worked.

Third, they’re community bonding events. Every April 1st, Minecraft content creators rush to document the new snapshot, speedrunners attempt impossible challenges in broken physics, and Reddit fills with screenshots of the weirdest generation seeds. For one day, the entire player base is focused on the same bizarre experience, sharing discoveries and laughing at the same glitches. Coverage from outlets like IGN amplifies this effect, turning niche snapshot trivia into mainstream gaming news.

Finally, they’re a reminder that Minecraft, even though being over 15 years old, hasn’t lost its sense of humor. The game could coast on its legacy, pushing out safe updates that tweak mob spawns and add new wood types. Instead, once a year, it breaks itself on purpose. That’s rare in live-service games, and it’s part of why Minecraft’s community remains so engaged.

Tips for Making the Most of Your April Fools Experience

Backup Your Worlds Before Installing

This is non-negotiable. April Fools snapshots are built to break things, and while they’re supposed to run in isolated installations, version corruption can happen. Before installing any snapshot:

  1. Navigate to your saves folder (on Windows, it’s typically %appdata%.minecraftsaves).
  2. Copy your world folders to a backup location, external drive, cloud storage, or a separate folder on your desktop.
  3. If you’re using mods or custom resource packs, back those up too. Snapshots can conflict with third-party tools and cause crashes or data loss.

Some players create a separate Windows user profile or use the launcher’s Game Directory option to ensure complete isolation. Overkill? Maybe. But losing a three-year survival world to a joke update isn’t a risk worth taking.

Explore with Friends for Maximum Fun

April Fools snapshots are designed for chaos, and chaos is always better with company. Spinning up a temporary server with friends turns the experience from “weird” to “unforgettable.”

Most snapshots support multiplayer, though you’ll need to manually download the server .jar file from Mojang’s version archive. Setup is identical to running a standard Minecraft server, drop the .jar into a folder, run it to generate config files, adjust server.properties if needed, and share your IP.

Multiplayer amplifies the absurdity. In the 2023 gravity-shift snapshot, coordinated builds became impossible because players’ up-and-down directions randomized independently. In the 2022 One Block snapshot, teams had to specialize in single block types and trade resources like an economy sim. The April Fools updates aren’t balanced for co-op, which is exactly why co-op makes them shine.

Record and Share Your Discoveries

Because these snapshots are temporary, they’re prime content for streaming and video creation. If you’re into content creation, April Fools day is one of the best times to capture weird Minecraft footage.

A few tips:

  • Use OBS or Shadowplay to record gameplay. These snapshots are full of one-time visual bugs and generation quirks that make great clips.
  • Document specific seeds if you find interesting generation. Some snapshots produce wildly different results based on world seed, and the community loves cataloging rare finds.
  • Collaborate with other creators for challenge runs. “Can you beat Minecraft in the One Block snapshot?” or “Surviving 24 hours in Infinite Dimensions” are instant video hooks.
  • Share on Reddit and Discord immediately. The window for relevance is short, by April 2nd, the hype has moved on. Post your discoveries while people are still actively exploring.

Even if you’re not a creator, screenshots and seed codes shared to community hubs help preserve the snapshot’s legacy after Mojang pulls it from the launcher.

Conclusion

The minecraft update april fools tradition is proof that even the biggest games in the world can afford to be ridiculous. For over a decade, Mojang has used April 1st to remind players that Minecraft is still a sandbox in the truest sense, a place where rules are optional and creativity beats convention.

Whether you’re diving into 2026’s snapshot for the first time or you’re a veteran who’s survived every dimension collapse and gravity flip since 2011, these updates offer something the main game can’t: complete unpredictability. There’s no meta to optimize, no progression to min-max. Just pure, unfiltered chaos and the stories that come from it.

So when April 1st rolls around, back up your worlds, grab some friends, and install whatever madness Mojang has cooked up. It’ll be broken, it’ll be hilarious, and it’ll be gone in a few days. That’s the point.

Few builds in Minecraft command the same presence as a towering colosseum. Whether you’re planning gladiator-style PvP battles, mob arena challenges, or just want a statement piece for your server, a well-executed colosseum brings ancient Rome right into your blocky world. The circular tiers, grand arches, and underground chambers create a spectacle that’s both functional and impressive.

But building a colosseum isn’t just about stacking stone blocks in a circle. You’ll need to nail the proportions, choose the right materials, and plan for both aesthetics and gameplay. This guide walks through every step, from foundation layout to redstone contraptions, with tips for survival and creative mode builders alike. By the end, you’ll have a colosseum that’s worthy of hosting epic arena battles and turning heads on any server.

Key Takeaways

  • A Minecraft colosseum serves multiple purposes—from hosting PvP tournaments and mob arena challenges to functioning as a server centerpiece and creative building showcase that demonstrates advanced construction skills.
  • Proper planning is essential: choose flat terrain, select a medium size (80–120 blocks diameter), use a 3–4 block material palette with stone bricks as your base, and gather 20,000+ blocks before starting the build.
  • Build your Minecraft colosseum foundation symmetrically by marking a center point, constructing one quarter section first, then mirroring it three times to catch errors early and ensure visual consistency.
  • Create iconic Roman arches using upside-down stairs, add depth with recessed arches and layered tiers, and incorporate 8–15 seating tiers with sectional dividers and access staircases to transform your arena into an authentic amphitheater.
  • Redstone integration elevates your colosseum beyond decoration—wire entry gates, floor traps, mob spawners, and team spawn systems to support PvP game modes like Last Man Standing, King of the Hill, and Mob Gauntlets.
  • In survival mode, break your colosseum project into three phases (preparation, foundation & walls, interior & details), farm materials efficiently using generators or community gathering, and expect 30–55 hours total for a medium-sized build.

Why Build a Colosseum in Minecraft?

A colosseum serves multiple purposes beyond just looking cool. It’s one of the most versatile mega-builds you can undertake.

PvP and Mini-Game Hosting: The arena floor provides a natural battleground for tournaments, duels, or custom game modes. Seating areas let spectators watch the action without interfering, and underground chambers can house spawn points, gear storage, or mob release mechanisms.

Server Centerpiece: On multiplayer servers, a colosseum becomes a community hub. Players gravitate toward impressive structures, and hosting regular events keeps your server population engaged. It’s also a statement piece that signals serious building chops.

Creative Challenge: Building a colosseum pushes your skills. The circular or oval shape requires planning and symmetry. Arches demand precision. Decorative elements like columns and statues test your attention to detail. It’s a project that’ll level up your building abilities.

Redstone Integration: Underground passages and arena mechanisms offer endless redstone possibilities. Trapdoors that drop mobs, hidden weapon dispensers, timed gates, a colosseum is the perfect playground for technical builds. You’ll combine aesthetic design with functional gameplay systems in ways few other structures allow.

Planning Your Minecraft Colosseum Build

Planning saves hours of rebuilding later. Before placing a single block, nail down the scale and palette.

Choosing the Right Location and Size

Flat Terrain Works Best: Look for plains, deserts, or flat-ish areas. Building on hills means extensive terraforming. If you’re committed to a specific biome for aesthetic reasons, be prepared to level ground or build support structures.

Size Matters for Functionality: A small colosseum (50-70 blocks diameter) works for solo or small group builds but feels cramped for events. Medium builds (80-120 blocks) hit the sweet spot, impressive without being overwhelming. Large colosseums (150+ blocks) are server showpieces but demand massive material investment and time.

Arena Floor Dimensions: The actual combat area should be at least 20×20 blocks minimum, though 30×30 or larger gives players room to maneuver. Remember that seating tiers and walls add significant diameter beyond the floor itself.

Selecting Materials and Block Palettes

Classic Roman Look: Stone bricks, cobblestone, and andesite form the base. Mix in polished variants for contrast. Stone brick stairs and slabs are essential for arches and seating. Spruce or oak trapdoors work for decorative grating.

Weathered Aesthetic: Combine regular stone bricks with cracked and mossy variants (roughly 70/20/10 ratio). Add cobblestone patches and stone brick slabs at different heights to simulate age. Andesite and diorite in small amounts break up monotony.

Material Quantities: A medium colosseum easily consumes 20,000+ blocks. In survival mode, set up a stone generator early or designate mining sessions. Gather at least:

  • 15,000+ stone bricks (or equivalent)
  • 3,000+ stairs and slabs
  • 1,000+ cobblestone for foundations
  • 500+ material for decorative accents

Color Palette Tip: Stick to 3-4 main blocks with 1-2 accent materials. Too many block types create visual noise. Test your palette in a small mockup before committing to the full build.

Step-by-Step: Building the Foundation and Outer Walls

The foundation determines whether your colosseum looks symmetrical or wonky. Take time here.

Laying Out the Circular or Oval Foundation

Use a Circle/Oval Generator: Tools like Plotz or in-game mods provide block-by-block templates. Input your desired diameter and it’ll map out each block placement. Screenshot the pattern or keep it open on a second monitor.

Mark the Center Point: Place a distinctive block (like glowstone) at the exact center. This anchor point ensures symmetry as you build outward.

Build in Quarters: Complete one quarter section of the circle first, then mirror it three times. This catches proportion errors early when they’re easier to fix.

Foundation Layer: Use cobblestone or a cheap material for the underground foundation (2-3 blocks deep). This won’t be visible but provides structural integrity and marks boundaries. The visible ground level starts above this.

Oval vs. Circle: True circles look more authentic to Roman architecture, but ovals work if your terrain or design demands it. Ovals are also slightly easier to build large-scale since the math is more forgiving on the long axis.

Constructing the Exterior Walls and Arches

Wall Height: Plan for 15-25 blocks tall on the exterior, depending on how many seating tiers you want. Taller walls create more dramatic presence but require more materials and scaffolding.

Arch Technique: Roman arches are the signature feature. Build them using stairs blocks:

  1. Mark archway width (5-7 blocks works well)
  2. Build straight pillars on each side up to arch height
  3. Use stairs placed upside-down to create the curved top
  4. Place full blocks at the apex for stability
  5. Repeat every 8-12 blocks around the perimeter

Layering Depth: Don’t build flat walls. Add depth by:

  • Recessing arches 1-2 blocks inward
  • Placing pillar sections that protrude outward
  • Using slabs and stairs to create horizontal bands
  • Adding buttresses every few arches for visual support

Upper Levels: Stack 2-3 tiers of arches, each slightly smaller than the one below. The top tier can be shorter or use columns instead of full arches for variety. This creates the iconic tiered Roman look.

Consistency Check: Walk the full perimeter regularly. One misplaced block ruins symmetry, and it’s easier to catch when the structure is partially complete rather than fully decorated.

Creating the Arena Floor and Underground Chambers

The arena floor is where gameplay happens. Functionality matters as much as looks here.

Designing the Arena Floor Layout

Floor Material: Sand is traditional for Roman arenas and allows for easy replacement after battles. Alternatively, use a mix of stone, gravel, and coarse dirt for a weathered pit look. Avoid grass, it looks too clean and gets destroyed during fights anyway.

Pattern and Zones: Break up the floor with subtle patterns using different materials. A center circle or crossed pathways add visual interest. In PvP builds, players published combat arena guides often recommend designating spawn zones in opposite quarters.

Elevation Changes: Slight height variations (1-2 blocks) create tactical advantages. Raised platforms, small walls, or sunken pits make combat more dynamic than a flat floor. Just keep it balanced so no spawn point has unfair advantage.

Drainage and Access: Build floor-level tunnels (2 blocks tall) leading from underground chambers to arena entrances. These serve as player and mob entry points. Add iron bars or gates that can be opened when battles begin.

Building Trapdoors, Dungeons, and Hidden Mechanisms

Underground Chamber Network: Excavate the area beneath the arena floor down 6-10 blocks. Create hallways connecting:

  • Holding cells (5×5 rooms with iron bars)
  • Gear storage rooms
  • Redstone mechanism spaces
  • Access tunnels to arena entrances

Trapdoor Mechanisms: These deliver mobs or surprises to the arena floor:

  1. Cut 2×2 or 3×3 holes in the arena floor
  2. Place trapdoors flush with the floor (closed position)
  3. Build a drop chute below leading to holding chambers
  4. Wire to lever or button for manual release, or pressure plate for automatic triggers
  5. Light the holding chamber well to prevent premature mob spawning

Hidden Weapon Dispensers: Place dispensers in walls at ground level, concealed behind trapdoors or paintings. Load with arrows, potions, or equipment. Wire to hidden buttons or pressure plates for mid-battle supply drops.

Spectator Safety: Make sure underground passages are completely separate from arena floor access. Last thing you want is spectators accidentally dropping into active combat zones. Use barriers or bedrock in creative mode to enforce boundaries.

Lighting: Keep underground areas well-lit to prevent hostile mob spawns in holding areas. Use torches, lanterns, or hidden glowstone. The arena floor itself can be darker for ambiance, but not so dark that it becomes a natural spawn zone between events.

Building Seating Tiers and Spectator Areas

Seating transforms your colosseum from a simple arena to an authentic amphitheater.

Tiered Stair Seating: Use stair blocks for seats, they’re literally made for this. Build in concentric rings stepping upward and inward. Each tier should be 3-4 blocks deep:

  • Bottom row: stairs facing arena
  • Middle section: slab or full block for foot space
  • Back row: stairs for next tier up

This pattern repeats for each level. Aim for 8-15 tiers depending on your exterior wall height.

Section Dividers: Break the seating into sections with radial aisles (every 15-20 blocks). Build these aisles 2-3 blocks wide using slabs or full blocks. This adds realism and gives spectators clear access paths.

VIP Boxes: Reserve one section for premium seating. Build it as an enclosed balcony with walls, a roof overhang, and use fancier materials like quartz or prismarine. Add a few throne-style seats using stairs with banners behind them.

Standing Room: The top tier can be left as flat standing space instead of stairs. Roman colosseums had this for general admission crowds. It also gives you space to add decorative columns or statues along the upper rim.

Access Staircases: Build enclosed staircases inside the exterior walls connecting ground level to upper seating tiers. Make them wide enough (3 blocks) for smooth player movement. Place them at quarter points around the structure.

Safety Railings: Add fences, walls, or trapdoors along the front edge of the first seating tier. This prevents spectators from accidentally falling into the arena. It also visually separates the crowd from the action below.

Capacity Estimation: Each stair block seats one player (or villager NPC). A medium colosseum with 10 tiers and 100 blocks of circumference per tier holds roughly 1,000 spectators. Scale accordingly for your server population.

Adding Architectural Details and Decorations

Details separate a good build from a great one. This is where your colosseum gets character.

Columns, Statues, and Ornamental Features

Exterior Columns: Place columns between arches using your primary building material. Make them 2×2 or 3×3 at the base. Add capital details at the top using slabs and stairs to create the appearance of Doric or Corinthian style.

Entry Pillars: Frame main entrance arches with taller, more ornate columns (4×4 base). Build them 5-10 blocks taller than surrounding structure. Top with decorative capitals using blocks like quartz stairs or stone brick slabs arranged in protruding patterns.

Statues and Sculptures: Create 5-10 block tall statues positioned:

  • At main entrances facing outward
  • On the upper rim between seating sections
  • In VIP box areas

Use a mix of quartz, concrete, or terracotta for skin tones. Keep designs simple, detailed sculptures are tough in Minecraft’s blocky medium. Stylized or abstract forms often look better than attempts at realism.

Cornices and Trim: Add horizontal detail lines running around the exterior using upside-down stairs or slab layers. These breaks in the wall surface add architectural complexity. Place them at floor level divisions between seating tiers.

Weathering Effects: Strategically replace 5-10% of stone bricks with cracked or mossy variants. Add andesite or cobblestone patches like damaged sections have been repaired over centuries. Place vines growing down from upper levels in corners and shaded arches.

Banners, Flags, and Custom Lighting

Banner Designs: Create faction or house banners using a loom. Hang them:

  • From the upper rim overhanging seating areas
  • Along exterior walls between arches
  • In VIP boxes and entrance tunnels

Use bold, simple patterns. Alternate 2-3 colors for visual variety but maintain a cohesive theme.

Flag Poles: Build tall flag posts (10-15 blocks) on the upper rim using fences. Top with banners that flutter. Space them evenly around the perimeter or cluster at cardinal directions.

Lighting Strategy: Balance ambiance with functionality:

  • Seating areas: Lanterns or sea lanterns placed every 8-10 blocks along aisles
  • Arena floor: Fewer lights for drama, maybe just torches around the perimeter or glowstone hidden under grates
  • Exterior: Lanterns on columns or hidden glowstone behind arches for nighttime illumination
  • Underground: Full lighting to prevent mob spawns

Glowstone Tricks: Hide glowstone behind trapdoors, under carpets, or within wall cavities for indirect lighting. This maintains medieval aesthetic while preventing hostile spawns.

Custom Touches: Add market stalls or vendor booths outside the main entrance. Build a few surrounding structures like smaller temples or administrative buildings to create a complex rather than just a standalone colosseum. These touches make it feel like part of a living city.

Advanced Features: Redstone Contraptions and Mini-Games

Redstone integration transforms your colosseum from decorative build to functional game space.

Installing Gates, Traps, and Mob Spawners

Entry Gates: Build piston doors at arena entrance tunnels:

  1. Create a 3-wide, 3-tall doorway
  2. Place sticky pistons facing the opening on both sides
  3. Attach blocks to piston faces
  4. Wire to lever in an announcer’s booth or button in underground control room
  5. When activated, pistons extend and seal the entrance

This contains players/mobs during events and adds spectacle to battle starts.

Floor Traps: Diversify arena combat with hazards:

  • Pit Traps: 3×3 areas where pistons retract floor blocks, dropping fighters into spike pits or lava (in creative) beneath. Wire to randomized clock circuits for unpredictability.
  • Arrow Traps: Dispensers hidden in walls loaded with arrows, triggered by pressure plates or tripwires across the arena floor.
  • Potion Dispensers: Load with splash potions of harming, poison, or slowness. Place on randomized timers.

Mob Spawner Integration: You can’t move natural spawners, but you can build mob delivery systems:

  1. Create dark spawn chambers underground (9×9 rooms, no light)
  2. Use water flows to push spawned mobs toward collection points
  3. Build vertical drop chutes (21+ blocks for fall damage) or water elevators leading to arena floor trapdoors
  4. Control release with piston gates

Note: This requires the area to be within your active chunks and properly dark. Many modded game modifications include spawner manipulation tools if you want more control.

Scoreboard Systems: Use command blocks and scoreboards to track kills, deaths, and wins if you’re running on a server with operator permissions. Display stats on banner-style signage or in a dedicated spectator area.

Setting Up PvP Arenas and Custom Game Modes

Team Spawn Points: Designate opposite sides of the arena as red/blue team spawns. Use colored concrete or banners to mark territories. Build small protected spawn rooms with gear chests that teams can access at match start.

Gear Balancing: Stock spawn chests with identical loadouts:

  • Iron or diamond armor sets
  • Weapons (sword + bow with 32-64 arrows)
  • Food (golden apples or steak)
  • Utility (ender pearls, potions, blocks for building)

Identical gear ensures skill-based outcomes rather than gear advantage wins.

Game Mode Ideas:

Last Man Standing: Classic deathmatch. Last player alive wins. Use regeneration reduction or no natural regen for faster-paced battles.

Mob Gauntlet: Solo or team survival against waves of increasingly difficult mobs released from underground chambers. Track how many waves players survive.

Capture the Flag: Place flag (banner) at each team’s spawn. First to capture and return opponent’s flag wins. Build accessible routes but include height variation for tactical play.

King of the Hill: Build a raised platform at arena center (5×5, 3 blocks high). Players must stand on it for 60 continuous seconds to win. Defending from elevation advantage versus attackers trying to dislodge them.

Redstone Timer System: Build a central clock using repeaters to count down match duration. Connect to note blocks that play sounds at intervals (5 min, 1 min, 30 sec warnings). Wire a final alert that opens exit gates or triggers fireworks to signal match end.

Spectator Mode Controls: If running in creative or with operator status, set up a command block system that puts eliminated players into spectator mode. They can watch remaining fighters without interfering. Saves having eliminated players awkwardly standing around or leaving.

Colosseum Build Ideas and Variations

The classic Roman design is just the starting point. Different themes completely change the vibe.

Roman-Style Classic Colosseum

Material Palette: Stone bricks, cobblestone, and andesite with oak or spruce wood accents. Stick to earth tones.

Signature Features:

  • Tiered exterior with stacked arches (3 levels minimum)
  • Sand or dirt arena floor
  • Circular or oval shape (historical Roman Colosseum was actually oval)
  • Underground hypogeum chambers
  • Weathering with cracked and mossy variants
  • Banner decorations in red, gold, or purple

Scale Reference: The real Colosseum is roughly 189×156 meters. In Minecraft, a 150×120 block build captures similar proportions at reduced scale. For more manageable projects, 80-100 blocks diameter still reads as authentically Roman.

Surrounding Context: Add Roman roads (stone bricks with stone brick slab borders), nearby temples, or market stalls. This places your colosseum in a broader Roman city context.

Fantasy and Nether-Themed Arenas

Nether Colosseum: Build in the Nether dimension or use Nether materials:

  • Palette: Blackstone, polished blackstone bricks, nether bricks, crying obsidian accents
  • Arena Floor: Netherrack, soul sand, or magma blocks (carefully, magma damages players)
  • Lighting: Lava flows behind iron bar grates, soul lanterns, shroomlight clusters
  • Hazards: Actual lava pits around arena edges, ghast spawn chambers, wither skeleton opponents

Fantasy Arena: Medieval meets magic:

  • Palette: Mix stone bricks with purple or cyan terracotta, prismarine, or purpur blocks
  • Arena Floor: End stone, mycelium, or custom pattern using glazed terracotta
  • Decorative Elements: Dragon heads mounted on walls, end rods as spires, sea lanterns for mystical lighting
  • Special Features: Ender pearl teleportation pads, enchanting tables in prep rooms, potion brewing stands for spectators

Many builders share unique creative arena concepts that blend multiple themes for truly one-of-a-kind designs.

Modern Stadium and Futuristic Designs

Modern Sports Stadium:

  • Palette: Concrete (white, light gray, black), glass, iron bars, quartz
  • Seating: Individual colored concrete seats arranged in team color sections
  • Arena Floor: Grass blocks with white concrete lanes marking boundaries, or colored concrete courts
  • Lighting: Redstone lamps on tall posts around the rim, sea lanterns in ceiling if domed
  • Screens: Build jumbo-tron style screens using black and white concrete patterns
  • Roof: Glass dome or concrete overhang sections covering parts of seating

Futuristic Arena:

  • Palette: Quartz, white/cyan/light blue concrete, sea lanterns, prismarine
  • Shape: Can break from circular tradition, hexagonal or even multi-level platforms
  • Arena Floor: Prismatic patterns, light-up floor sections using sea lanterns under white or cyan glass
  • Features: Teleportation pads, energy shield effects (vertical water streams or beacon beams), hologram-style signs using armor stands
  • Tech Integration: Heavy redstone with command blocks for automated systems, scoreboards, and special effects

Hybrid Approach: Combine classical architecture with modern materials. Stone brick structure with concrete seating and modern lighting creates a renovated historical venue look.

Tips for Building in Survival vs. Creative Mode

Mode choice drastically changes your approach and timeline.

Creative Mode Advantages:

  • Unlimited materials eliminate grinding
  • Flight makes building upper levels and symmetry checks easy
  • Instant placement speeds construction
  • Experimentation costs nothing, tear down and rebuild sections freely
  • Access to barrier blocks for invisible boundaries
  • Can use structure blocks to copy/paste symmetrical sections

Creative Mode Strategy: Build a test version first at reduced scale (50% size). Work out proportions, test redstone circuits, and finalize decoration schemes. Then scale up to final dimensions with confidence.

Survival Mode Challenges:

  • Material gathering is the real timesink (15-20+ hours for medium builds)
  • Scaffolding required for upper sections (bring tons of bamboo or ladders)
  • Hostile mobs during night construction
  • Fall damage risk, bring water buckets
  • Resource investment makes mistakes costly

Survival Mode Strategy:

Phase 1 – Preparation (5-10 hours):

  • Set up stone generator or efficient mining operation
  • Build temporary smelting array (6-8 furnaces minimum)
  • Stockpile food and basic tools
  • Gather wood for scaffolding
  • Create material storage system near build site

Phase 2 – Foundation & Walls (15-25 hours):

  • Mark foundation outline completely before building upward
  • Build one complete vertical section (ground to top) first to test design
  • Construct external scaffolding on perimeter for safe access
  • Work in daylight or light up work areas heavily
  • Keep a bed nearby to set spawn and skip nights

Phase 3 – Interior & Details (10-20 hours):

  • Arena floor and seating
  • Underground chambers (safest from mob interference)
  • Decorative elements last, functional structure first

Survival Building Tips:

  • Bring shulker boxes (if available) loaded with materials to work site rather than making constant storage runs
  • Mark symmetry points with torches or wool blocks you can see at distance
  • Build in chunks: Complete outer walls first, then seating, then decoration. Finish one section completely before moving to the next.
  • Efficiency enchantments: Efficiency IV+ pickaxe and fortune III for material gathering make massive difference
  • Elytra changes everything: If you have access to elytra and rockets, upper level construction becomes nearly as fast as creative mode

Material Farming Shortcut: If you’re on a server, organize a community project. Multiple players gathering materials simultaneously cuts survival build time by 60-70%. Plus, it builds hype for the eventual arena events.

Hybrid Approach: Some players build the structure in creative on a test world, then challenge themselves to recreate it in survival. You’ve already solved design problems, so survival becomes pure execution.

Conclusion

Building a minecraft colosseum is one of those projects that seems intimidating at first glance but breaks down into manageable steps. Foundation, walls, seating, details, tackle each phase systematically and you’ll watch your arena take shape block by block. Whether you’re going for Roman authenticity or a Nether-themed nightmare arena, the core principles stay the same: plan your scale, maintain symmetry, and layer in details that serve both form and function.

The real payoff comes when you host your first event. Watching players battle in the arena you built, surrounded by spectators in the seats you placed, makes every hour of construction worth it. And the best part? A colosseum is never truly finished. You can always add new redstone contraptions, expand underground chambers, or theme it for seasonal events. It’s a build that grows with your skills and keeps your server engaged for months.

So mark that center point, gather your materials, and start laying that foundation. Your minecraft colosseum awaits.

Letting your kid download “The Game” isn’t a decision you want to make blind. In 2026, the gaming landscape is more complex than ever, what looks like a harmless adventure on the storefront might have combat mechanics, online chat with strangers, or monetization tactics designed to hook young players. Whether you’re a parent who games yourself or someone trying to decode ESRB ratings for the first time, this guide breaks down exactly what “The Game” contains, who it’s appropriate for, and how to lock down parental controls before handing over the controller. No fluff, no corporate-speak, just the content details you actually need to make an informed call.

Key Takeaways

  • The Game carries a Teen (T) ESRB rating and includes violence, mild language, and online multiplayer features that require active parental monitoring and safeguards.
  • Violence is present but restrained compared to M-rated titles, with stylized fantasy combat and emotionally intense story scenes that may unsettle younger or sensitive players.
  • Online interactions through voice chat and text expose players to strangers and potential toxic behavior, making communication controls and open parent-child dialogue essential.
  • Cosmetic microtransactions and seasonal battle passes (as low as $2.99–$14.99) use psychological pressure tactics like weekly rotating stores and FOMO, so setting purchase boundaries is critical.
  • The Game is generally appropriate for ages 16 and up, possible for mature 13–15-year-olds with strict parental oversight, and not recommended for children under 13.
  • Combining platform-specific parental controls (PS5, Xbox, Steam, Switch) with active involvement—including playtime monitoring, co-play sessions, and open communication—is more effective than relying on settings alone.

What Is ‘The Game’ and Why Parents Should Pay Attention

“The Game” is a narrative-driven action-adventure title that launched across PC, PlayStation 5, Xbox Series X

|

S, and Nintendo Switch in late 2025. Developed by a mid-sized studio with a track record in story-heavy experiences, it blends exploration, puzzle-solving, and third-person combat in a semi-open world setting.

What sets it apart, and what parents need to watch, is its dual appeal. The art style and marketing lean younger, with vibrant environments and a teenage protagonist. But the story tackles heavier themes: loss, betrayal, moral ambiguity, and the consequences of violence. It’s not uncommon for games to walk this line, but “The Game” does so in ways that might surprise parents expecting a lighthearted romp.

The game also includes robust online features: co-op missions, competitive PvP modes, and proximity voice chat. That means your child isn’t just interacting with the game, they’re potentially interacting with strangers. Add in cosmetic microtransactions and seasonal battle passes, and you’ve got a recipe for both engagement and concern.

If your kid’s asking for it, or if it’s already installed, understanding what’s inside is step one.

Age Rating and Official Content Warnings

“The Game” carries a Teen (T) rating from the ESRB in North America, a PEGI 16 in Europe, and similar 15+ or 16+ ratings in most other territories. These ratings aren’t arbitrary, they reflect specific content flags that rating boards identified during evaluation.

Here’s what the ESRB lists for “The Game”:

  • Violence
  • Blood
  • Mild Language
  • Users Interact (online features)
  • In-Game Purchases

PEGI’s breakdown is comparable, with additional notes on “realistic violence” and “bad language.” Regional boards in Australia (M rating) and Japan (CERO B) aligned with the 15-16 age bracket.

ESRB, PEGI, and Regional Ratings Explained

The ESRB’s Teen rating means content is generally suitable for ages 13 and up. You’ll see more frequent or intense violence than an E10+ game, occasional profanity, and potentially suggestive themes. Think of it as PG-13 for movies, parents should preview content before deciding.

PEGI 16 is slightly stricter, flagging realistic-looking violence or sustained depictions of injury. It’s a notch above PEGI 12, which is closer to ESRB’s T. In practice, PEGI 16 games often feature grittier visuals or more explicit language.

Regional variations matter if you’re importing or using international accounts. Japan’s CERO B (12+) suggests milder content than Western versions, though the core game remains unchanged. Australia’s M rating (15+) is advisory, not legally restrictive, but signals moderate impact violence and themes.

Bottom line: official ratings put “The Game” in the mid-teen bracket. If your child is under 13, you’re outside the recommended age range. If they’re 13-15, it’s a judgment call based on maturity and your family’s tolerance for the content detailed below.

Violence and Combat Content

Combat is central to “The Game.” Players engage in real-time melee and ranged fights against both human-like enemies and fantastical creatures. The protagonist wields swords, axes, bows, and late-game firearms, with combos, dodges, and special abilities that reward skill and timing.

Types of Violence Depicted

Violence falls into two categories: stylized fantasy combat and context-driven story violence.

In gameplay, fights are fast-paced but not gratuitous. Enemies react to hits with stagger animations and damage numbers. You’ll see slashing, stabbing, and projectile impacts, but the camera doesn’t linger on wounds. Most encounters involve hostile soldiers, corrupted creatures, or robotic foes, humanoid enough to register as violent, but not photorealistic.

Story cutscenes ramp up intensity. Key scenes depict assassinations, executions, and ambushes with more dramatic framing. One mid-game sequence shows a character’s death in detail, complete with emotional fallout. Another involves the protagonist making a morally gray choice that results in collateral casualties. These moments are designed to hit hard narratively, and they do.

There’s no dismemberment or decapitation in the current version (Patch 1.2.4 as of March 2026), though modding communities on PC have created unofficial gore mods. Console versions remain unmodified.

Blood, Gore, and Graphic Imagery

Blood appears during combat and cutscenes. Sword strikes produce red splatter on the ground and character models, though it fades quickly. Certain boss fights leave bloodstains on the environment as visual feedback for phase transitions.

Gore is minimal. You won’t see exposed organs, severed limbs, or Mortal Kombat-style fatalities. The most graphic moment is a brief torture scene early in Chapter 5, restraints, implied pain, and visible bruising, but the camera cuts away before it escalates.

Compared to M-rated titles, “The Game” is restrained. Compared to E10+ adventures, it’s a clear step up. If your child handles MCU-level action violence without issue, this won’t be a shock. If they’re sensitive to seeing characters in pain, some scenes may be uncomfortable.

Many parents have mentioned gaming news sources as useful for tracking patch updates that might alter content, since post-launch changes can sometimes tweak violence presentation or add new story chapters.

Language and Profanity

“The Game” includes mild to moderate profanity, primarily in voiced dialogue and subtitles. The ESRB’s “Mild Language” descriptor undersells it slightly, depending on your standards, some parents might consider it moderate.

Expect words like “damn,” “hell,” “bastard,” and “ass” scattered throughout. One side character uses “shit” twice in optional dialogue. The F-word does not appear in any official localization, though the original script in certain languages (Japanese, for example) uses equivalents that translation teams softened.

Profanity isn’t constant. You might go 20 minutes without hearing anything, then hit a tense cutscene where a character swears in anger or frustration. It’s used for characterization and emotional weight, not shock value.

Subtitle filters exist but are limited. On PC and current-gen consoles, you can toggle a “language filter” in accessibility settings that replaces profanity with symbols (e.g., “d***”). It’s imperfect, tone and context remain obvious, but it’s an option if you want to reduce explicit words.

Overall, language is less of a red flag than violence or online interactions, but it’s present enough that younger or more sheltered kids might notice.

Sexual Content and Nudity

“The Game” contains no nudity and minimal sexual content. This is one area where the T rating is comfortable.

There’s a single romantic subplot involving the protagonist and a companion character. It includes dialogue hinting at attraction, one brief kiss in a cutscene (fully clothed, tasteful framing), and an optional dialogue choice to pursue or decline the relationship. If pursued, the relationship is acknowledged in later story beats but never depicted physically beyond hand-holding or brief embraces.

No characters wear overtly sexualized outfits. Character designs lean practical, armor, adventuring gear, weather-appropriate clothing. A few NPCs in tavern or city settings wear low-cut tops or form-fitting clothing, but nothing that stands out as fan service.

No sexual themes, innuendo-heavy dialogue, or mature situations appear. The romance angle is roughly equivalent to a YA novel or Disney+ series.

If your concern is exposure to sexual content, “The Game” is a non-issue.

Drug and Alcohol References

Drug and alcohol references are minimal and contextual. The game’s fantasy setting includes taverns where NPCs drink ale and wine, and the protagonist can order drinks as part of social interactions. Drinking doesn’t confer gameplay benefits or penalties, it’s purely narrative flavor.

One quest involves recovering stolen barrels of alcohol for a merchant. Another features a drunken NPC who provides comic relief and a minor fetch quest. The character stumbles and slurs words, playing into trope territory without glamorizing excessive drinking.

No drug use appears. There are fictional “potions” and “elixirs” used for healing and buffs, standard RPG mechanics with no real-world drug parallels. One late-game villain uses a substance to enhance combat abilities, framed clearly as dangerous and corrupting, essentially a fantasy steroid analogue with negative consequences.

ESRB doesn’t flag drug or alcohol content for “The Game,” and rightly so. It’s background scenery, not a focus. Parents concerned about substance portrayal will find this game benign compared to many T-rated titles.

Online Interactions and Multiplayer Safety

This is where parental vigilance becomes critical. “The Game” offers co-op missions, competitive PvP, and proximity voice chat, all of which open the door to interactions with strangers.

Communication Features and Stranger Danger

Voice chat is enabled by default in multiplayer modes. Players within a certain in-game radius can hear each other, and team-based modes include squad voice channels. There’s no automatic profanity filter on voice, and moderation relies on player reports.

In practice, this means your child might encounter toxic behavior: trash talk, slurs, or inappropriate conversations. The community isn’t notoriously bad, it’s better than many competitive shooters, but it’s also not curated for kids. Random matchmaking pairs players of all ages and backgrounds.

Text chat exists in lobbies and during matches. It includes a profanity filter that can be toggled on or off in settings (default: on). The filter catches common slurs and swears but isn’t foolproof. Players work around it with creative spelling, and moderation response times vary.

Friend requests and private messages are possible through the game’s social hub and platform-level systems (PSN, Xbox Live, Steam). Strangers can send friend requests after playing together, and some may follow up with messages. Teach your child not to accept requests from people they don’t know in real life.

The game does include a report and block system. Players can report others for harassment, hate speech, or cheating. Blocking prevents future matchmaking and communication. Response times from the developer have improved since launch, most credible reports see action within 48 hours as of early 2026.

Reputable sources tracking gaming industry coverage have noted improvements to moderation tools in recent patches, though no system is perfect.

In-Game Purchases and Microtransactions

“The Game” is a premium title ($59.99 USD at launch, currently $49.99), but it includes cosmetic microtransactions and a seasonal battle pass.

Microtransactions focus on skins, emotes, and weapon wraps. Prices range from $2.99 to $14.99 per item. There’s a rotating storefront that refreshes weekly, creating FOMO (fear of missing out). Items are purely cosmetic, no pay-to-win mechanics, but the psychological pressure to buy is real, especially for younger players.

The battle pass costs $9.99 per season (roughly 10 weeks). It offers 100 tiers of rewards: cosmetics, in-game currency, and exclusive items. A free tier exists but offers significantly fewer rewards. Completing the pass requires consistent play, around 1-2 hours daily or focused weekend sessions.

In-game currency can be purchased with real money. The game uses a dual-currency system: “Shards” (earned through play) and “Crowns” (premium, bought with cash). Many desirable items require Crowns, and the exchange rate is designed to leave small leftover amounts, nudging players toward additional purchases.

Parental controls can restrict purchases on all platforms, but they require setup. If your child has access to a saved payment method on their console or PC account, they can spend without additional authorization unless you enable purchase approval.

Set clear boundaries. Discuss spending limits, explain that cosmetics don’t affect gameplay, and consider using prepaid gift cards instead of linking credit cards.

Frightening and Intense Scenes

“The Game” includes several sequences designed to create tension, fear, or emotional impact. While it’s not a horror game, certain chapters lean into darker atmospheres and jump scares.

Chapter 3 features an extended dungeon crawl through abandoned catacombs. Lighting is minimal, ambient audio includes whispers and distant screams, and enemy encounters are unpredictable. One scripted jump scare involves a creature lunging from the shadows, it’s loud and sudden, potentially startling younger or sensitive players.

Chapter 7’s boss fight is intense both mechanically and thematically. The boss is a corrupted version of a former ally, and the fight includes voice lines pleading for help between attack phases. The emotional weight, having to “defeat” someone you’ve spent hours adventuring with, hits hard, and some players report it being more disturbing than traditional monster fights.

Nightmares and surreal sequences appear twice. The protagonist experiences visions tied to the story’s central mystery, depicted with distorted visuals, unsettling music, and symbolic imagery (drowning, falling, being chased). These aren’t gratuitous, but they’re disorienting and might unsettle kids prone to anxiety.

Themes of loss and grief run throughout. The protagonist is processing trauma, and the story doesn’t shy away from depicting sadness, hopelessness, or moral failure. Some parents appreciate the emotional depth: others feel it’s heavy for a T-rated game.

If your child struggles with jump scares, dark environments, or emotionally intense narratives, preview these sections or play alongside them.

Positive Elements and Educational Value

It’s not all red flags. “The Game” offers genuine positive elements that parents can appreciate.

Narrative depth and player choice encourage critical thinking. The story presents moral dilemmas without clear right answers, prompting players to consider consequences and perspectives. Side quests often explore themes of justice, forgiveness, and responsibility. These aren’t preachy, they’re woven into gameplay, but they do invite reflection.

Problem-solving and puzzle mechanics require spatial reasoning, pattern recognition, and experimentation. Environmental puzzles reward observation and creativity. Some late-game challenges are legitimately difficult, promoting persistence and iterative thinking.

Teamwork in co-op modes can build communication and collaboration skills. Success in co-op missions depends on coordination, role assignment, and adapting strategies on the fly. Playing with friends (especially people your child knows in real life) can be a positive social experience.

Representation and inclusivity are handled well. The cast is diverse in terms of race, gender, and body type without making a spectacle of it. LGBTQ+ characters exist in the world naturally, one NPC mentions their same-sex partner in passing, another side quest involves helping a non-binary character. It’s normalized, not tokenized.

Accessibility options are robust. Customizable subtitles, colorblind modes, remappable controls, difficulty settings that allow reducing combat challenge without removing it entirely, and visual/audio cues for important events make the game more inclusive for players with disabilities.

While “The Game” isn’t an “educational game,” it offers more than passive consumption. Players engage with story, mechanics, and social dynamics in ways that can be developmentally positive, assuming the content is age-appropriate and playtime is balanced.

Parental Controls and Safety Settings

Every major platform offers parental controls that can limit what your child accesses and how long they play. Here’s how to lock down “The Game” specifically.

Platform-Specific Parental Control Options

PlayStation 5:

  • Go to Settings > Family and Parental Controls > Family Management.
  • Select your child’s account, then set age restrictions (block games rated above a certain level).
  • Disable or require approval for spending.
  • Restrict voice chat and user-generated content.
  • Set playtime limits (daily or weekly) and restrict play during specific hours.

**Xbox Series X

|

S:**

  • Access Xbox Family Settings app (mobile or console).
  • Create a child account and customize content filters (block T-rated or higher games).
  • Require purchase approval and set spending limits.
  • Restrict communication to “Friends Only” or disable entirely.
  • Set screen time limits and schedule “game-free” hours.

PC (Steam, Epic Games, etc.):

  • Steam Family View: Enable PIN-protected Family View and restrict access to games by rating or title.
  • Epic doesn’t have native robust parental controls: consider third-party solutions like Windows Family Safety or router-level controls.
  • Disable in-game purchases by not saving payment info and requiring re-entry for each transaction.

Nintendo Switch:

  • Download the Nintendo Switch Parental Controls app (mobile).
  • Set play time limits, restrict games by age rating, disable screenshots/video sharing, and monitor play activity.
  • Restrict online communication in-game through console settings.

Many sources, including those aggregating game review scores and data, emphasize the importance of combining platform controls with active monitoring, since in-game settings can sometimes override system-level restrictions.

Setting Time Limits and Monitoring Play

Beyond platform controls, establish household rules:

  • Daily or weekly caps: “The Game” rewards consistent play (daily login bonuses, battle pass progress), which can encourage overuse. Set realistic limits, 1-2 hours on school nights, more flexibility on weekends.
  • Check play history: Most platforms log playtime. Review it weekly to ensure limits are respected.
  • Co-play sessions: Join your child for a session. You’ll see content firsthand, understand appeal, and open dialogue about in-game experiences.
  • Open communication about online interactions: Ask who they’re playing with, what they’re chatting about. Make it normal to talk about uncomfortable or weird interactions.
  • Monitor spending: Check transaction history monthly. Surprise charges are a red flag that purchase controls aren’t properly set.

Parental controls are tools, not babysitters. They work best when paired with ongoing conversation and involvement.

Is ‘The Game’ Appropriate for Your Child? Final Recommendations

There’s no universal answer, every kid is different, and every family has different standards. Here’s a framework to help you decide.

Age-based guidance:

  • Under 13: Not recommended. Violence, themes, and online interactions exceed what most preteens are ready for. Even mature 12-year-olds will encounter content that’s a stretch.
  • 13-15: Possible, with active parental involvement. Preview content, enforce strict online communication controls, monitor playtime and spending. Expect questions about story themes.
  • 16+: Generally appropriate for most teens. The content aligns with other media they’re likely consuming (PG-13/R movies, YA novels). Focus on healthy play habits and online safety rather than content filters.

Maturity factors to consider:

  • Violence sensitivity: If your child is uncomfortable with action movie violence or has nightmares from intense media, “The Game” may be too much.
  • Online safety awareness: Do they understand not to share personal info, accept friend requests from strangers, or engage with toxic players? If not, disable online features until they’re ready.
  • Impulse control with spending: If your child struggles with delayed gratification or understanding the value of money, the battle pass and storefront are risks.
  • Emotional resilience: The story deals with heavy themes. If your child is processing grief, trauma, or mental health challenges, some content may be triggering rather than cathartic.

Red flags to watch for:

  • Obsessive play (neglecting assignments, social activities, sleep).
  • Secretive behavior about in-game interactions or spending.
  • Mood changes after playing (increased aggression, anxiety, withdrawal).
  • Requests for money without clear explanation of what it’s for.

Green lights:

  • Your child respects screen time limits and transitions off-game without conflict.
  • They talk openly about what they’re playing and who they’re playing with.
  • They demonstrate understanding of why certain content is restricted.
  • They’re playing with friends you know, not random matchmaking.

Eventually, “The Game” is a well-made title that pushes T-rating boundaries in some areas. It’s not inappropriate for its rating, but it’s not conservative either. If you’re on the fence, try this: watch a Let’s Play of the first two chapters on YouTube. You’ll see violence, language, and tone firsthand, which beats speculating.

Trust your gut, know your kid, and don’t hesitate to say no, or “not yet.”

Conclusion

“The Game” delivers a compelling experience that straddles the line between teen-friendly adventure and mature storytelling. For parents, that means doing assignments before hitting “allow.” The violence is noticeable but not gratuitous, language is present but not pervasive, and online features require active safeguarding.

Your decision shouldn’t hinge on ratings alone, context matters. A 14-year-old who games regularly and understands online etiquette is a different case than a sheltered 13-year-old making their first foray into multiplayer. Use the platform controls, set clear expectations, and keep communication open. Gaming can be a positive hobby, but only when it’s age-appropriate, time-balanced, and free from exploitation.

If you’ve made it this far, you’re already ahead of the curve. Most parents hand over the controller and hope for the best. You’re doing the work, and your kid will benefit from it, even if they don’t admit it until they’re older.

Minecraft parties have evolved beyond just playing the game, they’re full-blown themed events where every detail counts. Whether you’re planning a birthday bash for a kid who’s obsessed with building redstone contraptions or hosting a LAN party with fellow crafters, the food needs to match the blocky aesthetic. Cupcakes are the perfect canvas for Minecraft designs: they’re individual, stackable, and you can turn each one into a miniature pixel-art masterpiece.

This guide covers everything from baking vibrant green Creeper cupcakes to recreating diamond ore blocks with edible glitter. We’ll break down specific recipes, decoration techniques, and tools that’ll help you achieve that signature pixelated look without needing a crafting table IRL. No filler, no generic party advice, just practical recipes and decorating methods that actually work.

Key Takeaways

  • Minecraft cupcakes are ideal for gaming parties because their blocky aesthetic translates perfectly to clean, pixelated designs that don’t require pastry chef skills.
  • Gel food coloring produces more vibrant, game-accurate colors than liquid coloring—use 4-6 drops per batch and mix shades like Creeper green (3 parts leaf green + 1 part brown) for authenticity.
  • Square piping tips like Wilton’s #789 or Ateco’s #133 are essential for achieving pixelated patterns; practice on parchment paper first and hold the bag perpendicular for uniform squares.
  • Layer decorations strategically by chilling frosting between applications (10 minutes at a time) to prevent colors from bleeding and to create sharp, clean lines on fondant or buttercream details.
  • Combine buttercream for flavor and ease with fondant elements only where you need razor-sharp edges, such as character faces or TNT letters, to balance decoration precision with practical execution.
  • Transport decorated Minecraft cupcakes in individual compartment carriers, remove them 30-45 minutes before serving to restore flavor, and keep them in shade at outdoor parties to prevent buttercream melting.

Why Minecraft-Themed Cupcakes Are Perfect for Gaming Parties

Minecraft’s visual style translates better to cupcake decorating than almost any other game. The blocky, pixelated aesthetic means you’re working with clean lines, simple color blocks, and recognizable patterns, no need for fine detail work that requires pastry chef skills.

Each cupcake becomes a buildable element. You can arrange them in grids to form larger structures, stack them vertically like actual blocks, or scatter them across the table as individual terrain pieces. The modular nature mirrors the game’s core mechanic: building with individual blocks.

The game’s icon status helps too. Even non-players recognize Creepers, grass blocks, and TNT designs instantly. That universal recognition means your themed cupcakes work for mixed-age parties where not everyone’s grinding for netherite but everyone gets the reference.

Practically speaking, cupcakes solve the serving problem at gaming parties. No cutting, no plates stacking up, minimal mess. Players can grab one between matches without pausing the action for five minutes while someone portions out cake slices.

Essential Ingredients and Tools for Minecraft Cupcakes

Cupcake Base Ingredients

Start with a reliable vanilla or chocolate base recipe. You’ll need:

  • 2 cups all-purpose flour
  • 1¾ cups granulated sugar
  • ¾ cup unsalted butter (room temperature)
  • 3 large eggs
  • 1 cup whole milk
  • 2½ teaspoons baking powder
  • 1 teaspoon vanilla extract
  • ½ teaspoon salt

For colored bases like Creeper green or Enderman purple, add gel food coloring directly to the batter. Gel produces more vibrant colors than liquid without affecting batter consistency. Use 4-6 drops per batch depending on intensity needed.

Red velvet works specifically for TNT cupcakes. Substitute 2 tablespoons cocoa powder for 2 tablespoons flour, add 1 tablespoon red gel coloring, and include 1 teaspoon white vinegar for that classic red velvet tang.

Frosting and Decoration Supplies

American buttercream remains the most forgiving frosting for decorating:

  • 1 cup unsalted butter (softened)
  • 4 cups powdered sugar
  • 2 teaspoons vanilla extract
  • 2-4 tablespoons heavy cream

This recipe pipes cleanly, holds shape at room temperature, and accepts gel coloring without breaking. Make separate batches for each color rather than trying to portion and color a single batch, it’s easier to achieve consistent shades.

For fondant work, purchase pre-colored fondant in black, white, brown, and green. Rolling your own and coloring takes significantly more time. Wilton and Satin Ice both make quality options available at craft stores.

Edible glitter, luster dust, and edible gems are essential for ore cupcakes. Blue and teal luster dust creates convincing diamond sparkle, while green gems work for emerald ore.

Minecraft-Specific Decorating Tools

Square piping tips are game-changers for achieving pixelated patterns. Ateco makes a #133 multi-opening tip that pipes small squares simultaneously, perfect for rapid grass texture application.

A small offset spatula helps apply frosting in clean, flat sections. The offset angle gives better control when creating distinct color zones like grass block layers.

Parchment paper and food-safe markers let you draw templates. Print Minecraft block textures at actual size, trace onto parchment, then use as stencils by placing directly on frosted cupcakes while piping.

Toothpicks work for detail corrections and for mixing custom colors in small quantities. Keep a cup of warm water nearby for cleaning tips between color changes, dried frosting in piping tips will ruin your clean lines.

Classic Creeper Cupcakes: Step-by-Step Recipe

Baking the Perfect Green Cupcake Base

Creepers demand a specific shade of green, not lime, not forest, but that middle-ground moss green from the game’s texture files. Mix gel colors to hit it: start with 3 drops leaf green and 1 drop brown per standard cupcake batch.

Add coloring after combining wet ingredients but before mixing with dry. This ensures even distribution without overmixing the final batter. Overmixing develops gluten and creates dense, tough cupcakes instead of light, fluffy ones.

Fill cupcake liners two-thirds full. Green batter looks darker when raw, it’ll lighten slightly during baking. Test one cupcake first if you’re unsure about the shade. Bake at 350°F for 18-20 minutes until a toothpick comes out with just a few moist crumbs.

Let cupcakes cool completely before frosting. Warm cupcakes melt buttercream and turn clean lines into blurry messes. If you’re in a rush, pop them in the fridge for 15 minutes once they’ve cooled to room temperature.

Creating the Iconic Creeper Face Design

The Creeper face consists of black squares on green, eight total blocks forming eyes, nose, and mouth. There are several decoration methods popular among gaming communities depending on skill level.

Method 1: Fondant squares (sharpest edges)

Roll black fondant to ⅛-inch thickness. Cut into uniform squares using a ruler and pizza cutter, you need two larger squares for eyes (approximately ¾-inch each) and six smaller squares for the nose and mouth sections.

Apply a thin green buttercream layer to the cupcake top first. This acts as glue for fondant pieces. Arrange the face pattern: two eye squares at the top, two nose squares centered below, and four mouth squares forming an inverted T-shape underneath.

Method 2: Piped buttercream (easier, kid-friendly)

Frost the entire cupcake with green buttercream smoothed flat with an offset spatula. Let it set in the fridge for 10 minutes so the base layer firms up.

Fill a piping bag with black buttercream fitted with a small round tip (Wilton #3 or #4). Pipe thick squares by applying steady pressure and moving slowly in a box pattern. Fill in the centers by continuing to pipe in a spiral motion until solid.

The piped method won’t have razor-sharp corners but works better for outdoor parties where fondant might sweat or for younger kids helping with decoration.

Grass Block Cupcakes: Building Edible Terrain

Layering Brown and Green Frosting

Grass blocks are Minecraft’s most iconic terrain element, brown dirt base with bright green top, separated by a distinct color line. Getting that clean division between layers is the technical challenge.

Prepare two frosting batches: one chocolate brown using cocoa powder (2 tablespoons per standard buttercream recipe) or brown gel coloring, and one bright grass green (4 drops leaf green gel).

Apply brown frosting to the bottom two-thirds of each cupcake. Use a piping bag or spatula, working around the sides and covering the bottom of the top surface. You want full coverage with no cake showing through.

For the green layer, pipe a thick ring around the top edge first, then fill in the center. Use an offset spatula to spread and flatten. The ring technique creates a natural boundary and prevents the two colors from bleeding together while you’re smoothing.

Chill decorated cupcakes for 5-10 minutes before adding texture details. The firm frosting base won’t shift when you add the textured top layer.

Adding Textured Details for Realism

Minecraft grass has subtle pixel variation, not smooth, not chaotic, just slightly irregular. Recreate this with a grass piping tip (Wilton #233 or similar) or a fork.

Grass tip method: Hold the piping bag perpendicular to the cupcake, squeeze gently, and pull straight up to create small spikes. Cover the entire green section with these upward pulls, slightly overlapping for full coverage. Vary the height slightly by changing pressure, perfect uniformity looks too artificial even for a blocky game.

Fork method: Drag a fork lightly across the green frosting in multiple directions. The tines create fine lines that mimic the game’s pixel texture. This works best with slightly softer frosting, if yours has been chilled too long, let it sit at room temperature for 5 minutes.

Some decorators add small brown “dirt specks” using a toothpick to dot tiny amounts of brown frosting onto the green section. This mimics partially-worn grass blocks from the game but is optional, clean grass blocks are equally recognizable.

TNT Block Cupcakes for Explosive Flavor

Red Velvet Base Recipe

TNT blocks call for red cupcakes, and red velvet delivers both color and flavor that stands out from standard vanilla. The subtle cocoa undertone adds complexity without going full chocolate.

Modify the base recipe:

  • 2¼ cups all-purpose flour
  • 1½ cups granulated sugar
  • 1 teaspoon baking soda
  • 1 teaspoon salt
  • 2 tablespoons cocoa powder
  • 1½ cups vegetable oil
  • 1 cup buttermilk (room temperature)
  • 2 large eggs
  • 2 tablespoons red gel food coloring
  • 1 teaspoon white vinegar
  • 1 teaspoon vanilla extract

Mix dry ingredients separately. Combine wet ingredients including the gel coloring. When you combine them, mix just until incorporated, red velvet is particularly prone to becoming dense with overmixing.

The vinegar reacts with baking soda for extra lift and helps activate the cocoa’s flavor. Don’t skip it. Bake at 350°F for 18-22 minutes. Red velvet stays slightly more moist than vanilla, so a few crumbs on the toothpick are fine.

Decorating with Red and White Patterns

TNT blocks feature red sides with white “TNT” lettering and white tops with red lettering. For cupcakes, simplify to a top-down view: white background with red details.

Frost the entire cupcake with white buttercream, smoothed flat. This is your canvas. Let it set briefly in the fridge so the red decorations won’t sink into soft frosting.

For the red pattern, you have two approaches:

Fondant letters (cleaner look): Roll red fondant thin and cut out the letters T-N-T using letter cutters or a knife. Arrange horizontally across the white frosting, pressing gently to adhere.

Piped letters (faster): Use red buttercream in a piping bag with a small round tip (#3). Pipe block-style letters, think squared-off, pixelated font rather than cursive. The game’s TNT texture uses a bold, thick font, so make letters chunky.

Add decorative elements by piping a red border around the top edge or creating a red crosshatch pattern in the corners. Some decorators pipe small red explosive “sparkles” radiating from the letters using star-shaped bursts.

Character-Inspired Cupcakes: Steve, Alex, and Enderman

Steve and Alex Face Cupcakes

Steve and Alex share the same blocky face structure with different color palettes. Both require precision with square shapes, their faces are literally pixelated in-game.

For Steve: Use light tan/peach frosting as the base skin tone (mix ivory gel with a tiny amount of brown). His face needs brown pixel squares for hair, eyes, nose, and beard.

Flatten the frosting smoothly, then use one of these methods:

  • Edible image method: Print Steve’s face on edible frosting sheets (available online or at bakery supply stores). Cut to size and place on frosted cupcakes. This is the easiest route for getting pixel-perfect accuracy.
  • Hand-piping method: Use brown buttercream with a small square tip. Pipe his hairline across the top third, two square eyes, a small vertical line for nose, and his characteristic beard outline. Reference the actual game skin for exact placement.

Alex uses the same technique with different colors: orange frosting for hair, green frosting for eyes (she has bright green irises while Steve’s are brown/black). Her face is slightly more defined with more visible features, so consider using a reference image while piping.

Skin tone accuracy matters less than getting the pixelated structure right. Even slightly off-color frosting reads as the character if the pixel pattern matches.

Mysterious Enderman Purple Cupcakes

Enderman cupcakes work best as abstract representations rather than detailed faces. The character’s most recognizable features are the black body and glowing purple eyes with particle effects.

Use dark chocolate cupcakes with black or very dark gray buttercream frosting. Achieve true black by mixing chocolate buttercream with black gel coloring, black coloring alone often looks gray.

For the purple eyes, create glowing effects using multiple techniques stacked:

  1. Base eyes: Place two bright purple candy pieces (M&Ms work) or pipe two purple buttercream circles where eyes would go
  2. Glow effect: Use purple luster dust or edible pearl dust mixed with vodka (it evaporates, leaving just the shimmer). Paint around the candy pieces with a small brush
  3. Particles: Pipe tiny purple dots around the cupcake randomly using a toothpick dipped in purple frosting, mimicking the particle effect Endermen emit

Some decorators add small fondant blocks in various colors held in the Enderman’s “hands” (positioned at the edge of the cupcake), referencing how they pick up blocks in-game.

Diamond Ore and Emerald Ore Cupcakes

Working with Edible Glitter and Gems

Ore blocks in Minecraft feature gray stone backgrounds with embedded gems that catch light. Recreating this requires combining matte and sparkle elements for contrast.

Diamond ore uses bright cyan-blue gems against gray. Start with gray buttercream (mix black gel into white frosting gradually, it’s easy to overshoot). Frost cupcakes smoothly and let them set.

For the diamonds themselves:

  • Edible gems/jewels: Blue candy gems or rock candy pieces give three-dimensional sparkle. Press 3-5 pieces into the frosting in an irregular pattern
  • Luster dust: Mix blue and teal luster dust with a drop of clear vanilla extract. Paint irregular diamond shapes onto the gray frosting. The alcohol evaporates, leaving metallic shine
  • Combination method: Place one or two larger candy gems, then paint luster dust around them for a mixed-size ore vein effect

Emerald ore follows the same technique with green elements. Use bright green edible gems or paint with green luster dust. Emeralds in-game are slightly larger than diamonds, so use fewer, bigger gem pieces, 2-3 per cupcake instead of 4-5.

Edible glitter works but creates a different effect than luster dust. Glitter gives overall sparkle while luster dust lets you paint specific gem shapes. For maximum accuracy to game textures, luster dust wins. Many crafters check community-created texture references to match the exact gem patterns.

Gray Frosting Base Techniques

Getting gray frosting right is trickier than it looks. Too much black gel makes it dark and muddy: too little leaves it looking off-white under certain lighting.

Start with 1 cup white buttercream and add black gel one drop at a time, mixing thoroughly between additions. You want medium stone-gray, similar to cobblestone. Test the shade by frosting a small piece of parchment, frosting often looks darker in the bowl than spread out.

For texture that mimics stone, use a textured frosting technique:

  1. Apply gray frosting roughly with a spatula, leaving it unsmoothed
  2. Dab with a paper towel to create irregular texture
  3. Alternatively, use a grass piping tip to pipe small irregular bumps across the surface before adding gems

The stone texture provides contrast for the smooth, shiny gems you’ll add on top. Completely smooth gray backgrounds make gems harder to distinguish visually, especially in party lighting.

Fondant vs. Buttercream: Choosing Your Decorating Method

When to Use Fondant for Sharp Pixelated Edges

Fondant excels at creating clean, geometric shapes with razor-sharp edges, exactly what Minecraft’s aesthetic demands. It rolls flat, cuts cleanly, and maintains shape without spreading or melting.

Best fondant applications:

  • Character faces: Steve and Alex faces with precise pixel squares
  • Creeper faces: Perfectly uniform black squares with hard edges
  • Block patterns: TNT letters, ore gem shapes, or grass block side patterns
  • Toppers: Three-dimensional elements that need to hold shape

Fondant downsides are worth noting. Many people find the taste less appealing than buttercream, it’s sweeter and chewier. Working with it requires different skills: rolling to consistent thickness, preventing drying and cracking, and achieving smooth attachment to cupcakes.

For outdoor parties or warm venues, fondant performs better than buttercream in heat. It won’t melt into a puddle at 85°F like buttercream will. If your gaming party is in a garage without AC during summer, fondant is the practical choice.

Buttercream Techniques for Easier Application

Buttercream offers forgiving application, easier color mixing, and better flavor for most people. It’s also significantly faster, no rolling, no drying time, just pipe or spread.

Achieve surprisingly clean pixelated looks with buttercream by:

  • Chilling between layers: Apply base color, refrigerate for 10 minutes, then add details on the firm surface
  • Using templates: Place parchment paper templates on frosted cupcakes, pipe around the edges, then remove the template
  • Piping with square tips: Square tips create more geometric patterns than round tips
  • Offset spatula smoothing: A small offset spatula creates flatter surfaces than a regular knife

For mixed designs, combine both methods. Use buttercream for the base frosting and larger color blocks, then add fondant elements only where you need ultra-precise details like letters or small squares.

Crusting buttercream (recipes with higher shortening content) bridges the gap. It firms up more than regular buttercream, taking details better while maintaining that creamy buttercream flavor.

Pro Tips for Achieving the Perfect Pixelated Look

Using Square Piping Tips and Templates

Square piping tips are non-negotiable for serious Minecraft cupcake work. Standard round tips create circles and curves, exactly what you’re trying to avoid. Square tips produce geometric patterns that instantly read as blocky and pixelated.

Wilton makes a #789 square tip that works for larger squares. For smaller pixels, Ateco’s #133 multi-opening tip pipes multiple small squares simultaneously, perfect for grass texture or rapid pattern work.

Technique matters with square tips:

  • Hold the piping bag perpendicular to the cupcake surface, not at an angle
  • Apply steady, even pressure, variations create irregular squares
  • Stop pressure before pulling away to avoid tails on corners
  • Practice on parchment paper first: square tips behave differently than round

Templates shortcut the precision problem. Print Minecraft block textures at cupcake-top size (typically 2 inches diameter). Trace onto parchment paper, cut out sections to create stencils.

Place the template on your frosted cupcake and pipe or paint through the openings. Remove carefully to reveal clean patterns. This works especially well for complex patterns like TNT text or detailed ore veins.

For repeated designs across dozens of cupcakes, create reusable templates from thin plastic sheets (available at craft stores). They clean easily and won’t tear after three uses like parchment.

Food Coloring Mixing Guide for Minecraft Colors

Minecraft’s color palette is specific. Generic “green” or “blue” won’t match the game’s distinctive shades. Mix gel food colorings to hit these key colors:

Creeper green: 3 parts leaf green + 1 part brown
Grass green: 4 parts leaf green + 1 part lemon yellow
TNT red: Use no-taste red gel at full strength (bright, pure red)
Diamond cyan: 3 parts sky blue + 1 part teal
Enderman purple: 2 parts violet + 1 part royal blue
Stone gray: Start with 1 drop black per ¼ cup white frosting, add gradually
Steve’s skin: 3 parts ivory + 1 part tan + tiny amount (knife-tip) of pink
Cobblestone: 2 parts black + 1 part brown per ¼ cup white frosting

Gel colors intensify as they sit. Mix frosting colors 30 minutes before use if possible, letting them develop fully. What looks slightly too dark in the bowl often looks perfect once spread.

Keep color references pulled up on your phone or printed out. Game screenshots work, but dedicated guide sites with color breakdowns help when you’re comparing subtle shade differences under kitchen lighting.

For very small amounts of custom colors, use toothpicks to mix. Dip the toothpick in gel, swirl into a small amount of white frosting, and build color gradually. This prevents wasting entire frosting batches on color experiments.

Printable Cupcake Toppers and Edible Images

Printable toppers offer a shortcut when you need dozens of cupcakes decorated quickly or when your piping skills aren’t up for detailed character faces. Edible images and printed paper toppers both work, each with advantages.

Edible frosting sheets print directly on special edible paper with edible ink. You apply them directly to frosted cupcakes where they become part of the frosting. They’re completely edible and taste slightly sweet.

Purchase pre-printed Minecraft designs online or print custom designs with an edible ink printer. Many local bakeries offer edible printing services, send them your designs and they’ll print sheets you can cut.

Application process: Frost cupcakes smoothly with white or light-colored buttercream. Cut printed images into circles slightly smaller than cupcake tops. Peel the backing carefully (they’re fragile) and place onto frosted surface, smoothing gently from center outward to remove air bubbles.

Edible images work best with buttercream bases. Fondant-covered cupcakes need a thin layer of piping gel applied first for adhesion.

Paper toppers (non-edible) offer sharper graphics and brighter colors. Print Minecraft designs on cardstock, cut them out, and attach to toothpicks or lollipop sticks. Insert into cupcakes like flags.

Paper toppers advantages:

  • Higher resolution: Home printers produce sharper images on paper than edible printers
  • Cost-effective: No special supplies needed beyond cardstock and printer ink
  • Dimensional options: Create 3D elements by folding or layering paper
  • Keep as party favors: Guests can remove toppers before eating and keep them

Design your own toppers using free Minecraft assets or find free templates online. Standard sizes work well: 2-inch circles for flat toppers or 2×3-inch rectangles for folded dimensional toppers.

Combine approaches: Use edible images for character faces, paper toppers for decorative elements like pickaxes, swords, or block icons that extend above the cupcake for visual interest.

For large batches, set up an assembly line. Print and cut all toppers first, frost all cupcakes, then apply toppers rapid-fire rather than completing one cupcake at a time.

Pairing Your Cupcakes with Gaming Party Themes

Coordinating Decorations and Table Setup

Minecraft cupcakes deserve a setup that extends the blocky aesthetic beyond just the food. Transform your party space into a biome using simple materials.

Table covering: Use green tablecloths or butcher paper for grass biome themes. For Nether parties, go with red. End dimension themes call for black or dark purple with scattered purple accents.

Cupcake displays: Stack cupcakes in grids or pyramids that mimic block structures. Tiered cupcake stands work, but building block-shaped risers from cardboard wrapped in colored paper creates more authentic Minecraft geometry. Create “floating islands” by suspending platforms at different heights with clear fishing line.

Biome clustering: Group cupcakes by type into biome sections. Grass blocks and Creepers in one zone, diamond ore and stone cupcakes in a “cave” section, TNT cupcakes in a “explosive zone.”

Signage: Add small signs using cardstock mounted on craft sticks, labeled with Minecraft-style names: “Creeper Cakes,” “Diamond Ore Treats,” or “TNT Blocks.” Use the game’s characteristic font (Minecraft’s font is called Minecrafter and is available free).

Lighting: String up LED torch lights or craft foam torches for ambient lighting that references in-game lighting mechanics. For End-themed parties, use purple LED strips.

Props: Scatter toy Minecraft figures, printed block cubes, or craft foam pickaxes and swords around the cupcake display. Create a backdrop using printed Minecraft landscapes or hang mob faces on the wall.

Keep serving tools themed too. Use green or brown serving platters for grass blocks, gray or stone-patterned plates for ore cupcakes.

Minecraft-Themed Party Game Ideas

Cupcakes are better with context. Run Minecraft-themed games between multiplayer sessions or as activities for younger party-goers not actively gaming.

Pin the Block on the Creeper: Classic pin-the-tail variation. Blindfolded players try to place TNT blocks on a Creeper face poster made with an AI poster designer.

Resource Scavenger Hunt: Hide toy diamonds, emeralds, and gold nuggets around the party space. Give participants pickaxes (foam or cardboard) and buckets to collect them. Trade resources for cupcakes, diamonds worth a Creeper cupcake, emeralds worth an ore cupcake, etc.

Build Competition: Supply real building blocks (Legos, wooden blocks, or cardboard boxes). Challenge teams to build recognizable Minecraft structures in 10 minutes. Winner gets first pick of cupcake types.

Mob Freeze Dance: Play Minecraft soundtrack music (C418’s albums). When music stops, call out a mob name, everyone must freeze in that mob’s pose. Creeper (arms at sides), Enderman (arms extended), Spider (hands and feet on ground), etc.

Cupcake Decorating Station: Set up a DIY decorating area with plain frosted cupcakes, piping bags with colored frosting, and fondant pieces. Let guests create their own Minecraft designs to take home.

Trivia Challenges: Ask Minecraft questions between gaming rounds. First correct answer wins a specific cupcake design. Categories: crafting recipes, mob behaviors, biome features, update history.

Time party games to match your guests’ energy. Run active games like scavenger hunts before gaming sessions when energy is high. Save decorating stations or trivia for breaks between Minecraft multiplayer rounds.

For LAN parties with adults, cupcakes work as victory rewards. Winner of each match gets first cupcake pick, creating in-game stakes tied to real-world treats.

Storage and Transport Tips for Decorated Cupcakes

Decorated Minecraft cupcakes require careful handling, hours of detailed piping work can get destroyed in seconds if you’re careless with transport or storage.

Short-term storage (same day, pre-party):

Refrigerate decorated cupcakes in single layers. Place them on cookie sheets or in cupcake carriers with individual compartments. Don’t stack unless you’re using tiered carriers designed for it.

Cover loosely with plastic wrap tented above the cupcakes so wrap doesn’t touch decorations. Better option: use large plastic storage containers where cupcakes sit on the bottom and the lid provides clearance above.

Remove from refrigeration 30-45 minutes before serving. Cold cupcakes mute flavors and create condensation on decorations as they warm. The condensation can blur piped details or make fondant pieces slide.

Overnight storage:

Buttercream-decorated cupcakes store fine overnight in the refrigerator, covered. Fondant decorations might sweat when removed from cold storage, this creates moisture that softens fondant and can cause colors to bleed.

For fondant-decorated cupcakes stored overnight, let them come to room temperature inside their covered container. Keep the lid on for the first 20 minutes to prevent rapid temperature change and condensation.

Transport methods:

Cupcake carriers with individual wells are safest for decorated cupcakes. Brands like Snapware or Wilton make carriers holding 12 or 24 cupcakes with locking lids.

For quantities beyond standard carriers, use cardboard flats from bakery supply stores. These are shallow boxes with individual cupcake indentations. Stack them carefully, never more than two high.

Drive carefully. Cupcakes shift during sudden stops or turns. Place carriers on flat surfaces (trunk floor or passenger floor mat) rather than seats where they might slide.

Delicate decorations (tall toppers, three-dimensional elements):

Transport these decorations separately and attach on-site. Bring a small container with extra frosting as “glue” for reattaching any pieces that shift.

For paper toppers on sticks, either insert them after arriving or ensure they’re short enough not to hit the carrier lid. Bent toppers look sloppy.

Heat management:

Buttercream melts at around 80-85°F. Fondant holds shape longer but can soften. In hot weather, transport cupcakes in a cooler with ice packs separated by cardboard (don’t let ice packs directly touch cupcake containers). Or run AC in the car and transport cupcakes in the coolest area.

Venue setup matters too. Don’t place cupcakes near heat sources, in direct sunlight, or outside in summer without shade. Even perfectly decorated cupcakes turn into frosting puddles in 90°F heat.

For outdoor parties, use fondant decorations over buttercream when possible. Set up the cupcake display in shade, ideally with a fan nearby for air circulation.

Conclusion

Minecraft cupcakes combine the game’s iconic blocky aesthetic with practical party food that actually tastes good. Whether you’re piping perfect Creeper faces with square tips or pressing edible gems into gray ore cupcakes, the techniques in this guide give you multiple approaches based on your skill level and available time.

The modular nature works in your favor, each cupcake is its own small project, so you can mix difficulty levels. Knock out simple grass blocks for bulk numbers, then spend extra time on detailed Steve faces or glittering diamond ore for centerpiece cupcakes.

Start with one or two designs for your first Minecraft party. Master Creepers and grass blocks, then expand your repertoire for future events. The combination of recognizable game elements, pixelated visual style that’s naturally forgiving, and individual servings makes these cupcakes a solid choice for gaming parties from kids’ birthdays to adult LAN events.