
133 Results

node

Search

Los Santos doesn’t run on dreams, it runs on cash. After years of updates, DLCs, and economy rebalancing patches, GTA Online’s business landscape in 2026 looks very different than it did at launch. Some enterprises that once printed money now barely cover daily fees, while newer additions have shifted the meta entirely.

The question isn’t whether you should invest in businesses (you absolutely should), but which ones deserve your limited startup capital. With property costs ranging from under $1 million to well over $4 million, choosing wrong means weeks of grinding just to break even. This guide cuts through the noise with tested profit-per-hour data, optimal upgrade paths, and strategic combinations that turn your criminal empire from a money pit into a self-sustaining machine. Whether you’re a fresh character with a modest bank account or a veteran looking to optimize your portfolio, you’ll find the exact roadmap to maximum returns.

Key Takeaways

  • The best GTA Online business depends on your playstyle: start with the Agency for immediate cash flow, then build passive income through a Bunker and Nightclub for sustainable wealth.
  • Equipment and Staff upgrades are essential for profitability—an unupgraded business operates at 50% efficiency, so prioritize upgrades before expanding your portfolio.
  • Location matters significantly; always choose central map positions (Chumash for Bunker, West Vinewood for Nightclub) over budget Paleto Bay properties that waste valuable time on sales.
  • The Nightclub becomes profitable once you own prerequisite businesses and functions as a cornerstone mid-game property that generates $1.3M+ passively every 2-3 days.
  • Buy supplies rather than steal them—Agency Contracts and active income methods provide better profit-per-hour than spending 10-15 minutes on resupply missions.
  • Sell at 25% stock as a solo player to guarantee single-vehicle missions and avoid losing product to failed timers, especially with slow Post Op van deliveries.

Understanding GTA Online Business Mechanics in 2026

Before dropping millions on properties, you need to grasp how GTA Online’s economy actually works. The game doesn’t explain its business systems well, and outdated advice from 2018 YouTube guides can lead you straight into bankruptcy.

How Businesses Generate Income

Every business in GTA Online operates on a supply-and-demand loop. You acquire supplies (either by purchasing them or completing resupply missions), wait for your business to convert those supplies into product, then sell the finished goods for profit. The math changes dramatically based on three factors:

Production time varies wildly. The Agency generates Safe income passively in real-time without any input. Bunkers take roughly 2 hours and 20 minutes to convert a full supply bar ($75k purchased) into stock worth $210k to Los Santos buyers. MC Businesses like cocaine or meth have their own timers, typically ranging from 2-5 hours for full production.

Sale missions can make or break profitability. A business that pays well on paper becomes trash-tier if its sale missions require four vehicles for a solo player or send you across the entire map with a slow Post Op van. Recent updates have improved some of these, but others remain frustrating.

Upgrade tiers exponentially impact earnings. An unupgraded Cocaine Lockup produces at roughly half the speed and value of a fully upgraded one. Equipment and Staff upgrades aren’t optional, they’re the difference between profit and wasted time.

The 2026 meta heavily favors businesses that respect your time. With Cayo Perico, Agency Contracts, and other high-efficiency money methods available, any business that demands 45 minutes of sale missions for $150k profit simply can’t compete.

Active vs. Passive Income Streams

This distinction defines your entire business strategy.

Passive income accumulates while you’re doing other activities. The Nightclub is the gold standard, it generates warehouse goods automatically (no resupply needed) as long as you own the corresponding businesses. You can run Cayo Perico, grief cargo griefers, or literally just cruise around while your nightclub fills. The Agency Safe works similarly, depositing up to $250k over time without any player input beyond occasionally emptying it.

Active income requires hands-on participation. Special Cargo means running 3-crate missions repeatedly to fill a warehouse. Vehicle Cargo demands you steal and deliver high-end cars. These businesses pay nothing if you don’t actively work them.

The smartest players build a foundation of passive income first, then layer active businesses on top during dedicated grinding sessions. Running a Bunker, Nightclub, and Agency passively generates roughly $500k-$700k every few hours with minimal effort. Add active Special Cargo or Vehicle Cargo runs during double-money weeks, and you’re looking at $2M+ sessions.

One critical 2026 update: AFK strategies still work but require console/PC-specific workarounds after the December 2025 patch that kicked idle players more aggressively. Security camera watching in your nightclub or apartment remains effective, but expect occasional disconnects.

Top Tier Businesses: Highest Profit Potential

These are the heavy hitters, businesses that justify their price tags with consistent, high-volume returns. If you can only afford one or two properties, start here.

The Agency

The Agency (introduced in The Contract DLC, refined through multiple patches) sits at the top of the 2026 meta for good reason. Base price ranges from $2.01M to $2.83M depending on location, but the ROI is unmatched.

Why it dominates:

  • Safe income generates up to $250k passively (caps at $250k, fills over real-world time based on completed Security Contracts)
  • Security Contracts pay $30k-$75k each and take 5-15 minutes solo
  • Payphone Hits offer $85k for 2-3 minute assassinations with specific bonus conditions
  • VIP Contracts (Dr. Dre missions) pay $1M first completion, $1M for repeating the finale

A typical Agency session: empty your safe ($250k), run 3 Payphone Hits ($255k), complete 2 Security Contracts ($120k). That’s $625k in under an hour, solo, in invite-only sessions. No cargo griefers, no Post Op vans, no BS.

Upgrades worth buying: Armory (weapon workbench access), Vehicle Workshop (Imani Tech vehicles). Skip the accommodation and arcade-style games.

Nightclub

The Nightclub is passive income perfection, but it requires prerequisite businesses to reach its potential. Prices range from $1.08M (Elysian Island) to $1.7M (West Vinewood), plus essential upgrades.

How it works: Once you own businesses (Bunker, Cargo Warehouse, Hangar, MC Businesses), assign nightclub Technicians to accrue goods in your warehouse automatically. No resupply missions, no MC daily fees, the nightclub generates product independently.

Optimal technician assignment (by profit per hour):

  1. South American Imports (Cocaine Lockup) – $10k/hour
  2. Cargo and Shipments (Hangar or Special Cargo) – $8.5k/hour
  3. Pharmaceutical Research (Meth Lab) – $8.5k/hour
  4. Sporting Goods (Bunker) – $7.5k/hour
  5. Cash Creation (Counterfeit Cash) – $7k/hour

A full nightclub warehouse sells for approximately $1.69M to Los Santos buyers (about 66 hours of AFK time). With the Pounder Custom or Mule Custom (avoid the Speedo for large sales), you can solo sell in 10-15 minutes.

Critical upgrades: Equipment (production speed), Staff (production speed), Storage floors (capacity). The popularity/club management minigame is optional, ignore it unless you enjoy the roleplay.

Bunker

The Bunker has aged remarkably well since the Gunrunning update. Prices range from $1.16M (Paleto Bay, never buy this) to $2.37M (Chumash or Farmhouse, always buy these).

Production efficiency: A single full supply bar ($75k purchased) produces $210k worth of stock to Los Santos in about 2h 20m (fully upgraded). That’s $135k profit for zero active work if you buy supplies.

The catch: sell at or below 25% stock (one vehicle guaranteed) for solo players, or gather a crew for full sales (up to 4 vehicles). Phantom Wedge and Insurgent missions are easy: Dune FAV and Merryweather missions are painful.

Bunker strategy in 2026: Buy supplies for $75k, let it cook while you run Agency contracts or Cayo Perico setups, sell when full for $210k. Repeat. Over a 5-hour session, you’ll pull 2 sales ($420k revenue, $270k profit) without dedicating focused time.

Essential upgrades: Equipment and Staff (mandatory, roughly double production value and speed). Security is worthless unless you AFK: raids are rare if you sell regularly. Skip the gun range and living quarters.

Mid-Tier Businesses: Balanced Investment and Returns

These businesses occupy the middle ground, profitable if managed correctly, but outclassed by top-tier options in pure efficiency. They shine during 2x events or as nightclub prerequisites.

Motorcycle Club Businesses

MC Businesses (Cocaine, Meth, Counterfeit Cash, Weed, Document Forgery) were once the grind meta. In 2026, they’re supporting cast for your nightclub, not starring roles.

Why they’ve fallen off:

  • Daily fees drain $30k+ when registered as MC President
  • Resupply missions are tedious and time-consuming
  • Raids occur if product sits too long, potentially wiping your stock
  • Sale missions include nightmares like Post Op vans (3+ vehicles, slow, multiple drops)

That said, Cocaine Lockup (fully upgraded) still profits $187.5k per full supply run (Los Santos sale, $75k supply cost). During 2x MC week events, that doubles to $375k profit, making it worthwhile.

2026 MC strategy: Buy Cocaine, Meth, and Cash purely to feed your nightclub technicians. Upgrade them minimally or not at all (nightclub production is independent of MC upgrades). Only actively run them during 2x events, and always buy supplies, steal missions waste time better spent elsewhere.

Skip Weed and Document Forgery entirely. Their profit margins don’t justify the headache even at 2x.

Special Cargo Warehouse

Special Cargo Warehouses (small: $250k-$360k, medium: $880k-$1.05M, large: $1.9M-$3.5M) reward active grinders with solid per-hour rates if you can stomach the repetition.

How it works: Source 1-3 crates per mission (3-crate purchases cost $18k, yield best profit per mission), fill your warehouse, sell when full. A large warehouse (111 crates) sells for $2.22M, netting roughly $1.6M profit after crate costs.

The grind: filling a large warehouse solo takes approximately 37 3-crate missions (about 4-5 hours of active work). That’s $320k-$400k per hour, competitive in 2026 but demanding.

Pros:

  • Works in invite-only sessions (post-2022 updates)
  • Predictable profit scaling
  • Feeds nightclub Cargo and Shipments technician

Cons:

  • Highly repetitive source missions
  • Sale missions can require multiple vehicles (though recent updates allow solo-friendly options more often)
  • Vulnerable to bugs/disconnects (losing a full warehouse to a server error is rage-inducing)

Many players following efficient grinding protocols have shifted away from special cargo toward faster options, though it remains viable during 2x cargo weeks when sale values double.

Vehicle Cargo

Vehicle Cargo via the Vehicle Warehouse ($1.5M-$2.7M) was the solo grind king in 2017-2019. It’s still profitable but shows its age.

The loop: Source a vehicle (usually involves a chase or gunfight), store it, then export for profit. High-end cars (the only ones worth exporting) sell for $100k, minus $20k modification cost and any damage repairs. A perfect sale nets $80k in about 10-15 minutes total.

The 32-car method still works: fill your warehouse with 10 standard and 10 mid-range cars (never sell them). From then on, you’ll only source high-end vehicles, maximizing profit.

Why it’s fallen to mid-tier:

  • $80k per 15 minutes ($320k/hour) is respectable but not exceptional
  • Enemy NPCs introduced in patches have aimbot-level accuracy, often causing $5k-$10k in damage before you reach your warehouse
  • Cooldowns between exports prevent constant grinding
  • No passive element whatsoever

Vehicle Cargo shines for players who enjoy driving and want active income without the tedium of crate missions. It doesn’t feed your nightclub, though, limiting its strategic value in empire-building.

Budget-Friendly Businesses for Beginners

Fresh off the plane with under $2M? These businesses offer entry points without requiring massive capital or a portfolio of prerequisite properties.

Auto Shop

The Auto Shop ($1.67M-$1.86M) from the Los Santos Tuners update is criminally underrated for new players.

Income streams:

  • Customer Vehicle Deliveries: ~$30k-$40k each, take 3-5 minutes (delivered across the map, no combat)
  • Auto Shop Contracts: $170k-$300k per contract (30-45 minutes, 2-4 players recommended but soloable)
  • Exotic Exports: Daily vehicle lists pay $20k per car delivered to the docks

The Auto Shop contracts are the real draw. The Union Depository Contract pays $300k on hard difficulty and plays like a mini-heist with decent replay value. Run one contract every other day and you’ll profit $150k+ per hour invested.

Bonus: the Auto Shop includes a Vehicle Mod Shop where you can customize cars for free (saves money if you’re a car enthusiast) and access to new LS Tuners vehicles.

Downside: doesn’t contribute to nightclub warehouse, so it’s purely active income. Still, at under $2M entry cost with no prerequisites, it’s a solid first business.

Arcade

The Arcade ($1.23M-$2.53M) serves dual purposes: it’s the planning hub for the Casino Heist and generates modest passive income through arcade machines.

Arcade machine income: Maxed out (all machines purchased), the arcade safe accumulates roughly $5k per in-game day, capping at $50k. It’s pocket change, but it’s free pocket change that requires zero effort.

Casino Heist potential: The main value is access to the heist itself. A well-executed Casino Heist (Silent & Sneaky or Big Con approach) nets $1.5M-$2.3M per run (2-3 hours including setups). That’s excellent money, though it requires either a competent teammate or strong solo skills.

For beginners, the Arcade works as a stepping stone. Buy the cheapest location (Pixel Pete’s in Paleto Bay for $1.23M), run the Casino Heist a few times to build capital, then invest in top-tier businesses. Don’t bother filling it with arcade machines, the passive income is negligible.

Note: The Master Control Terminal (MCT) upgrade ($1.74M) lets you manage all your businesses from one computer. It’s a luxury purchase for later, not a beginner priority.

Strategic Business Combinations for Maximum Efficiency

Individual businesses are fine. Synergized portfolios are transformative. The difference between randomly buying properties and strategically building an empire is millions of dollars in opportunity cost.

The Passive Income Empire Setup

This setup prioritizes money earned while you sleep, AFK, or focus on active grinds.

Phase 1 foundation (priority order):

  1. Agency ($2-$2.8M + $720k for Armory/Vehicle Workshop) – immediate active income to fuel further purchases
  2. Bunker (Chumash: $1.65M + $1.75M for Equipment/Staff upgrades) – passive production begins
  3. Cocaine Lockup ($975k base, minimal or no upgrades) – nightclub prerequisite
  4. Meth Lab ($910k base, minimal or no upgrades) – nightclub prerequisite
  5. Nightclub ($1.5M midrange + $1.4M for Equipment/Staff/Storage) – ties everything together

Total investment: Approximately $11-12M (achievable through Cayo Perico grinding in 2-3 weeks for a new player).

Daily routine:

  • Log in, empty Agency safe ($20k-$50k depending on time elapsed)
  • Buy bunker supplies ($75k), let cook
  • Run 1-2 Agency contracts or Payphone Hits ($100k-$170k, 15-20 minutes)
  • Sell bunker when ready ($210k, 10 minutes)
  • Check nightclub (sell when 80%+ full, roughly every 2-3 days for $1.3M+)

This routine generates $500k-$700k per hour of actual playtime, with most money accruing passively. It’s sustainable, low-stress, and works perfectly in invite-only sessions.

The Active Grinder Setup

For players who want to maximize dollars per session through constant activity.

Core businesses:

  1. Agency (Contracts, Payphone Hits, VIP missions)
  2. Vehicle Warehouse (high-end export loop)
  3. Special Cargo Warehouse (large, for 2x weeks)
  4. Auto Shop (Contracts between cooldowns)

Grind cycle:

  • Run Agency Payphone Hit ($85k, 3 minutes)
  • Export Vehicle Cargo ($80k, 12 minutes)
  • Source 3 Special Cargo crates (during 2x events, 8 minutes)
  • Run Auto Shop Contract when available ($200k+, 40 minutes)
  • Repeat

This setup demands focus and tolerates repetition, but it can push $800k-$1.2M per hour during double-money events. Players who adopt proven cash strategies often favor this aggressive approach.

Maintain a Bunker and Nightclub in the background for passive income even during active grinds, there’s no reason to leave money on the table.

Essential Upgrades and Locations

Buying a business is step one. Buying the right business in the right location with the right upgrades is how you actually make money.

Which Upgrades Are Worth It

Not all upgrades are created equal. Some double your profit: others are cosmetic wastes of cash.

Bunker:

  • Equipment ($1.15M) – ESSENTIAL. Doubles production value and speed.
  • Staff ($598k) – ESSENTIAL. Further increases production.
  • Security ($351k) – Skip unless you AFK heavily. Raids are rare with regular selling.
  • Shooting Range, Personal Quarters, Gun Locker – cosmetic/convenience, skip initially.

Nightclub:

  • Equipment ($1.43M) – ESSENTIAL. Increases technician speed.
  • Staff ($475k) – ESSENTIAL. Further increases speed.
  • Storage Floors ($1.37M total for all floors) – ESSENTIAL. Can’t profit if you can’t store product.
  • Security ($695k) – Skip. Raids are extremely rare.
  • Garage levels, decorations, DJ swaps – pure cosmetics.

MC Businesses (if actively running):

  • Equipment and Staff – necessary for profit. Without them, margins are terrible.
  • Security – pointless. Sell regularly, avoid raids.
  • If only using for nightclub, buy NO upgrades. Nightclub production is independent.

Agency:

  • Armory ($720k) – Weapon Workbench access, useful if you don’t own other properties with it.
  • Vehicle Workshop ($800k) – Imani Tech vehicles (off-radar, missile lock jammer), strong PvP utility.
  • Accommodation, arcade games – skip.

Auto Shop:

  • Most upgrades are cosmetic. The business functions fine at base level.

Analysts at Game8 regularly update business tier lists confirming these upgrade priorities based on production data mining.

Best Property Locations by Business Type

Location affects sale distances, resupply mission convenience, and sometimes even building layout.

Bunker:

  • Best: Chumash ($1.65M) or Farmhouse ($2.38M) – central map locations, shortest average sale distances
  • Avoid: Paleto Bay ($1.16M) – it’s cheap for a reason. Sales to Los Santos are brutally long.

Nightclub:

  • Best: West Vinewood ($1.7M), Del Perro ($1.64M), or La Mesa ($1.5M) – central, quick highway access
  • Avoid: Elysian Island ($1.08M) – isolated, awkward access, saves $600k but costs time on every sale

Agency:

  • Best: Hawick ($2.83M) or Vespucci Canals ($2.37M) – central, close to high-traffic mission areas
  • Decent: Little Seoul ($2.01M) – budget option, still usable
  • All agencies are functionally similar: location matters less than Bunker/Nightclub.

MC Businesses (if active use):

  • Cocaine: Alamo Sea ($975k) – decent location, moderate sale distances
  • Meth: Grand Senora Desert ($910k) – similar reasoning
  • Avoid: all Paleto Bay locations for any MC business

Vehicle Warehouse:

  • La Mesa ($1.5M) is the standard choice, central, good access. The more expensive options don’t provide meaningful advantages.

Special Cargo:

  • Large warehouse in Darnell Bros ($1.9M) or Wholesale Furniture ($2.135M) offer solid locations. Avoid remote warehouses.

Location guides on GamesRadar+ provide detailed breakdowns, though the consensus among experienced players hasn’t shifted much since 2024 patches.

Common Mistakes to Avoid When Building Your Empire

Even veteran players stumble into these traps. Avoid them and you’ll save millions in wasted capital and countless hours of frustration.

Buying Paleto Bay properties to save money. That discounted Bunker or Facility seems like a smart budget move until you’re driving a slow-ass Post Op van from Paleto to the city for 25 minutes per sale. The time cost obliterates any savings. Always prioritize location over initial price.

Neglecting upgrades. An unupgraded Bunker or MC business produces at half capacity and value. You’re literally running a business at 50% efficiency, it’s like grinding with one hand tied behind your back. If you can’t afford Equipment and Staff upgrades, don’t buy the business yet. Save another $1-2M first.

Registering as MC President unnecessarily. Every minute you’re an MC President, you’re accruing daily fees for all your MC businesses, $30k+ every 48 real-world minutes. Only register when actively sourcing/selling MC product. Otherwise, stay as CEO or VIP to avoid fees.

Running businesses in public lobbies without protection. Pre-2022, you needed public lobbies for sales. Post-December 2022 update, invite-only sessions allow full business functionality. There’s zero reason to risk cargo griefers on Oppressor Mk IIs. Run everything invite-only unless you specifically want PvP.

Ignoring the nightclub until late-game. Many players treat the Nightclub as an endgame luxury. It’s actually a mid-game cornerstone. Once you own a Bunker and 2-3 MC businesses (even unupgraded), the nightclub starts printing money passively. Don’t wait until you’re bored with nothing to buy, integrate it as soon as you can afford it.

Stealing supplies instead of buying them. Steal missions waste 10-15 minutes for $75k worth of supplies. In that same time, you could run an Agency contract for $60k+ profit and buy the supplies. Stealing made sense in 2017 when money methods were limited. In 2026, it’s objectively inefficient. Always buy supplies for Bunker and MC businesses.

Overfilling solo sales. Selling a full Bunker or MC business solo almost guarantees multiple vehicles. You’ll fail the timer on some missions (especially Post Op) and lose product. Sell at 25% stock for guaranteed single-vehicle missions, or find a reliable crew. Don’t gamble your product on RNG mission types.

Buying businesses in random order. Progression matters. Agency first for fast cash generation. Bunker second for passive income. Nightclub third to leverage your growing portfolio. Special Cargo and Vehicle Warehouses fill gaps during 2x events. Don’t buy a Document Forgery business before you own an Agency, you’re wasting opportunity cost.

Expecting instant returns. Even the best businesses require time to ROI. A fully upgraded Bunker costs $3.5M total: it’ll take roughly 20-25 supply runs (40-50 hours of production time) to break even. That’s normal. Build your empire for long-term gains, not immediate payback. Reviewers at IGN consistently note that GTA Online’s economy rewards patience and strategic planning over impulsive spending.

Conclusion

The 2026 GTA Online business meta is clear: passive income foundations (Agency, Bunker, Nightclub) unlock sustainable wealth, while active grinds (Special Cargo, Vehicle Cargo, Auto Shop) amplify earnings during focused sessions. Location and upgrades aren’t optional, they’re the difference between profit and bankruptcy.

Start with an Agency for immediate cash flow. Layer in a Bunker and MC businesses to feed a Nightclub. Avoid Paleto Bay like it’s a five-star wanted level. Buy supplies, sell smart, and never register as MC President unless you’re actively working MC product.

The beauty of GTA Online’s economy in 2026 is flexibility. Prefer passive income? Build the empire setup and check in twice a day for $500k+. Want to grind hard? Stack active businesses and push seven figures per session. Either path works, as long as you follow the fundamentals laid out here.

Now stop reading and start building. Los Santos doesn’t reward hesitation.
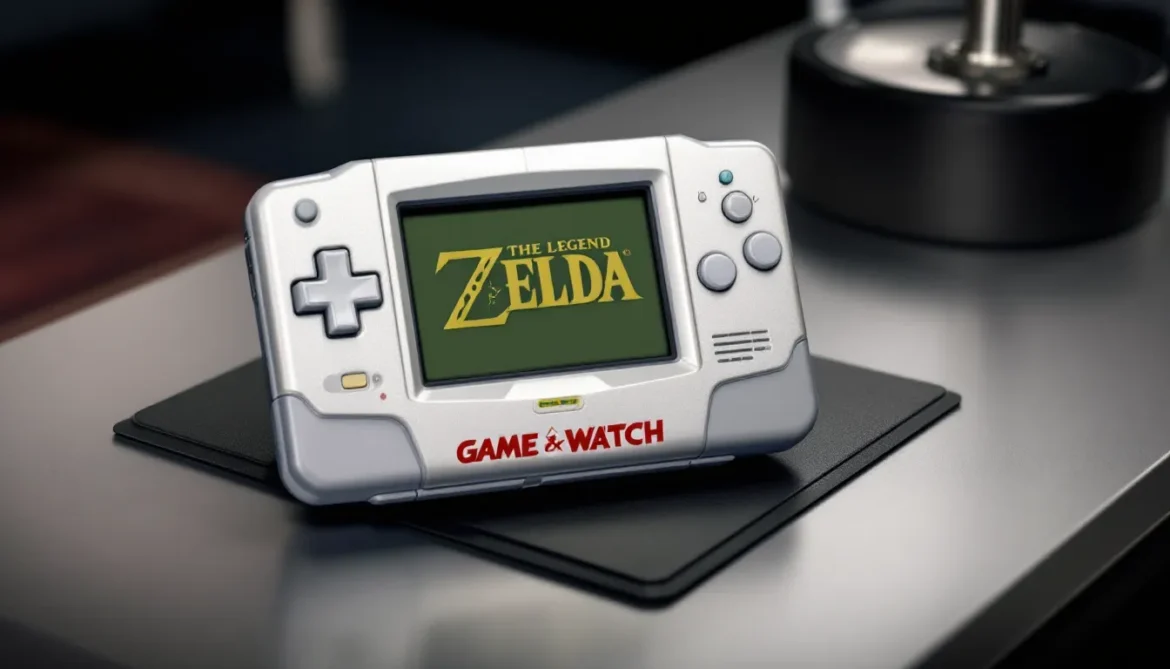
When Nintendo announced the Game & Watch: The Legend of Zelda edition back in 2021, it sent collectors and retro enthusiasts into a frenzy. This wasn’t just another piece of gaming hardware, it was a love letter to both the Game & Watch legacy and one of gaming’s most iconic franchises. Now, in 2026, the device has cemented itself as a must-have collectible, with prices fluctuating wildly on the resale market and availability becoming increasingly scarce.

But what makes the Nintendo Game and Watch Zelda edition so special? Is it worth tracking down for your collection, or should modern gamers skip it in favor of more robust retro handhelds? This guide breaks down everything from the included games and build quality to market value and how it stacks up against competing devices. Whether you’re a hardcore Zelda fan or just curious about this golden slice of gaming history, here’s what you need to know.

Key Takeaways

  • Game and Watch Zelda comes pre-loaded with three classic Zelda games (NES original, Zelda II, and Link’s Awakening DX) plus Vermin bonus game in a premium gold collectible device.
  • The Game and Watch Zelda retains authentic gameplay from original hardware with responsive controls and a sharp 2.36-inch LCD screen, though battery life is limited to approximately 4 hours of continuous play.
  • Sealed units typically sell for $150–$250 USD on the resale market in 2026, representing a significant appreciation from the original $49.99 launch price, making it a solid mid-tier collectible.
  • Link’s Awakening DX is the standout title that justifies the purchase for many players, offering a complete 15–20 hour portable adventure with exceptional design and soundtrack.
  • The device is ideal for Zelda collectors and nostalgic players seeking official, focused hardware, but gamers wanting variety or extended battery life may find competing retro handhelds like the Anbernic RG35XX offer better value.

What Is the Game & Watch: The Legend of Zelda Edition?

The Game & Watch: The Legend of Zelda is a limited-edition handheld device released by Nintendo in November 2021 to celebrate the 35th anniversary of The Legend of Zelda franchise. It’s part of Nintendo’s revival of the classic Game & Watch line, which originally launched in 1980 and pioneered portable gaming long before the Game Boy arrived.

Unlike modern handhelds with massive game libraries, the legend of zelda game and watch is a self-contained nostalgia device. It comes pre-loaded with three classic Zelda titles plus bonus features, all housed in a premium gold chassis that screams collector’s item. There’s no cartridge slot, no online store, and no expandability, what you see is what you get.

A Brief History of the Game & Watch Series

The original Game & Watch line ran from 1980 to 1991, with designer Gunpei Yokoi creating over 60 different models. These devices featured simple LCD games and doubled as digital watches, hence the name. They were Nintendo’s first major push into portable gaming and laid the groundwork for the Game Boy.

Nintendo revived the brand in 2020 with the Game & Watch: Super Mario Bros. edition, which sold out almost immediately. The success of that model paved the way for the Zelda edition a year later. Both revivals maintain the dual-screen clamshell aesthetic of certain original models while upgrading the internals to modern standards with full-color LCD displays and rechargeable batteries.

The 2021 Zelda Edition: Features and Specifications

The device measures 112mm x 67mm x 12.5mm when closed and weighs approximately 104 grams. It features a 2.36-inch color LCD screen for gameplay, plus a smaller clock display that shows Zelda-themed animations when not in use.

Key specs include:

  • Display: 2.36-inch TFT LCD, 320 x 240 resolution
  • Battery: Built-in lithium-ion rechargeable battery
  • Battery life: Approximately 4 hours of gameplay on a full charge
  • Charging: USB-C port (cable included, adapter sold separately)
  • Audio: Built-in speaker plus 3.5mm headphone jack
  • Controls: D-pad, A/B buttons, Pause/Set button, Game button
  • Color: Metallic gold with black accents

The unit ships in a collector’s box with a USB-C charging cable and nothing else. No manual, no AC adapter, Nintendo assumed most users would have USB power bricks lying around by 2021.

The Three Included Zelda Games Explained

The game & watch: the legend of zelda comes loaded with three full titles from the series, all running on emulated versions of their original hardware. These aren’t remakes or remasters, they’re the authentic NES and Game Boy games, pixel-perfect and complete.

The Legend of Zelda (1986): Classic NES Adventure

The Legend of Zelda for the NES is where it all began. This top-down action-adventure game drops players into Hyrule with minimal instruction and maximum freedom. You’ll explore dungeons, collect pieces of the Triforce, upgrade Link’s equipment, and eventually face Ganon.

The game holds up surprisingly well nearly four decades later. The open-world design was revolutionary for 1986, and the difficulty curve remains challenging without feeling cheap. Expect to die frequently until you memorize enemy patterns and dungeon layouts. The lack of hand-holding might frustrate modern gamers used to quest markers, but that sense of discovery is exactly what made Zelda legendary.

One quirk: the game still requires you to save manually by pressing Up + A on the second controller, which the Game & Watch replicates with a button combo (Pause + Game button). It’s archaic, but authentic.

Zelda II: The Adventure of Link

The black sheep of the series, Zelda II: The Adventure of Link ditched the top-down perspective for side-scrolling action with RPG leveling mechanics. It’s notoriously difficult, with brutal combat that punishes mistakes and an unforgiving Game Over system that sends you back to the starting palace.

Many consider it the weakest mainline Zelda title, but it’s gained a cult following over the years. The sword-and-shield combat requires timing and precision, and the magic system adds strategic depth. It’s worth experiencing at least once, if only to understand how different the series could have been.

Fair warning: unless you’re using save states (which the Game & Watch doesn’t offer), expect to lose progress frequently. The difficulty isn’t balanced for modern sensibilities, and some sections border on tedious.

The Legend of Zelda: Link’s Awakening

This is the crown jewel of the collection. Link’s Awakening originally launched for the Game Boy in 1993 and remains one of the finest portable games ever made. The version included on the Game & Watch is the DX edition from the Game Boy Color, complete with the optional color dungeon and photo-collecting side quest.

The game tells a melancholic story about Link washing ashore on Koholint Island and trying to wake the Wind Fish. The dungeon design is top-tier, the soundtrack is hauntingly beautiful even through the limited audio hardware, and the gameplay strikes a perfect balance between challenge and accessibility.

Link’s Awakening alone justifies the device for many collectors. It’s a complete 15-20 hour adventure that still feels fresh, and playing it on dedicated hardware adds to the charm.

Bonus Features: Vermin and the Zelda Timer

Beyond the three main games, the device includes Vermin, a simple Game & Watch title from 1980 featuring Link instead of the original generic character. It’s a basic reflex game where you whack moles, fun for a few minutes but not much more.

The Zelda Timer function turns the device into a themed digital clock with animated scenes featuring Link, Zelda, and various enemies. It cycles through different animations depending on the time of day. It’s a nice touch for display purposes but offers no gameplay value.

Design, Build Quality, and Portability

Nintendo didn’t cut corners on presentation. The Game & Watch Zelda feels like a premium collectible from the moment you open the box.

Gold Aesthetic and Premium Construction

The metallic gold finish is striking and immediately recognizable. It’s not real gold, obviously, it’s plastic with a metallic coating, but it looks expensive and photographs beautifully. The front features embossed Hylian Shield and Triforce artwork that catches the light.

Build quality is solid. The plastic shell feels durable, with no creaking or flex when handling the device. The D-pad and buttons are clicky and responsive, with satisfying tactile feedback. The hinge mechanism is smooth but firm, holding the screen at any angle without flopping around.

One minor complaint: the gold coating shows fingerprints and smudges easily. If you’re planning to actually play with this thing, keep a microfiber cloth handy. Collectors who display it sealed won’t have this problem.

Screen Quality and Display Performance

The 2.36-inch LCD screen is sharp and vibrant, with excellent viewing angles. Colors pop on Link’s Awakening DX, and even the NES titles look crisp even though their limited 8-bit palette.

The screen resolution of 320 x 240 is more than sufficient for these retro games. Nintendo applied minimal filtering, so pixels are clean and sharp without the blurriness some emulators introduce. There’s a slight border around the gameplay area to maintain the original aspect ratios, which is the correct approach.

Brightness is adjustable via the Pause menu, with three levels to choose from. Even at maximum brightness, the screen remains comfortable for extended play sessions. No backlight bleeding or dead pixels on retail units that I’ve seen reported.

Battery Life and Charging Options

Battery life is the biggest practical weakness. At approximately 4 hours of continuous gameplay, you’re not getting through a long flight or road trip without recharging. Standby time is decent, the device can sit in clock mode for days, but active play drains quickly.

Charging via USB-C is convenient, and a full charge takes about 2 hours. The inclusion of a USB-C port was smart future-proofing by Nintendo, especially considering USB-C has become the universal standard by 2026.

The lack of an included AC adapter is annoying but not a dealbreaker. Most gamers have multiple USB power supplies already, and the device charges fine from laptop ports or power banks.

Gameplay Experience and Controls

How a device looks matters, but how it plays matters more. The Game & Watch Zelda delivers a surprisingly competent experience given its compact size.

D-Pad Responsiveness and Button Layout

The D-pad is excellent, precise, responsive, and comfortable for extended sessions. Diagonal inputs register cleanly, which matters for the original Zelda where you’ll frequently walk at angles to avoid enemies. It’s not quite at the level of the Switch Pro Controller, but it’s close.

The A and B buttons are slightly smaller than ideal, but they’re well-positioned and have good travel. You won’t get hand cramps, though players with larger hands might find the overall layout a bit cramped compared to full-sized controllers.

The Pause/Set button serves double duty for pausing games and accessing menus, while the Game button switches between titles and functions. It’s intuitive after a few minutes, though switching games requires a full reset, no quick-swapping mid-session.

How the Controls Handle Classic Zelda Mechanics

All three games control exactly as they did on original hardware, which means they inherit both the strengths and limitations of those platforms.

The Legend of Zelda feels natural with the D-pad and two-button layout. Sword slashing, item usage, and menu navigation all work smoothly. The only missing feature is the ability to use save states, which would’ve been a nice modern convenience.

Zelda II benefits from the responsive controls, though the game’s difficulty remains punishing regardless of input method. The tight timing windows for blocking and attacking feel fair when your controller isn’t fighting you.

Link’s Awakening translates perfectly. The Game Boy’s original four-button layout maps cleanly to the Game & Watch, and the game’s pacing and mechanics feel tailor-made for portable play. This is where the device truly shines.

Collectibility and Current Market Value in 2026

The Game & Watch Zelda was always destined to become a collector’s item, and five years post-release, that prediction has proven accurate.

Original Retail Price vs. Resale Market

Nintendo originally sold the device for $49.99 USD at launch in November 2021. That was a fair price for three complete games and a premium collectible. Production was limited from the start, with no indication Nintendo planned extended manufacturing runs.

By 2026, sealed units regularly sell for $150-$250 USD depending on condition and market fluctuations. Complete-in-box opened units hover around $100-$150 USD. Prices spike during holiday seasons and after major Zelda announcements, as Gematsu often reports when covering Nintendo’s latest franchise updates.

Loose units (device only, no box) can sometimes be found for $80-$100 USD, but they’re less desirable to serious collectors. The packaging is part of the appeal, with the presentation box featuring beautiful artwork and gold accents.

Compared to other limited Nintendo releases, the Game & Watch Zelda has appreciated slower than the NES Classic or SNES Classic, but faster than most amiibo. It’s a solid mid-tier collectible, valuable but not prohibitively expensive.

Where to Buy and What to Look For

In 2026, your best options for purchasing are:

  • eBay: Largest selection, prices vary wildly, check seller ratings carefully
  • Mercari/OfferUp: Sometimes underpriced by casual sellers unfamiliar with current values
  • Local game stores: Hit or miss, but some stores stock retro collectibles
  • Facebook Marketplace: Occasionally find good deals from people cleaning out closets

What to inspect before buying:

  • Screen condition: Check for scratches, dead pixels, or backlight issues
  • Hinge tightness: Should open/close smoothly without excessive wobble
  • Button functionality: Test all inputs, especially the D-pad diagonals
  • Charging port: Ensure USB-C port isn’t loose or damaged
  • Cosmetic condition: Gold finish should be intact without significant wear
  • Box and accessories: Verify the USB-C cable and any included paperwork

Avoid units with aftermarket repairs or modified firmware. While homebrew scene exists for some Game & Watch models, modifications tank collectible value.

Is the Game & Watch Zelda Worth It for Gamers and Collectors?

The answer depends entirely on what you’re looking for. This isn’t a device for everyone, but for the right person, it’s absolutely worth tracking down.

Pros: Nostalgia, Portability, and Game Selection

The Game & Watch Zelda excels in several key areas:

Authentic retro experience: These are the real games, not inferior ports or remakes. If you want to play Link’s Awakening as it was originally designed, this delivers.

Premium presentation: The gold aesthetic and build quality make it feel special. It’s the kind of thing you’re proud to display on a shelf when not in use.

True portability: At 104 grams, it’s lighter than most smartphones and easily pockets. The clamshell design protects the screen without needing a separate case.

No subscriptions or additional purchases: Pay once, own forever. No online services required, no microtransactions, no DLC. Refreshingly simple.

Link’s Awakening alone: For many players, having the DX version of Link’s Awakening on dedicated hardware justifies the purchase. It’s that good.

Cons: Limited Library and Price Considerations

The device isn’t without significant limitations:

Only three games (plus Vermin): You’ll exhaust the content faster than any other gaming device you own. Replay value depends entirely on your fondness for these specific titles.

No save states or rewind features: Modern emulation conveniences are absent. You’re playing these games exactly as they existed decades ago, including all their frustrating quirks.

Battery life: Four hours is serviceable but not impressive. Dedicated retro handhelds like the Anbernic RG35XX offer 6-8 hours.

Inflated resale prices: At $150-$250 in 2026, you’re paying a collectibility premium. That money could buy a more versatile emulation handheld with thousands of games.

No expandability: Can’t add ROMs, can’t mod the software (without voiding value), can’t do anything beyond what Nintendo included.

For pure gaming value, a $50 Raspberry Pi with a controller offers more bang for your buck. But that’s not really the point of this device.

How It Compares to Other Retro Gaming Handhelds

The retro handheld market exploded in the early 2020s, giving gamers dozens of options for playing classic titles. How does the Game & Watch Zelda stack up?

Vs. Anbernic RG35XX ($60-$80 in 2026): The Anbernic offers thousands of games via emulation, better battery life, and a larger screen. But it lacks the premium feel and official licensing. If you want variety, go Anbernic. If you want a Zelda-specific collectible, the Game & Watch wins.

Vs. Analogue Pocket ($220+ in 2026): The Pocket is the gold standard for authentic Game Boy gameplay via FPGA hardware. It plays original cartridges with zero lag and features a gorgeous screen. It’s objectively superior for serious Game Boy collectors, but costs more and doesn’t include the NES Zelda titles. Different target audiences.

Vs. Nintendo Switch with Nintendo Switch Online ($200-$300 + subscription): The Switch offers all three games via NSO’s retro library, plus the 2019 Link’s Awakening remake. Far more versatile, but also far less portable and lacking the collectible appeal. You’re not displaying your Switch in a case.

Vs. Original hardware (Game Boy, NES): Authentic hardware requires collecting cartridges, dealing with aging batteries and screens, and carrying bulky systems. The Game & Watch offers convenience and preservation without those headaches. Coverage from outlets like Siliconera frequently highlights how devices like this balance authenticity with modern convenience for JRPG and retro enthusiasts.

Vs. Steam Deck/Emulation PC ($400-$600): Complete overkill for 8-bit Zelda games, but offers unlimited flexibility. The Game & Watch is a focused, curated experience. The Deck is a gaming PC. Apples and oranges.

The Game & Watch occupies a unique niche. It’s not the best value, most versatile, or most powerful option. It’s the best official, collectible Zelda handheld, and that’s what matters to its target audience.

Tips for Getting the Most Out of Your Game & Watch Zelda

Whether you’re a collector displaying the device or a gamer planning to actually play it, these tips will enhance your experience.

For players:

  • Master the button combos early: Hold Pause + Game button to access save options in the original Zelda. Getting comfortable with these non-standard inputs saves frustration.
  • Use headphones for Link’s Awakening: The built-in speaker is serviceable, but the soundtrack truly shines through decent earbuds. The 3.5mm jack is there for a reason.
  • Adjust brightness based on environment: Max brightness drains battery faster. In indoor settings, medium brightness is perfectly readable and extends playtime.
  • Take breaks during Zelda II: Seriously, this game is brutal. Save your sanity and play in short sessions. The game actively tries to tilt you.
  • Explore without guides in the original Zelda: Part of the magic is getting lost. Resist the urge to follow a walkthrough on your first playthrough.

For collectors:

  • Display in a UV-protected case: Sunlight will fade the box artwork and potentially discolor the gold plastic over time. Keep it away from windows.
  • Store in low humidity: Excessive moisture can damage electronics and packaging. Climate-controlled storage is ideal for long-term preservation.
  • Keep the original USB-C cable: Even if you’re not using it, the complete package maintains maximum value.
  • Document condition with photos: If you ever plan to sell, having timestamped photos of the device from purchase helps verify authenticity and condition.
  • Consider buying a second unit to play: If you can afford it, having one sealed and one opened lets you enjoy the games without compromising collectible value.

General maintenance:

  • Clean the gold finish with a soft, dry microfiber cloth only. No cleaners or liquids.
  • Charge the battery at least once every 6 months if storing long-term to prevent battery degradation.
  • Keep the hinge clean, dust can accumulate and affect the mechanism over time.

Platform-specific gaming devices like this benefit from regular care, much like Windows Central recommends for Xbox accessories and PC gaming peripherals.

Conclusion

The Game & Watch: The Legend of Zelda remains a fascinating artifact five years after its release. It’s not trying to be the most powerful handheld or offer the biggest library. Instead, it delivers a focused, premium experience celebrating three classic games and one of gaming’s most beloved franchises.

For collectors, it’s a no-brainer if you can find one at a reasonable price. The build quality, presentation, and limited availability make it a solid investment that will likely continue appreciating moderately over time. For players, the value proposition is trickier. If you have deep nostalgia for these specific Zelda titles and want the convenience of official hardware in a portable package, it’s worth the current market price. If you’re just looking for ways to play old games, cheaper alternatives exist.

The device succeeded in what Nintendo set out to do: create a beautiful piece of Zelda memorabilia that also functions as a legitimate gaming device. It’s not essential, but for the right person, it’s perfect. Whether it belongs in your collection depends on how much you value that specific combination of form, function, and franchise heritage.

Minecraft‘s longevity isn’t just about its blocky charm, it’s the endless ways players can twist, reshape, and completely overhaul the game without ever touching a line of Java code. Datapacks are the unsung heroes of vanilla customization, letting you add new recipes, tweak mob behavior, introduce custom loot tables, or even build entire game modes using nothing but the game’s built-in command system. Unlike mods that require Forge or Fabric loaders, datapacks work directly with vanilla Minecraft, making them cleaner, safer, and server-friendly. Whether you’re running a survival server with friends, building adventure maps, or just want to add quality-of-life tweaks without breaking your world’s integrity, datapacks are the tool you’ve been sleeping on. This guide covers everything from installation to creation, with recommendations for the best datapacks worth installing in 2026.

Key Takeaways

  • Minecraft datapacks enable deep vanilla customization without mod loaders, making them safer, cleaner, and server-friendly for both single-player and multiplayer environments.
  • Unlike mods that require external loaders or resource packs that only change visuals, datapacks work directly within vanilla Minecraft’s framework to modify gameplay mechanics and content.
  • Installing datapacks is straightforward—download the .zip file, place it in your world’s datapacks folder, and run /reload to enable without restarting the game.
  • Popular datapacks for 2026 span quality-of-life improvements (Coordinates HUD, Timber), adventure overhauls (Terralith’s 85+ biomes), and creative tools (Universal Dyeing, Custom Villager Shops).
  • Creating your own datapack requires only basic command knowledge and understanding of JSON—start with simple functions, use /reload to test, and leverage predicates and loot tables for advanced customization.
  • Troubleshoot common datapack issues by verifying file structure and pack_format, checking for namespace conflicts between multiple packs, and using /datapack list to diagnose loading problems.

What Are Minecraft Datapacks?

Datapacks are official, vanilla-compatible customization files that modify Minecraft’s gameplay using the game’s own data-driven systems. Introduced in version 1.13, they allow players to change loot tables, add crafting recipes, alter world generation, create custom advancements, and execute complex command functions, all without external mod loaders.

Think of datapacks as server-side configuration files that tap into Minecraft’s JSON-based backend. When you load a datapack, you’re essentially telling the game to use your custom data instead of (or plus to) its default behavior. A simple datapack might add a recipe for saddles: a complex one could introduce an entire progression system with custom bosses, structures, and loot.

The key advantage? Datapacks run on unmodified Minecraft clients. Players join your server or open your world without downloading anything extra. The server handles all the logic, making datapacks perfect for multiplayer environments where mod version mismatches and client-side installations are a pain.

How Datapacks Differ from Mods and Resource Packs

The line between datapacks, mods, and resource packs confuses a lot of players, but the distinctions matter.

Mods require third-party loaders like Forge, Fabric, or NeoForge. They can add entirely new blocks, items, mobs, dimensions, and game mechanics that don’t exist in vanilla code. Mods are powerful but come with compatibility headaches, version conflicts, required client-side installations, and potential security risks from sketchy downloads.

Datapacks work within vanilla Minecraft’s existing framework. They can’t add new block types or completely new entities, but they can repurpose existing ones in creative ways. A datapack can make zombies drop custom loot or trigger command chains that simulate new mechanics, but it won’t add a literal “copper golem” mob unless it’s retexturing an existing entity.

Resource packs only change visuals and sounds, textures, models, music, UI elements. They don’t affect gameplay mechanics at all. You can combine resource packs with datapacks for the full custom experience: the datapack adds the gameplay changes, and the resource pack makes them look and sound right.

In practice, many custom maps and servers use all three in tandem, but datapacks occupy the sweet spot between vanilla compatibility and deep customization.

Why Use Datapacks in Your Minecraft Worlds?

Datapacks solve real problems for players who want more from Minecraft without the friction of mod installations or the risk of breaking their worlds with every update.

Enhance Vanilla Gameplay Without Third-Party Software

One of the biggest selling points is simplicity. No mod loaders, no compatibility patches, no “this mod requires version 1.19.2 and won’t work on 1.19.3” nonsense. Datapacks hook directly into Minecraft’s native systems, so they’re update-resistant and far less likely to corrupt your save.

Want coordinates displayed without hitting F3? There’s a datapack for that. Need villagers to restock faster, or shulkers to respawn, or a way to craft horse armor? Datapacks handle these tweaks elegantly. Many popular quality-of-life improvements don’t require the overhead of full mods, datapacks get the job done with zero client-side installation.

For streamers and content creators, datapacks also mean less troubleshooting on camera. Viewers don’t need to install anything to understand what’s happening: the gameplay changes are server-driven and transparent.

Perfect for Multiplayer Servers and Custom Maps

Datapacks shine brightest in multiplayer. Server admins can deploy gameplay changes without forcing every player to download and configure mods. As long as the server runs the datapack, everyone experiences the same mechanics, no version mismatches, no “did you install the client-side component?” support tickets.

Custom adventure maps rely heavily on datapacks for progression systems, custom loot, and scripted events. Map creators can use command functions to trigger cutscenes, spawn bosses, grant custom items, and track player progress through advancements, all without external tools. When you download a popular adventure map from community platforms, the datapack is usually bundled right in the world folder.

For survival multiplayer servers (SMPs), datapacks let you tweak balance and add features without alienating vanilla purists. A datapack that adds a few extra crafting recipes or tweaks mob drops feels less intrusive than a full mod overhaul.

How to Install Minecraft Datapacks

Installing datapacks is straightforward, but the process differs slightly between single-player and servers. Both methods involve dropping files into the correct folder, no installers, no complicated setup.

Installing Datapacks in Single-Player Worlds

  1. Download the datapack as a .zip file. Don’t extract it: Minecraft reads datapacks as zipped folders.
  2. Open your Minecraft saves folder. On Windows, it’s %appdata%.minecraftsaves. On Mac, it’s ~/Library/Application Support/minecraft/saves. On Linux, it’s ~/.minecraft/saves.
  3. Navigate to your world folder and open the datapacks subfolder. If it doesn’t exist, create it.
  4. Drop the .zip file directly into the datapacks folder.
  5. Launch Minecraft and load the world. When you enter the world, type /reload in the chat to refresh datapacks without restarting.
  6. Verify installation by typing /datapack list. Your datapack should appear in the enabled list.

If the datapack isn’t loading, double-check the file structure. The .zip should contain a pack.mcmeta file and a data folder at the root level, not nested in another folder.

Installing Datapacks on Multiplayer Servers

Server installation follows the same logic but targets the server directory instead.

  1. Stop the server before making changes. Attempting to add datapacks while the server is running can cause issues.
  2. Access your server files via FTP, control panel, or direct file access.
  3. Navigate to the world folder (usually named world by default) and open the datapacks subfolder.
  4. Upload the .zip file into the datapacks folder.
  5. Start the server. When it finishes loading, join and run /reload as an operator to enable the datapack.
  6. Check with /datapack list to confirm it’s active.

For hosted servers (like those from server hosting platforms), the control panel often includes a datapack upload tool. Use it if available, it simplifies file permissions and avoids FTP headaches.

Best Minecraft Datapacks to Try in 2026

The datapack ecosystem has exploded since 2020, with thousands of options ranging from tiny tweaks to game-changing overhauls. Here’s a curated list of standout datapacks worth installing, broken down by category.

Quality-of-Life Datapacks

These datapacks fix vanilla annoyances without altering core gameplay.

  • Coordinates HUD: Displays your XYZ coordinates and biome on-screen without opening the debug menu. Essential for navigation and building projects.
  • Wandering Trader Hermit Trades: Replaces the wandering trader’s usually useless trades with Hermitcraft-style mini-blocks and novelty items. Still balanced, way more fun.
  • Armor Statues: Adds a book that lets you pose and customize armor stands with extreme precision, arms, rotations, equipment slots, visibility toggles. A must-have for decorators.
  • AFK Display: Shows which players are AFK in the tab list, useful for multiplayer servers to identify idle players.
  • Villager Death Coordinates: Sends a chat message with coordinates when a villager dies, saving you from losing valuable trades to random creeper explosions.

Adventure and Challenge Datapacks

For players who want vanilla Minecraft to feel fresh and dangerous.

  • Terralith: A world generation overhaul that adds 85+ new biomes without adding any new blocks. Works in vanilla clients and makes exploration feel brand new. Compatible with 1.20+ and pairs beautifully with structure datapacks.
  • Custom Nether Portals: Lets you build nether portals in any shape and size, not just the boring rectangle. Great for custom bases and creative builds.
  • Dungeons & Taverns: Adds procedurally generated structures like dungeons, taverns, and bandit camps with custom loot tables. Feels like a lite RPG expansion.
  • Creeper Overhaul: Makes creepers spawn in biome-specific variants with unique explosion effects. Jungle creepers spread vines, snowy creepers slow you with powder snow, desert creepers create sandstorms.
  • Hardcore Revival: In hardcore mode, instead of permadeath, you become a ghost that can spectate or be revived by another player at a totem. Keeps the tension without the frustration.

Building and Creative Datapacks

These expand your creative palette or streamline building workflows, fitting naturally into projects like creative survival builds.

  • Universal Dyeing: Lets you dye any dyeable block (wool, concrete, terracotta, glass) by combining it with dye in a crafting grid. No more hunting for specific colored blocks.
  • Custom Villager Shops: Adds a system for creating custom villager trades via commands, perfect for multiplayer economies or adventure maps.
  • More Mob Heads: Killing any mob has a small chance to drop its head, massively expanding decoration options beyond the usual skeleton, zombie, and creeper skulls.
  • Double Shulker Shells: Shulkers always drop two shells instead of the RNG-based drop. Quality-of-life for builders who need shulker boxes in bulk.
  • Timber Datapack: Chop the bottom log of a tree and the whole thing falls. It’s the classic “tree capitator” mechanic in vanilla form.

How to Create Your Own Minecraft Datapack

Creating your own datapack sounds intimidating, but the barrier to entry is lower than you think. If you can edit a text file and understand basic Minecraft commands, you’re halfway there.

Understanding Datapack Structure and File Format

Every datapack starts with the same skeleton structure:


your_datapack_name/

├── pack.mcmeta

└── data/

└── namespace/

├── functions/

├── advancements/

├── loot_tables/

├── recipes/

└── tags/

The pack.mcmeta file is a JSON file that tells Minecraft what version the datapack targets. For Minecraft 1.20.x in 2026, it looks like this:


{

"pack": {

"pack_format": 15,

"description": "Your datapack description"

}

}

The pack_format number changes with major updates. As of early 2026 (Minecraft 1.20.5+), format 15 is standard. Check the Minecraft wiki if you’re targeting a different version.

The namespace is your datapack’s unique ID. Use lowercase letters, numbers, and underscores only. Avoid generic names like “datapack” or “custom”, go with something specific like “example_loot” or “harder_caves”.

Inside the namespace folder, you create subfolders for different data types: functions for command scripts, recipes for crafting, loot_tables for mob and chest drops, advancements for progression tracking, and tags for grouping items or blocks.

Writing Your First Function and Commands

Functions are .mcfunction files that contain lists of commands, executed in sequence. They’re the backbone of datapack logic.

Let’s create a simple function that gives the player a diamond when they run a command.

  1. Inside data/your_namespace/functions/, create a file called give_diamond.mcfunction.
  2. Add this line: give @s minecraft:diamond 1
  3. Save the file.

To run this function in-game, type /function your_namespace:give_diamond. The game executes the command and you get a diamond.

Functions can call other functions, use selectors (@a for all players, @p for nearest, @e for entities), test for conditions with execute, and modify scoreboards for variables. Here’s a slightly more complex example that checks if a player is sneaking:


execute as @a[predicate=your_namespace:is_sneaking] run give @s minecraft:emerald 1

This uses a predicate (a separate JSON file) to test player state. Predicates are powerful filters that let you check for almost any condition, player health, item in hand, biome, time of day, you name it.

Testing and Debugging Your Datapack

The /reload command is your best friend. Every time you edit a datapack file, save it and run /reload in-game to apply changes without restarting Minecraft.

If something breaks, Minecraft usually spits out an error in chat or the log. Common mistakes:

  • Wrong pack_format number: The datapack won’t load at all. Check the error message and update pack.mcmeta.
  • File path typos: Functions won’t run if the namespace or file name is misspelled. Double-check /function syntax.
  • JSON syntax errors: Missing commas, unclosed brackets, and unquoted strings will break recipes, loot tables, and predicates. Use a JSON validator to catch these.

Start small. Test each function individually before combining them. Use /datapack list to confirm your datapack is enabled, and /datapack disable to troubleshoot conflicts.

For more advanced debugging, enable the game log in the launcher settings. It’ll show detailed error messages that don’t always appear in chat.

Troubleshooting Common Datapack Issues

Even well-made datapacks occasionally hit snags. Here’s how to diagnose and fix the most frequent problems.

Datapacks Not Loading or Appearing

If your datapack doesn’t show up in /datapack list, the issue is usually structural.

Check the file structure. The .zip should contain pack.mcmeta and the data folder at the root level. If you unzip and see another folder first, the structure is nested incorrectly. Re-zip with the correct hierarchy.

Verify pack_format. If you’re running Minecraft 1.20.4 but your datapack uses pack_format 10 (for 1.18), it may not load. Update the number in pack.mcmeta to match your Minecraft version.

Look for JSON errors. One typo in pack.mcmeta can prevent the entire datapack from loading. Common culprits: missing quotes, extra commas, or wrong bracket types ({} vs []).

Enable the datapack manually. Sometimes Minecraft disables datapacks on load. Run /datapack enable "file/your_datapack_name" to force it.

Check file permissions. On servers, incorrect file permissions can block datapacks. Ensure the server process has read access to the datapacks folder.

Compatibility Issues Between Multiple Datapacks

Datapacks can conflict when they modify the same game systems. Unlike mods, there’s no automatic load order or conflict resolution, last loaded usually wins.

Identify the conflict. Disable datapacks one by one using /datapack disable until the problem disappears. Once you know which two are clashing, you can troubleshoot.

Check for namespace collisions. If two datapacks use the same namespace and file names, one will overwrite the other. Rename namespaces in the offending datapack to avoid overlap.

Load order matters. Use /datapack list to see the current load order. Run /datapack disable and /datapack enable in the correct sequence to prioritize one datapack over another.

Recipe and loot table conflicts. If both datapacks alter the same recipe or loot table, only one will apply. Merge them manually by editing the JSON files, or choose which datapack’s version you prefer.

Some datapacks explicitly note compatibility requirements, read the documentation before installing multiple big packs like Terralith and other worldgen overhauls.

Where to Find and Download Minecraft Datapacks

Finding quality datapacks is half the battle. Stick to reputable sources to avoid broken or malicious files.

Planet Minecraft is the go-to hub for datapacks, with thousands of user-uploaded packs, ratings, and comments. You can filter by version, category, and popularity. Most listings include installation instructions and compatibility notes.

Smithed (smithed.dev) is a newer platform built specifically for datapacks. It’s community-curated, with a focus on high-quality, well-documented packs. The site also includes a library system for creators, making it easier to build complex datapacks with shared code.

Vanilla Tweaks (vanillatweaks.net) offers a customizable datapack generator for quality-of-life tweaks. You pick the features you want, coordinate HUD, player head drops, multiplayer sleep, and it bundles them into a single download. Clean, simple, and safe.

GitHub hosts many open-source datapacks. If you’re comfortable navigating repositories, it’s a goldmine for advanced packs and learning resources. Just download the repository as a .zip and drop it in your datapacks folder.

CurseForge and similar platforms like modding communities traditionally focus on mods but increasingly host datapacks as well. Check the file type before downloading, some uploads bundle datapacks with resource packs or mods.

Reddit communities like r/MinecraftCommands and r/Minecraft occasionally feature datapack showcases. Always scan comments for feedback before downloading user-shared files.

Whatever the source, read descriptions carefully. Check supported versions, known conflicts, and whether the pack requires a resource pack to function properly. Avoid sketchy ad-riddled sites, stick to established platforms.

Advanced Datapack Techniques and Tips

Once you’re comfortable with basic datapacks, these advanced techniques unlock serious customization potential.

Using Predicates and Loot Tables

Predicates are JSON files that define conditions. They’re reusable filters for commands, loot tables, and advancements. For example, a predicate that checks if a player is underwater:


{

"condition": "minecraft:entity_properties",

"entity": "this",

"predicate": {

"location": {

"fluid": "minecraft:water"

}

}

}

You can reference this predicate in commands: execute as @a[predicate=namespace:underwater] run effect give @s minecraft:water_breathing 10. This gives water breathing to any player underwater, clean, modular, reusable.

Loot tables control drops from mobs, chests, fishing, and block breaking. Editing them lets you add custom items, adjust drop rates, or introduce conditional loot. A loot table that makes zombies drop emeralds 10% of the time:


{

"pools": [

{

"rolls": 1,

"entries": [

{

"type": "minecraft:item",

"name": "minecraft:emerald",

"conditions": [

{

"condition": "minecraft:random_chance",

"chance": 0.1

}

]

}

]

}

]

}

Save this as data/your_namespace/loot_tables/entities/zombie.json. Now zombies have a 10% chance to drop emeralds alongside their normal loot.

You can layer conditions, only drop if killed by a player, only in certain biomes, only at night. Loot tables are incredibly flexible.

Optimizing Performance for Large Datapacks

Datapacks run on the server tick, so poorly optimized packs can tank performance, especially on multiplayer servers.

Limit entity selectors. Avoid commands like execute as @e[type=.player] that target every non-player entity. Use more specific selectors or limit search radius with distance=..10.

Use scoreboards efficiently. Running /scoreboard players set every tick for hundreds of players is expensive. Batch updates and use conditional execution to skip unnecessary checks.

Avoid excessive /execute chains. Each /execute adds overhead. Combine conditions when possible: execute as @a[tag=flying,nbt={OnGround:0b}] is better than two separate checks.

Test with /debug start and /debug stop. Minecraft’s built-in profiler tracks tick time and identifies bottlenecks. Run it for 10 seconds, stop it, and analyze the generated .txt file. Look for functions consuming excessive tick time.

Split heavy logic across multiple ticks. Instead of processing 1000 entities in one tick, process 100 per tick over 10 ticks. Use rotation or chunking strategies to distribute load.

Disable unused datapacks. On servers, only enable what you need. Every active datapack adds to tick time, even if it’s just sitting idle.

Conclusion

Datapacks are Minecraft’s secret weapon for customization, powerful, accessible, and vanilla-friendly. They bridge the gap between pure vanilla and modded play, offering deep gameplay changes without the hassle of mod loaders or compatibility hell. Whether you’re tweaking recipes, overhauling world generation, or building a full custom adventure map, datapacks give you the tools to reshape Minecraft exactly how you want it.

Start simple, install a few quality-of-life packs, see what clicks. Once you’re comfortable, jump into creation. The learning curve is gentler than you’d expect, and the Minecraft commands community is one of the most helpful in gaming. With the right datapacks, your Minecraft world stops being just another seed and becomes something entirely your own.

The Legend of Zelda has been kicking players’ butts since 1986, but not all entries in the series are created equal when it comes to difficulty. Some Zelda games gently guide you through Hyrule with helpful hints and forgiving mechanics, while others drop you into brutal combat scenarios with cryptic dungeons and punishing resource scarcity. The hardest Zelda game isn’t just about tough bosses, it’s about combat systems that demand mastery, puzzles that refuse to hold your hand, and survival mechanics that force you to think three steps ahead.

Whether you’re a veteran who conquered the Water Temple blindfolded or a newcomer wondering which Zelda title will test your limits, understanding what separates the brutal from the beginner-friendly is essential. This guide ranks the hardest Zelda games based on combat complexity, puzzle design, resource management, and overall player challenge. We’ll break down exactly why Zelda II still haunts speedrunners’ nightmares, how Breath of the Wild’s Master Mode flips the script on conventional strategies, and which classic titles deserve their reputation for merciless difficulty.

Key Takeaways

  • Zelda II: The Adventure of Link ranks as the hardest Zelda game due to its frame-perfect combat mechanics, punishing progression system, and brutal final dungeon that demands near-perfect execution.
  • The hardest Zelda game difficulty comes from interconnected systems including combat complexity, cryptic puzzle design, and resource scarcity rather than any single mechanical factor.
  • Master Mode in Breath of the Wild transforms the game through enemy health regeneration and tier promotion, forcing sustained aggression and creative resource management in the early game.
  • Master Quest (Ocarina of Time 3DS) amplifies difficulty by redesigning dungeons, doubling enemy damage, and deliberately creating solutions that contradict the original game’s logic.
  • Classic Zelda games like the NES original and A Link to the Past relied on cryptic exploration and permanent consequences, while modern titles offer optional challenge modes that maintain accessibility alongside demanding experiences.
  • Successfully conquering the hardest Zelda games requires mastering enemy patterns, prioritizing heart containers, managing consumables strategically, and leveraging environmental hazards over relying on raw combat power.

Understanding What Makes a Zelda Game Difficult

Difficulty in Zelda isn’t a single stat you can point to. It’s a combination of interconnected systems that either support or challenge the player. Some games pile on aggressive enemies with complex attack patterns, while others starve you of resources or trap you in labyrinthine dungeons with no clear exit. Let’s break down the core factors that determine whether a Zelda game is a cakewalk or a controller-throwing nightmare.

Combat Complexity and Enemy AI

Combat difficulty hinges on three things: enemy behavior, damage output, and the tools available to counter threats. Early Zelda games featured simple AI, enemies followed predictable patterns, and once you learned the rhythm, they became manageable. But titles like Zelda II: The Adventure of Link introduced enemies that required precise timing, blocking, and positioning. Iron Knuckles don’t just walk at you: they read your movements and punish button-mashing.

Modern entries like Breath of the Wild elevated enemy AI significantly. Bokoblins coordinate attacks, Lynels adapt to your strategies, and Guardians lock onto you with terrifying precision. Master Mode amplifies this by giving enemies health regeneration, forcing players to maintain aggressive pressure or watch their progress evaporate. Combat complexity isn’t just about hitting harder, it’s about demanding smarter play.

Puzzle Design and Dungeon Navigation

Zelda’s reputation as a puzzle-adventure series means dungeon design plays a massive role in difficulty. The original Legend of Zelda (NES) and Master Quest are notorious for cryptic solutions that require trial-and-error or external guides. You’re not always told which wall to bomb or which block to push, and some dungeons loop back on themselves in ways that feel deliberately disorienting.

Oracle of Ages took puzzle complexity to another level with time-travel mechanics layered into already-challenging dungeon layouts. You’d solve half a puzzle in the past, warp to the present, and realize you needed an item you wouldn’t get until three dungeons later. The difficulty wasn’t just spatial, it was temporal and cognitive. Puzzle difficulty peaks when the game respects your intelligence but refuses to spoon-feed solutions.

Resource Management and Survival Mechanics

Nothing tests a player like scarcity. Early Zelda games were brutal about rupees, bombs, and arrows. Run out of resources mid-dungeon in A Link to the Past, and you’re either grinding respawning enemies or backtracking to a shop. Majora’s Mask introduced time pressure that turned resource management into a constant balancing act, every rupee spent, every arrow fired, every second wasted brought you closer to the moon crashing down.

Breath of the Wild’s Master Mode weaponizes scarcity in the early game. Weapons break faster than you can find replacements, and high-tier enemies appear before you’ve stockpiled decent gear. You’re forced to improvise with the environment, steal weapons mid-combat, or avoid fights entirely. When resources are tight, every decision carries weight, and that’s where difficulty becomes genuinely engaging rather than artificially inflated.

The Hardest Zelda Games Ranked from Most to Least Challenging

Let’s cut to the chase. These are the hardest Zelda games, ranked by overall difficulty based on combat, puzzles, and resource management. This isn’t about subjective frustration, it’s about measurable challenge.

Zelda II: The Adventure of Link – The Infamous Black Sheep

Zelda II sits at the top of every “hardest Zelda games” list for good reason. It abandoned the top-down perspective for side-scrolling action-RPG gameplay, and the result was a brutal learning curve that still filters players decades later. Enemies like Blue Iron Knuckles and Fokka require frame-perfect timing to dodge and counter. The game punishes you for dying by removing experience points, and the final dungeon, The Great Palace, is a gauntlet that tests every skill you’ve developed.

There’s no hand-holding here. You need to grind levels, master the high-low sword mechanics, and memorize enemy patterns. The infamous Shadow Link fight at the end demands near-perfect execution, and many players resort to exploiting AI quirks just to survive. If you’re asking what is the hardest Zelda game, Zelda II is the undisputed champion.

Master Quest and Ocarina of Time’s Toughest Version

When Nintendo re-released Ocarina of Time for the 3DS, they included Master Quest, a remixed version with redesigned dungeons, double damage from enemies, and mirrored worlds. Dungeons like the Water Temple and Shadow Temple became nightmarish puzzles with repositioned switches, new enemy placements, and solutions that defied logic from the original game.

Master Quest assumes you’ve already beaten Ocarina of Time and know the base mechanics. It’s designed to trip up veterans, and it succeeds. The double damage modifier means you’re constantly one mistake away from a game over, and some puzzle solutions feel deliberately obtuse. Many players consider this the definitive challenge for Ocarina fans, and several game guides have dedicated entire sections to navigating its toughest dungeons.

The Legend of Zelda (NES) – Where It All Began

The original Legend of Zelda on NES earns its spot through sheer ambiguity. You’re dropped into Hyrule with no map, no quest markers, and cryptic hints from old men in caves. Finding dungeons requires exploration and experimentation, burning random bushes, bombing unmarked walls, and pushing blocks with no visual indicators.

Combat is simple by modern standards, but enemy damage is punishing, and health recovery is scarce early on. The Second Quest ramps up difficulty further by rearranging dungeons and hiding items in new locations. For players in 1986, this was groundbreaking. For modern audiences without a guide, it’s an exercise in patience and note-taking. The NES original proves that difficulty doesn’t always need complex mechanics, sometimes obscurity is enough.

Why Breath of the Wild’s Master Mode Pushes Players to Their Limits

Breath of the Wild on Normal difficulty is approachable. Master Mode? That’s a different beast entirely. Introduced in the DLC, Master Mode fundamentally changes how you approach combat, exploration, and resource gathering. It’s not just “harder enemies”, it’s a systemic overhaul that punishes careless play.

Regenerating Enemy Health and Strategic Combat

The defining mechanic of Master Mode is enemy health regeneration. If you disengage from combat for more than a few seconds, enemies start recovering HP. This eliminates hit-and-run tactics and forces sustained aggression. Casual players who relied on kiting or chip damage in Normal Mode hit a wall immediately.

You need high-DPS weapons, perfect dodges for Flurry Rushes, and environmental kills (cliffs, explosives, elemental reactions) to compensate. Lynels become endurance tests where a single mistake costs you half your health and resets your progress. The mechanic demands focus and punishes hesitation, making every encounter feel like a mini-boss fight. Detailed strategies on enemy behavior patterns have become essential reading for players tackling this mode.

Limited Resources in the Early Game

Master Mode promotes all enemies by one tier. Red Bokoblins become Blue, Blue become Black, and so on. This means the Plateau, the tutorial area, is filled with enemies that would normally appear mid-game. Your starting gear is laughably inadequate, and weapons shatter after a handful of swings.

Players are forced to think creatively. Stealth becomes mandatory. You’ll steal weapons from sleeping enemies, use Magnesis to drop metal objects on patrols, and avoid fights you’d normally steamroll. Resource scarcity in the first 10 hours makes Master Mode feel like a survival game, not an action-adventure. Once you’ve gathered enough shrines and gear, the difficulty curve softens, but those early hours are a legitimate test of patience and strategy.

Other Notoriously Difficult Zelda Titles Worth Mentioning

While Zelda II and Master Quest dominate the conversation, several other entries deserve recognition for their unique challenges. These games might not crack the top three, but they’ve left their mark on players who underestimated them.

Oracle of Seasons and Oracle of Ages

Capcom’s Oracle games are often overlooked in difficulty discussions, but they shouldn’t be. Oracle of Ages leans heavily into puzzle complexity, with dungeons that require juggling time-travel mechanics across multiple floors. The Jabu-Jabu’s Belly and Ancient Tomb dungeons are infamous for solutions that feel borderline unfair without a guide.

Oracle of Seasons focuses more on combat, with boss fights that demand pattern recognition and tight execution. The linked game mode, where you import a completed save from one Oracle game into the other, introduces Hero Mode, which doubles enemy damage and removes heart drops. It’s a brutal endurance run that tests both puzzle-solving and combat skills.

Majora’s Mask and the Pressure of Time Management

Majora’s Mask isn’t mechanically harder than Ocarina of Time, but the three-day time loop creates constant pressure. You’re always racing against the clock, juggling side quests, dungeon progress, and the looming threat of the moon crashing. The stress of time management adds a layer of difficulty that’s more psychological than mechanical.

The Stone Tower Temple is one of the series’ toughest dungeons, requiring you to flip the entire structure upside-down and navigate both orientations. Boss fights like Gyorg (pre-3DS version) were notoriously tedious and punishing. Majora’s Mask demands efficiency and planning, and that’s a different kind of hard than pure combat or puzzles.

A Link to the Past’s Deceptive Difficulty Curve

A Link to the Past starts gentle and then blindsides you. The Light World is manageable, but the Dark World dungeons ramp up significantly. Turtle Rock and Ice Palace feature maze-like layouts, sparse checkpoints, and enemies that hit like trucks. The lack of Fairy Fountains in certain dungeons means you’re stuck with whatever potions you brought.

Boss rushes in the final dungeon throw multiple boss rematches at you in succession, and if you didn’t stockpile resources, you’re in for a rough time. ALTTP’s difficulty is subtle, it doesn’t scream “hard mode,” but it quietly punishes mistakes and poor planning.

Tips and Strategies for Conquering the Hardest Zelda Games

Knowing which Zelda games are hard is one thing. Actually beating them requires strategy, patience, and a willingness to learn from failure. Here are proven tactics that work across the toughest entries.

Mastering Combat Patterns and Enemy Behaviors

Every tough Zelda enemy has a pattern. Iron Knuckles telegraph their swings. Lynels have specific tells before charging or roaring. Guardians lock on with a predictable sequence. Your job is to identify these patterns and exploit the gaps.

Practice parrying and perfect dodges in safe environments before committing to boss fights. In Zelda II, the crouch-stab is essential for dealing with low-attacking enemies like Stalfos. In Breath of the Wild Master Mode, Flurry Rushes extend weapon durability by maximizing damage per swing. Don’t just react, anticipate.

Use the environment. Cliffs, water, and explosive barrels are free damage. In Master Quest, repositioned enemies often stand near hazards you can exploit. Combat in hard Zelda games rewards preparation and observation over button-mashing.

Essential Resource and Heart Container Management

Never skip heart containers or heart pieces. In harder Zelda games, the difference between 10 hearts and 20 hearts is the difference between a manageable challenge and a death loop. Explore thoroughly, complete side quests, and prioritize health upgrades early.

Manage consumables carefully. Potions, fairies, and food are your safety net. In Breath of the Wild, cook high-tier meals (hearty durians, endura carrots) before tackling divine beasts or Lynels. In A Link to the Past, always carry at least one fairy in a bottle before entering the Dark World.

Don’t waste resources on trash mobs. If a fight isn’t mandatory, sneak past it. Save your best weapons and items for bosses and mini-bosses where they’ll have the biggest impact. Resource management separates players who struggle from those who thrive in difficult Zelda games.

How Modern Zelda Games Compare in Difficulty to Classic Titles

The Zelda series has evolved significantly over nearly four decades, and so has its approach to difficulty. Comparing modern entries like Tears of the Kingdom to classics like Zelda II or the NES original reveals fundamental shifts in design philosophy.

Quality of Life Improvements vs. Added Challenge Modes

Modern Zelda games include quality-of-life features that classic titles lacked: fast travel, quest markers, autosave, difficulty toggles, and in-game hints. These reduce frustration and make games more accessible, but they also lower the baseline difficulty. The original Legend of Zelda required memorization and note-taking: Breath of the Wild provides a minimap and waypoints.

To compensate, modern games offer optional challenge modes. Master Mode in Breath of the Wild, Hero Mode in the Oracle games (via linked saves), and self-imposed challenges like three-heart runs or no-upgrade playthroughs. Classic Zelda games were hard by default: modern games let you choose your difficulty, which is better design but makes direct comparisons tricky.

Classic titles also lacked checkpoints. Die in a dungeon in A Link to the Past or Ocarina of Time, and you restart from the entrance with fairies consumed. Modern games autosave frequently, removing the sting of failure. That procedural friction was a huge part of what made older games feel harder.

Tears of the Kingdom’s Difficulty Progression

Tears of the Kingdom continues Breath of the Wild’s philosophy: open-world freedom with scalable difficulty. Early-game enemies are manageable, but the Depths, Sky Islands, and late-game content introduce tougher encounters. Gloom-afflicted enemies reduce your max HP, and some constructs require creative Fuse combinations to counter.

Compared to Breath of the Wild’s Master Mode, Tears of the Kingdom on Normal is easier, no health regeneration, more abundant resources, and more forgiving enemy scaling. But the game’s complexity comes from puzzle-solving with Ultrahand, Ascend, and Fuse rather than pure combat difficulty. Experienced players have documented strategies for late-game combat that leverage advanced Fuse mechanics and environmental manipulation.

Tears of the Kingdom prioritizes creative problem-solving over mechanical execution, which makes it less traditionally “hard” but more intellectually demanding. It’s a different kind of challenge than Zelda II’s gauntlet-style difficulty.

Which Zelda Game Should You Play Based on Your Skill Level?

Not sure where to start? Here’s a breakdown based on your experience and tolerance for punishment.

Beginner-Friendly:

  • Twilight Princess – Generous health system, straightforward dungeons, and forgiving combat. Perfect for newcomers.
  • Skyward Sword – Motion controls aside, it’s a guided experience with clear objectives and manageable difficulty.
  • Link’s Awakening (2019 Switch remake) – Charming, approachable, and the remake smooths out the original GB jank.

Intermediate Challenge:

  • Ocarina of Time – The gold standard. Challenging enough to feel rewarding but not punishing.
  • Breath of the Wild (Normal Mode) – Open-ended exploration with scalable difficulty. You control the challenge by choosing which regions to tackle first.
  • A Link to the Past – Classic design with a fair difficulty curve. Tough in spots but never unfair.

Advanced/Masochist Tier:

  • Zelda II: The Adventure of Link – No hand-holding, brutal combat, and unforgiving progression. Only for players who enjoy retro-hard games.
  • Master Quest – For Ocarina veterans who want their knowledge weaponized against them.
  • Breath of the Wild Master Mode – Endurance test with regenerating enemies and scarce resources. Demands mastery of core mechanics.
  • Oracle of Ages (Linked Hero Mode) – Puzzle complexity meets doubled damage. A true test of patience and problem-solving.

If you’re asking yourself what is the hardest Zelda game and want to prove you can handle it, start with Zelda II or Master Quest. If you want a tough but fair experience, go with Breath of the Wild Master Mode or Oracle of Ages.

Conclusion

The hardest Zelda game depends on what kind of difficulty you’re measuring. For pure mechanical brutality and unforgiving design, Zelda II: The Adventure of Link remains unmatched. For puzzle complexity and mental gymnastics, Master Quest and Oracle of Ages take the crown. And for modern, systemic challenge that demands strategic thinking, Breath of the Wild’s Master Mode redefines what hard means in the series.

Difficulty in Zelda has always been about more than damage numbers. It’s about exploration without guidance, puzzles that respect your intelligence, and combat that rewards mastery. Whether you’re a veteran looking to test your limits or a newcomer wondering which title will push you hardest, the series offers challenges across every era and playstyle.

Pick your poison, stock up on fairies, and don’t be afraid to look up a guide when a dungeon stumps you for the third hour straight. Even the best players have been there.

When Sony San Diego Studios announced that MLB The Show would finally break free from its PlayStation-exclusive cage, Xbox players collectively lost their minds. For over a decade, PlayStation owners enjoyed baseball’s only AAA sim while Xbox fans were stuck with outdated alternatives or no baseball games at all. That drought ended in 2021, and five years later, the multi-platform experiment has been a resounding success.

Whether you’re a first-time player picking up a controller or a returning veteran adjusting to Xbox hardware, this guide covers everything you need to know about playing MLB The Show on Microsoft’s ecosystem. From performance optimization on Series X

|

S to Diamond Dynasty strategies that won’t drain your wallet, we’re breaking down the entire experience with the specificity Xbox players demand.

Key Takeaways

  • MLB The Show on Xbox has evolved into a polished multi-platform powerhouse since its 2021 debut, offering feature parity across all platforms with optimized performance on Series X|S.
  • Diamond Dynasty’s player-friendly economy allows competitive teams without spending money through grinding programs, flipping cards on the marketplace, and building budget-friendly theme teams.
  • MLB The Show Xbox players on Series X enjoy native 4K at 60 FPS with near-instant loading, while Series S delivers smooth 1440p gameplay—both significantly outperforming last-gen Xbox hardware.
  • Mastering Pure Analog pitching and Zone hitting mechanics separates casual players from competitive ranks, rewarding timing and plate discipline over button mashing.
  • Game Pass subscribers get the Standard Edition of MLB The Show 26 at no additional cost, making it one of the subscription service’s best values for baseball fans.
  • Cross-platform play and cross-progression (with account linking) enable seamless competition between Xbox and PlayStation players while maintaining identical Diamond Dynasty progress across systems.

The Historic Xbox Launch: How MLB The Show Broke Platform Barriers

Why MLB The Show Coming to Xbox Was a Game-Changer

The announcement in December 2019 sent shockwaves through the gaming community. Sony, a company that thrives on exclusivity, would bring one of its marquee first-party franchises to competing platforms. The reason? Major League Baseball itself pushed for broader accessibility as part of the license renewal.

For Xbox players, this meant access to the only legitimate MLB-licensed simulation on the market. No more settling for arcade alternatives or decade-old franchises. The shift brought parity to baseball gaming and forced Sony San Diego Studios to optimize for hardware they’d never touched before.

The move also validated cross-platform gaming as the industry standard. Players could finally compete against friends regardless of console preference, breaking down barriers that felt increasingly archaic in modern gaming.

Evolution from PlayStation Exclusive to Multi-Platform Powerhouse

MLB The Show 21 launched simultaneously on PlayStation 4, PlayStation 5, Xbox One, and Xbox Series X

|

S on April 20, 2021. Sony San Diego Studios delivered feature parity across all platforms, refusing to compromise on gameplay or content based on hardware.

By The Show 22, the studio had refined Xbox optimization significantly. Frame rates stabilized, loading times improved, and Xbox-specific controller feedback received attention. The Show 23 introduced cross-progression refinements, allowing players to seamlessly switch between platforms without losing progress.

The Show 24 and 25 continued this trajectory, with the 2026 edition representing the most polished multi-platform release yet. What started as a risky business decision has become the blueprint for how first-party studios can expand their reach without sacrificing quality.

What Makes MLB The Show the Best Baseball Game Available

Unmatched Realism and Gameplay Mechanics

MLB The Show sets the gold standard for baseball simulation through its physics-driven gameplay. Pitch trajectories account for spin rate, release point, and velocity with accuracy that mirrors real MLB data. Hitting mechanics reward timing and plate discipline over button mashing, creating a skill ceiling that separates casual players from ranked season grinders.

The Pure Analog pitching system demands precision, analog stick movement determines pitch location and break. Miss your release point by even a fraction, and you’ll hang a slider that gets sent 450 feet. Fielding incorporates player ratings, positioning, and reaction time, meaning a 65-rated shortstop won’t make diving plays like Fernando Tatis Jr.

Graphics have reached the point where broadcast replays look indistinguishable from actual MLB coverage. Player faces are scanned with startling accuracy, stadiums recreate every architectural detail, and weather effects impact gameplay in tangible ways.

Diamond Dynasty: The Ultimate Card-Collecting Mode

Diamond Dynasty is The Show’s answer to FIFA’s Ultimate Team and Madden’s MUT, but with a significantly more player-friendly economy. You build a roster by collecting player cards ranging from bronze commons to 99-overall legends, then compete in various online and offline modes.

Unlike competitors, The Show doesn’t gate competitive cards behind paywalls. Grinding programs, completing moments, and flipping cards on the marketplace all provide viable paths to elite squads without spending real money. The content calendar drops new programs weekly, keeping the mode fresh from April through October.

The Seasons structure introduced in The Show 23 and refined through 2026 offers tiered rewards based on XP accumulation. Casual players can still earn quality cards by playing at their own pace, while hardcore grinders race to prestige rewards.

Road to the Show: Create Your Baseball Legacy

Road to the Show (RTTS) lets you create a custom player and guide them from the minors to Hall of Fame immortality. The mode received a major overhaul in The Show 21 with the introduction of the Ballplayer system, which unified your created player across RTTS and Diamond Dynasty.

Your progression focuses on Archetypes that determine attribute caps and playstyle. A Power archetype emphasizes home runs but sacrifices contact, while Contact builds prioritize average and on-base percentage. Training opportunities between games let you boost specific skills, creating meaningful customization.

The Show 24 and 25 expanded narrative elements, adding branching dialogue choices that affect team chemistry and front-office decisions. Relationships with teammates, coaches, and agents now impact contract negotiations and trade scenarios.

Getting Started with MLB The Show on Xbox: Essential Tips for New Players

Choosing Your Game Edition and Understanding What’s Included

MLB The Show 26 offers three editions on Xbox: Standard Edition ($69.99), MVP Edition ($99.99), and Digital Deluxe Edition ($119.99). The Standard Edition includes the base game and nothing more, perfectly adequate if you’re testing the waters or primarily play Franchise Mode.

The MVP Edition adds 10,000 stubs (in-game currency), 25 The Show Packs, and a choice pack containing a 90-overall player. This edition makes sense for Diamond Dynasty players who want a head start without excessive spending.

Digital Deluxe bundles 100,000 stubs, 50 packs, two choice packs with 92-overall players, and a Diamond Dynasty uniform pack. It’s overkill unless you’re committed to competitive online play from day one.

All editions support dual entitlement between Xbox One and Xbox Series X

|

S, meaning one purchase covers both generations. Progress carries over seamlessly through cross-save functionality.

Mastering the Controls: Xbox Controller Configuration

Transitioning to Xbox hardware after years of PlayStation exclusivity meant adapting default button layouts. The Show maps actions to Xbox buttons logically, but muscle memory takes time to develop.

For hitting, A button swings normally, X button executes contact swings, and B button triggers power swings. The right stick controls PCI placement (the reticle determining where your bat makes contact). Veteran players recommend starting with Zone hitting and gradually adjusting PCI sensitivity in settings.

Pitching offers three control schemes. Meter pitching uses timed button presses, Pulse pitching relies on shrinking circles, and Pure Analog demands precise stick movements. Most competitive players gravitate toward Pure Analog for maximum control, though it has the steepest learning curve.

Fieldding is largely automated, but manual throws use the face buttons corresponding to bases. A throws to first, B to second, Y to third, and X to home. Pre-loading throws with LB before fielding the ball speeds up double plays significantly.

Xbox-Specific Features and Performance Optimization

Performance Differences Across Xbox Series X

|

S and Xbox One

Xbox Series X runs MLB The Show 26 at native 4K resolution with a locked 60 FPS in all modes. Loading times are virtually nonexistent, franchise games load in under five seconds, and Diamond Dynasty menus are instantaneous. The Stadium Creator mode, which can tank performance on older hardware, runs flawlessly on Series X.

Xbox Series S targets 1440p at 60 FPS and achieves it consistently in gameplay. Menu navigation and stadium creator tools see slight slowdowns compared to Series X, but the difference rarely impacts actual baseball. Series S is the sweet spot for budget-conscious players who demand smooth gameplay without 4K requirements.

Xbox One and One X struggle with The Show 26. Base Xbox One runs at 1080p with frequent frame drops during complex stadiums or weather effects. Loading times stretch to 20-30 seconds between innings. Xbox One X improves resolution to dynamic 4K but still can’t maintain consistent 60 FPS in crowded Diamond Dynasty stadiums.

The studio prioritizes next-gen optimization, meaning last-gen versions feel increasingly compromised. If you’re serious about competitive play, Xbox Series X

|

S is non-negotiable.

Xbox Game Pass Availability and Value Proposition

MLB The Show has appeared on Xbox Game Pass day one since The Show 21, representing one of the subscription’s best values. Sony’s willingness to put a first-party title on a competing service seemed baffling initially, but the strategy has paid off in player acquisition.

Game Pass subscribers get the Standard Edition at no additional cost. Diamond Dynasty progression remains identical to purchased copies, meaning free players aren’t handicapped competitively. The catch? You lose access if your subscription lapses, and you don’t own the game outright.

For players uncertain about committing $70 to a sports sim, Game Pass offers a risk-free trial period. Many who initially tried The Show through the service ended up purchasing the MVP or Digital Deluxe editions to lock in permanent ownership and bonus content. Publications covering Xbox and Game Pass updates consistently highlight this title as a subscription highlight.

Cross-Platform Play and Progression Between Xbox and PlayStation

Cross-platform play is enabled by default in all online modes. Ranked Seasons, Battle Royale, Events, and Co-Op all match Xbox and PlayStation players without restrictions. The only identifier is a small platform icon next to usernames, otherwise, you’d never know who’s playing on what hardware.

Cross-progression requires linking your MLB The Show account to your console profiles. Once linked, Diamond Dynasty rosters, stubs, and XP carry across platforms. You can grind programs on Xbox Series X at home, then continue on PlayStation 5 at a friend’s house without missing a beat.

Franchise Mode and Road to the Show saves are platform-locked due to technical limitations with save file formats. Sony San Diego Studios has stated this won’t change until they completely rebuild those modes’ backend systems.

Voice chat defaults to party-only, meaning you’ll only hear teammates in Co-Op if you form an Xbox party. Game chat exists but is disabled by default due to toxicity concerns.

Advanced Strategies to Dominate in Diamond Dynasty

Building Your Dream Team Without Very costly

Diamond Dynasty’s no-money-spent (NMS) community proves you can field a god squad without opening your wallet. The key is understanding which content to prioritize. Programs offer the best return on time investment, Mini Seasons, Conquest maps, and Moments all reward 95+ overall cards within hours of grinding.

Ignore low-tier packs entirely. Standard packs have abysmal odds and drain stubs faster than you can earn them. Focus on Choice Packs from program rewards, which let you select specific players rather than gambling on pulls.

Theme teams built around specific franchises or eras provide competitive squads at fraction of the cost. An all-Yankees team featuring free program cards like Derek Jeter, Mariano Rivera, and Aaron Judge competes with expensive meta squads while costing 50,000 stubs instead of 500,000.

Rotation and bullpen matter more than most players realize. A 94-overall starter with outlier fastball and good pitch mix dominates more reliably than a 99-overall position player with poor swing animations. Invest stubs in pitching first, fill out your lineup second.

Flipping Cards and Working the Marketplace

The marketplace operates on supply and demand economics identical to real-world trading. Cards fluctuate in price based on program releases, roster updates, and meta shifts. Smart flippers exploit these fluctuations for massive stub gains.

Target gatekeeper cards, diamonds required for team collections but not top-tier players. These cards maintain stable demand as new players chase collection rewards. Buy during content drops when the market crashes, sell during dry periods when supply dwindles.

Buy orders and sell orders are your primary tools. Never quick-sell or quick-buy unless you’re desperate. Placing patient orders saves 10% on purchases and earns 10% more on sales. Over hundreds of transactions, this compounds into hundreds of thousands of stubs.

Daily flipping guides and market trackers exist, but learning to read trends yourself proves more valuable long-term. Watch which cards spike after YouTubers showcase them, anticipate roster updates that boost player ratings, and dump investments before new programs tank prices.

Competitive Online Play: Ranked Seasons and Battle Royale Tips

Ranked Seasons is Diamond Dynasty’s premier competitive mode, matching players by skill rating across nine difficulty tiers. Games play on Hall of Fame or Legend difficulty at higher ranks, demanding near-perfect PCI placement and pitch sequencing.

Pitch tunneling separates good players from great ones. Start sequences with fastballs middle-middle to establish timing, then tunnel sliders or changeups that start in the same location before breaking away. Most players chase pitches that start in the zone, racking up strikeouts against aggressive hitters.

On offense, patience trumps aggression. Hall of Fame and Legend difficulties shrink PCI size significantly, meaning bad swings result in weak contact or whiffs. Take pitches until you get something middle-in or middle-up, these locations maximize exit velocity and launch angle.

Battle Royale operates as The Show’s draft mode. You draft a 25-man roster from randomized player pools, then compete in a three-loss bracket. Rewards scale with wins, with 12-win runs netting multiple high-diamond cards and substantial stubs.

Drafting strategy prioritizes starting pitching and bullpen depth. You’ll face god squads piloted by elite players, meaning you need pitchers who can survive five innings without surrendering crooked numbers. Draft at least two starters with Outlier fastballs and three relievers with high H/9 ratings.

Offensive drafting focuses on swing animations over raw attributes. Cards with smooth, quick swings like Griffey Jr. or Vlad Guerrero perform better than higher-rated cards with clunky animations. Test swings in practice mode before committing to expensive cards.

Franchise Mode Deep Dive: Managing Your Team to Championship Glory

Franchise Mode remains the deepest single-player experience in The Show, offering full control over scouting, drafting, development, and team management across decades. The mode hasn’t received the same attention as Diamond Dynasty in recent years, but the foundation remains rock-solid.

Financial management balances competitive rosters with long-term sustainability. Luxury tax penalties cripple big-market teams that overspend, while small-market teams need creative contract structuring to retain stars. Front-loaded contracts backload salary cap hits, buying competitive windows at the cost of future flexibility.

Scouting overhaul in The Show 22 introduced Discovery and Evaluation phases. Discovery scouting reveals player names and positions, while Evaluation uncovers specific attributes and potential ratings. Budget allocation between these phases determines draft success, over-invest in discovery and you’ll know every prospect but lack detailed grades.

Minor league development now accounts for playing time, coaching quality, and personality traits. Rushing top prospects to the majors before they’re ready tanks confidence and stunts growth. Let them dominate AAA for a full season before the call-up, even if it feels slow. Organizations favoring critical metrics and player ratings often track development success across multiple seasons.

Trade logic has improved significantly through patches, though AI teams still occasionally make questionable decisions. The trade finder tool identifies realistic deals by inputting desired positions and budget constraints. Don’t expect to fleece the CPU, fair value rules modern trade negotiations.

Rule changes introduced in real MLB now appear in Franchise Mode, including pitch clock enforcement, defensive shift bans, and expanded playoff formats. Sim engines account for these rule adjustments, making statistical outputs more accurate to modern baseball.

Common Issues Xbox Players Face and How to Fix Them

Connection Problems and Server Errors

“Unhandled server exception” errors plague Diamond Dynasty during peak hours, especially during new program launches. This server-side issue has no player fix, Sony San Diego Studios needs to increase server capacity. Check the official Twitter account for outage acknowledgments before troubleshooting locally.

Failed to retrieve data messages when loading Diamond Dynasty rosters usually indicate corrupted cache files. Hard reset your Xbox by holding the power button for 10 seconds, then unplugging for 30 seconds. Restart and reconnect, this clears temporary data causing conflicts.

Connection drops mid-game in Ranked Seasons or Battle Royale often result from strict NAT types. Navigate to Xbox network settings and verify your NAT is Open. Moderate or Strict NAT types cause disconnections that count as losses. Port forwarding fixes this, forward TCP/UDP ports 3074, 1935, and 1936 in your router settings.

Game Pass users occasionally encounter entitlement check failures preventing game launch. This happens when licenses don’t refresh properly. Go to “Manage game and add-ons” for MLB The Show, select “Clear local saved games,” then re-sync from cloud storage. Your progress remains safe on servers.

Frame Rate Drops and Graphics Settings

Frame rate instability on Xbox Series X

|

S is rare but can occur in Stadium Creator parks with excessive props. The engine struggles rendering 1,000+ custom objects at 4K/60. Reduce prop density or lower resolution scaling in graphics settings to stabilize FPS.

Xbox One users experiencing chronic frame drops should disable 4K upscaling if playing on One X, and reduce visual effects quality in settings. This disables some particle effects and crowd detail but stabilizes frame rate near 60 FPS.

Screen tearing happens when vertical sync is disabled. Enable V-Sync in video settings to eliminate tearing at the cost of minor input lag. Competitive players prefer screen tearing over input lag, but casual players should enable V-Sync for visual smoothness.

Stuttering during pitcher-batter transitions points to hard drive issues on Xbox One. MLB The Show streams assets in real-time, and aging HDDs struggle keeping pace. Upgrading to an external SSD via USB 3.0 dramatically reduces stuttering and cuts loading times in half. Coverage from sources discussing Xbox hardware optimization frequently recommends this upgrade path for legacy console owners.

Conclusion

MLB The Show on Xbox represents one of the most successful cross-platform transitions in modern gaming. Five years after breaking PlayStation exclusivity, the franchise has refined Xbox optimization to the point where platform choice comes down to personal preference rather than performance concerns.

Xbox Series X

|

S owners enjoy a premium experience with buttery-smooth frame rates and instant loading. Game Pass subscribers access baseball’s best sim at no additional cost, lowering barriers for newcomers. Cross-platform play ensures thriving online communities regardless of console loyalty.

The learning curve is real, Pure Analog pitching demands precision, and Zone hitting punishes poor PCI placement. But The Show rewards time investment more generously than its ultimate team competitors. Diamond Dynasty’s NMS-friendly economy lets skilled players compete without opening wallets, while Franchise Mode offers deep simulation for management enthusiasts.

Whether you’re grinding toward World Series rank in Ranked Seasons or rebuilding the Orioles across 15 Franchise seasons, The Show delivers the most authentic baseball experience available on any platform. Xbox players waited long enough for this game. Now it’s time to step up to the plate and make it count.

The Minecraft speedrunning scene has evolved from casual basement experiments into one of gaming’s most competitive arenas. What started as players trying to beat the Ender Dragon “pretty fast” has transformed into a hyper-optimized sport where milliseconds matter and runs under seven minutes aren’t just possible, they’re expected. Every few months, someone shaves off another fraction of a second, pushing the theoretical limits of what’s achievable with perfect RNG and flawless execution.

If you’ve ever watched a speedrunner tear through the Nether, one-cycle the dragon, and claim a world record in less time than it takes to make breakfast, you’ve witnessed thousands of hours of practice distilled into a single perfect attempt. This guide breaks down the current world records, the strategies behind them, and what it actually takes to compete at the highest level of Minecraft speedrunning in 2026.

Key Takeaways

  • The Minecraft speedrun world record for Random Seed Any% Glitchless currently stands at approximately 6 minutes and 42 seconds, requiring near-perfect RNG and flawless execution throughout the run.
  • Minecraft speedrunning requires mastery of critical strategies including optimal Nether navigation, efficient blaze rod and ender pearl collection through piglin trading, and one-cycle dragon fight optimization using bed explosions.
  • The 1.16 Nether Update revolutionized the speedrunning meta by introducing piglin bartering and bastion remnants, enabling runners to drop record times from 30+ minutes to sub-7 minute runs.
  • Speedrun.com maintains strict verification protocols including full video footage review, rule compliance checks, and statistical analysis to prevent cheating and ensure the legitimacy of all world records.
  • The theoretical limit for Minecraft speedrunning is estimated around 5 minutes and 30 seconds with perfect RNG, while Set Seed runs showcase peak mechanical execution with records under 1 minute and 49 seconds.
  • Beginners can start speedrunning by learning the basic route, practicing individual sections like Nether navigation and dragon fights, and gradually implementing world resets once consistency improves.

What Is Minecraft Speedrunning?

Minecraft speedrunning is the practice of completing the game, specifically defeating the Ender Dragon, as quickly as possible. Unlike sandbox play where you build, explore, or survive indefinitely, speedrunning imposes a singular goal: reach The End dimension and kill the dragon before the timer stops.

Understanding the Core Objective

The objective is deceptively simple but brutally complex in execution. Speedrunners must navigate the Overworld, enter the Nether to collect blaze rods, trade with piglins for ender pearls, locate a stronghold, activate the End portal, and defeat the Ender Dragon. Every decision, from which trees to punch first to which lava pool to MLG clutch into, affects the final time.

Runs are timed from world creation to the moment the dragon dies, with the in-game timer (F3 menu) serving as the official measure. Runners use MultiMC or other launchers to reset worlds instantly, since finding a seed with favorable RNG is part of the challenge in most categories.

Why Speedrunning Has Captivated Millions

Minecraft speedrunning exploded because it transforms a sandbox game into a high-stakes race against the clock. The blend of skill, routing, and RNG creates drama, one bad piglin trade can ruin a world-record pace run, while a god-tier bastion spawn can make history. The learning curve is accessible enough for beginners to understand the route, but the skill ceiling is high enough that top runners spend years perfecting movement, crafting muscle memory, and studying optimal fight cycles.

Plus, the community is huge. Platforms like Twitch and YouTube have made speedrunning a spectator sport, with runners streaming hundreds of attempts and fans watching for that one perfect run. The fastest minecraft speedrun attempts often rack up millions of views, and world record progression gets dissected frame-by-frame on Reddit and Discord.

Official Speedrun Categories Explained

Minecraft speedrunning isn’t a monolith, dozens of categories exist, each with distinct rules and fanbases. Understanding the categories is essential because “world record” means nothing without context.

Random Seed vs. Set Seed Runs

The biggest division in Minecraft speedrunning is between Random Seed and Set Seed runs.

  • Random Seed: The runner generates a completely random world and must adapt to whatever the game provides. This tests adaptability, decision-making under pressure, and the ability to execute strategies with imperfect RNG. Random Seed runs are considered the purest test of skill because you can’t memorize spawn locations or practice specific seeds.

  • Set Seed: The runner uses a pre-determined seed with known structures, spawns, and loot. These runs are more about execution perfection, hitting frame-perfect movements, optimizing every second of a known route, and eliminating all human error. Set Seed times are significantly faster since runners know exactly where everything is.

Most of the hype and mainstream attention focuses on Random Seed runs, but Set Seed holds its own niche for showcasing the absolute ceiling of mechanical skill.

Any% Glitchless: The Most Popular Category

Any% Glitchless is the flagship category, the one most people think of when they hear “Minecraft speedrun world record.” The rules are straightforward:

  • Beat the game by any means necessary (hence “Any%”).
  • No major glitches or exploits allowed (“Glitchless”).
  • Minor tricks like bed explosions in the Nether and one-cycling the dragon are permitted.

This category has the most competition, the most record changes, and the most community infrastructure. Speedrun.com lists separate leaderboards for Java Edition (1.16+, which introduced crucial piglin bartering mechanics) and older versions.

Alternative Categories Worth Exploring

Beyond Any% Glitchless, speedrunners compete in:

  • All Advancements: Complete every single advancement in the game. These runs take several hours and require meticulous routing.
  • Half% (Get a Bed): A meme category that’s surprisingly optimized. Goal: craft and place a bed.
  • Kill All Bosses: Defeat the Ender Dragon, the Wither, and the Elder Guardian. Adds significant routing complexity.
  • Filtered Seed: Runners use seed-finding tools to filter for favorable world generation, then race those pre-vetted seeds without memorizing specifics.
  • Hardcore Mode: Death means reset. Adds a psychological layer to high-level play.

Each category has dedicated runners and leaderboards. Some prefer the consistency of Set Seed, others thrive on the chaos of Random Seed All Advancements.

Current Minecraft Speedrun World Records (2026)

As of early 2026, Minecraft speedrun records continue to fall, with top runners pushing into territory once thought impossible. Here’s where the records stand.

Random Seed Any% Glitchless Records

The crown jewel of Minecraft speedrunning. As of March 2026, the Java Edition 1.16+ Random Seed Any% Glitchless world record sits at approximately 6 minutes and 42 seconds, held by a runner who benefited from near-perfect RNG: a village spawn with an iron source, a fortress within 100 blocks of the Nether spawn, and a stronghold under 800 blocks from world spawn.

For context:

  • Sub-10 minutes was once considered the holy grail. Now it’s table stakes for top-tier runners.
  • Sub-7 minutes is the new benchmark, and only a handful of verified runs have broken it.
  • The current record required a one-cycle dragon kill, frame-perfect bed placements, and zero wasted movement.

Bedrock Edition records tend to run slightly faster due to different game mechanics, particularly more favorable village generation and piglin trades. The Bedrock Random Seed record hovers around 6 minutes and 30 seconds.

Set Seed World Records

Set Seed runs showcase the absolute peak of mechanical execution. The Java Edition 1.16+ Set Seed Any% Glitchless record is approximately 1 minute and 49 seconds. Yes, under two minutes.

These runs are borderline TAS-level in precision. Runners practice the same seed hundreds of times, optimizing every jump, every crafting sequence, every bed angle in the End fight. There’s zero room for hesitation, muscle memory and routing are everything.

Notable Records in Other Categories

Beyond the flagship categories:

  • All Advancements (Random Seed): Around 3 hours and 20 minutes for the current record. These runs are endurance tests requiring focus and routing across dozens of biomes and structures.
  • Half% (Random Seed): The record sits under 30 seconds. It’s absurd and hilarious.
  • Hardcore Random Seed: Roughly 8 minutes, as runners play more conservatively to avoid resets from death.

Evolution of Minecraft Speedrunning Records

The progression of Minecraft speedrun world records tells the story of a community relentlessly optimizing, innovating, and discovering new strategies.

Early Days: Breaking the Hour Barrier

In the early 2010s, beating Minecraft in under an hour was impressive. Runners didn’t have the route knowledge, tool assistance, or community infrastructure that exists today. Strategies were inefficient, runners often mined for diamonds, built full armor sets, and took their time in the Nether.

The first sub-30 minute runs started appearing around 2014-2015, driven by better Nether navigation and the realization that diamonds weren’t necessary. Speedrunning was still niche, mostly confined to small forums and early YouTube channels.

The Rise of Sub-10 Minute Runs

Everything changed with the 1.16 Nether Update in 2020. The introduction of piglin bartering revolutionized speedrunning by providing a consistent source of ender pearls without hunting Endermen. Suddenly, runners could guarantee End portal activation with enough gold.

This update also introduced bastion remnants with predictable loot and faster Nether travel via the new biomes. Record times plummeted. By late 2020, sub-15 minute runs were common. By 2021, competitive gaming communities were tracking sub-10 minute barrier breaks with the intensity usually reserved for esports tournaments.

Runners like Dream, Illumina, and Couriway became household names in the gaming community, pushing records below 15 minutes, then 12, then finally breaking into single digits.

Recent Innovations and Record Progression

From 2022 onward, record progression slowed, not because runners got worse, but because they’d optimized nearly everything. Shaving seconds now requires near-perfect RNG combined with flawless execution. Innovations since then include:

  • Educated travel in the Nether: Calculating optimal angles to minimize Overworld distance.
  • Pie-chart reading: Runners analyze the F3 pie chart to predict stronghold distance and direction more accurately.
  • Advanced bed strats: Optimized bed placement patterns in the End fight to one-cycle the dragon consistently.

The current sub-7 minute records represent the bleeding edge. Some theorize the absolute floor, assuming god-tier RNG, is around 5 minutes and 30 seconds. But hitting that would require a unicorn seed and a perfect human performance.

Top Minecraft Speedrunners to Watch

The Minecraft speedrunning scene is packed with talented runners, each bringing unique strengths and styles to the competition.

Record Holders and Their Achievements

Some of the most dominant names in 2026 include:

  • Couriway: Known for insane consistency and world-record pace runs that just miss by seconds. He’s held multiple Random Seed records and is a master of Nether routing.
  • Illumina: A mechanical god who excels in both Random Seed and Set Seed categories. His movement is borderline frame-perfect, and he’s set records across multiple patches.
  • Feinberg: One of the fastest runners in the scene, known for aggressive strategies and high-risk plays that either blow up spectacularly or result in world records.
  • Silverr: A veteran runner with deep game knowledge. He’s contributed extensively to routing innovations and holds records in alternative categories.

These runners stream regularly on Twitch and upload highlight runs to YouTube. Watching their attempts, especially the grind sessions where they reset hundreds of times, gives insight into the mental endurance required.

Rising Stars in the Community

The speedrunning community constantly sees new talent. Emerging runners often specialize in specific categories or bring fresh strategies that challenge established meta. Discord servers and subreddits like r/MinecraftSpeedrun are great places to discover up-and-comers grinding leaderboards.

Many rising stars focus on filtered seed categories or niche challenges before transitioning to Random Seed competition. Some of the most exciting moments in esports coverage happen when an unknown runner comes out of nowhere with a record-breaking run.

Essential Strategies Used by World Record Holders

Breaking records isn’t just about luck, it’s about executing proven strategies flawlessly. Here’s what separates world-record holders from the rest of the pack.

Optimal Nether Navigation Techniques

The Nether makes or breaks a run. Top runners use several advanced techniques:

  • Educated guessing for fortress location: Fortresses generate along the Z-axis in strips. Runners travel perpendicular to spawn direction to maximize coverage.
  • Lava pool hopping: Instead of bridging, runners MLG into lava pools and swim to minimize travel time.
  • Piglin trading stations: Drop gold, pick up pearls, repeat. Experienced runners manipulate piglin AI to trade faster by managing aggro and positioning.
  • Bastion rushing: If a bastion spawns near the portal, runners loot it for gold blocks rather than mining. This can save 30+ seconds.

Efficient Nether navigation can save over a minute compared to unoptimized routes. The difference between a 6:42 and an 8:00 run often comes down to Nether RNG and execution.

Efficient Blaze Rod and Ender Pearl Collection

Blaze rods are non-negotiable, you need at least seven (for six blaze powder to activate the portal, plus margin). Top runners:

  • Use beds to kill blazes quickly. Beds explode in the Nether, dealing massive damage. A practiced runner can kill blazes in 1-2 beds each.
  • Collect exactly seven rods and leave immediately. No grinding for extras.

For ender pearls, piglin bartering is the meta. Runners need 12 pearls minimum (to activate the portal), but collect extras as insurance. Gold ingots come from:

  • Ruined portal chests (if near spawn).
  • Bastion treasure.
  • Crafting from gold blocks in bastions.

The key is balancing time spent collecting gold vs. the number of piglin trades needed. RNG matters, bad trades can mean 30+ gold for 12 pearls, while good trades might need only 15.

Stronghold Location and End Portal Strategies

Once out of the Nether, runners triangulate the stronghold using ender eye throws. Advanced runners use the F3 pie chart and coordinate math to minimize the number of eyes thrown (each throw wastes time and risks eye loss).

Portal room RNG is brutal. Sometimes the portal spawns with all frames intact, just pop in 12 eyes and go. Other times, it’s missing frames or buried behind walls, forcing runners to dig or craft extra eyes. World record runs almost always have favorable portal RNG.

Dragon Fight Optimization

The End fight has been optimized to a science. The goal: one-cycle the dragon.

Top runners:

  • Destroy end crystals using a combination of arrows and snowballs (crafted from snow blocks found in cold biomes).
  • Place a line of beds on the center platform.
  • Wait for the dragon to perch, then detonate beds sequentially to kill her in one perch cycle.

One-cycling requires precise bed placement and timing. Miss the cycle, and you lose 20-40 seconds waiting for the dragon to perch again. The fastest runners can one-cycle with their eyes closed.

How Speedrun Records Are Verified

A world record means nothing without verification. Minecraft speedrunning has robust systems to prevent cheating and ensure legitimacy.

Speedrun.com Submission Requirements

To submit a run to Speedrun.com (the central leaderboard), runners must provide:

  • Full, uncut video footage of the attempt, including the F3 menu showing the in-game timer.
  • Proof of game version (visible in the F3 screen).
  • Logs and metadata if requested by moderators.
  • Acceptable video quality (no potato-quality captures that obscure details).

Runs under certain time thresholds (typically sub-15 minutes for Random Seed) face additional scrutiny and require clearer footage.

The Verification Process and Moderator Review

Submitted runs go into a queue where volunteer moderators review them. Moderators check:

  • Timing accuracy: Does the run start and end at the correct frames?
  • Rule compliance: Was the run glitchless? Were allowed mods used?
  • Legitimacy indicators: Does movement, RNG, and execution look natural?

For top-tier runs, moderators may request additional evidence: world files, mod lists, or even live attempts to reproduce similar strategies. Verification for a world record can take days or even weeks as multiple mods review frame-by-frame.

Anti-Cheat Measures and Controversy Prevention

The Minecraft speedrunning community takes cheating seriously, especially after high-profile controversies (2020’s Dream scandal being the most infamous). Anti-cheat measures include:

  • Statistical analysis: Moderators use probability calculators to flag suspiciously good RNG (like improbable piglin trade rates or blaze rod drops).
  • Metadata checks: Game files and logs can reveal edited seeds or spliced footage.
  • Community vigilance: Runners scrutinize each other’s runs. Anything fishy gets reported and investigated.

Even though occasional drama, the verification system is robust. Cheaters get caught, and legitimate records are celebrated. Transparency matters, most top runners stream their attempts live, providing real-time proof of legitimacy.

Getting Started with Minecraft Speedrunning

Watching world records is inspiring. Actually attempting them is humbling. Here’s how to start your speedrunning journey without getting overwhelmed.

Essential Mods and Tools for Speedrunners

Legal mods and tools are essential for serious speedrunning:

  • MultiMC or Prism Launcher: Mod loaders that allow instant world resets. Speedrunners reset hundreds of seeds per session hunting for favorable RNG.
  • Sodium/Lithium/Phosphor: Performance mods that boost FPS without altering gameplay. Allowed on leaderboards.
  • F3+Pause Mod: Lets you pause while viewing the F3 menu to read coordinates and data without getting attacked.
  • SpeedRunIGT: Displays an accurate in-game timer overlay for tracking times in real-time.
  • Set Seed Finders (for Set Seed runs): Tools like SeedQueue help find and practice optimal seeds.

All legal mods are cosmetic or QOL improvements. Anything that alters RNG, loot tables, or game mechanics is banned.

Practice Routines to Improve Your Times

Starting out, don’t expect sub-30 minute runs. Here’s a progression:

  1. Learn the basic route: Watch tutorial videos from runners like Couriway or Illumina. Understand the overall flow: spawn → wood → iron → Nether → blaze rods → piglin trades → stronghold → End.
  2. Practice individual sections: Drill Nether navigation separately. Practice dragon fights in creative mode. Master bed crafting and item management.
  3. Do full runs without resetting: Early on, finish every run regardless of time. This builds endurance and teaches recovery from mistakes.
  4. Start resetting bad seeds: Once you’re consistently under an hour, begin resetting seeds with poor spawns (no villages, bad Nether portals, etc.).
  5. Analyze your own runs: Record and review footage. Identify time losses and practice those sections.

Improvement is incremental. Dropping from 40 minutes to 30 takes weeks. Breaking 20 minutes takes months. Sub-10 is years of grinding for most runners.

Common Beginner Mistakes to Avoid

New speedrunners often stumble on:

  • Wasting time on unnecessary resources: You don’t need diamonds, full iron armor, or a shield. Grab what’s essential and move.
  • Panicking in the Nether: Stay calm. Dying to a ghast or falling in lava is frustrating, but panicking makes it worse.
  • Ignoring movement optimization: Sprinting, jump-sprinting, and swim-sprinting all have different speeds. Master movement early.
  • Not using beds in the Nether: Beds are your best weapon against blazes and the dragon. Practice bed strats.
  • Giving up after bad RNG: Speedrunning is a numbers game. Bad seeds happen. Reset and try again.

Patience and consistency matter more than raw mechanical skill when you’re starting out. Helpful game guides and tutorials can provide additional walkthroughs for specific techniques.

The Future of Minecraft Speedrunning

Where does Minecraft speedrunning go from here? The scene shows no signs of slowing, but the nature of competition is evolving.

Predicted Record Barriers and Theoretical Limits

Most top runners agree that the theoretical limit for Random Seed Any% Glitchless (assuming perfect RNG and flawless execution) is somewhere around 5 minutes and 30 seconds. Getting there would require:

  • Spawn next to a village with iron and a ruined portal.
  • Nether portal lands within 50 blocks of a fortress and bastion.
  • God-tier piglin trades (12 pearls in under 10 gold).
  • Stronghold under 500 blocks from spawn with a complete portal.
  • Perfect one-cycle dragon kill.

That combination is vanishingly rare. Even with millions of seeds generated, hitting all those conditions in a single run is lottery-odds. Most analysts predict the realistic floor, achievable within the next few years, is closer to 6 minutes flat.

For Set Seed, the record might eventually dip below 1 minute and 30 seconds as runners perfect their execution, but gains are measured in frames at this point.

Impact of Game Updates on Speedrunning

Every major Minecraft update reshapes speedrunning. The 1.16 Nether Update revolutionized the meta. Future updates could do the same, or kill current strategies entirely.

Mojang has historically been speedrun-friendly, but changes to core mechanics (piglin trading rates, stronghold generation, dragon AI) could force runners to adapt or migrate to legacy versions. The community typically “freezes” on favorable patches for competition (1.16.1 remains the standard as of 2026), but new updates occasionally introduce faster strats that justify version changes.

There’s also growing interest in modded speedrunning and custom challenge runs as vanilla records become harder to break. Categories like “Beat Minecraft but every 10 seconds a random item spawns” add chaos and variety, attracting casual viewers even if they’re not leaderboard-official.

Conclusion

Minecraft speedrunning has come a long way from the early days of hour-long slogs to the current era of sub-7 minute mastery. The world records standing in 2026 represent the culmination of years of community innovation, individual dedication, and countless hours of grinding resets in search of that one perfect seed.

Whether you’re chasing records yourself or just watching in awe as runners pull off frame-perfect dragon one-cycles, the speedrunning community offers something for everyone. The barrier to entry is low, download the game, learn the route, and start running. The skill ceiling is absurdly high, which keeps top-level competition intense and records constantly under threat.

As game updates roll out and new strategies emerge, the Minecraft speedrun world record will keep evolving. The theoretical limits haven’t been reached yet, and every runner believes they’ve got one more second to shave off. That relentless pursuit of perfection is what makes speedrunning one of the most compelling corners of gaming in 2026.

When Naughty Dog released The Last of Us in June 2013, nobody anticipated just how profoundly it would reshape expectations for narrative-driven games. What started as another post-apocalyptic survival game quickly evolved into something far more ambitious: a deeply human story wrapped in brutally satisfying gameplay, elevated by performances that rivaled Hollywood’s finest work. Over a decade later, with multiple re-releases including the 2022 remake for PS5 and PC, The Last of Us remains a benchmark against which all story-heavy games are measured.

This review examines the complete Last of Us experience, from its original PS3 release through the PS4 Remastered version and the recent PS5/PC remake. Whether you’re a newcomer wondering what the hype is about or a veteran considering the updated versions, this breakdown covers what still works, what hasn’t aged as gracefully, and why this game continues to dominate “greatest of all time” conversations in 2026.

Key Takeaways

  • The Last of Us game review reveals why this 2013 masterpiece remains the benchmark for narrative-driven games, with a seamlessly integrated story and gameplay that prioritizes character development over spectacle.
  • Joel and Ellie’s father-daughter relationship is gaming’s gold standard for authentic emotional dynamics, developed through natural dialogue and interactive moments rather than exposition or cutscenes.
  • Resource scarcity and the elegant crafting system create genuine survival tension, forcing players to constantly prioritize between healing items and combat tools while managing limited ammunition.
  • The game’s atmosphere and world-building shine through environmental storytelling, realistic decay patterns, and faction ideologies that make the post-apocalyptic setting feel thoroughly researched and lived-in.
  • Troy Baker and Ashley Johnson’s award-winning performances, enhanced by cutting-edge motion capture in the PS5/PC remake, deliver career-defining voice acting that sets industry standards for character authenticity.
  • While the linear structure limits player agency and gameplay encounters follow predictable arena-clearing patterns, The Last of Us compensates with a focused 15-hour runtime that respects player time and delivers one of gaming’s most powerful narratives.

What Makes The Last of Us a Groundbreaking Experience

The Last of Us succeeded where countless others failed by treating its gameplay and narrative as inseparable partners rather than competing elements. Naughty Dog built a world where every environmental detail, a child’s abandoned backpack, graffiti marking safe zones, skeletal remains in a subway tunnel, tells a story without a single line of dialogue.

The game’s revolutionary approach lies in its restraint. Unlike most AAA titles that bombard players with set pieces and explosions, The Last of Us understands the power of silence. Long stretches pass with only ambient sound and the crunch of debris underfoot. When violence erupts, it’s messy, desperate, and earned.

What truly sets it apart is the seamless integration of character development into gameplay moments. Joel teaching Ellie to swim isn’t a cutscene, it’s an interactive beat that builds their relationship while advancing the plot. These moments accumulate into something greater than the sum of their parts, creating an emotional investment that most games can’t touch.

The impact was immediate and measurable. The original release scored 95/100 on Metacritic, collected over 200 Game of the Year awards, and influenced a generation of developers. Games like God of War (2018), Hellblade, and even Red Dead Redemption 2 owe a debt to the template The Last of Us established.

Story and Narrative: A Post-Apocalyptic Journey Like No Other

Set twenty years after a cordyceps fungal outbreak decimates civilization, The Last of Us follows Joel, a hardened smuggler, as he escorts Ellie, a 14-year-old girl with immunity to the infection, across a ruined America. The setup sounds generic on paper. The execution is anything but.

The narrative spans four seasons and roughly a year of in-game time, taking players from Boston’s quarantine zone through Pittsburgh’s hunter-infested ruins, the serene but deadly Wyoming wilderness, and finally to a hospital in Salt Lake City. Each location feels geographically and culturally distinct, with environmental storytelling doing heavy lifting alongside dialogue.

Joel and Ellie’s Emotional Bond

The father-daughter dynamic between Joel and Ellie forms the beating heart of the experience. Joel lost his daughter Sarah in the outbreak’s initial chaos, a prologue sequence that remains one of gaming’s most gut-wrenching openings. His relationship with Ellie begins as purely transactional but gradually evolves into something that mirrors what he lost.

What makes this bond work is the writing’s willingness to let it develop naturally. Early chapters show Joel’s emotional walls clearly intact. Ellie chips away at them through humor, curiosity, and sheer persistence. By the time they reach the University of Eastern Colorado, their banter feels authentic, he’s become protective, she’s become dependent, and the game doesn’t need to announce it.

The controversial ending capitalizes on this bond brilliantly. Joel’s decision to save Ellie by massacring the Fireflies and lying to her about it afterward isn’t heroic, it’s selfish, human, and utterly believable for his character. It’s the kind of morally complex conclusion that most games would focus-test into oblivion.

The Cordyceps Infection and World-Building

Naughty Dog based their infection on real-world cordyceps fungi, which infect insects and manipulate their behavior. This grounding in actual science gives the horror a disturbing plausibility. Infected humans progress through stages: Runners retain some humanity, Stalkers exhibit predatory intelligence, Clickers rely on echolocation after fungal growths destroy their eyes, and Bloaters become walking tanks covered in fungal armor.

The world-building extends beyond the infected. FEDRA (Federal Disaster Response Agency) maintains authoritarian control over quarantine zones. The Fireflies fight as a revolutionary militia. Survivor camps range from organized communities to cannibal groups led by a preacher. Each faction feels ideologically consistent with their circumstances.

Environmental design reinforces the timeline. Nature reclaims cities in ways that feel researched, specific plant species overtaking buildings, water damage patterns, the way infrastructure crumbles. The attention to decay creates a world that feels lived-in (or died-in) rather than designed for a video game.

Gameplay Mechanics: Survival, Stealth, and Combat

The Last of Us builds its gameplay around scarcity and consequence. Unlike contemporary shooters where ammo is plentiful and health regenerates, here every bullet counts and every mistake can cascade into disaster. This design philosophy supports the narrative’s themes while creating genuinely tense encounters.

Resource Management and Crafting System

The crafting system is elegant in its simplicity. Players scavenge components, alcohol, rags, blades, binding, sugar, explosives, scattered throughout environments. These combine into useful items:

  • Health kits (alcohol + rags)
  • Molotov cocktails (alcohol + rags + binding)
  • Nail bombs (blade + explosives + binding)
  • Smoke bombs (sugar + explosives)
  • Shivs (blade + binding, required for stealth kills on Clickers)

The genius is in the overlap. Alcohol and rags can become either healing or fire bombs, forcing constant priority decisions. Do you craft medkits for survivability or molotovs for crowd control? There’s no right answer, which keeps the tension high.

Ammunition scarcity adds another layer. The game distributes just enough resources to barely scrape through encounters if you’re efficient. Waste shots or miss a stealth kill, and you’ll find yourself crafting shivs from precious materials or desperately swinging a pipe at Clickers.

Stealth vs. Action Approach

Most encounters allow multiple approaches. Stealth is generally optimal, Listen Mode reveals enemy positions through walls, letting players tag patrol routes and strike from shadows. Joel can choke out human enemies silently or use shivs on Clickers before they echolocate his position.

Going loud is always an option, just a costly one. Gunfire attracts nearby infected and alerts distant enemies. The 9mm pistol, revolver, pump shotgun, hunting rifle, El Diablo (sawed-off), and flamethrower each handle distinctly, with weighty recoil and satisfying feedback. But ammo constraints mean even the best shooters can’t brute-force everything.

The game shines when stealth breaks down mid-encounter. You take out three hunters quietly, but the fourth spots you. Now you’re scrambling, throw a brick to stun him, shotgun blast to the chest, sprint behind cover as his buddies converge, toss your last molotov to create separation. These emergent moments feel desperate in the best way.

Enemy Types and AI Behavior

Human enemies flank, call out Joel’s position, and flush him from cover with molotovs. They’re smart enough to search methodically after losing sight and will execute allies you’re using as human shields. On Survivor and Grounded difficulties, their accuracy and aggression make firefights genuinely punishing.

Infected follow different rules. Runners charge in groups but die easily. Stalkers (introduced in Pittsburgh) hide behind cover and ambush, blending human intelligence with infected aggression. Clickers are the iconic threat, one-hit kills if they grab you, immune to frontal melee attacks, but blind and vulnerable to stealth. Bloaters absorb absurd damage and throw spore bombs that create deadly clouds.

The AI occasionally glitches, Ellie and other companions sometimes stand in plain view without alerting enemies, breaking immersion. The PS5 remake improved this somewhat, but it’s not perfect. Still, when the systems work (which is most of the time), encounters feel dynamic and reactive.

Graphics, Sound Design, and Immersive Atmosphere

Even by 2026 standards, The Last of Us remains visually impressive, a testament to Naughty Dog’s technical artistry and the care put into each version.

Visual Presentation Across Platforms

The original PS3 release pushed that hardware to its absolute limit. Character models featured unprecedented detail for the era, with facial animations driven by motion capture that captured micro-expressions. Lighting was baked but carefully authored, creating moody interiors and oppressive atmospheres.

The PS4 Remastered version (2014) bumped resolution to 1080p, doubled the framerate to 60fps, and improved shadow quality and draw distances. The framerate boost alone transformed combat fluidity and responsiveness. For five years, this was the definitive way to experience the game.

The PS5/PC remake (2022, titled The Last of Us Part I) rebuilt assets from scratch using the engine developed for Part II. The improvements are substantial: real-time lighting with ray tracing on PC, massively improved character models with realistic skin shading and hair rendering, enhanced environmental detail, and improved accessibility features. Facial animations were completely redone using modern capture technology.

On PC specifically, the remake supports ultrawide monitors, uncapped framerates, DLSS/FSR upscaling, and extensive graphical options. The initial launch suffered serious performance issues and stuttering, but patches throughout 2023 largely resolved stability problems. As of 2026, it runs well on mid-to-high-end rigs.

Award-Winning Score and Voice Acting

Gustavo Santaolalla’s minimalist score defines The Last of Us’ sonic identity. Built around guitar, piano, and sparse percussion, the music never overwhelms. Tracks like “The Last of Us” theme and “Vanishing Grace” evoke melancholy and isolation without manipulation. Critically, the score knows when to shut up, long segments play with only ambient sound, making musical moments land harder.

The voice acting elevated industry standards overnight. Troy Baker (Joel) and Ashley Johnson (Ellie) delivered performances that IGN and numerous outlets compared favorably to prestige television. Their chemistry feels unrehearsed and natural, with overlapping dialogue and realistic reactions.

Supporting cast members like Annie Wersching (Tess), Merle Dandridge (Marlene), and Hana Hayes (Sarah) match the leads beat for beat. Even minor characters feel like actual people rather than exposition dispensers.

Sound design deserves equal praise. The Clickers’ echolocation clicks are horrifyingly distinct, once you hear them, adrenaline spikes. Environmental audio creates constant low-level dread: distant gunfire, building creaks, infected shrieks echoing through subway tunnels. The mix is exceptional, providing clear directional information crucial for stealth gameplay.

Level Design and Pacing

Naughty Dog structures The Last of Us as a linear experience with wide-linear levels, essentially corridors with exploration space. This approach sacrifices open-world freedom for tightly controlled pacing and authored experiences.

Each chapter balances combat, exploration, environmental puzzles, and narrative beats. The Boston section establishes mechanics and world rules. Pittsburgh introduces hunter enemies and Stalkers, ramping difficulty. The suburbs and lakeside resort provide breathing room with minimal combat, focusing on character development. Wyoming delivers rural horror with the sniper sequence and Bloater introduction. The University serves as a climactic encounter before the brutal winter chapter.

The winter section, where players control Ellie for several hours, represents the game’s structural high point. It recontextualizes mechanics, Ellie is smaller, weaker, and relies more heavily on stealth. The switch in perspective refreshes gameplay while advancing Ellie’s character arc from dependent to survivor. The final confrontation with David is visceral and unforgettable.

Pacing occasionally stumbles. The sewer section drags with repetitive valve-turning and ladder-fetching. The financial district’s generator puzzle feels like padding. These moments are brief, but they interrupt otherwise excellent flow.

Level design cleverly gates progress without feeling artificial. Buildings collapse, forcing detours. Flooded basements require swimming (and separate Joel from Ellie, who can’t swim). Infected nests block direct routes. These obstacles feel organic to the world rather than video game-y.

The roughly 15-hour runtime (12-20 depending on difficulty and exploration) feels appropriate. The game doesn’t overstay its welcome or rush crucial beats. By the ending, players have spent enough time with Joel and Ellie to understand the weight of the final choice.

Character Development and Performance

Character work separates The Last of Us from technically competent games and transforms it into something emotionally resonant.

Joel begins the story broken. Twenty years of survival have calcified him into someone willing to torture informants, abandon strangers, and suppress empathy. Troy Baker’s performance captures this through subtle details, the way Joel’s jaw tightens when Ellie asks personal questions, how his accent thickens when stressed, the exhaustion in his posture.

Ellie is the inverse: born into apocalypse, she’s never known the world before. Ashley Johnson plays her with humor, curiosity, and a vulnerability she masks with jokes and profanity. The progression from naive kid cracking puns to someone who can torture information out of enemies feels earned, not contrived.

Supporting characters avoid archetypes. Tess isn’t just Joel’s partner, she’s pragmatic, ruthless, and accepts her infection with grim determination. Bill is a paranoid survivalist, but his backstory with Frank adds tragic depth. Sam and Henry‘s arc provides one of the game’s most heartbreaking moments. David manages to be terrifying precisely because his reasonable exterior barely masks the predator beneath.

The game develops characters through incidental dialogue and optional conversations. Ellie’s joke book and her reactions to giraffes, arcade cabinets, and other relics of the old world reveal personality organically. Joel’s gradual willingness to engage with her observations tracks his emotional thaw without explicit declaration.

Motion capture technology, cutting-edge in 2013, refined for the remake, captures performances with fidelity that sells every moment. When Ellie’s voice cracks during emotional scenes or Joel’s hands tremble while holding a photograph, these details ground the fiction in human behavior.

Replayability and Game Modes

The Last of Us offers decent but not exceptional replay value. The linear structure means subsequent playthroughs follow identical story beats, which limits discovery compared to games with branching narratives or procedural generation.

What does encourage replays:

New Game Plus carries over upgrades, letting players experiment with fully upgraded weapons and abilities from the start. This transforms the balance, scarcity remains a factor, but maxed-out Joel is noticeably more capable.

Difficulty modes dramatically alter the experience:

  • Easy/Normal: Forgiving checkpoints, ample resources, generous Listen Mode
  • Hard/Survivor: Limited resources, smarter AI, restricted Listen Mode
  • Grounded (added in Remastered): No Listen Mode, no HUD, one-hit deaths from Clickers, extreme scarcity. This mode transforms The Last of Us into a proper survival horror experience where every encounter requires planning.

Trophy/achievement hunters have incentive to replay for collectibles: Firefly pendants (30 total), training manuals (12), comics (14), and artifacts (141). Finding everything requires thorough exploration and chapter select.

The Left Behind DLC, included in Remastered and subsequent versions, adds roughly three hours of content. It splits between Ellie and Riley’s pre-game backstory and Ellie scavenging for supplies after Joel’s injury. The mall sequences provide excellent character work and some of the best environmental storytelling in the package.

Absent are the modes that extend some games indefinitely: no randomized elements, no meaningful alternate endings, no branching choices. Once you’ve seen the story, replays offer mechanical challenges and missed collectibles rather than narrative surprises.

The multiplayer component, Factions, was a standout in the PS3/PS4 versions, a tense, tactical PvP mode with resource scarcity mechanics mirroring the campaign. Unfortunately, Factions isn’t included in the PS5/PC remake, which stings for players who invested hundreds of hours into that mode. Naughty Dog announced a standalone Factions game, but as of 2026, it remains in development limbo.

How The Last of Us Compares to Modern Story-Driven Games in 2026

Thirteen years post-release, The Last of Us competes in a landscape it helped create. The influence is obvious: God of War’s father-son dynamic, Hellblade’s intimate character focus, even The Witcher 3’s commitment to consequential storytelling all reflect lessons the industry learned from Naughty Dog’s success.

By 2026 standards, the gameplay feels somewhat dated. Movement is weightier and less responsive than contemporaries like The Last of Us Part II or modern third-person games. The jump button’s absence (climbing is contextual) and the limited interaction with environments stand out when compared to games that offer more systemic freedom.

Combat encounters, while still tense, follow predictable rhythms. Most boil down to clearing arena-like spaces of enemies before progressing. Games like Dishonored 2, Deathloop, or even recent entries in franchises The Last of Us influenced (Uncharted 4, A Plague Tale: Requiem) offer more varied approaches and emergent solutions.

What hasn’t aged: the emotional core. The character work, performances, and narrative ambition still hit as hard as they did in 2013. Players accustomed to modern graphical fidelity will find the PS5/PC remake holds up perfectly well against 2026 releases. The PS4 version looks dated but serviceable: the PS3 original feels like a museum piece, impressive for its time but rough by current standards.

The linearity, once a potential weakness, now feels refreshing. In an era dominated by 100+ hour open-world checklists, The Last of Us’ focused 15-hour runtime respects player time. It knows what it wants to say and says it without filler.

Story-driven single-player experiences are healthier in 2026 than doomsayers predicted a decade ago, partly because The Last of Us proved their commercial viability. Games like God of War Ragnarök, Baldur’s Gate 3, and Alan Wake 2 continue pushing narrative boundaries, but The Last of Us remains the touchstone against which they’re measured.

Strengths and Weaknesses

What The Last of Us Gets Right

Character-driven narrative: Joel and Ellie’s relationship is gaming’s gold standard for emotionally authentic character dynamics. The writing trusts players to read between lines rather than spelling out every emotion.

Atmosphere and world-building: Environmental storytelling, sound design, and visual presentation create a consistently oppressive, immersive world. The attention to decay, faction ideologies, and how society collapsed feels researched and believable.

Performance and presentation: Troy Baker and Ashley Johnson deliver career-defining work. The mo-cap and facial animation (especially in the remake) capture nuance that sells dramatic moments.

Tension and pacing: Resource scarcity creates genuine survival tension. The balance between combat, exploration, and story beats maintains engagement across 15 hours.

Thematic depth: The game explores uncomfortable questions about morality, tribalism, and what we’re willing to sacrifice for those we love. The ending refuses easy answers, trusting players to wrestle with Joel’s choice.

Technical achievement: Naughty Dog extracted incredible performance from every platform. The PS3 original pushed that hardware beyond reasonable limits: the PS5/PC remake showcases cutting-edge tech while respecting the source material.

Areas Where It Falls Short

Gameplay repetition: Encounter design follows formulas, clear the arena, solve simple environmental puzzle, progress. By the back third, the loop becomes predictable even though enemy variety.

Limited player agency: The linearity serves the story but restricts player expression. You can’t spare enemies, negotiate alternative solutions, or influence narrative outcomes. This works thematically but may frustrate players expecting RPG-style choices.

Companion AI inconsistencies: Ellie and other allies sometimes stand in enemy sightlines without triggering alerts, breaking immersion. The remake improved this but didn’t eliminate it.

Environmental puzzles: Ladder-finding and pallet-floating sequences pad runtime without adding meaningful engagement. They’re infrequent but noticeable speed bumps.

Accessibility (original/Remastered): The PS3 and PS4 versions lacked extensive accessibility options. The remake addresses this with comprehensive features, but players stuck on older versions face unnecessary barriers.

Factions absence: Removing the multiplayer mode from the remake without offering a replacement disappointed longtime fans, especially with the standalone Factions project in uncertain status.

Price-to-content ratio (remake): The PS5/PC remake launched at $70 for a game many players had already purchased twice. Without Factions and minimal additional content beyond visual upgrades, the value proposition is debatable.

Conclusion

The Last of Us earns its reputation through the rare combination of technical excellence, masterful storytelling, and emotional authenticity. It’s a game willing to let players sit in uncomfortable silence, willing to end on a morally questionable note, and willing to prioritize character development over spectacle.

Is it perfect? No. The gameplay loop shows its age, especially against modern titles that offer more systemic depth. Environmental puzzles occasionally interrupt flow. Linearity limits replayability.

But these criticisms feel minor against what the game achieves. Thirteen years later, Joel and Ellie’s journey remains one of gaming’s most powerful narratives. The world Naughty Dog built feels lived-in and meticulously researched. The performances set industry standards for motion capture and voice acting. The atmosphere, that oppressive, melancholic dread, is unmatched.

For newcomers in 2026, the PS5/PC remake is the version to play, offering modern accessibility and visuals that honor the original vision. For veterans, whether it’s worth revisiting depends on your attachment to the material and tolerance for replaying a linear experience. Either way, The Last of Us stands as essential gaming history, a before-and-after moment that proved interactive media could deliver stories as complex and emotionally devastating as any other medium.

The fact that we’re still talking about a 2013 game in these terms tells you everything you need to know.

MLB The Show 25 marks another year of Sony San Diego Studio’s dominance in the baseball sim genre, and for Xbox players, it’s a chance to experience what PlayStation fans have enjoyed exclusively for decades. Since the franchise made its multi-platform debut in 2021, Xbox gamers have finally gotten their hands on the most polished baseball simulation available. The Show 25 builds on that foundation with refined gameplay, deeper modes, and optimizations that take full advantage of Xbox Series X

|

S hardware.

Whether you’re a Diamond Dynasty grinder, a Road to the Show purist, or someone who just wants to recreate the magic of October baseball, The Show 25 delivers. This year’s iteration introduces meaningful upgrades to pitching mechanics, batting feedback systems, and franchise AI that make every at-bat and every managerial decision feel consequential. For Xbox players specifically, the integration with Game Pass and console-specific performance tweaks make this the smoothest experience yet on Microsoft’s platform.

Key Takeaways

  • MLB The Show 25 on Xbox delivers 4K/60 FPS gameplay on Series X with refined mechanics like Perfect Pitch Plus and Batting Vision 2.0 that fundamentally improve how you approach at-bats and pitching strategies.
  • Game Pass subscribers get exclusive 10% Stub discounts and free Diamond Dynasty packs monthly, making MLB The Show 25 Xbox’s most accessible sports simulation at no additional cost.
  • The overhauled Franchise Mode features improved GM AI, regional scouting systems, and dynamic morale mechanics that make multi-season saves feel engaging and unpredictable rather than stagnant.
  • Diamond Dynasty’s free-to-play model allows competitive roster building through daily missions, Conquest maps, and card flipping without demanding real-money purchases to stay competitive.
  • Xbox Series S performance at 1440p/60 FPS remains nearly identical to Series X during gameplay, while Xbox One’s 30 FPS frame rate introduces input lag that puts you at a disadvantage in ranked seasons.
  • Cross-platform progression and unified community marketplace sync your Diamond Dynasty progress across Xbox, PlayStation, and Switch, keeping your team and economy stable regardless of platform switching.

What’s New in MLB The Show 25 for Xbox Players

The Show 25 doesn’t reinvent the wheel, but it sharpens every spoke. San Diego Studio focused on iterative improvements that compound into a noticeably better experience. For Xbox players, this year’s release feels more native to the platform than ever before.

Enhanced Graphics and Performance Optimization

On Xbox Series X, MLB The Show 25 runs at a locked 60 FPS in 4K with HDR support. The stadium lighting has been completely overhauled, you’ll notice the difference immediately during day-to-night transition games at Fenway or Dodger Stadium. Player models received texture upgrades, with more realistic skin tones, jersey fabric physics, and facial animations during close-ups.

Series S players get a solid 1440p at 60 FPS, which maintains the buttery-smooth gameplay without visual compromises that impact performance. Load times on both consoles are under 8 seconds when jumping into games, thanks to optimized asset streaming. Xbox One versions run at 1080p/30 FPS, which is playable but noticeably less responsive during online matches.

The HDR implementation finally feels calibrated correctly for Xbox displays. Previous years had washed-out highlights during day games, but The Show 25 balances bright sunlight and shadow detail without crushing blacks or blowing out the sky.

New Gameplay Mechanics and Features

Perfect Pitch Plus (PPP) is the standout addition this year. It replaces the old meter system with a gesture-based input that reads stick movement speed and angle to determine break and location. It takes practice, but once mastered, you’ll have surgical control over two-seamers and sliders. Timing windows are tighter than last year, expect more foul balls and check swings until you dial in the new feedback.

Batting Vision 2.0 introduces a dynamic PCI (plate coverage indicator) that shrinks under two-strike counts and expands when you’re ahead in the count. This mirrors real-world plate discipline pressure and makes working counts feel more strategic. Contact results now account for barrel angle and exit velocity with more granularity, so squared-up balls don’t just become automatic home runs unless you’re genuinely under the pitch.

Baserunning AI got a quiet but crucial upgrade. CPU runners no longer make boneheaded decisions on shallow fly balls, and lead-off logic adapts to pitcher pickoff tendencies. Stealing feels risk-reward balanced instead of the free-base exploit it was in The Show 24.

Xbox-Exclusive Enhancements and Integration

Xbox Game Pass Ultimate subscribers get 10% off Stub purchases and exclusive Diamond Dynasty packs through partnership bonuses. It’s not game-breaking, but the monthly free pack (usually an 85+ OVR player) adds up over the season.

Quick Resume works flawlessly on Series X

|

S, letting you jump back into a Franchise game mid-season without reloading. The Xbox controller’s impulse triggers provide subtle feedback during pitching release and bat contact, it’s a small touch, but PS5’s DualSense doesn’t have a monopoly on haptic immersion anymore.

Achievements are integrated with Diamond Dynasty programs. Unlocking specific Xbox achievements grants Stubs and XP toward seasonal rewards, creating a dual-progression system that feels rewarding rather than grindy.

Game Modes: What MLB The Show 25 Offers on Xbox

The Show 25 doesn’t skimp on content. Whether you’re chasing cards, building a legacy, or just playing quick exhibition matches, there’s a mode tailored to your playstyle.

Diamond Dynasty: Building Your Ultimate Team

Diamond Dynasty remains the ultimate time sink and the mode that keeps the community engaged year-round. It’s The Show’s answer to Ultimate Team modes in other sports games, but with a far more generous free-to-play structure.

You start with a squad of bronze and silver players and grind through moments, conquest maps, and online ranked seasons to earn Stubs (the in-game currency). The Season 1 program includes legends like Randy Johnson and Ken Griffey Jr. as reward milestones. Unlike previous years, the program XP cap was removed, so dedicated players can unlock top-tier cards without hitting artificial walls.

Mini Seasons return with better rewards and shorter game lengths (3 innings instead of 9). It’s perfect for grinding Stubs while you’re half-watching a stream. Battle Royale offers a draft-style mode where you build a team from randomized player pools and compete for tiered rewards.

The marketplace remains active and accessible on Xbox. Flipping cards is still viable if you’re patient, and the companion app lets you manage your lineup and buy/sell cards while away from the console.

Road to the Show: Your Journey to MLB Stardom

Road to the Show (RTTS) is the career mode where you create a player and grind from the minors to the Hall of Fame. The Show 25 adds dynamic morale systems that affect your player’s performance based on contract negotiations, team chemistry, and media interactions.

You’ll now face off-field decisions: take a hometown discount to stay with the team that drafted you, or chase a max contract in free agency? Your choices influence clubhouse dynamics and unlock unique perks. A high-morale player gets stat boosts during clutch moments, while low morale results in inconsistent performance.

The archetype system lets you build a two-way player (pitcher and hitter) or specialize in contact hitting, power, speed, or defense. Progression feels faster than The Show 24, with XP multipliers for achieving daily goals and strong performances.

Integration with Diamond Dynasty means your RTTS player can be used in DD lineups once they hit certain OVR thresholds. It’s a smart way to keep both modes relevant without forcing you to choose one over the other.

Franchise Mode and March to October

Franchise Mode received the most significant overhaul in years. The new GM AI makes realistic trades and contract decisions, so rebuilding teams actually improve over seasons, and contenders don’t randomly blow up their rosters.

Scouting overhaul introduces a regional scouting system where you assign scouts to specific areas and player types. Instead of generic prospect ratings, you get detailed reports on plate discipline, pitch repertoire, and injury risk. International free agency is now interactive, letting you negotiate with top prospects before the signing period opens.

March to October remains the condensed franchise experience. You play key moments across a season and make roster/strategy decisions between games. The Show 25 adds playoff scenarios where single elimination games carry higher stakes and pressure modifiers. It’s ideal for players who want the franchise feel without committing to simming 162 games.

Getting Started: Tips for Xbox Players New to The Show

If you’re jumping into The Show 25 as your first baseball sim, the learning curve is real but manageable. The game rewards patience and pattern recognition over button-mashing reflexes.

Mastering the Controls on Xbox Controller

Hitting uses the right stick (PCI control) and buttons for swing types. Start with directional hitting if you’re brand new, it removes the PCI aiming entirely and focuses on timing. Once comfortable, switch to Zone hitting for full control. Move the PCI (right stick) to where you predict the pitch and press X for normal swing, A for contact, or B for power.

Don’t sleep on check swings. Letting go of the swing button before full commitment can save you from chasing garbage out of the zone. On Xbox, the trigger feedback helps you feel when you’ve committed too far.

Pitching has three main interfaces: Meter, Pinpoint, and Pure Analog. Pinpoint Pitching (the new Perfect Pitch Plus system) offers the most control but demands precision. For beginners, Pulse Pitching is forgiving, just release when the circle is smallest. As you improve, transition to Pinpoint to gain the edge in online matches.

Fielding is mostly automated with occasional throw-meter prompts. Use LB to dive, hold Y for crow-hop throws, and tap Y for quick throws. Don’t overthink it, The Show’s fielding is the most forgiving part of the game.

Base running: LB advances all runners, RB sends them back. Hold LT and press A/B/X/Y to control individual runners. The key is reading the outfielder’s arm strength and not getting greedy on fly balls.

Best Settings for Optimal Performance

Head to Settings > Display and toggle on High Framerate Mode if you’re on Series X

|

S. This locks 60 FPS and disables unnecessary visual fluff that can cause input lag.

Set Strike Zone Camera for hitting, it’s the most competitive view and helps with PCI placement. For pitching, Pitcher camera gives you the same perspective the AI sees, making it easier to spot hitter tendencies.

Under Gameplay Settings, adjust Pitch Speed and Hitting Difficulty separately. Start both on Rookie or Veteran, then bump hitting to All-Star once you’re making consistent contact. Pitch speed can stay lower if you’re struggling with timing.

Enable Batting Feedback to see your PCI placement after swings. This is critical for learning why you popped up or grounded out. Turn on Hot Zones display to see which parts of the plate each hitter crushes.

For online play, activate High-Speed Internet mode in Network Settings. It prioritizes connection stability over visual fidelity during ranked matches.

Advanced Strategies to Dominate in MLB The Show 25

Once you’ve got the basics down, The Show 25 becomes a chess match. Recognizing tendencies, exploiting weaknesses, and adjusting mid-game separate good players from elite ones.

Pitching Tips: Control the Mound

Mix speeds and locations. The most common mistake is throwing the same pitch type repeatedly. Fastball high, changeup low, slider away, keep hitters guessing. If your opponent sits fastball, they’ll be late on breaking balls.

Work the edges. Pitches on the black (edge of the strike zone) are harder to square up. Use Pinpoint Pitching to paint corners consistently. According to many experienced players following Xbox game analysis, precision pitching is the difference between All-Star and Legend difficulty.

Attack weaknesses. Check the hitter’s Cold Zones before each at-bat. If they struggle low and away, spam sinkers and sliders there until they prove they can hit it. Don’t groove pitches middle-middle just because you’re ahead in the count.

Use pickoffs and slide-steps. Fast runners will test you. Throw over to first occasionally to keep them honest, and use slide-step deliveries (hold LB while pitching) to shorten your windup when a runner’s on base.

Save your closer. Don’t burn your best reliever in the 6th inning of a tied game. The Show 25’s stamina system punishes overuse, and a gassed closer gives up meatballs in the 9th.

Batting Techniques: Timing and Plate Discipline

Sit on a pitch and location. Before the pitch, decide where you think it’s coming and commit your PCI there. If you’re right, you’ll crush it. If you’re wrong, you might whiff, but that’s better than being late on everything by reacting.

Lay off the high fastball. It’s the most common bait pitch in online play. Unless you have two strikes, let it go. The AI and human opponents love throwing high heat to induce pop-ups.

Work counts. Taking pitches forces your opponent to throw strikes, which gives you better pitches to hit. A 3-1 count usually means a fastball down the middle. Patience pays off in The Show 25 more than any previous version.

Use power swings sparingly. Power swings (B button) shrink your PCI and increase strikeout risk. Reserve them for pitches middle-in with power hitters. Contact swings (A button) are better for two-strike counts and hitting with runners in scoring position.

Check your swing feedback. After every out, glance at the PCI placement. If you’re consistently under the ball, adjust your timing slightly earlier. If you’re rolling over everything, you’re swinging too late.

Fielding and Base Running Excellence

Pre-pitch positioning matters. If you’re facing a pull-heavy lefty, shift your infield right. The Show 25 lets you adjust defender depth and alignment on the fly with the D-pad.

Prioritize defense at catcher and shortstop. A gold-glove catcher prevents passed balls and improves framing, which can steal strikes. Shortstops with low fielding will cost you runs on routine ground balls.

Base running aggression: Always tag up on deep fly balls with runners on third and less than two outs. On base hits to the outfield, read the fielder’s arm rating (shown in the fielding display). If it’s below 70, you can stretch singles into doubles.

Stealing bases: Watch the pitcher’s timing. If they have a slow windup, send your runner on first movement. Success rate is tied to the runner’s speed and steal rating versus the catcher’s arm. Don’t attempt steals with runners below 70 speed unless the catcher is weak.

Hit-and-run plays are underused but effective. With a contact hitter up and a fast runner on first, call a hit-and-run (RB + A). The runner takes off, and the hitter makes contact to avoid a double play. It’s perfect for moving runners into scoring position against tough pitchers.

Diamond Dynasty Guide: Building a Championship Roster

Diamond Dynasty can feel overwhelming with all the card types, programs, and currencies. Here’s how to build a competitive squad without dropping cash on Stubs.

Earning Stubs Without Spending Real Money

Complete daily missions and moments. These reward 500-2000 Stubs for simple tasks like hitting a home run or striking out three batters. They reset daily, so logging in consistently stacks up fast.

Play Conquest maps. Conquest is a single-player territory-capture mode that rewards packs, Stubs, and XP. The USA map is beginner-friendly and grants multiple packs just for completion. Each stolen stronghold gives 500-1000 Stubs, and you can repeat maps after finishing them.

Flip cards in the marketplace. Buy low, sell high. Look for high-demand cards (popular legends or meta players) where the buy-now price is significantly higher than the sell-now price. Buy at sell-now, list slightly below buy-now, and pocket the difference. It’s tedious but profitable if you’re patient.

Play Mini Seasons. A full season (28 games at 3 innings each) takes about 4-5 hours and rewards 10,000+ Stubs plus packs. You can sim games you don’t want to play and only control key moments.

Rank up in Battle Royale. Even if you don’t go 12-0, a 6-win run grants a gold player pack and a few thousand Stubs. Entry fee is 1,500 Stubs, so breaking even is easy.

Sell duplicate cards immediately. Don’t hoard commons and bronzes. List them for 25-50 Stubs each. It’s pocket change per card, but it adds up when you’re opening packs regularly.

Best Card Types and Team Building Strategies

Legends and Flashbacks are endgame content. Cards like 99 OVR Babe Ruth or Randy Johnson dominate, but they’re expensive (200k+ Stubs). Early in the season, focus on Live Series diamonds (85-89 OVR) that perform well above their rating. Players like Bobby Witt Jr. and Gunnar Henderson are meta picks for under 20k Stubs.

Team Chemistry doesn’t exist in The Show 25, so mix and match any players you want. Your lineup can be a mashup of Yankees legends and Dodgers stars without penalty.

Prioritize hitting over pitching. You control hitting every at-bat, but pitching success depends on your opponent’s skill. A stacked lineup of 90+ contact and power hitters will win more games than an elite rotation.

Build a balanced bullpen. You need at least two lefties and four righties with different pitch mixes. Flamethrowers (100+ MPH fastballs) are great for the 9th inning, but control-oriented pitchers (high BB/9 rating) are better for middle relief.

Platoon advantages matter. Stack your bench with lefty bats to pinch-hit against righty relievers and vice versa. In ranked seasons, games are often decided by late-inning substitutions.

Parallel XP boosts your cards. Every card gains XP as you use it, unlocking +1 to stats at Parallel 1, +2 at Parallel 2, etc. A Parallel 5 diamond is noticeably better than its base version. Stick with a core lineup to maximize parallels instead of constantly swapping players.

Cross-Platform Play and Online Features on Xbox

MLB The Show 25 supports full cross-platform play across Xbox, PlayStation, and Nintendo Switch. You can squad up with friends regardless of their console or face them in ranked seasons without restrictions.

The cross-progression system links your Diamond Dynasty team and RTTS player to your San Diego Studio account, so switching between Xbox and another platform keeps your progress intact. Just sign in with the same account and everything syncs.

Ranked Seasons run in roughly 6-week cycles with tiered rewards. You start in Spring Training (lowest rank) and climb to World Series (highest). Wins earn rating points, losses subtract them. The competition tightens significantly at the Championship Series rank and above. Many serious players track competitive rankings and meta shifts to stay ahead.

Co-op modes let you team up with a friend online in Diamond Dynasty. You each control half the lineup (one bats odd spots, one bats even) and alternate pitching duties. It’s chaotic fun and counts toward program XP.

Events are limited-time modes with unique squad-building rules (e.g., only Gold cards, only players from specific teams, etc.). Rewards scale with wins, and the entry is free. Events rotate every two weeks and offer exclusive cards unavailable elsewhere.

Online stability is solid on Xbox Series X

|

S. Lag is rare if both players have decent connections, though Cross-play with Switch users occasionally introduces frame rate desync. There’s no region lock, so you might face international opponents during off-peak hours, which can introduce latency.

The Community Market is cross-platform, meaning card prices are unified. This keeps the economy stable and prevents platform-specific price gouging. Xbox players buy and sell from the same pool as PlayStation users.

How MLB The Show 25 Performs on Different Xbox Consoles

Performance varies significantly depending on which Xbox you’re running. Here’s the breakdown.

Xbox Series X

|

S Performance

Xbox Series X is the definitive console experience for The Show 25. Native 4K at 60 FPS with HDR10 support makes every stadium look photorealistic. Textures load instantly, and there’s zero pop-in during player intros or replays. Load times from dashboard to first pitch average 6-8 seconds, which is a massive improvement over last-gen.

The impulse triggers add immersive feedback during bat contact and pitch release. It’s subtle, nothing game-changing, but it enhances the feel of crushing a fastball over the fence.

Xbox Series S runs at 1440p/60 FPS, and honestly, the performance difference is negligible during gameplay. Side-by-side with Series X, you’ll notice slightly softer textures on uniforms and grass, but nothing that impacts the experience. Load times are nearly identical (8-10 seconds). If you’re on a 1080p display, Series S is perfect and saves you a few hundred bucks.

Both consoles support Quick Resume, which is a game-changer for Franchise Mode. You can pause mid-game, turn off the console, and jump back in exactly where you left off days later.

Xbox One Compatibility and Limitations

MLB The Show 25 is playable on Xbox One and Xbox One X, but you’ll feel the hardware strain. Both run at 1080p/30 FPS, and the frame rate dip is immediately noticeable compared to current-gen. Hitting timing feels slightly less responsive, which matters in competitive online modes.

Load times balloon to 25-35 seconds when entering games or navigating Diamond Dynasty menus. Franchise simulations take longer to process between games, and there’s occasional stuttering during weather effects (rain, fog) in stadiums.

Graphically, Xbox One versions cut details like crowd animations, dynamic shadows, and stadium atmosphere lighting. Player models are lower resolution, and jerseys lack the fabric physics present on Series X

|

S. The critical aggregate review scores reflect this performance gap, with current-gen versions scoring notably higher.

Online play is where Xbox One struggles most. Input lag is more pronounced, especially during ranked seasons against Series X opponents. You’re technically at a disadvantage, though skilled players can still compete. If you’re serious about climbing ranked ladders, upgrading to Series S is worth the investment.

Xbox One X splits the difference, better textures than base Xbox One but still locked at 30 FPS. It’s the best last-gen option, but the 30 FPS cap is a dealbreaker for competitive play.

Is MLB The Show 25 Worth It for Xbox Gamers?

If you’re a baseball fan with an Xbox, the answer is straightforward: yes. The Show 25 is the most complete baseball simulation on the market, and there’s no close second. RBI Baseball is dead, and Super Mega Baseball caters to a more arcade-style experience.

For Xbox Game Pass subscribers, it’s a no-brainer. The Show 25 launched on Game Pass day one, so you’re getting a $70 game at no additional cost. Even if you’re only casually interested in baseball, the value is undeniable.

The gameplay refinements this year justify upgrading from The Show 24. Perfect Pitch Plus and Batting Vision 2.0 aren’t superficial tweaks, they fundamentally change how you approach at-bats and pitch sequencing. The Franchise AI overhaul makes long-term saves feel dynamic instead of predictable.

Diamond Dynasty’s free-to-play model remains the fairest in sports gaming. You’ll never hit a paywall that demands real money to stay competitive. Stub earning is generous, and the grind never feels exploitative. If you’ve been burned by Ultimate Team modes in Madden or FIFA, The Show’s approach will feel refreshing.

That said, if you’re not into baseball, The Show 25 won’t convert you. It’s a simulation first, which means patience, pattern recognition, and strategic thinking over twitch reflexes. There’s no “easy mode” that lets you mash buttons and win. You’ll strikeout, ground out, and get frustrated until you learn the systems.

For competitive players, ranked seasons and events offer endless replayability. The meta shifts as new cards drop, and the skill ceiling is high enough that improvement feels rewarding. If you enjoy grinding ranks and optimizing rosters, Diamond Dynasty will consume hundreds of hours.

Franchise Mode diehards finally have meaningful upgrades after years of stagnation. The scouting rework and improved AI make multi-season saves engaging again. March to October offers a middle ground if full Franchise feels too time-intensive.

If you skipped The Show 24, this is an excellent entry point. If you played 24 extensively, the improvements are evolutionary rather than revolutionary. Whether that’s enough depends on how much you crave a fresh roster and incremental gameplay polish.

Bottom line: MLB The Show 25 is the best baseball game on Xbox and one of the strongest sports sims across any platform. If you have any interest in baseball, it’s worth your time.

Conclusion

MLB The Show 25 solidifies its place as the definitive baseball experience on Xbox. San Diego Studio continues refining the formula with meaningful gameplay upgrades, deeper modes, and performance optimizations that leverage current-gen hardware. Whether you’re grinding Diamond Dynasty, chasing a Hall of Fame career in Road to the Show, or managing a franchise dynasty, there’s enough content to keep you engaged through an entire season and beyond.

Xbox players specifically benefit from Game Pass inclusion, cross-platform progression, and console-specific enhancements that make the game feel native rather than ported. The Series X

|

S versions run flawlessly, and even Xbox One players can enjoy a solid (if compromised) experience.

For newcomers, the learning curve is real but rewarding. Take time to master the controls, adjust your settings, and don’t get discouraged by early strikeouts. For veterans, the Perfect Pitch Plus system and Batting Vision 2.0 offer fresh challenges that elevate the strategic depth. The Show 25 isn’t just a roster update, it’s the culmination of years of iteration that makes every pitch, swing, and managerial decision feel consequential.

You’re three hearts down, a skeleton’s arrow just whizzed past your head, and a creeper is hissing in the distance. Your standard food won’t cut it, you need regeneration, and you need it now. That’s where the golden apple comes in. This iconic Minecraft item has saved countless players from near-death experiences since its introduction, offering not just hunger restoration but critical buffs that can turn the tide in combat, exploration, and even village management.

Golden apples aren’t your everyday food item. They’re a strategic resource that demands understanding: when to use them, where to find them, and how to maximize their effects. Whether you’re gearing up for the Ender Dragon, prepping for PvP, or trying to cure a zombie villager for better trades, knowing your golden apples inside and out is essential. This guide breaks down everything from crafting recipes to chest spawn rates, regular versus enchanted variants, and the combat math that makes them worth their weight in… well, gold.

Key Takeaways

  • Golden apples in Minecraft provide Regeneration II for 5 seconds and Absorption I for 2 minutes, making them essential for emergency healing during combat, tough encounters, and curing zombie villagers for better trades.
  • Regular golden apples are craftable with 8 gold ingots and 1 apple, while enchanted golden apples are rare loot-only items that cannot be crafted and offer superior buffs including Resistance and Fire Resistance effects.
  • Golden apples spawn in dungeons (21.8% Java, 23.5% Bedrock), mineshafts (28.2% Java, 23.0% Bedrock), desert temples (23.5% Java, 20.6% Bedrock), and bastion remnants in the Nether, making strategic exploration key for farming.
  • Eating a golden apple before combat gives players 22 total hearts at full health, providing both instant regeneration and an absorption buffer that can swing PvP fights and boss battles in your favor.
  • Curing zombie villagers with a golden apple and Splash Potion of Weakness is the only way to unlock discounted villager trades and build efficient trading halls, making apples non-negotiable for long-term gameplay.
  • Pre-buff with golden apples before dangerous encounters, hotkey them for quick access, and avoid the common mistake of eating them too late when health is critically low, as timing is crucial for maximizing their protective effects.

What Is a Golden Apple in Minecraft?

A golden apple is a rare consumable item in Minecraft that provides temporary buffs alongside restoring hunger. Unlike bread, cooked meat, or other standard food sources, golden apples grant the player Regeneration II for 5 seconds and Absorption I for 2 minutes, creating a temporary shield of extra hearts above the player’s normal health bar.

The item has been part of Minecraft since early beta versions, though its recipe and effects have shifted across updates. As of the current version in 2026, golden apples remain one of the most reliable panic buttons in a player’s inventory. They’re especially valued in situations where health regeneration needs to happen fast, faster than natural regeneration or even eating a steak.

Golden apples serve three primary functions: emergency healing during combat, providing absorption hearts before difficult encounters, and curing zombie villagers to convert them back into regular villagers. That last use is non-negotiable if players want to establish efficient villager trading halls, making golden apples a cornerstone of both combat and economy-focused gameplay.

They’re craftable, which sets them apart from their rarer cousin (the enchanted golden apple), but the gold cost isn’t trivial. Eight gold ingots per apple means players need to decide whether the buff is worth the resource investment, or whether they’d rather hunt for one in a chest.

Types of Golden Apples: Regular vs. Enchanted

Minecraft features two distinct types of golden apples, and confusing them can lead to wasted resources or missed opportunities.

Regular Golden Apple Stats and Effects

The standard golden apple provides:

  • Regeneration II for 5 seconds (restores 4 health points total)
  • Absorption I for 2 minutes (grants 2 extra absorption hearts)
  • Restores 4 hunger points (2 hunger bars) and 9.6 saturation

This version is craftable and relatively accessible once players have access to gold farms or mining operations. The regeneration effect heals quickly, useful when a player is mid-fight and can’t afford to retreat. The absorption hearts stick around for 2 minutes, giving a buffer against incoming damage.

In practical terms, eating a regular golden apple before a fight gives a player 22 total hearts (assuming full health) for the duration of the absorption effect. That’s a significant edge in PvP or when tackling tough mobs.

Enchanted Golden Apple Stats and Effects

The enchanted golden apple (also called a “god apple” or “notch apple” in older community slang) is a different beast entirely:

  • Regeneration II for 20 seconds (restores 16 health points total)
  • Absorption IV for 2 minutes (grants 8 extra absorption hearts)
  • Resistance I for 5 minutes (reduces all incoming damage by 20%)
  • Fire Resistance I for 5 minutes (immunity to fire and lava damage)
  • Restores 4 hunger points and 9.6 saturation

Enchanted golden apples are no longer craftable as of Minecraft version 1.9 (released in 2016), making them strictly loot-only items. They’re significantly rarer and more powerful, with extended regeneration and a massive absorption boost that grants 28 total hearts when consumed at full health. The added resistance and fire immunity make them invaluable for Nether exploration and extended boss fights.

How to Craft a Golden Apple

Crafting a golden apple is straightforward, but the material cost means players should plan their gold usage carefully.

Materials You’ll Need

To craft one regular golden apple, gather:

  • 8 Gold Ingots (not gold nuggets or blocks, ingots specifically)
  • 1 Apple

Gold ingots are smelted from gold ore or raw gold in a furnace or blast furnace. Apples drop from oak and dark oak leaves when broken or naturally decay, with a 0.5% drop chance per leaf block. Players can speed up apple collection by using shears on leaves or building an oak tree farm.

It’s worth noting that gold is a competitive resource. Those same 8 ingots could be used for powered rails, golden carrots (a staple food for serious players), or armor. Golden apples compete directly with these uses, so many players prefer to find them in chests rather than craft them outright.

Step-by-Step Crafting Recipe

  1. Open a crafting table (3×3 grid required).
  2. Place the apple in the center slot.
  3. Surround the apple with 8 gold ingots, one in each remaining slot around the center.
  4. The golden apple will appear in the result box. Drag it to your inventory.

This recipe hasn’t changed since the crafting system was updated, making it one of the more stable recipes in the game. Just remember: this only works for regular golden apples. Enchanted golden apples cannot be crafted and must be found as loot.

Where to Find Golden Apples in Minecraft

For players who’d rather save their gold or simply want to stockpile more apples than they can craft, chest loot is the way to go. Golden apples appear in several structure types, each with different spawn rates.

Dungeon and Mineshaft Chests

Dungeons (small mossy cobblestone rooms with a mob spawner) have a 21.8% chance of containing 1 golden apple per chest in Java Edition, and 23.5% in Bedrock Edition. These structures are common enough that players exploring cave systems will encounter multiple dungeons over time.

Abandoned mineshafts offer a 28.2% chance per chest in Java Edition (23.0% in Bedrock). Mineshafts are sprawling and contain many chest minecarts, making them one of the better spots to farm golden apples if players are willing to explore thoroughly. The recent cave generation updates in Minecraft’s underground systems have made mineshafts even more accessible.

Stronghold and Desert Temple Loot

Strongholds contain altar chests with a 2.5% chance of holding golden apples, and storeroom chests with a 47.5% chance in Java Edition (32.5% in Bedrock). Strongholds are guaranteed to exist in every world, making them reliable if a bit dangerous to navigate.

Desert temples have a 23.5% chance per chest in Java Edition (20.6% in Bedrock). Each temple contains four loot chests hidden beneath the central floor, and savvy players can loot these quickly by carefully disarming the TNT trap.

Bastion Remnant and Ruined Portal Locations

In the Nether, bastion remnants are golden apple hotspots. Generic bastion chests have a 10.7% chance, treasure chests have a 16.9% chance in Java Edition (13.9% in Bedrock), and bridge chests offer a 11.2% chance. Bastions are dangerous, filled with piglins and other hostile mobs, but their loot density makes them worth the risk for prepared players.

Ruined portals in the Overworld offer a 1.5% chance per chest, which isn’t high, but these structures are common enough that players will stumble across them regularly during exploration. Ruined portals in the Nether have slightly better odds at 1.5% as well, though their chest loot is generally less rewarding than bastions.

Where to Find Enchanted Golden Apples

Enchanted golden apples are among the rarest items in Minecraft. Since the removal of their crafting recipe in version 1.9, they’re exclusively found as chest loot, and the spawn rates are punishingly low.

Dungeon chests have a 3.1% chance in Java Edition (3.5% in Bedrock). Mineshaft chests offer a 1.4% chance in Java (1.5% in Bedrock). Desert temple chests sit at 2.6% in Java (3.1% in Bedrock). These are the same structure types that spawn regular golden apples, but the enchanted variant is far less common.

The best odds come from Ancient City chests (introduced in the 1.19 Wild Update), which have an 8.4% chance in Java Edition (7.4% in Bedrock). Ancient Cities are found deep underground in the Deep Dark biome, surrounded by sculk shriekers and the Warden, a mob that can kill even well-equipped players in a few hits. According to major gaming guides, Ancient Cities remain one of the riskiest but most rewarding locations for rare loot.

Bastion remnant treasure chests offer a 6.5% chance in Java (5.7% in Bedrock), making them the second-best source. Woodland mansions, while rare, have a 3.1% chance per chest in Java (3.5% in Bedrock).

Given these low spawn rates, most players will go dozens of hours without finding an enchanted golden apple unless they’re specifically farming Ancient Cities or treasure bastions. It’s common for experienced players to hoard enchanted golden apples and only use them in the most critical situations, Ender Dragon fights, Wither battles, or high-stakes PvP.

Best Uses for Golden Apples in Gameplay

Golden apples aren’t meant to be spammed. They’re tactical tools that shine in specific scenarios.

Combat and PvP Advantages

In PvP, golden apples are a staple. The instant regeneration and absorption hearts can swing a losing fight into a win. Competitive players on servers often carry a stack of golden apples (or as many as they can afford) and bind them to a hotkey for quick consumption mid-combat.

The 2-minute absorption duration is key. A player can eat a golden apple before engaging, then fight with 22 total hearts. Even after taking damage, the regeneration effect buys time to land hits or reposition. In organized PvP formats, golden apple cooldowns and counts are sometimes regulated to balance gameplay.

Boss Fights and Difficult Encounters

Golden apples are essential for solo Ender Dragon and Wither fights. The Ender Dragon’s knockback and the Wither’s Wither II debuff both drain health rapidly, and the absorption buffer from a golden apple can mean the difference between survival and death.

Many players bring 5-10 golden apples to a Wither fight and 3-5 for the Ender Dragon, depending on their gear and skill level. Enchanted golden apples, if available, are saved for true emergencies, like when the Wither reaches half health and becomes more aggressive, or when the player is juggling multiple endermen while fighting the dragon.

Curing Zombie Villagers

This is the non-combat use that every long-term player relies on. To cure a zombie villager and convert it back into a regular villager:

  1. Trap the zombie villager in a secure area.
  2. Throw a Splash Potion of Weakness at it.
  3. Feed it a golden apple by right-clicking (or pressing the use button).
  4. Wait 3-5 minutes while the zombie villager shakes and emits red particles.

Once cured, the villager will offer significantly discounted trades for a limited time, often reducing costs to 1 emerald per item. This mechanic is the foundation of efficient villager trading halls, and it’s why even players who never touch PvP still need a steady supply of golden apples. According to guides from trusted sources, curing mechanics have remained consistent across recent updates, making this strategy reliable for both Java and Bedrock editions.

Golden Apple vs. Other Healing Items: Which Is Better?

Minecraft offers several healing and buff items, and knowing when to use each one separates efficient players from wasteful ones.

Golden carrots are the go-to food for most situations. They restore 6 hunger points and provide 14.4 saturation, the highest in the game. They’re cheaper to craft (8 gold nuggets instead of 8 ingots) and don’t waste a slot on buffs when buffs aren’t needed. For everyday exploration and mining, golden carrots win.

Suspicious stew (made with specific flowers) can grant regeneration, but the effect is brief and the recipe is situational. It’s not practical for combat.

Potions of Healing (Instant Health I and II) restore health immediately without eating, which can be clutch in fast-paced PvP. But, they don’t provide absorption hearts or regeneration over time. A player at 10 hearts can chug a Healing II potion to jump to full health instantly, but they’re left vulnerable to the next hit. Golden apples, by contrast, provide both healing and a buffer.

Enchanted golden apples outclass everything for raw survivability, but their scarcity makes them impractical for regular use. They’re an “oh no” button, not a strategy.

Golden apples sit in the middle: more expensive than golden carrots, cheaper than enchanted apples, and more versatile than potions. They’re the right choice when a player knows they’re heading into danger and wants both healing and absorption without burning an ultra-rare resource. For village curing, there’s no substitute, golden apples are the only item that works.

Tips and Strategies for Maximizing Golden Apple Effectiveness

Getting the most out of golden apples requires timing, preparation, and game knowledge.

Pre-buff before engagements. Don’t wait until health is low. Eating a golden apple at full health gives 22 hearts to work with, which lets players take risks they otherwise couldn’t. In building defensive structures, having absorption hearts means players can tank a creeper blast without losing progress.

Hotkey your apples. Fumbling through the inventory mid-fight is a death sentence. Bind golden apples to a number key (typically 8 or 9, near other consumables) and practice swapping to them quickly.

Stack regeneration with armor. Full Protection IV diamond or netherite armor combined with golden apple absorption makes a player nearly unkillable for short bursts. Add a Shield for blocking, and even groups of mobs become manageable.

Farm gold efficiently. Zombie piglin farms in the Nether produce gold nuggets that smelt into ingots. A well-designed farm can yield hundreds of gold ingots per hour, making golden apple crafting far more sustainable. Check resources like Twinfinite for up-to-date farm designs compatible with the current version.

Don’t overthink enchanted apples. If a player has one or two, they should use them when the situation genuinely demands it, not hoard them forever. A unused enchanted apple in a chest doesn’t win fights.

Bring extras for curing. When curing multiple zombie villagers for a trading hall, bring at least one extra golden apple in case a villager despawns or a mistake happens. Running out mid-cure is frustrating and wastes the Splash Potion of Weakness.

Common Mistakes to Avoid When Using Golden Apples

Even veteran players make errors with golden apples. Here’s what to watch out for.

Eating them too late. Waiting until health is at 2-3 hearts often means death arrives before the regeneration ticks. Golden apples shine when eaten early, not as a last resort.

Wasting them on trivial fights. A single skeleton in broad daylight doesn’t warrant a golden apple. Save them for scenarios where the buff actually matters: outnumbered fights, boss encounters, or PvP.

Forgetting the absorption duration. Absorption hearts last 2 minutes. If a player eats a golden apple, then spends 90 seconds running away or organizing inventory, they’ve wasted most of the buff. Engage quickly after consuming.

Confusing regular and enchanted apples. In high-pressure moments, players sometimes eat a regular golden apple when they meant to use an enchanted one, or vice versa. Keep them in separate hotbar slots and label chests clearly in storage.

Not accounting for the eating animation. Minecraft’s eating animation takes roughly 1.6 seconds, during which the player moves slower and can’t attack. Eating mid-swing or while an enemy is charging can result in taking damage during the animation. Create space first, then eat.

Ignoring Bedrock vs. Java differences. Some chest loot percentages and game mechanics differ between editions. A strategy that works in Java might need tweaking in Bedrock, especially about villager curing discounts and spawn rates.

Over-crafting before looting. New players often craft golden apples before exploring structures. Check dungeon and mineshaft chests first, free golden apples beat crafted ones every time.

Conclusion

Golden apples have been a Minecraft cornerstone for over a decade, and they’re not going anywhere. Whether it’s clutching a PvP fight with that last-second absorption shield, walking out of a Wither battle with half a heart, or building a trading empire one cured villager at a time, golden apples deliver when it counts.

The difference between a regular and enchanted golden apple isn’t just stats, it’s strategy. Know when to craft, when to loot, and when to eat. Master the timing, respect the resource cost, and golden apples become one of the most reliable tools in any player’s arsenal. Now get out there, stock your hotbar, and make every apple count.

Building a survival base in Minecraft isn’t just about slapping four walls together and calling it a day. It’s the difference between thriving through the night and respawning at dawn with nothing but regret. Whether you’re playing solo on Java Edition 1.21 or teaming up on Bedrock’s latest update, your base is your hub, the place where you’ll store loot, plan expeditions, and eventually build toward endgame goals like the Ender Dragon or Wither fights.

This guide breaks down everything from picking the right location to designing bases that scale with your progress. New players will find beginner-friendly shelters that keep creepers at bay, while veterans can explore advanced concepts like underground cities and sky bases. We’ll also cover the best minecraft houses in terms of functionality and aesthetics, blending practical survival needs with designs that actually look good. No filler, no fluff, just actionable building strategies you can start using today.

Key Takeaways

  • A successful Minecraft survival base location should sit within 200–300 blocks of key resources like mines, water, forests, and villages to maximize efficiency and minimize travel time.
  • Every functional survival base needs essential components: organized storage systems, renewable food production, enchanting stations with 15 bookshelves, and proper lighting at level 8+ to prevent mob spawns.
  • Underground bunkers and above-ground cabins are beginner-friendly starter designs that scale into larger bases as you gather more resources and unlock advanced building materials.
  • Intermediate and advanced survival base concepts—such as mountain builds, lakeside compounds, underground cities, and sky bases—offer strategic depth and require planning for expansion using modular design principles.
  • Defend your base with proper mob-proofing through lighting, walls, moats, and perimeter fencing, then transform it into a showcase with consistent material palettes, terraforming, and thoughtful exterior decoration.
  • Connect multiple bases using transit systems like minecart railways for early game, ice boat highways for mid-game, or Nether tunnels for endgame travel efficiency.

Why Your Survival Base Location Matters

Location isn’t just real estate, it’s survival strategy. Drop your base in the wrong spot, and you’ll waste hours running back and forth for basic resources. Pick wisely, and you’ll have everything you need within sprinting distance.

Biome Considerations for Base Building

Biomes dictate available resources, mob spawns, and even weather patterns. Plains and forests are solid starter choices, they offer wood, passive mobs for food, and relatively flat terrain for building. Taiga biomes add spruce trees and wolves, while savanna gives you acacia wood and villages for trading.

Avoid deserts and badlands early on unless you’re near a desert temple or mineshaft, the lack of wood and water makes them rough for beginners. Swamps have slimes and witch huts, but the constant water and uneven terrain slow down construction. Mushroom islands are the ultimate safe zone (no hostile mob spawns), but they’re rare and isolated, making resource gathering tedious.

Jungle biomes are resource-rich but dense, expect slower navigation and more fall damage from vines. If you’re hunting for specific materials like bamboo or melons, they’re worth the hassle. Mountain biomes (post-1.18 terrain generation) offer dramatic views and natural cave access but demand more building effort due to elevation changes.

Resource Proximity and Strategic Positioning

Your base should sit within 200-300 blocks of key resources: a mine entrance, water source, forest, and village if possible. Villages mean trading, beds, and free food, don’t underestimate them.

Water is non-negotiable. You need it for farms, brewing, and quick mob-proof travel via boat. If you’re near an ocean or river, you’ve got infinite water and access to ocean monuments later. A lake works fine for smaller bases.

Mines and caves are your iron, coal, and diamond pipelines. Bases built near ravines or cave entrances (especially the new 1.18+ deep dark caves) cut down on travel time. Just light up the area first, nothing worse than mobs spawning inside your storage room.

Consider spawn chunks if you’re technical. Bases built within the 19×19 chunk area around world spawn stay loaded even when you’re far away, letting farms and smelters run 24/7. It’s overkill for casual play, but serious players swear by it.

Essential Components Every Survival Base Needs

A functional base isn’t about aesthetics (yet), it’s about systems that keep you alive and efficient. Miss one of these, and you’ll feel it.

Storage Systems and Organization

Chests are your lifeline, but dump everything into random boxes and you’ll waste minutes hunting for a single piece of redstone. Start with labeled chest groups: one for blocks (stone, dirt, wood), one for ores and ingots, one for tools and weapons, one for food, and one for mob drops.

Barrels are cheaper than chests (six planks + two slabs vs. eight planks) and work even with a block on top, use them for bulk storage like cobblestone or dirt. Shulker boxes are endgame but game-changing: portable storage you can carry in your inventory. Until then, double chests are your best friend.

Item sorters using hoppers and comparators are mid-to-late game upgrades. They’re resource-heavy (five iron per hopper) but worth it once you’re farming mobs or mining in bulk. For beginners, manual sorting is fine, just stay consistent.

Farming and Food Production Areas

Starvation is embarrassing. Set up a wheat farm (9×9 plot around water) for bread, and breed cows or pigs for renewable meat. Chickens are the fastest to breed and give you eggs for cakes and pumpkin pie.

Carrot and potato farms are more food-efficient than wheat, no crafting required, just eat them cooked. Find them in villages or zombie drops. Beetroot is fine but objectively worse.

Automatic farms are overkill early on, but a simple sugarcane farm (plant next to water) fuels your book and paper needs for enchanting. Kelp farms in ocean bases give you infinite smelting fuel once you dry it into blocks.

Enchanting and Brewing Stations

You’ll hit a wall in survival without enchanted gear. An enchanting table needs 15 bookshelves (one block away, same level or one higher) for max-level enchants. That’s 45 books, or 135 pieces of paper and 45 leather. Cows and sugarcane farms pay off here.

Brewing stands require blaze rods from the Nether, so they’re mid-game. Set up a dedicated brewing room with chests for ingredients: netherwart (grows in soul sand), glowstone, redstone, and common potion bases like spider eyes and magma cream. Keep a water source or cauldron nearby for bottles.

Don’t forget an anvil (three blocks of iron + four ingots) for combining enchants and repairing gear. They break eventually, so keep iron flowing.

Beginner-Friendly Survival Base Designs

First-night shelters evolve into proper bases if you build smart. These designs prioritize speed, safety, and scalability.

Starter Shelter: The Underground Bunker

Dig three blocks down, hollow out a 5×5 room, and seal the entrance with dirt or cobblestone. You’re now mob-proof. Add a door, crafting table, furnace, and bed, and you’ve got a functional shelter in under five minutes.

Expand by digging horizontally, side rooms for storage, farms, and smelting. Staircases down lead to mining tunnels. The beauty of underground bases is zero exterior mob spawns and natural protection from creepers. The downside? No sunlight for crops (use torches) and limited aesthetic appeal unless you commit to a massive underground build.

Light everything with torches (light level 8+) to prevent mobs. Lanterns and soul lanterns look better but cost more early on.

Simple Above-Ground Cabin

A 7×7 wooden cabin takes about 200 logs (50 planks’ worth) and builds fast. Use oak or spruce planks for walls, cobblestone or stone bricks for the floor (fireproof), and wood slabs or stairs for the roof.

Layout: door on one wall, bed in a corner, crafting table and furnace on another wall, and chests lining the third. Leave space in the center to move around. Add windows (glass panes or trapdoors) for light and sightlines.

Upgrade the roof with slabs or stairs to add depth, flat roofs look lifeless. A small porch with fences and trapdoors (acting as chairs) adds character without much cost. Plant saplings and flowers outside to soften the edges.

Above-ground bases are faster to navigate and easier to expand. The trade-off? You’ll need to mob-proof the perimeter with lighting and fences.

Intermediate Survival Base Ideas

Once you’ve got steady resources and iron gear, these designs offer more space, style, and strategic value.

Multi-Level Mountain Base

Carving into a mountain or cliff face gives you natural walls and dramatic elevation. Start with a main entrance at ground level, use stone bricks, andesite, or deepslate tiles to frame the doorway and make it stand out.

Dig horizontally into the mountain for rooms: ground floor for storage and smelting, second level for enchanting and brewing, top level for living quarters and balconies. Connect floors with staircases or ladders, staircases are safer and faster.

Balconies with glass panes, fences, or walls offer incredible views and natural lighting. Add slabs or carpets to the floors for texture. Interior mountain bases stay cool (literally, no sun glare), but they require more torches and can feel cramped if you don’t hollow out enough space.

External builds on mountain peaks work too, build upward with stone or wood, using the elevation as a natural defense. Players who enjoy working with elevation often prefer mountain bases for the layering opportunities.

Lakeside Compound with Docks

A base next to a lake or river combines water access with scenic builds. Construct the main structure on the shore using spruce wood, stone, and acacia accents. A 10×10 main hall with 5×5 side buildings (storage, farm, bedroom) creates a compound feel.

Build a dock extending into the water using oak planks and fences. Add boats for quick travel and fishing rods for food. Lanterns on fence posts light the dock without looking industrial.

Underwater expansions are possible but tricky, you’ll need sponges (from ocean monuments) or tedious block-by-block clearing. A simpler option: build an aquarium room with glass walls showcasing the lake below. Stock it with tropical fish or axolotls for flair.

Lakeside bases excel at aesthetics and accessibility but demand more effort to secure, water attracts drowned mobs at night. Light up the shoreline and consider underwater lighting to prevent spawns.

Advanced Survival Base Concepts

These builds are ambitious, resource-intensive, and deeply satisfying. Expect to sink hours into planning and execution.

Mega Underground City

Forget a single bunker, imagine a sprawling underground metropolis with districts for different functions. Dedicate chunks to farms (wheat, carrots, cows), industrial zones (smelters, crafting halls, item sorters), residential areas (decorated rooms with beds), and utility hubs (enchanting, brewing, anvils).

Connect districts with tunnels or minecart railways. Powered rails every 38 blocks keep carts moving without stopping. Use stone brick variations (regular, mossy, cracked, chiseled) to differentiate areas. Arches, pillars, and vaulted ceilings make spaces feel grand instead of claustrophobic.

Lighting is critical, mix torches, lanterns, glowstone, and sea lanterns to avoid monotony. Leave some areas dimly lit for atmosphere, but never below light level 8 (mobs spawn at 7 or lower).

Resource cost: thousands of stone, hundreds of torches, and serious time. But communities exploring comprehensive building systems often rank underground cities among the most rewarding long-term projects.

Sky Base with Floating Islands

Build at Y-level 150+ for a base above the clouds. Start with a central island platform (20×20 minimum) and branch out with smaller satellite islands connected by bridges (or elytra in late game).

Use glass floors or partial slabs to let light through and showcase the drop below. Exterior walls from quartz, white concrete, or prismarine give a futuristic or ethereal vibe. Farms need dirt or grass blocks carried up, tedious but doable.

Water elevators (soul sand bubbles) are your vertical transport before elytra. Encase them in glass for safety and aesthetics. Sky bases are mob-proof by default (they spawn on the ground, not in the air), but you’ll need lightning rods to prevent phantom spawns if you’re not sleeping.

The biggest hurdle? Fall damage. Keep water buckets, ender pearls, or slow falling potions on hand. One misclick and you’re respawning.

Ocean Monument Conversion

Draining and repurposing an ocean monument is peak endgame flex. Monuments spawn in deep ocean biomes and are packed with guardians until you clear them.

First, kill the three elder guardians (drop sponges) and use those sponges to drain sections. It’s a slow, methodical process, expect several hours. Once cleared, you’ve got a massive structure with unique prismarine blocks and a built-in aesthetic.

Convert rooms into farms, storage, or guardian farms (guardians drop prismarine shards/crystals and XP). The central chamber makes an epic throne room or enchanting hall. Add glowstone or sea lanterns for underwater lighting.

Ocean monuments are rare and dangerous, but the payoff is a base no one else has. Players who’ve completed this often share designs on modding hubs and community forums as proof of dedication.

Defensive Features to Protect Your Base

A beautiful base means nothing if a creeper erases it overnight. Defense isn’t optional.

Lighting and Mob-Proofing Techniques

Light level 8 or higher prevents mob spawns. Place torches every 12 blocks (they emit light level 14, which drops by 1 per block). Lanterns (light level 15) and glowstone (also 15) are brighter but costlier.

Soul torches and soul lanterns (light level 10) add ambiance but are weaker, you’ll need them closer together. Jack-o-lanterns (light level 15) are carved pumpkins with torches inside, cheap and effective for exteriors.

Mob-proof your roof with slabs (top half), stairs, glass, or leaves, mobs only spawn on full blocks. Same goes for walls: anything transparent or partial blocks stops spawns.

Buttons on walls look like decoration but prevent mobs from pathfinding near them. Carpets on top of fences create invisible barriers, mobs see them as two blocks tall but players can walk through.

Walls, Moats, and Perimeter Defense

A wall is the oldest defense in Minecraft. Cobblestone or stone bricks are cheap and blast-resistant (creeper-proof). Build at least three blocks high, skeletons can shoot over two-block walls, and spiders climb anything.

Moats (two-block-deep water or lava trenches) stop most mobs. Water is safer (you won’t die if you fall in), but lava kills mobs faster and looks more intimidating. Encase lava in glass or iron bars to prevent accidental deaths.

Iron golems patrol and attack hostile mobs. Spawn them by placing four iron blocks in a T-shape with a pumpkin or jack-o-lantern on top. Each golem costs 36 iron, so wait until you’ve got steady mining output.

Fences and walls keep mobs out but let you see through. Pair them with gates for entry points. For serious fortifications, castle-style defense systems that layer multiple barriers.

Aesthetic Design Tips for Beautiful Bases

Survival doesn’t mean ugly. A few intentional design choices transform functional boxes into builds you’re proud to screenshot.

Choosing Building Materials and Palettes

Mixing two to three block types creates depth without chaos. Classic combos:

  • Oak planks + stone bricks + cobblestone (medieval)
  • Spruce wood + dark oak + stone (Nordic/cabin)
  • Birch planks + white concrete + glass (modern)
  • Acacia + red sandstone + terracotta (desert/savanna)
  • Blackstone + deepslate + soul lanterns (gothic)

Avoid mixing too many wood types, stick to one or two. Stripped logs as pillars or beams add texture without new blocks. Stairs and slabs create angles and layers, flat walls feel lifeless.

Contrast matters. If your walls are dark (spruce, blackstone), use lighter roofs (stone, sandstone). Light walls pair with darker roofs. Windows break up solid planes, use glass panes, not full blocks, for a refined look.

Landscaping and Exterior Decoration

Terraforming is underrated. Flatten the immediate area around your base, then add back custom terrain: small hills, ponds, or stone paths. Use coarse dirt or gravel for paths that don’t grow grass.

Gardens with flowers, tall grass, and saplings soften hard edges. Bone meal spam creates lush greenery fast. Add hedges (leaf blocks) or bushes (trapdoors arranged vertically) for structure.

Fences and walls define boundaries without blocking views. Campfires (with hay bales underneath for taller smoke) add life. Lanterns on fence posts create lighting that feels intentional, not just functional.

Depth transforms builds. Don’t make walls flat, bring sections forward or push them back by one block. Add overhangs to roofs, porches with stairs as seating, or balconies on upper floors. For more simple but striking ideas, small details like flower boxes (trapdoors + flowers) or awnings (stairs over windows) make bases feel lived-in.

Custom trees beat default generation. Plant saplings in clusters, then trim leaves into rounded or angular shapes. It’s tedious but worth it for bases you’ll stare at for hundreds of hours.

Expansion and Long-Term Base Planning

Survival worlds last months or years. Build with the future in mind, or you’ll tear everything down and start over.

Modular Design for Future Growth

Modular building means designing sections that connect without forcing you to rebuild the core. Start with a central hub (storage, crafting, bed) and attach wings or buildings as you need them.

Leave empty space between structures, tight packing looks cramped and limits expansion. A 10-block gap gives you room for pathways, gardens, or new builds.

Use consistent materials and heights across modules so everything feels unified. If your first building is spruce and stone, stick with that palette. Vary the shape and size to avoid repetition, rectangle, L-shape, square, tower.

Foundations matter. Lay a flat platform or grid before building so future additions sit on the same level. Nothing looks worse than buildings at mismatched heights.

Connecting Multiple Bases with Transit Systems

Once you’ve got several bases or outposts, travel infrastructure becomes essential. Here’s what works:

Minecart railways are the classic. Use powered rails every 38 blocks on flat terrain (every 32 blocks uphill). Add a button or lever at stations to launch carts. Long-distance rails eat resources (gold for powered rails, iron for regular rails), but they’re AFK-friendly and reliable.

Ice boat highways are faster and cheaper. Build a 1-block-wide trench lined with blue ice (requires Silk Touch and a snowy biome) and ride a boat. You’ll hit speeds of 72 m/s, faster than elytra without fireworks. Cover the trench with trapdoors or slabs to prevent mob falls.

Nether highways cut overworld distance by 8x. Build a tunnel at Y-level 120+ (above lava lakes) in the Nether, and every block traveled equals eight in the overworld. Use cobblestone or blackstone (ghast-proof) and light everything. This is mid-to-late game but unmatched for long distances.

Elytra + fireworks are endgame travel, requires killing the Ender Dragon and looting End cities for elytra, then crafting firework rockets (paper + gunpowder). Fly anywhere in minutes, but you’ll burn through rockets fast.

Pick the system that fits your resources and playstyle. Rails for early game, ice boats for mid-game, Nether highways for everything after.

Conclusion

A survival base isn’t just shelter, it’s the backbone of your entire Minecraft experience. Whether you’re hollowing out a mountain, building a lakeside compound, or converting an ocean monument, the principles stay the same: pick a smart location, prioritize function, then layer in aesthetics and defense.

Start small. A 7×7 cabin or underground bunker gets you through the first nights. As resources pile up, expand with modular designs that grow with your ambitions. Don’t skip the essentials, storage, farms, and enchanting stations, but don’t ignore the details either. A well-placed lantern or custom tree transforms a base from functional to memorable.

The best builds balance creativity with survival logic. Experiment, iterate, and don’t be afraid to tear down and rebuild. Every world is different, and every base tells the story of how you survived it.